Disclosure: As an Amazon Associate I earn from qualifying purchases.
Now let’s see how I build it!
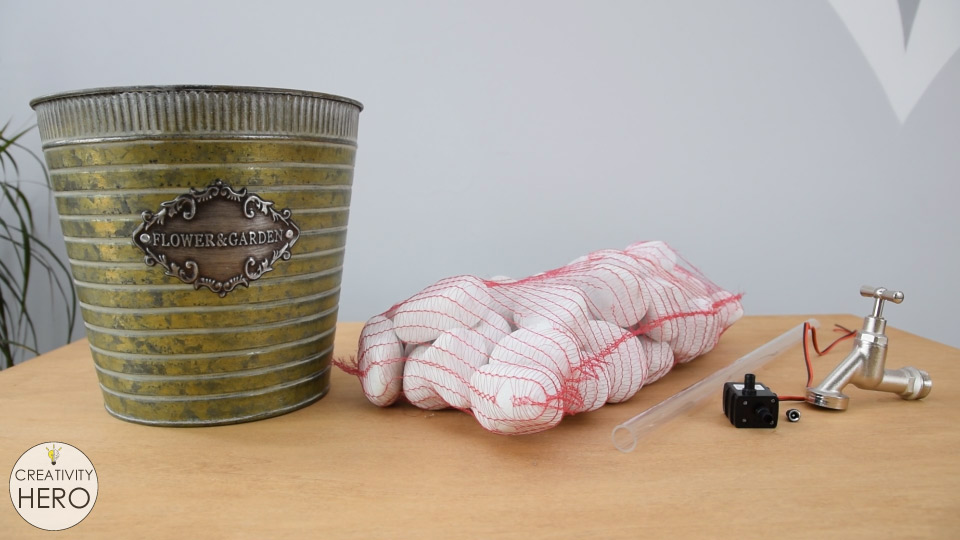
For this project you’re going to need a bucket, or any kind of waterproof container, a bunch of natural river rocks, a clear rigid acrylic tube, a small submersible water pump and a spigot or faucet.
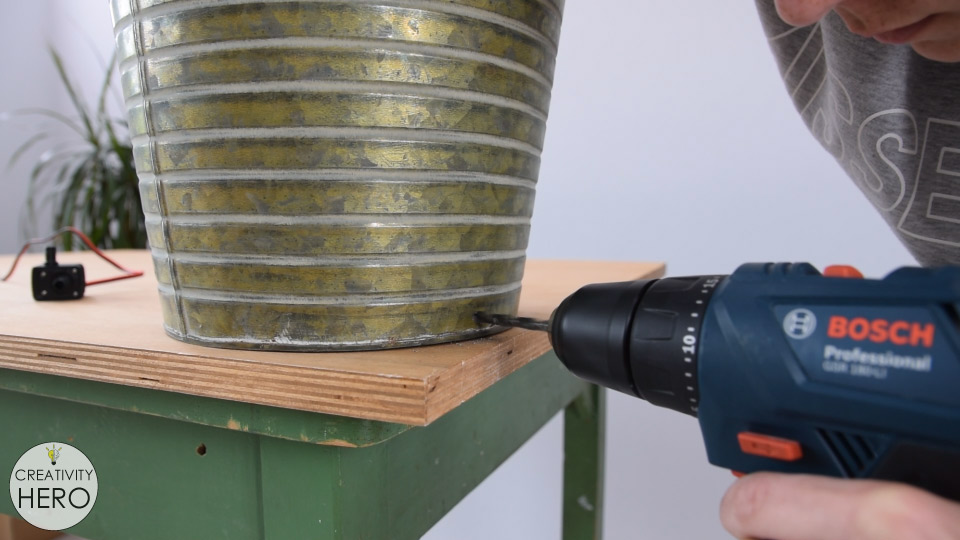
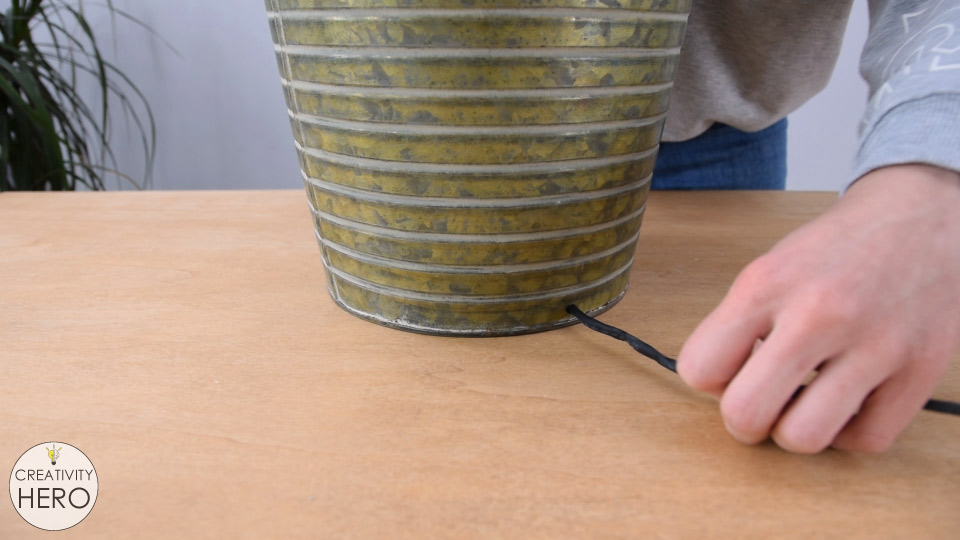
A submersible water pump is ideal for this project because it is quiet and easy to install. It will be placed at the bottom of the bucket, but I don’t want the cord coming up over the edge of the bucket.
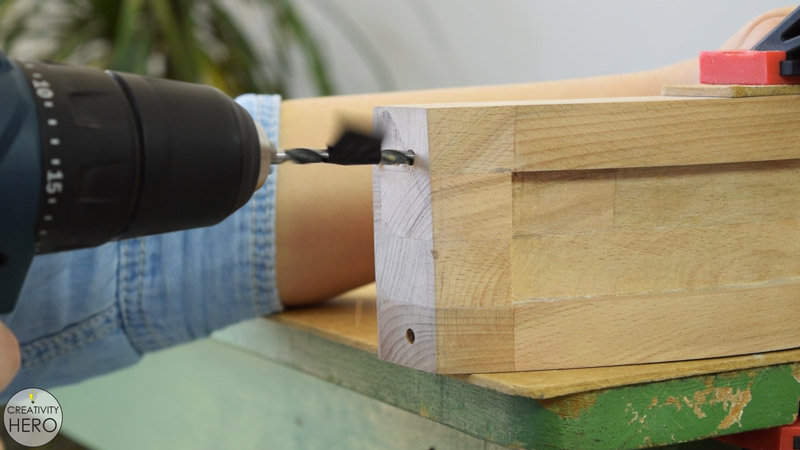
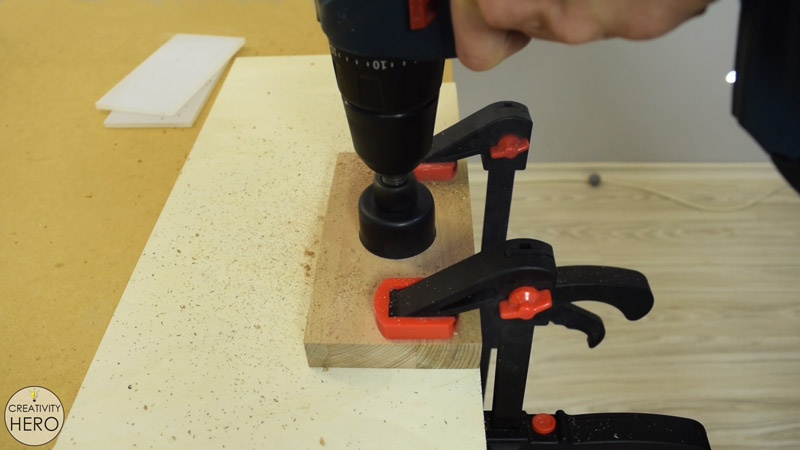
So, I’m going to drill a small hole down into the back of the bucket. The hole should be big enough to fit the cord of the pump, and for this purpose I’m using 6 mm drill bit.
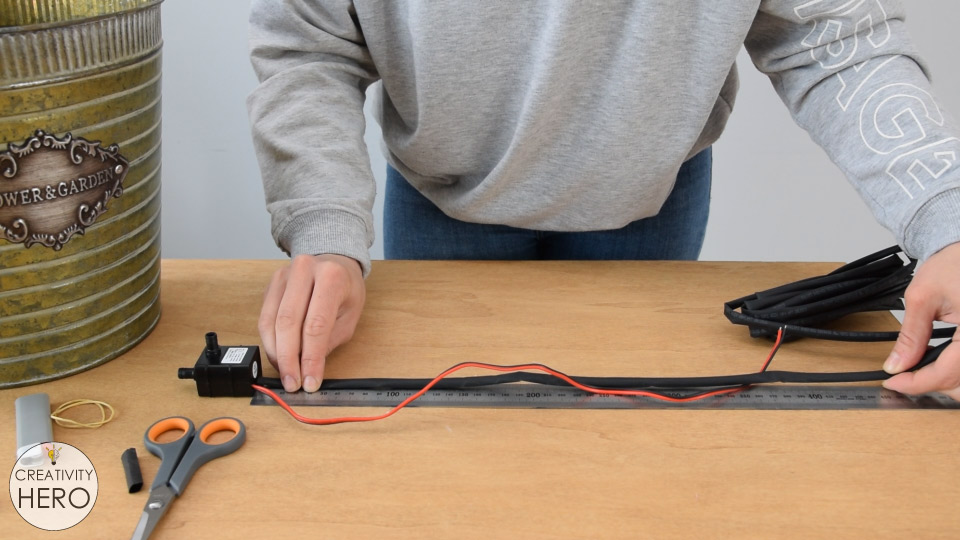
Also, I don’t like the look of the red and black wire without outer jacket and I decided to cover them with black heat shrink tubing. The length of the wires is 46 cm, but I cut around 44 cm of the heat shrink tubing, leaving 2 cm of the wires exposed.
For powering this pump I’m using 12 V DC power supply.
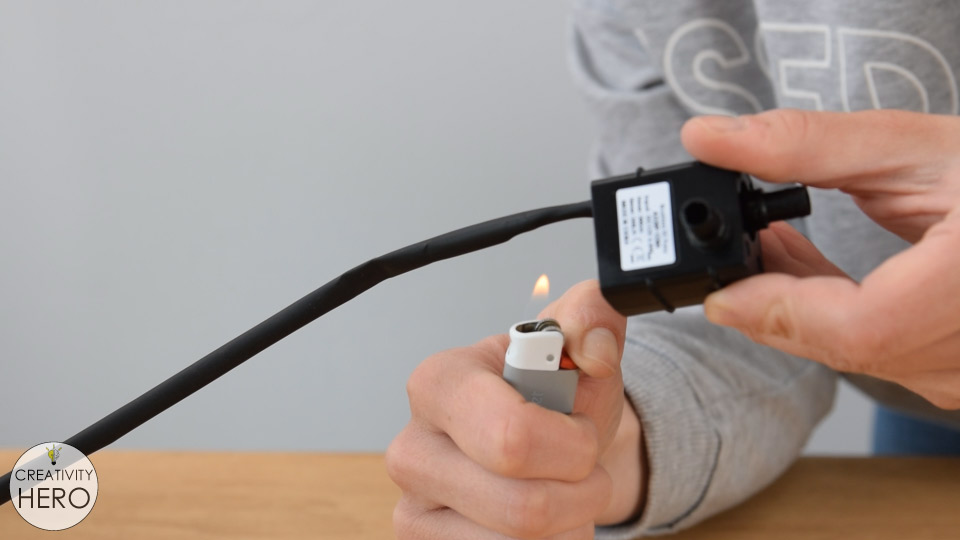
Using a lighter, I shrunk the heat shrink tubing.
With that done, I can run the cord through the bucket.
Another piece of heat shrink needs to go through the wires, which I’ll use later in the project.
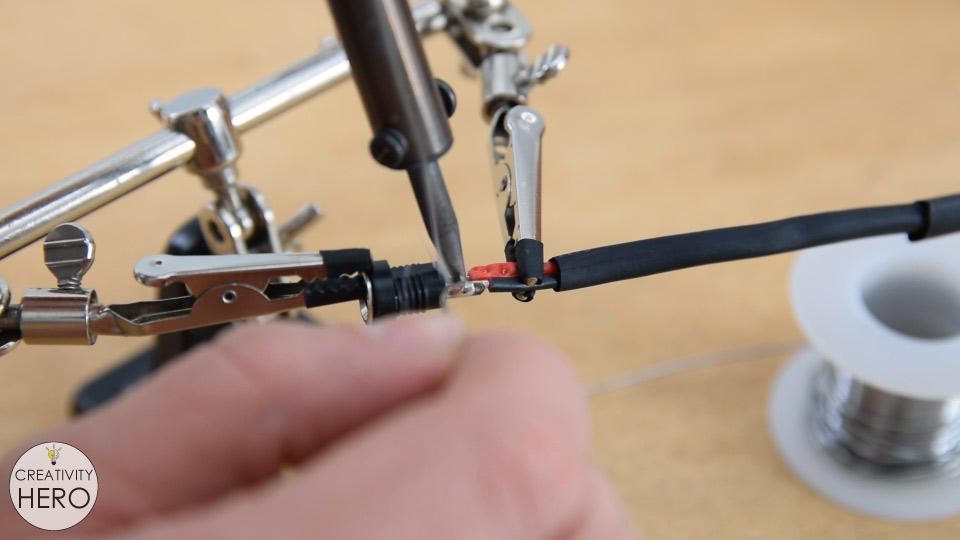
The ends of the wires are already prepared to soldering, but I need to strip just a little bit more of the insulation of the black wire.
So, I soldered the red wire onto the shorter tip of the DC power jack, and the black wire onto the longer tip of the jack.
After that I used the lighter to shrink the heat-shrink piece I previously added, and insulated the connection.
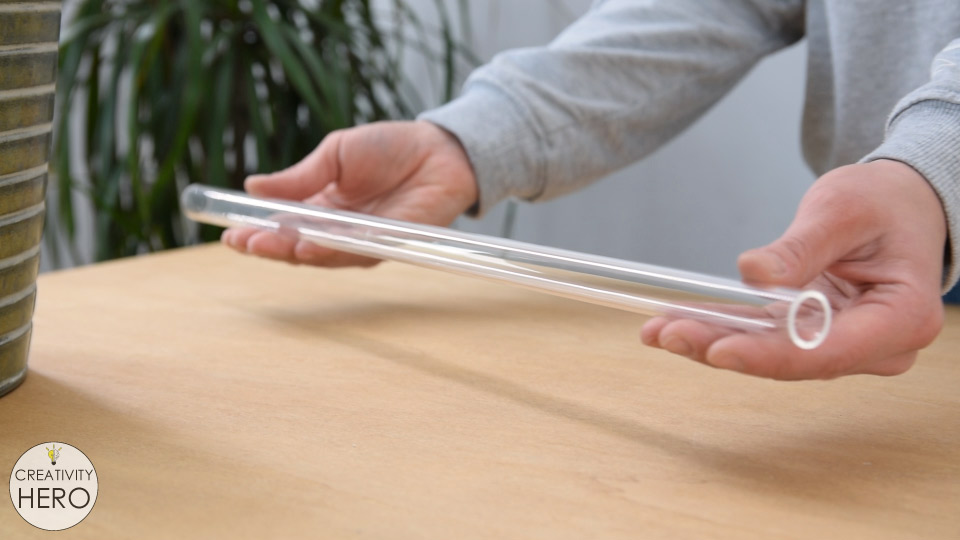
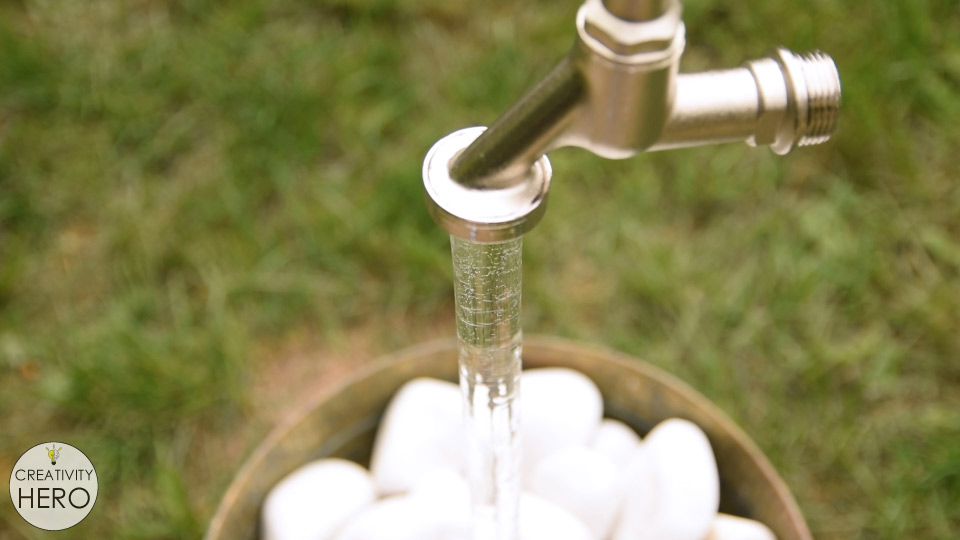
This is a clear rigid acrylic tube. It has 20 mm outer diameter and is 50 cm long, which is perfect size for my bucket.
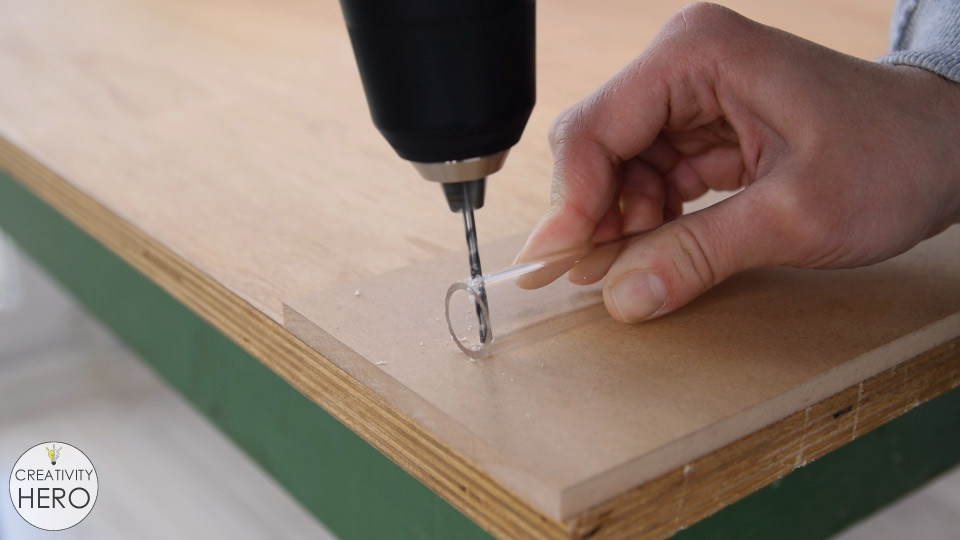
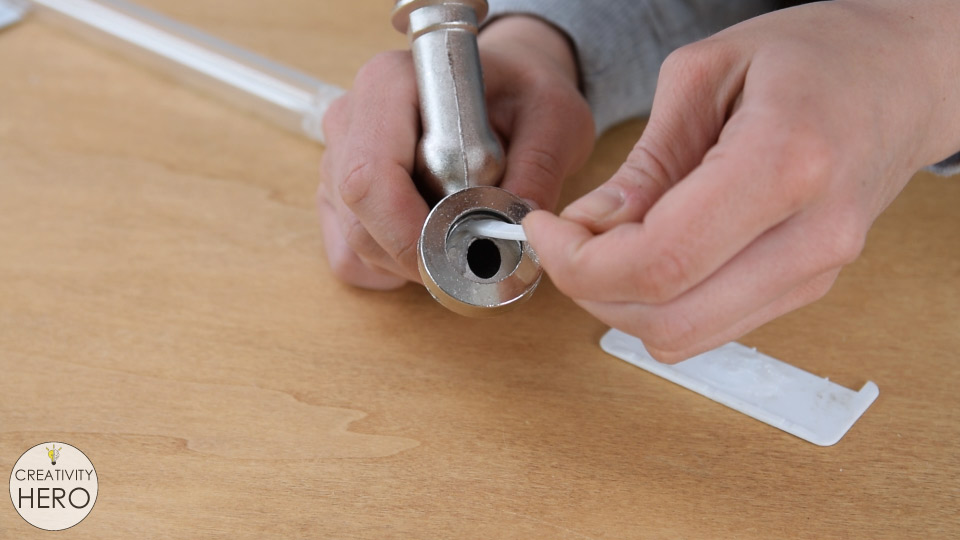
Before gluing the tube to the faucet, I need to drill some small holes in the top of the tube, because I want water to be able to come out of the top easily, which will actually create the illusion we’re going for.
I drilled 8 holes equal distance apart with 3 mm drill bit, and made sure they’re really close to the top, only 3 mm away.
Then I removed all the burrs with a sandpaper both inside and outside, which will additionally help make stronger bond with the glue.
Two-part epoxy is a great choice for gluing acrylic to metal and it only takes 5 min to cure.
I applied generous amount of epoxy inside the faucet, avoiding the sides, because I want to have enough clear space for the holes of the acrylic tube that I previously drilled.
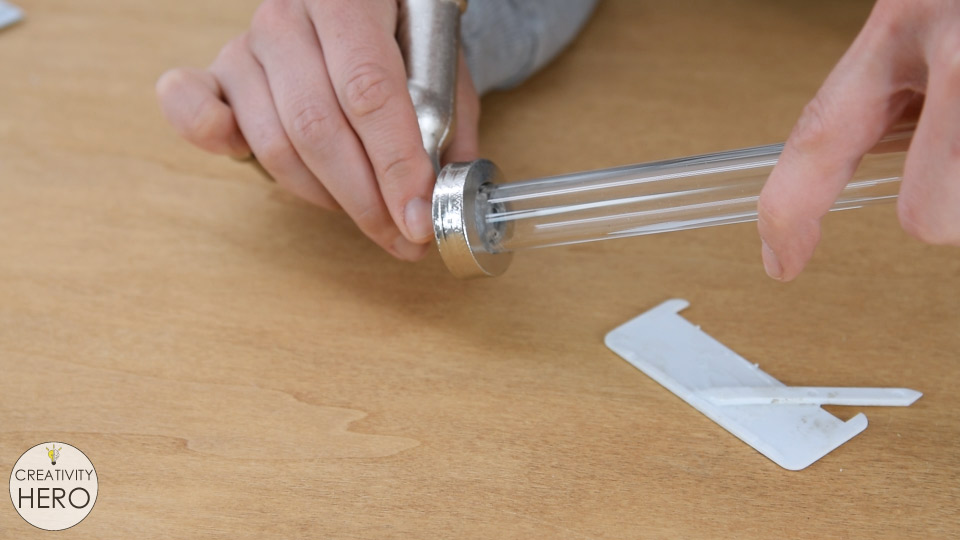
The inside diameter of the acrylic tube is too wide for the nozzle that comes with the pump. But I’ll fix that with hot glue.
First, I applied hot glue around the nozzle. While the glue was still hot, I placed the tube above the nozzle. And then, I applied large amount of hot glue around the tube.
Now the tube is attached to the pump and the faucet and the glue is completely cured, so I can move on with the project.
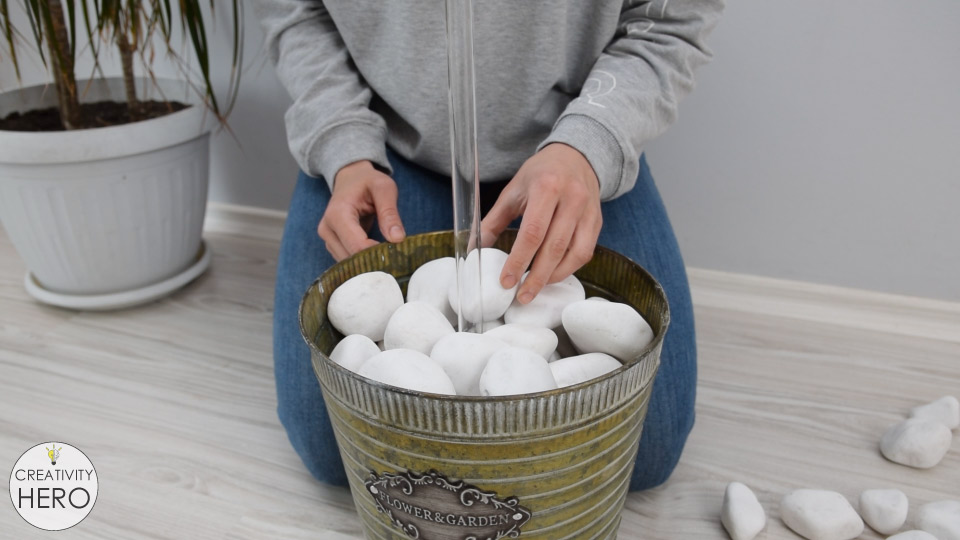
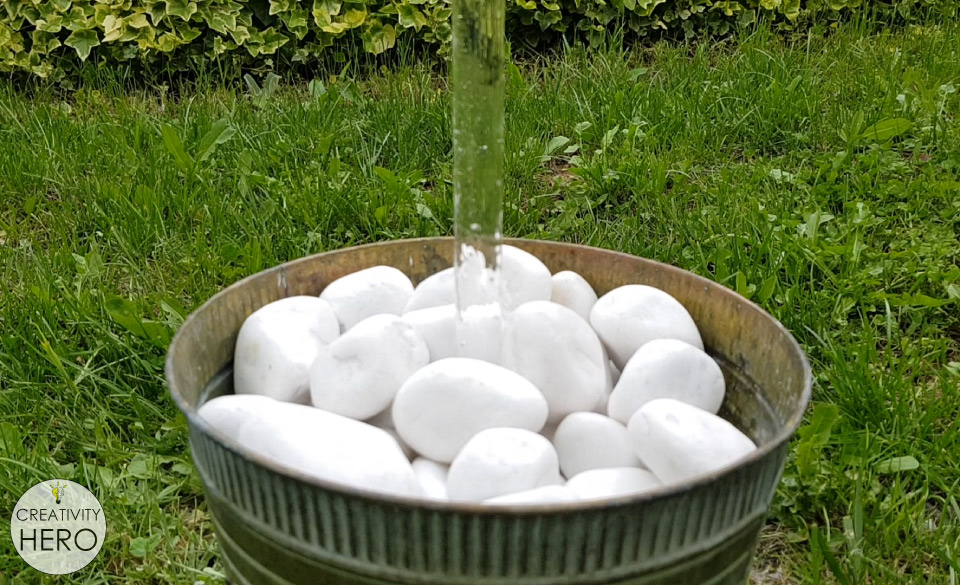
At this point, I positioned the tube in the middle of the bucket, and started pilling the river rocks up. The rocks are going to hold everything in place.
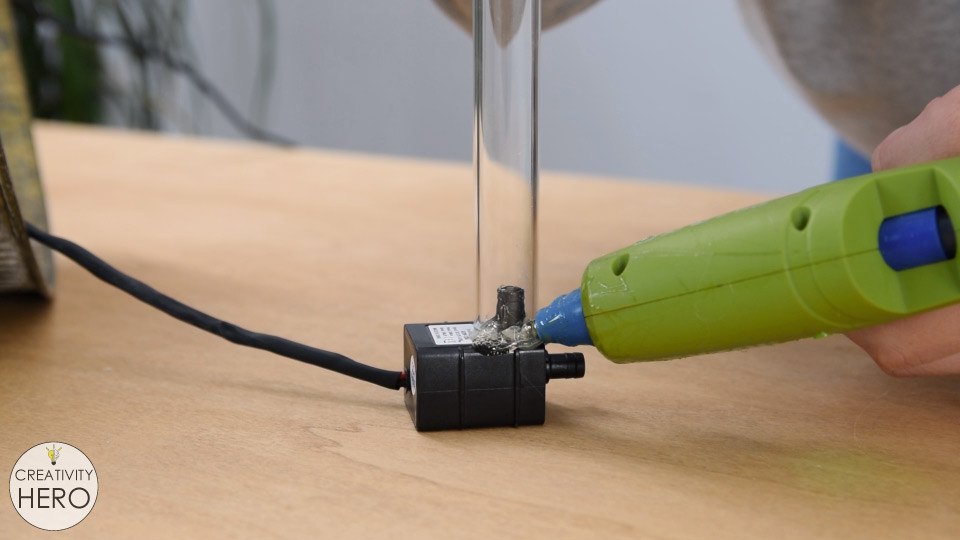
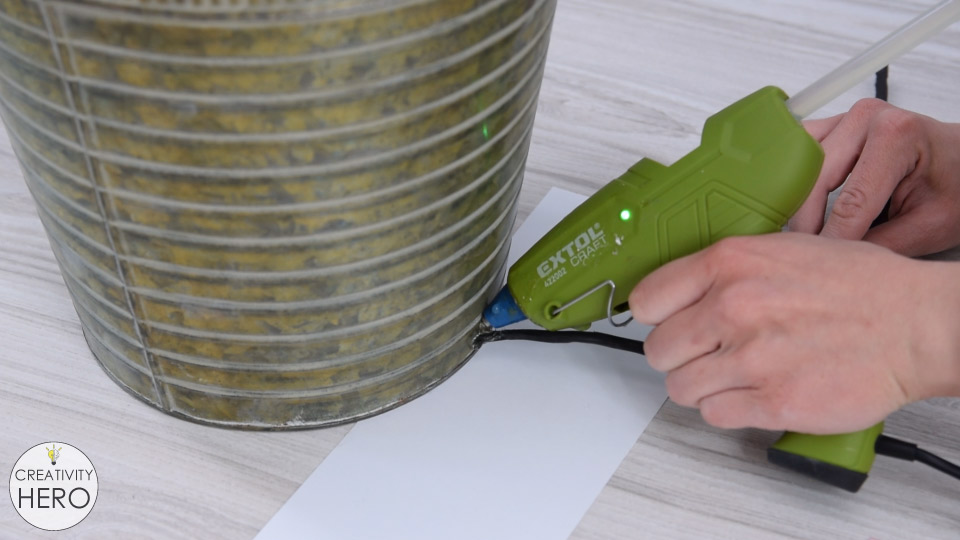
The pump is inside the bucket, the tube is straight up, and the faucet is in the right position, which means that everything is in place. The cord is down behind the faucet, so we can seal off the hole where the cord is running out. I’m going to use some hot glue for that.
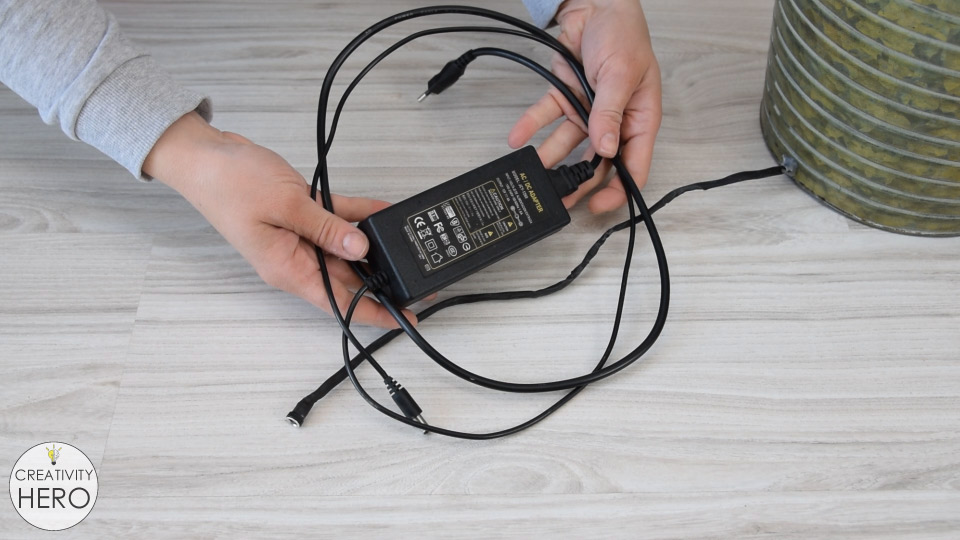
This is the power adapter that I’m using. I already mentioned that for powering the pump I’m going to use 12 V DC power supply. Now I need to connect the pump to the adapter and plug it in.
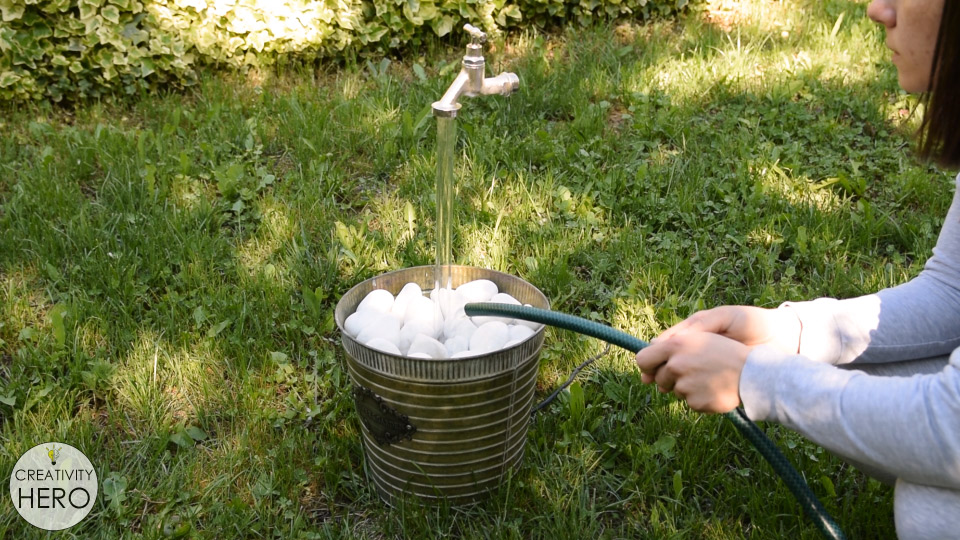
The final step is adding some water in the bucket. You can add as much water as you want.
OK. So, let’s plug the fountain in and see how it works.
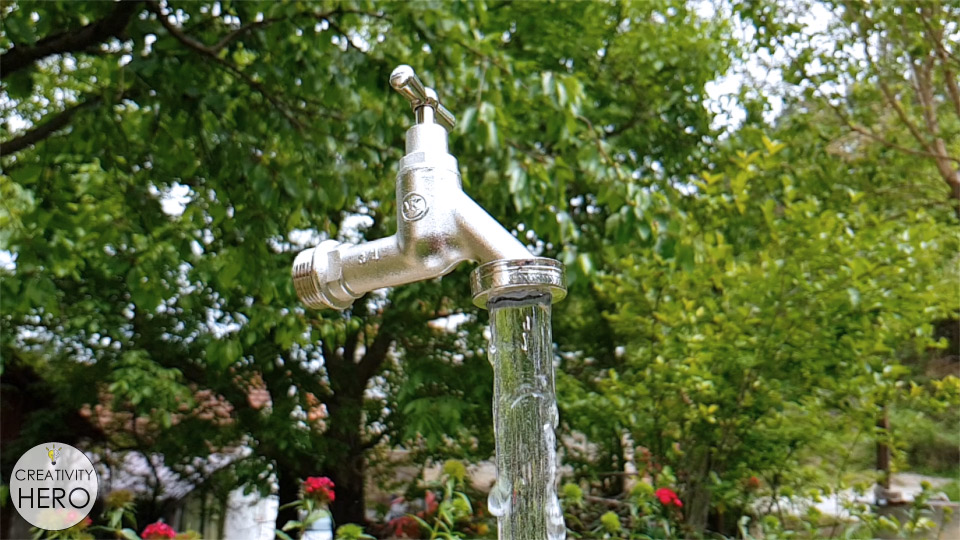
The water came up out the holes in the top of the tube and started flowing around the sides. And this is exactly what we need.
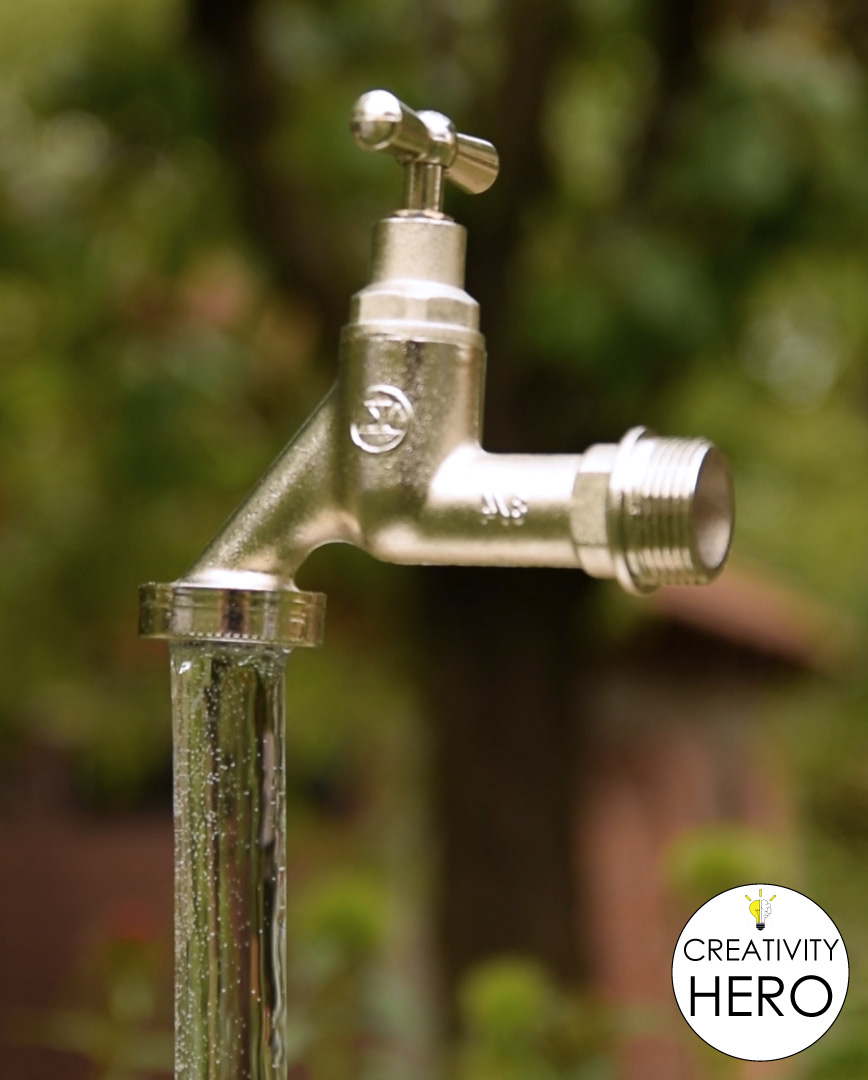
The illusion of floating faucet is achieved, which means that I’m done with this project. I really like how it turned out. It looks absolutely amazing.
This was very fun project, and is something you can definitely try at home.
If you like this project give me a thumbs up, leave a comment down below and don’t forget to subscribe to my YouTube channel.
Disclosure: As an Amazon Associate I earn from qualifying purchases.
Bending acrylic is one of the coolest things I’ve learned recently.
There are so many different methods of bending acrylic. Some of those methods include using a strip heater, a heat gun, a soldering iron, or a propane torch. Some people are even using their kitchen oven or hair drier for this purpose. However, all these methods have one thing in common, which is heat bending. It is actually the process of heating acrylic until it softens enough, and then bending it into different shapes.
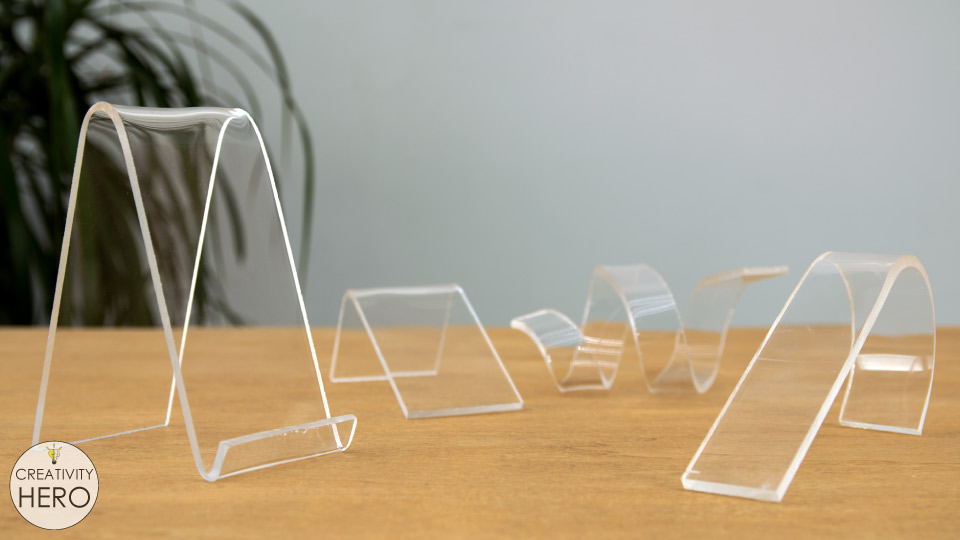
The method that I chose works on the same principle, but it is very cheap, simple, and it doesn’t require power tools, which means that everyone can try it at home. Now, I’m going to show you how to make different shapes out of acrylic with some practical examples.
So, let’s get into it!
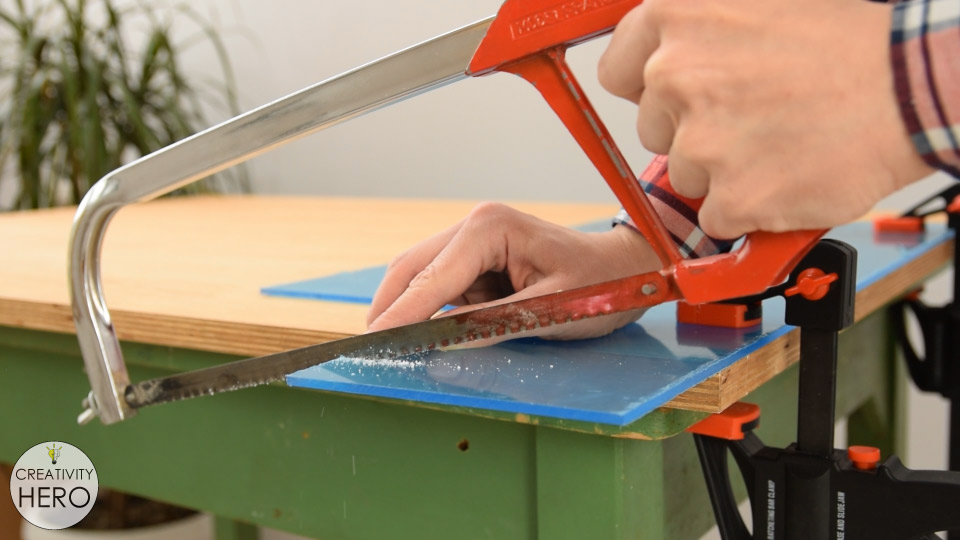
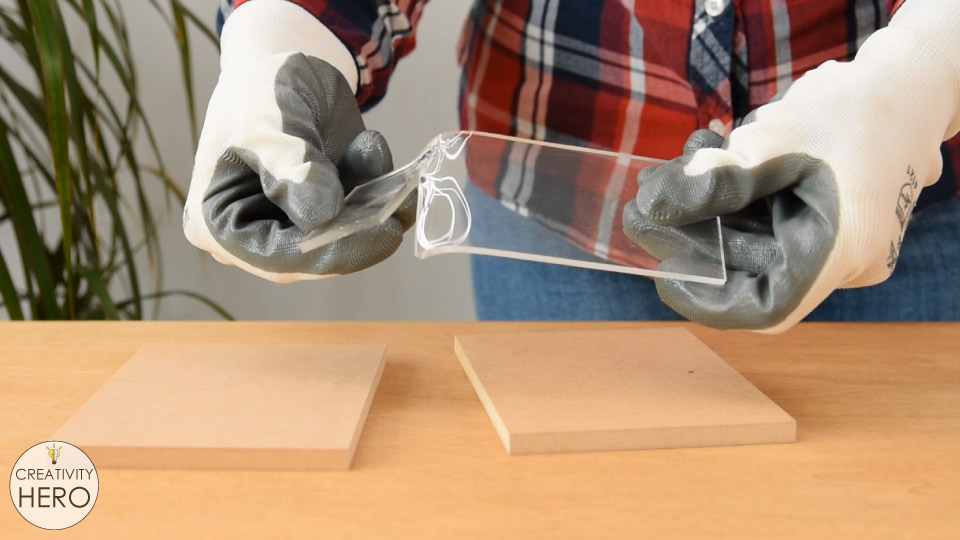
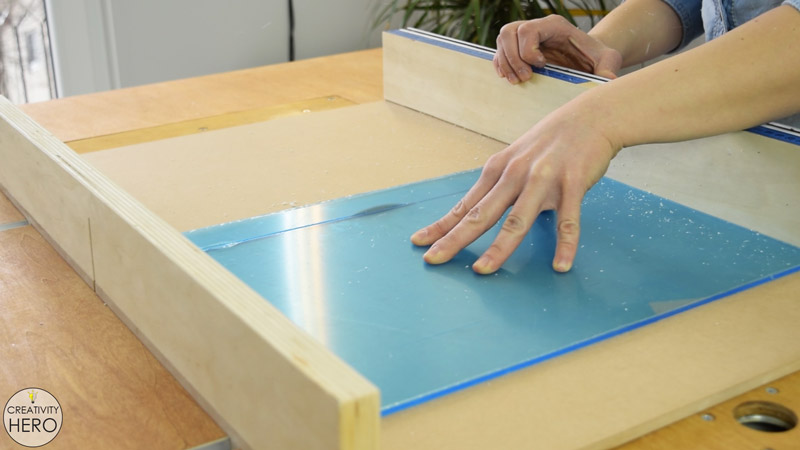
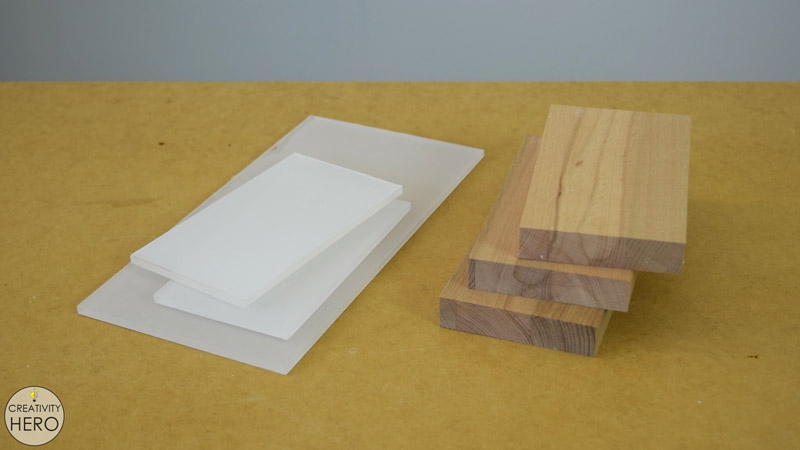
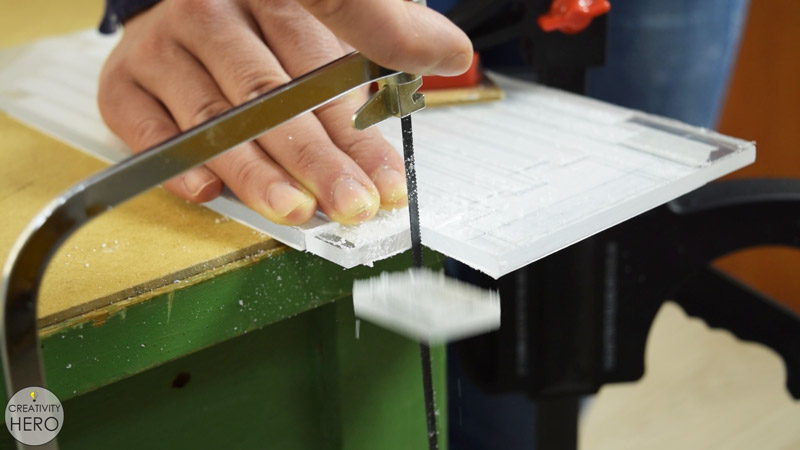
I have 5 mm thick acrylic sheet, so I’ll cut a few pieces with a hacksaw. I’ve cut different sizes, in order to show you how the size of the acrylic affects the process of bending.
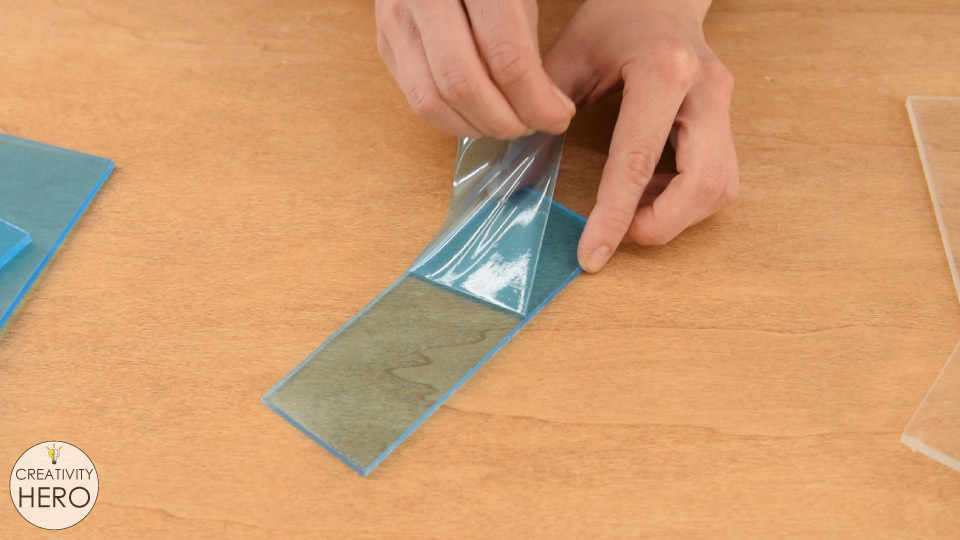
Before heating up the acrylic, I peeled off the protective film on both sides. If you do not remove the film, it will melt and will be nearly impossible to remove it from the acrylic.
Then I wiped the dust off of the surface, because when exposed to heat it can stick to the acrylic.
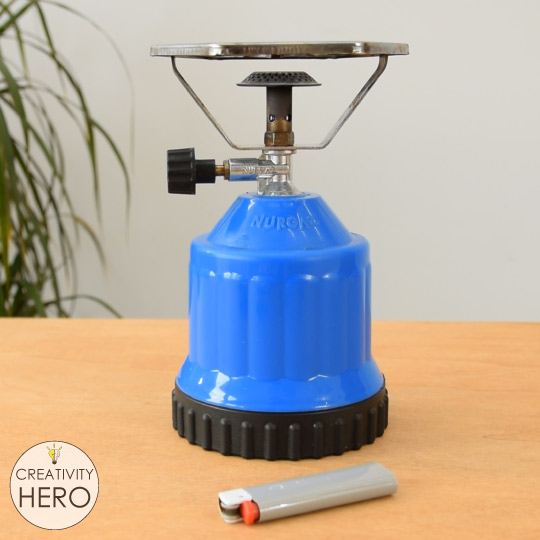
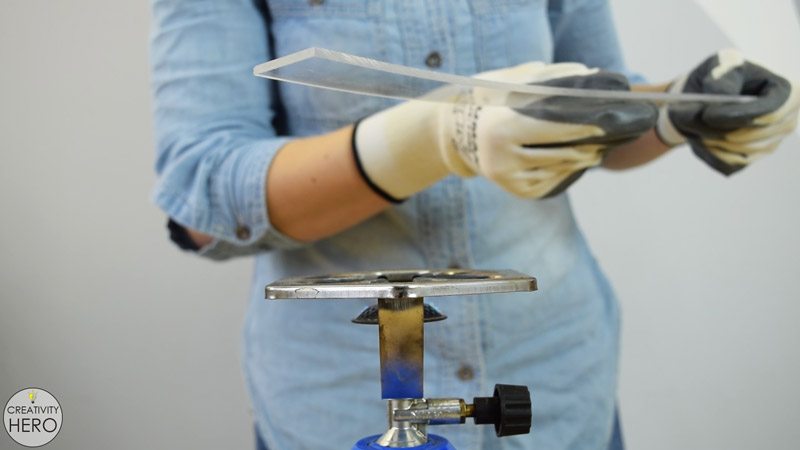
The heat source that I’m using is a portable gas stove. This is common heat source in almost every household, and it can be very useful for small-scale DIY projects. It is recommended for outdoor use, but you can use it indoors as well if you provide adequate ventilation.
Remember to wear heat-resistant gloves for protection against flames or heat. You could also wear a mask to limit your exposure to fumes.
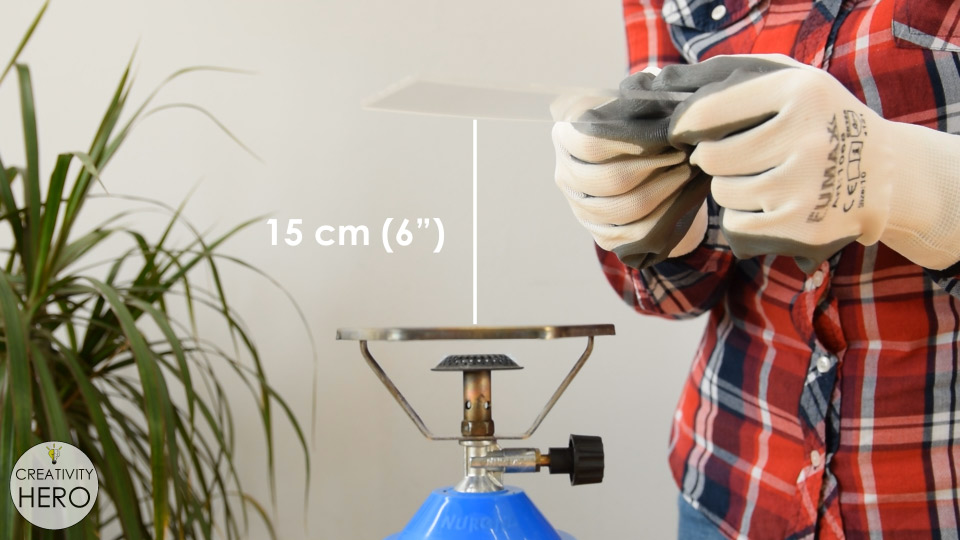
So, I turned the gas stove on and reduced the heat as much as possible. Then, I took one acrylic piece and placed it above. The distance between the acrylic and the heat should be at least 15 cm (or 6 inches).
Here, I tried to apply even heat along the bend line and waited for about 3 minutes until the acrylic softened enough. You know that it is time to bend the acrylic, when it starts to bend by itself without applying any pressure to it. And this happens once it reaches around 130°C.
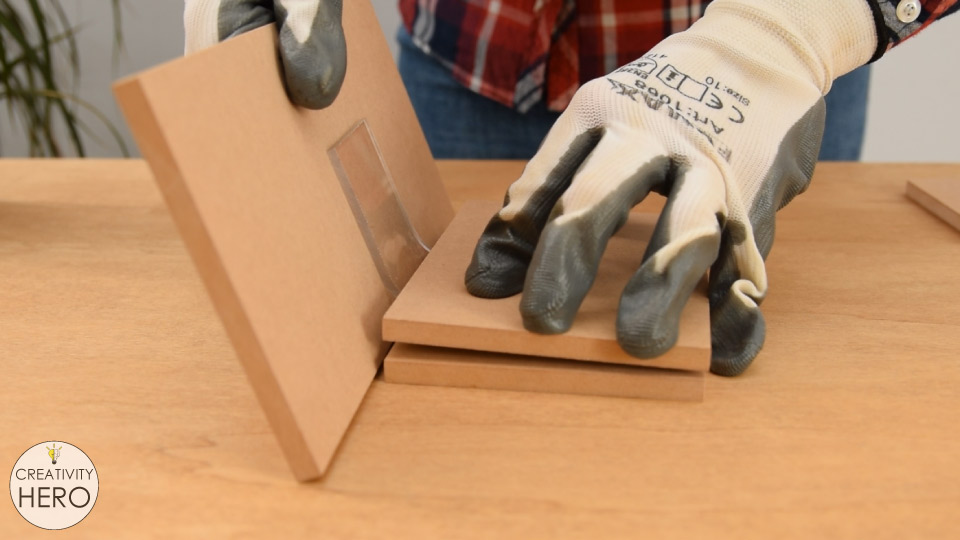
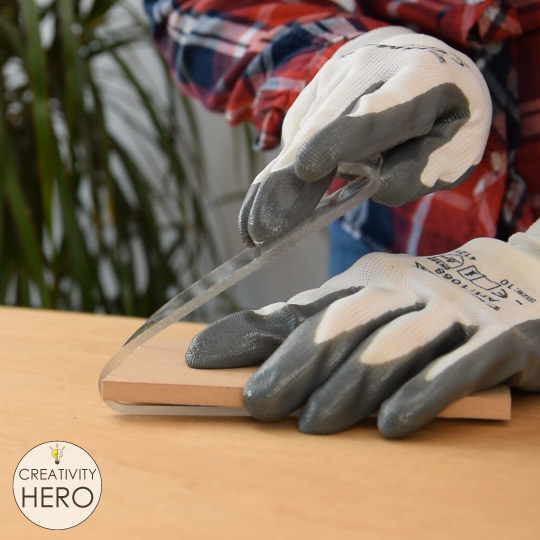
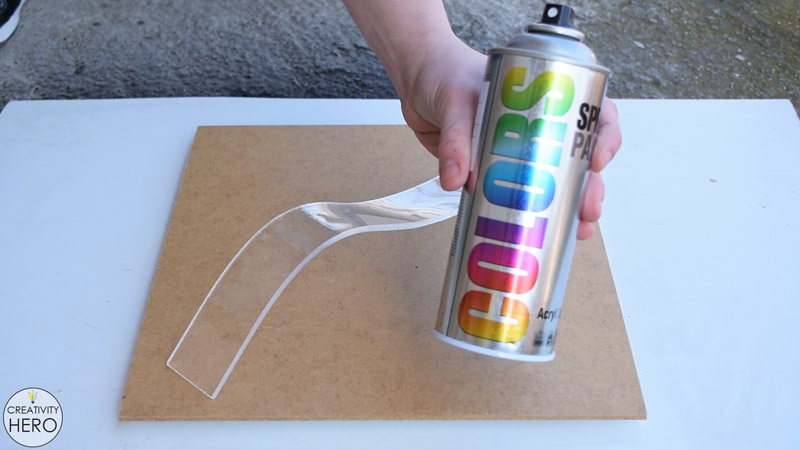
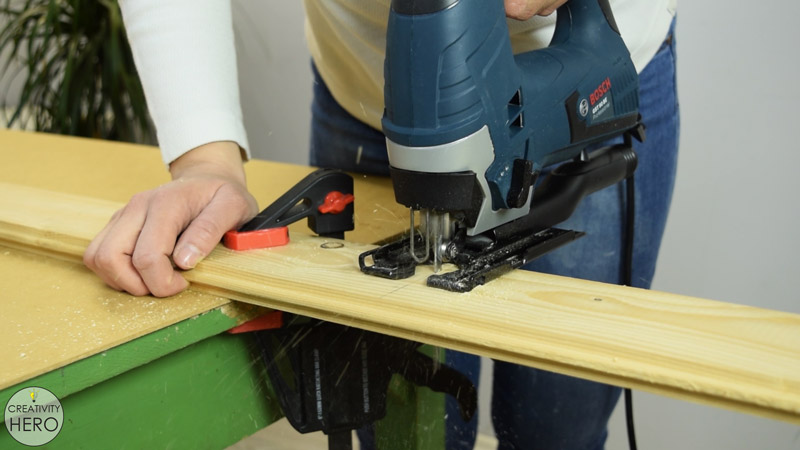
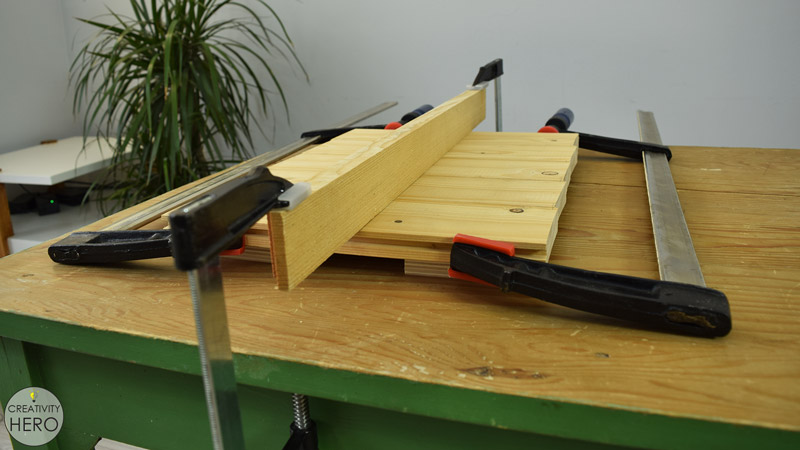
Now I can bend the acrylic piece away from the heat source. To make straight bend, I used 2 scrap wood pieces to hold the acrylic in place, and one piece to apply pressure and make the proper bend.
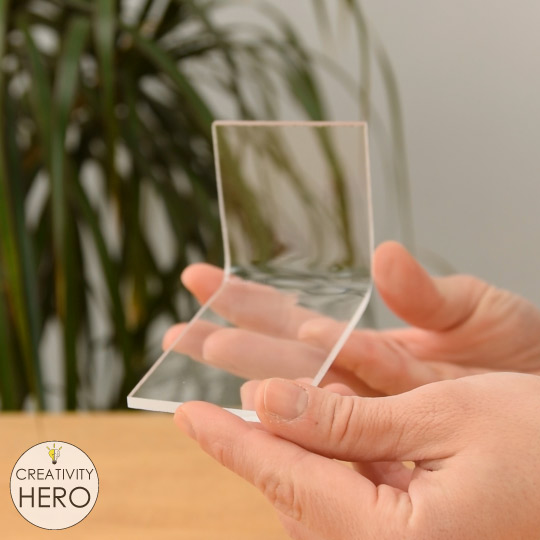
So, I made a very simple 90-degree angle. If you have additional bends to make with the same piece of acrylic, repeat the process.
When you’re done bending, allow the bend to completely cool before doing anything else, so that you do not lose its new shape.
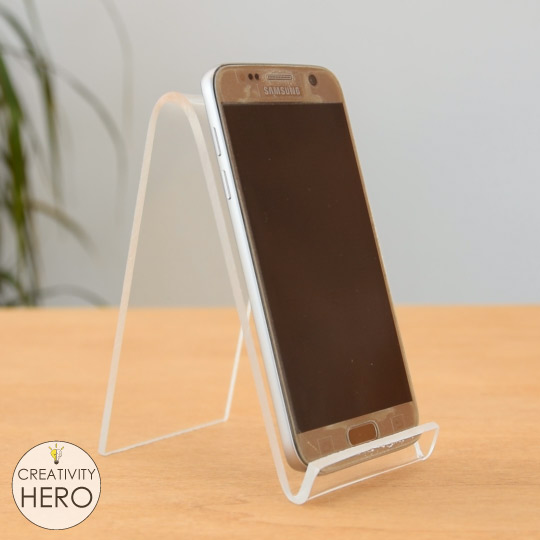
To make a phone stand I took larger acrylic piece. In this case I need to make two bends. This is much larger surface, so it took me around 5 minutes for each bend until the acrylic softened enough.
Heating is a slow process, and requires a lot of patience. But, you really need to make sure that you get a straight bend, which is in fact your final goal. The softening time depends on the thickness of the acrylic, as well as the size of the surface that we need to bend.
With these two bends I created a phone stand in less than 15 minutes, which is pretty awesome.
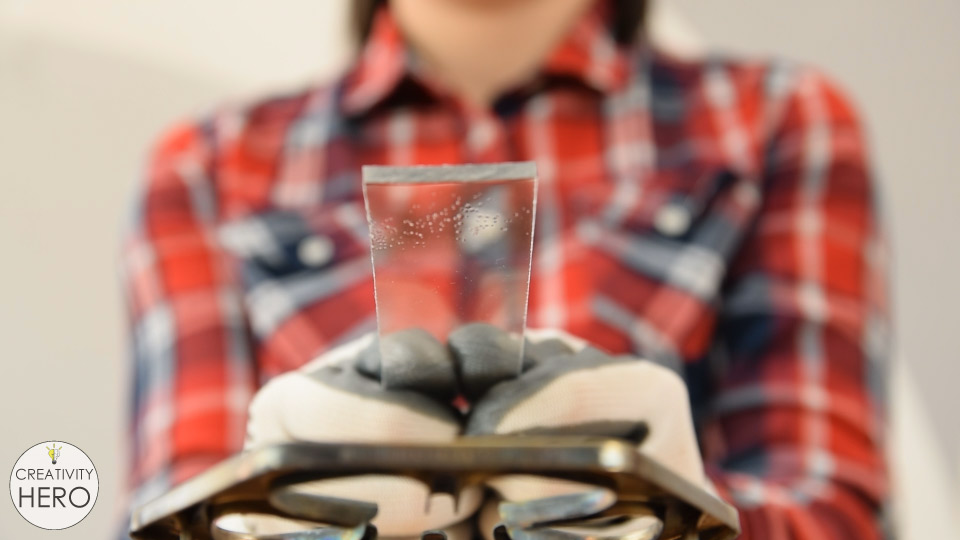
Why you need to keep 15 cm distance between the acrylic and the heat source?
The answer is very simple: to avoid air bubbles which could damage the acrylic. In the picture you can see how those bubbles look like. In the beginning, I kept the acrylic too close to the stove, and you can notice that after a few seconds a lot of bubbles appeared on the surface, and the acrylic softened a lot more than needed.
Also, if you stay in one spot for too long it means you don’t apply heat evenly to the bend line. This will again create bubbles into the acrylic that cannot be removed, which is something you really don’t want to happen.
And if you don’t apply heat evenly to the bend line, you won’t get a straight bend, or in the worst case, you’ll break the acrylic.
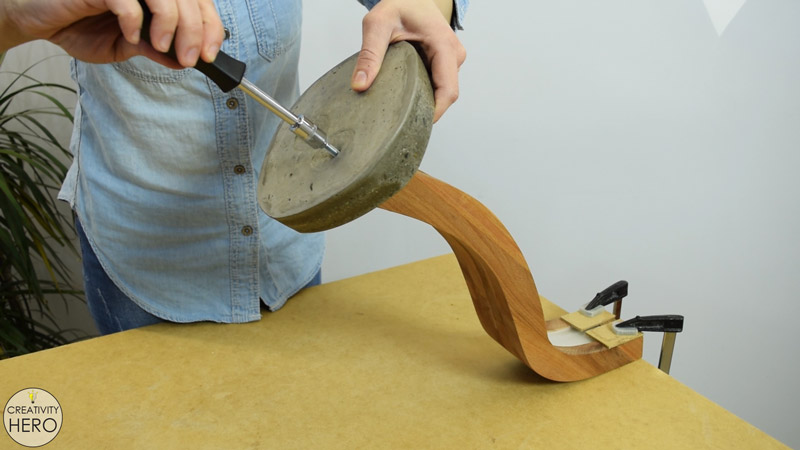
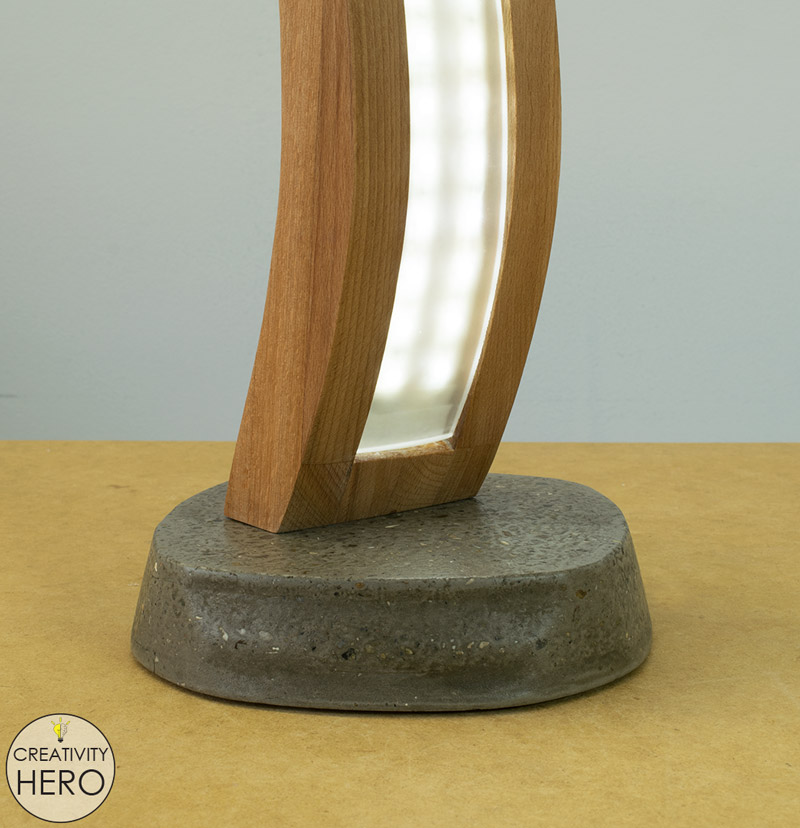
I’ve already used this method of bending acrylic in two of my previous videos. In the first video I’ve made Curved Wood and Acrylic LED Desk Lamp with Concrete Base, where I’ve bent one large piece of acrylic that needed to be a perfect fit for the wooden body of the lamp.
In the second video I’ve made Concrete and Acrylic LED Lamp with a Wooden Base, where I’ve bent tiny acrylic pieces which then I inserted into the concrete. So, you can check those videos out for more details.
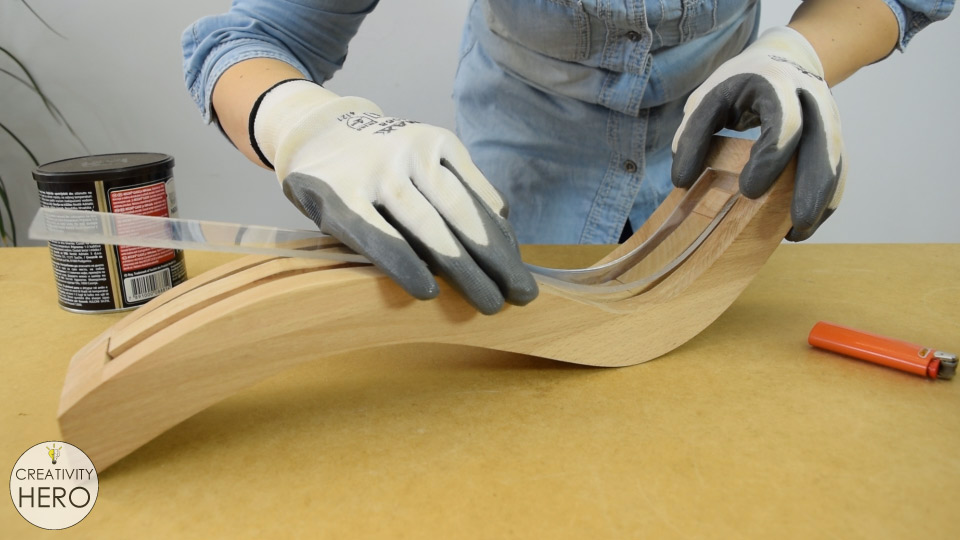
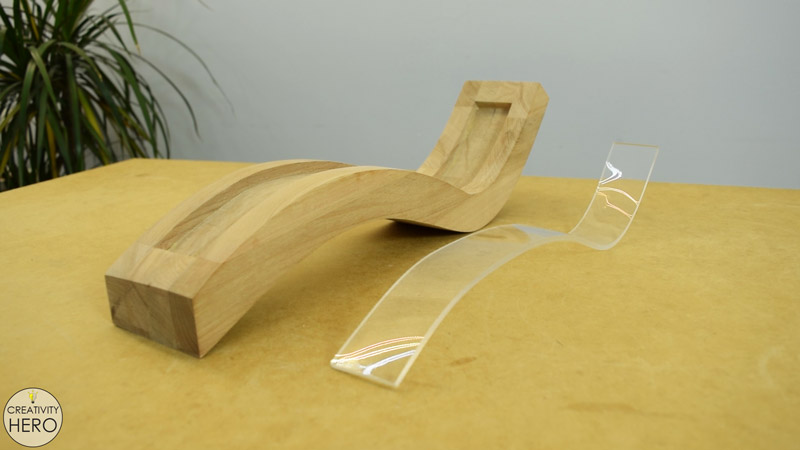
If you want to make round shapes, for example circle, you actually have much larger surface for bending, so to soften the whole surface, you need to slowly move the acrylic piece back and forth for longer period.
I suggest using a can or something similar, and when the acrylic piece is soft enough, wrap it around the can.
Using the can, I slightly bent another long acrylic piece, and added a light source underneath. This way, I made a cool looking lamp.
You can also make different shapes freehand. I’ve made a bow out of a tiny acrylic piece and a spiral out of a larger one. I think they turned out pretty good.
This method might not be useful for larger pieces of acrylic, or for making some complex shapes and angles. However, if you don’t have an appropriate bending tool, it is definitely worth trying.
There are so many different DIY projects you can make using this simple method of bending acrylic. Plus, you can combine different materials like wood, concrete and some LED lights to bring your projects to a whole new level. Just use your creativity and make something amazing.
I hope you find this tutorial useful and you learned something new. If you have any questions or suggestions leave a comment down below. Don’t forget to like, share and subscribe to my YouTube channel.
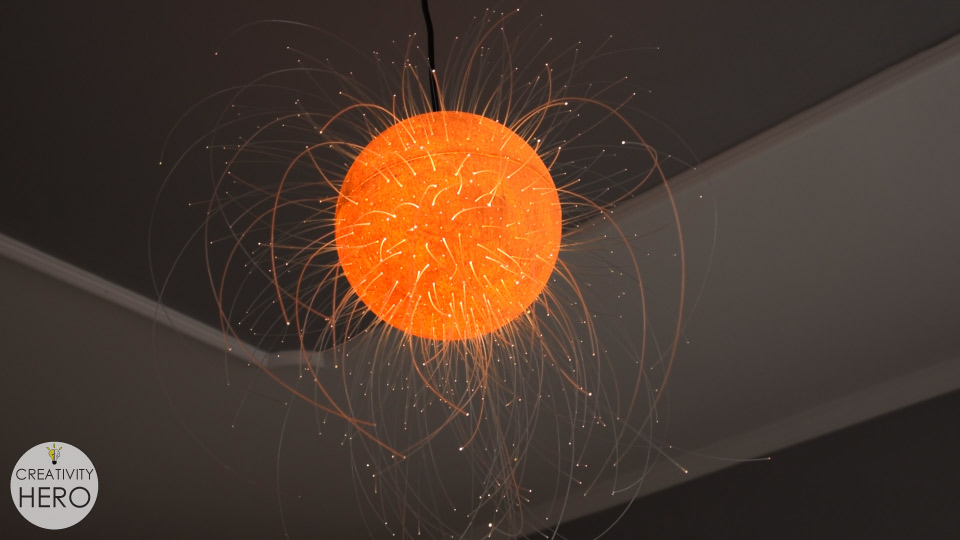
In this video I’ll show you how I made an exploding sun LED lamp out of Styrofoam and optical fibers. The lamp might seem a bit complicated at first glance, but it is actually very simple project that can be done in a day.
Also, it requires just a few basic tools that everyone has at home, so I encourage you to follow my instructions and make your own outstanding piece of art.
Don’t forget to watch the video below, where you can see the full process of creating this magical lamp:
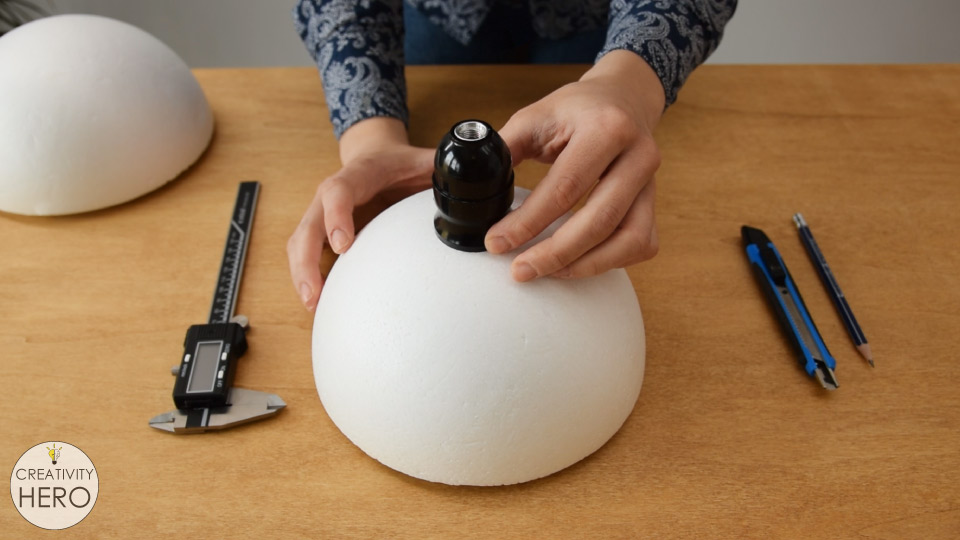
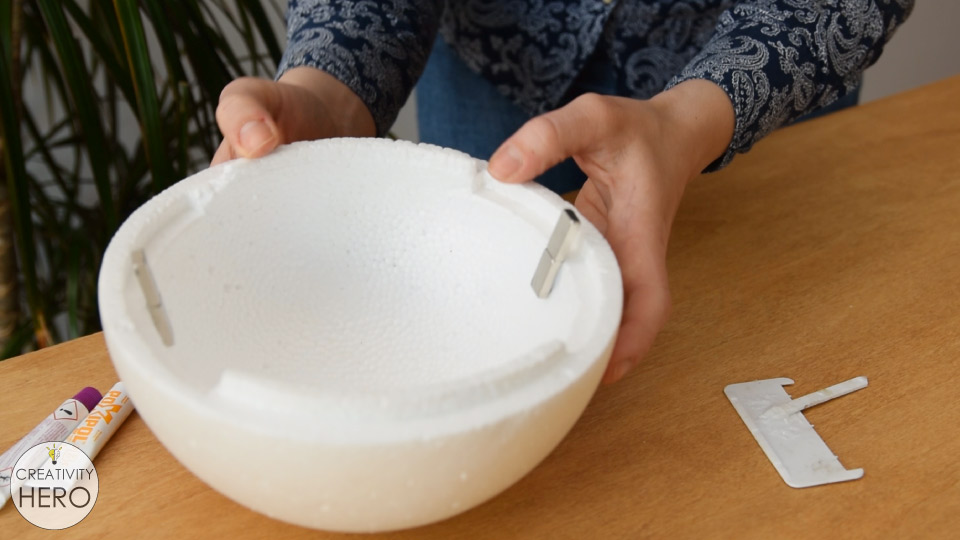
For this project I used a Styrofoam sphere with 20 cm diameter, consisting of 2 pieces.
The socket needs to be placed in the center of one half of the sphere, hence I need to make a hole to fit in the socket. The diameter of the socket is around 40 mm, but I couldn’t use the socket itself to draw a circle, because it is bell shaped, and it is much wider on the end.
Luckily, the electrical tape that I have has exactly 40 mm diameter, so I took it to outline the circle.
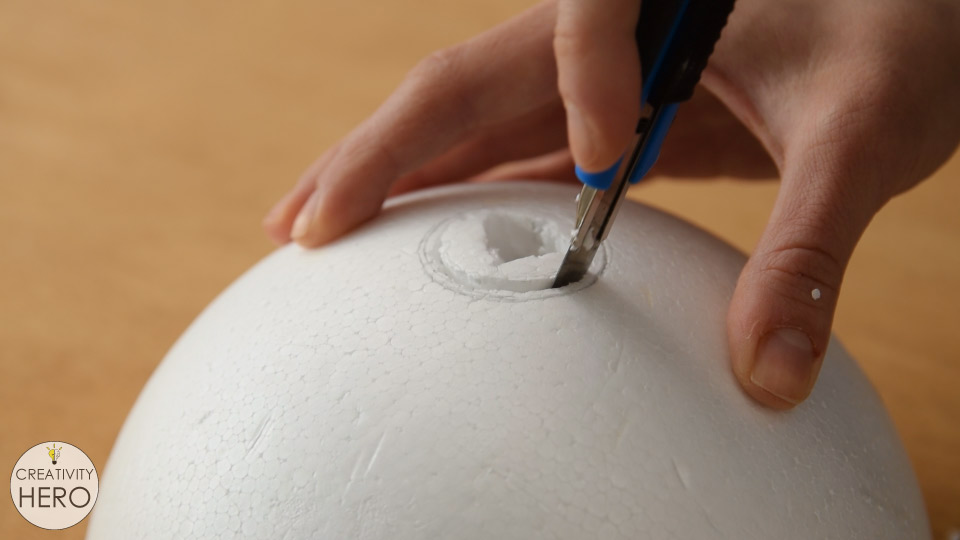
The opening I made with a utility knife, which works pretty well on Styrofoam. I tried to follow the line very carefully, making sure I don’t remove more than I needed.
The opening perfectly fits the socket, and now I can move on to the next step.
Making Tiny Holes into the Styrofoam for the Optical Fibers
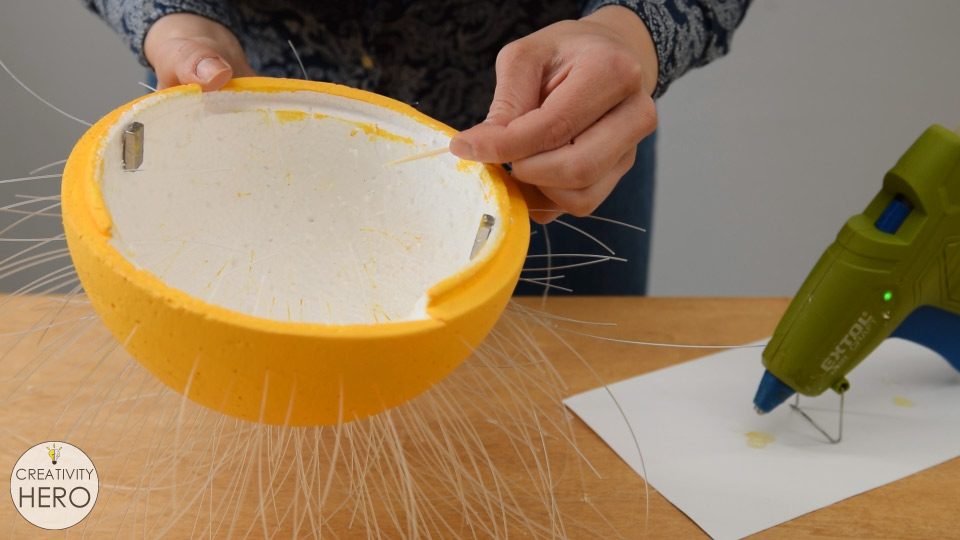
I have around 100 m of optical fibers, that need to be inserted into the sphere. But first, I’ll use a medical needle to make tiny holes into the Styrofoam, in order to be able to insert the fibers easily.
I made as many holes as possible on both halves of the sphere. The hub of the needle served as a handle, thus it was very easy to make those holes.
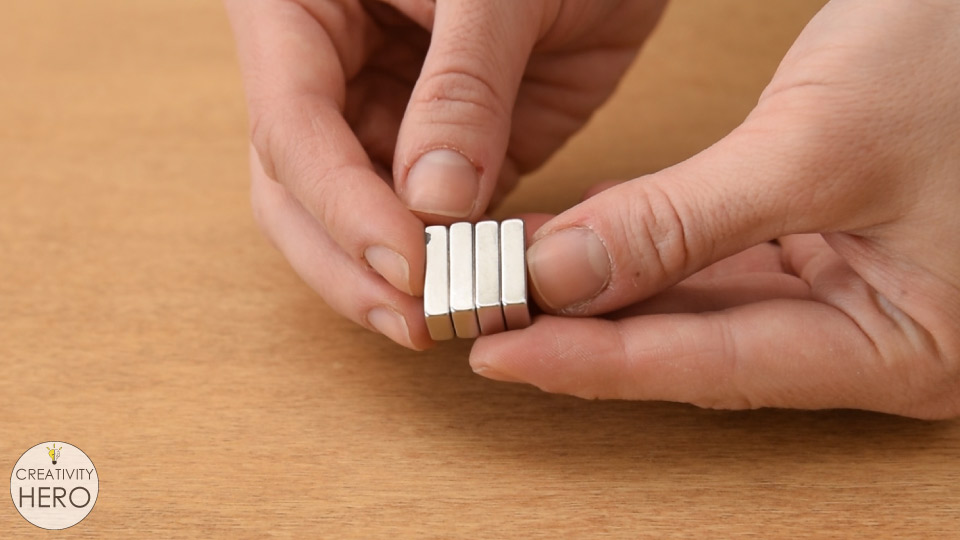
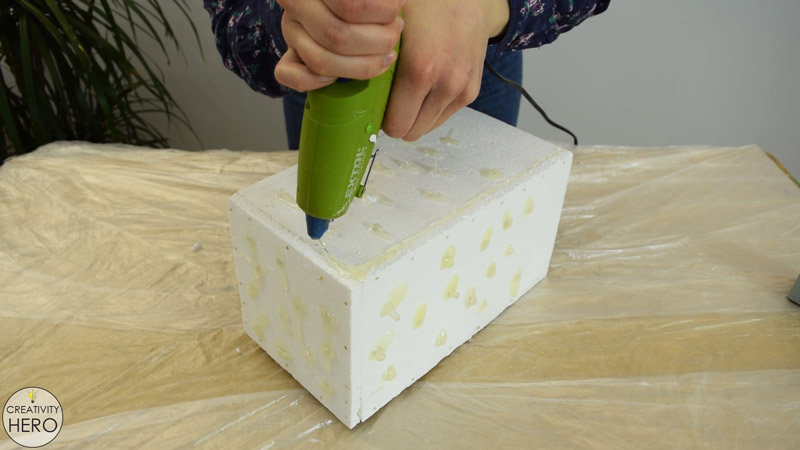
Once I’m done with the holes, I need to attach magnets to the sphere to keep the two halves together. Instead glue, I decided to use magnets, because that way I can easily remove one half of the sphere and replace the bulb if needed. I have 4 neodymium magnets with size 20 by 10 by 4 mm. They’re pretty large, so I’ll attach them vertically, which means they’ll attract each other with the smallest surface of 10 by 4 mm.
The neodymium magnets are very strong, and they’ll hold the two halves together pretty well.
To attach the magnets onto the Styrofoam I used 5 min epoxy. But, if you choose different type of glue, you might want to test it first, because it can melt or dissolve the Styrofoam. Also, when gluing the magnets, make sure they attract each other on both sides.
Painting the Styrofoam Sphere
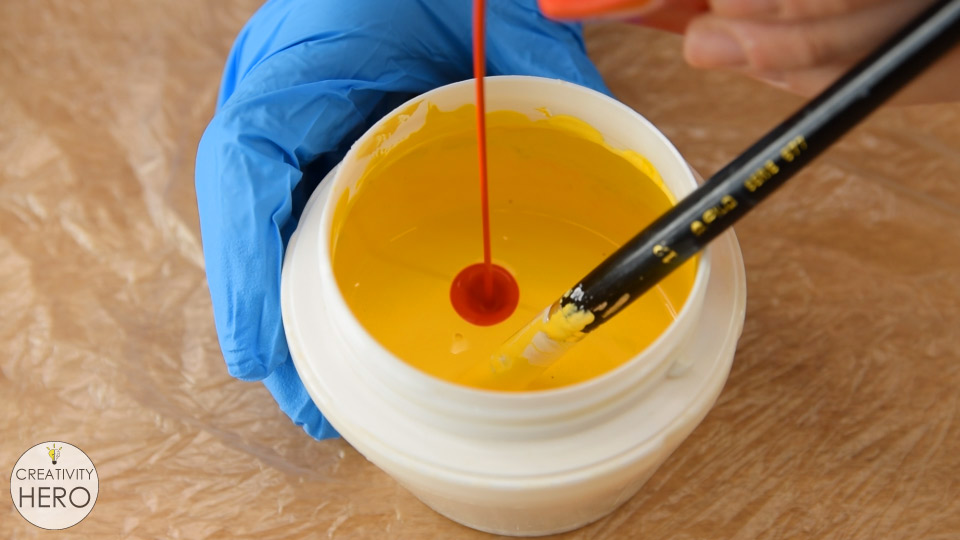
Now it is time to make the sphere more vibrant and add some color to it.
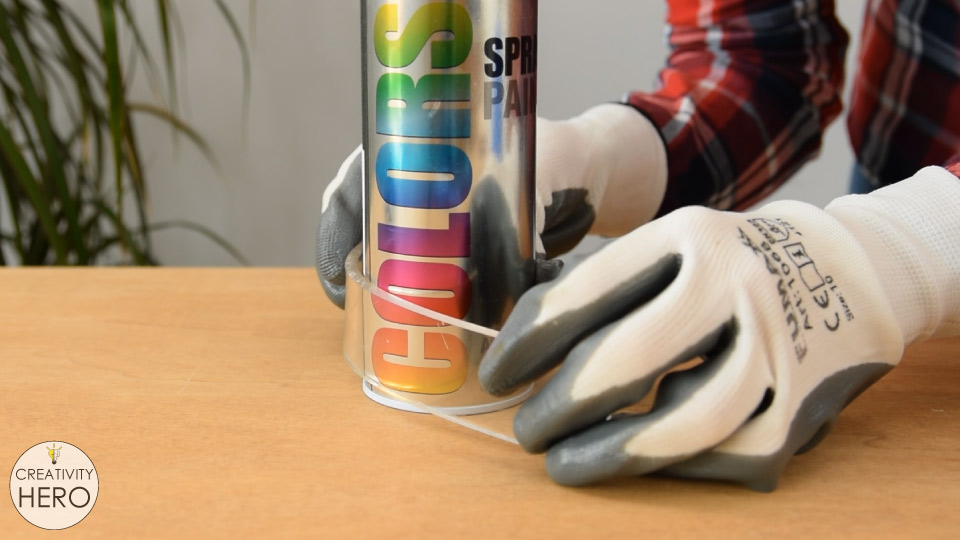
At first, I wanted to spray paint the sphere, but after spraying a scrap piece of Styrofoam, I noticed that it started to melt.
That’s why I went with acrylic paint, and combined white as a primary color, with a few drops of yellow and red tint in order to get a color that will remind of the Sun.
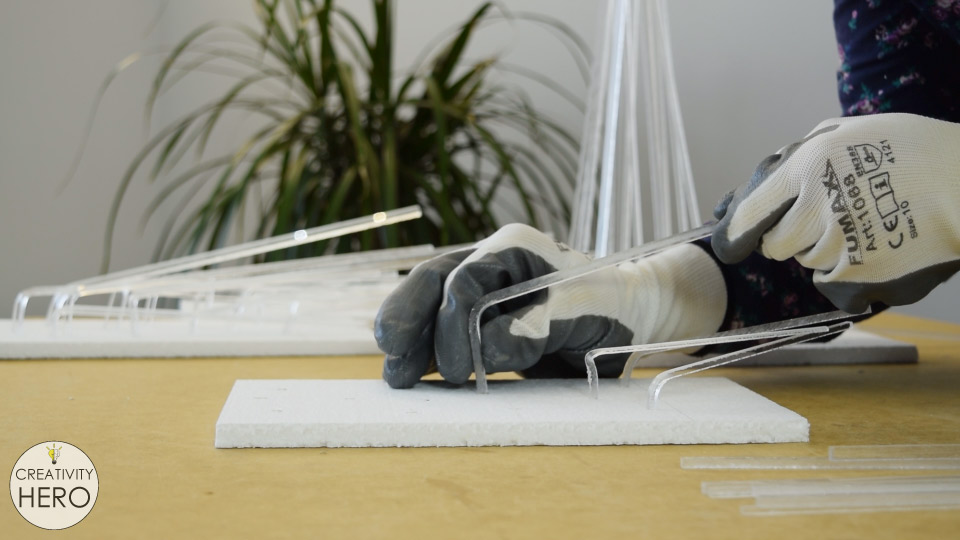
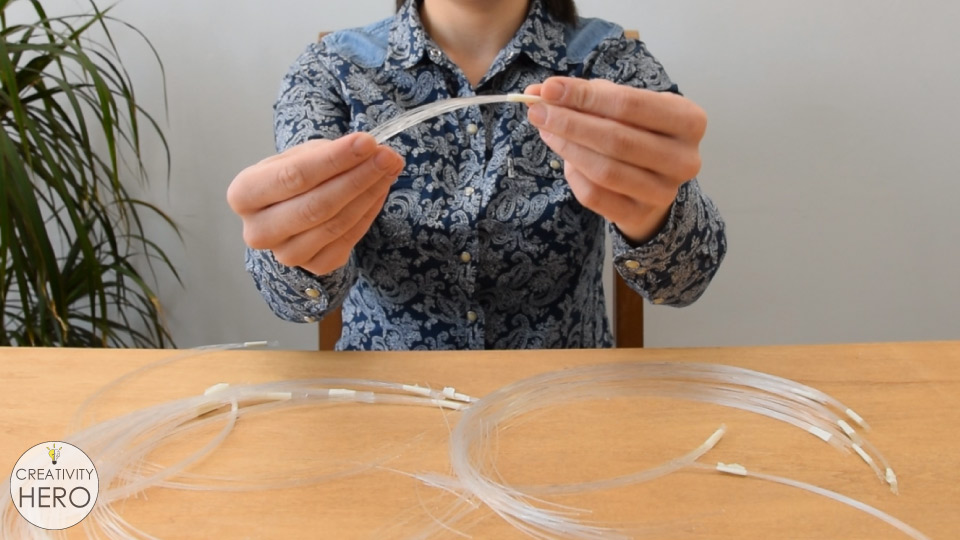
Cutting Different Lengths of Optical Fibers
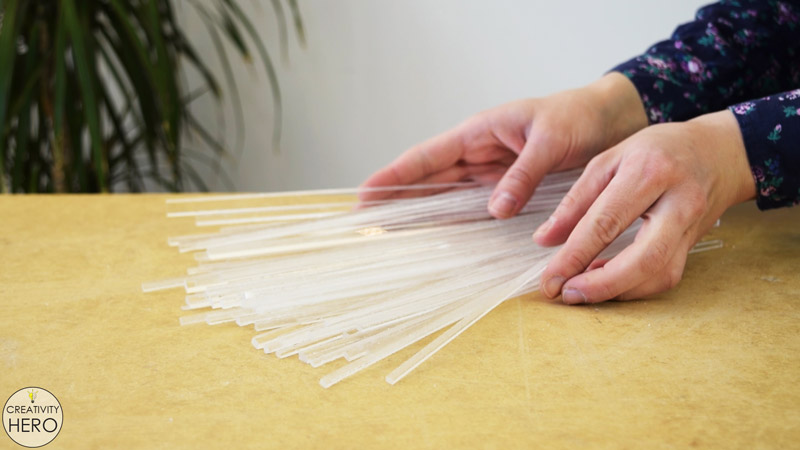
While the paint was drying, I continued with the optical fibers. I cut different lengths of the fibers with scissors, the shortest are 5 cm, and the longest are around 60 cm. This will actually give the effect of explosion of the Sun.
Before I started inserting the fibers, I noticed that I actually needed more holes into the foam, therefore I took the needle and made a bunch of other random holes. This additional step didn’t affect the color at all.
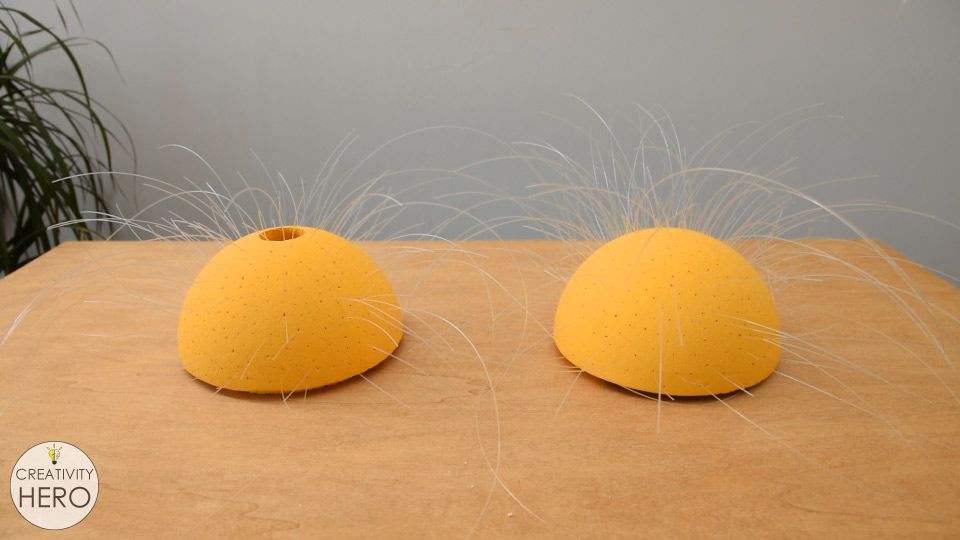
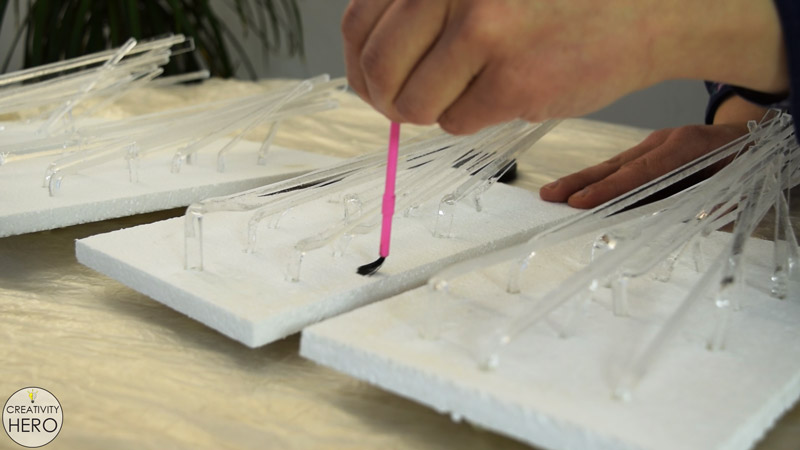
Now I can move on to the most time-consuming part of the project, which is inserting the fibers into the holes.
This type of optical fibers perfectly transmits the light from one end of the fiber to the other. It took me around 2 hours to do that.
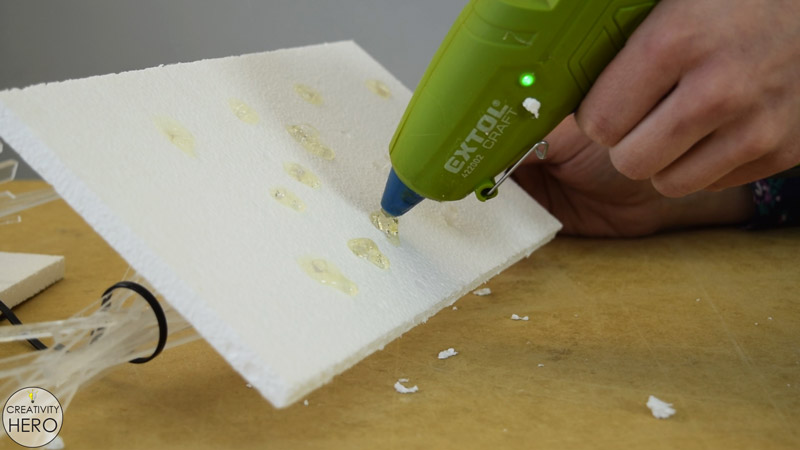
Applying Hot Glue onto the Optical Fibers
To keep the fibers in place, I applied hot glue onto the fibers inside the sphere. I used toothpick to apply a small amount of hot glue on each fiber. This process also gave the glue time to cool down just a little, because when applied directly it melts the fibers.
You need to be very careful here and avoid applying glue directly onto the end of the fiber, since you don’t want to prevent the light transmission.
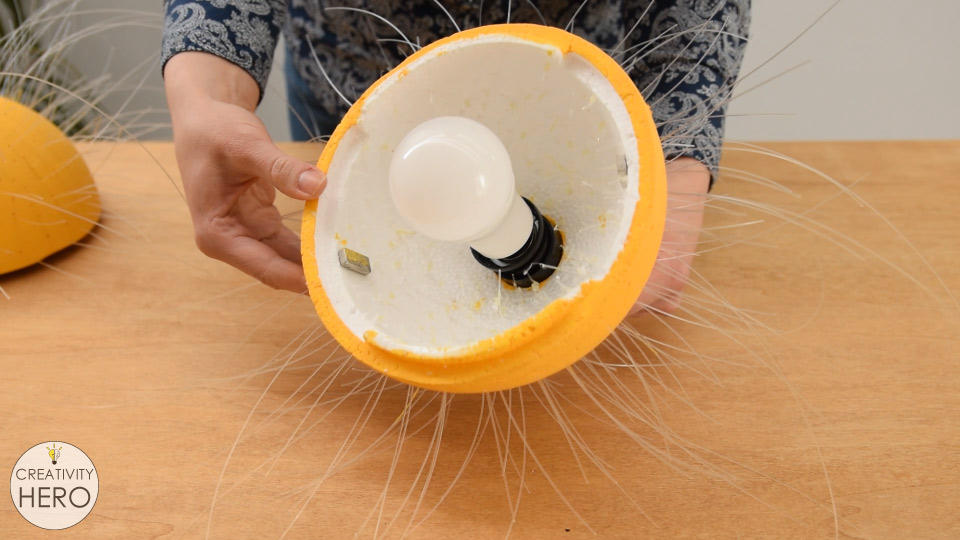
Installing the Light
Next, I moved on to the socket. I cut around 20 cm cable and removed 2 cm of the jacket with a utility knife. I used wire strippers to remove the insulation off of the ends of the wires. Then, I attached the wires into the socket interior, and screwed on the shell.
I chose warm white LED light bulb. It is very important to use LED bulb, because it produces very small amount of heat.
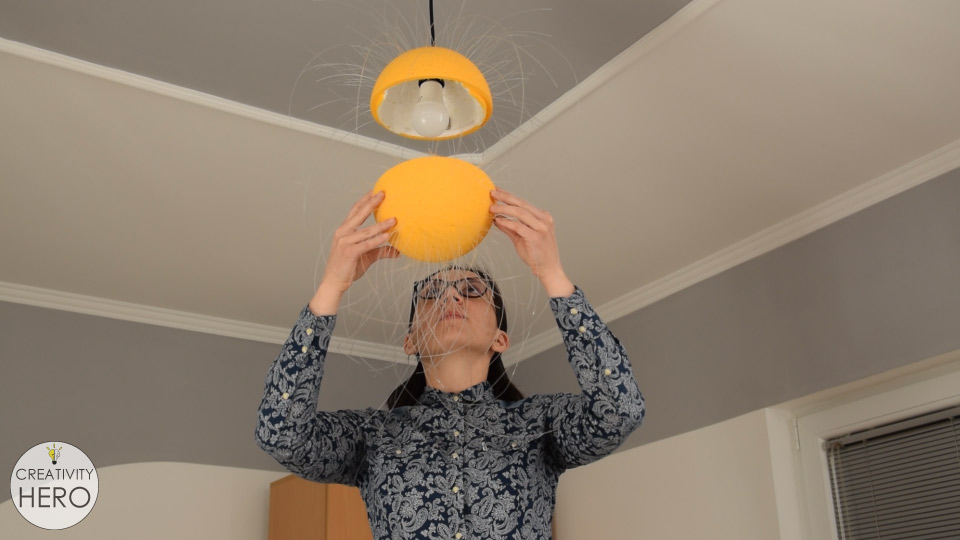
Mounting the Exploding Sun LED Lamp onto the Ceiling
Now that I’m done assembling the parts, I can mount it onto the ceiling.
Finally, I can attach the other half of the sphere, turn the light on and enjoy the mesmerizing beauty of the lamp.
This is very simple and unique project, and I think it is perfect for both indoor and outdoor.
There are no limits on how you can make this Exploding Sun LED Lamp. You can use larger or smaller sphere, you can add more optical fibers, you can even change the color of the sphere and on the light, it’s all up to you.
I hope you enjoyed this project. Let me know what you think in the comments section below. Also, subscribe to my YouTube channel and hit the notifications bell to never miss another video.
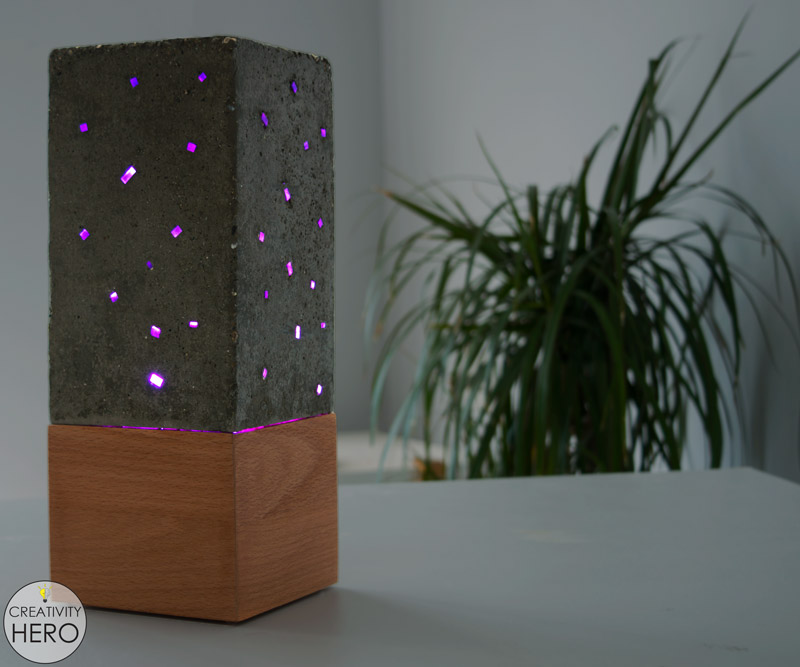
Today I’m going to make a color-changing concrete lamp with a wooden base.
I always want to challenge myself to try new things, and combine different materials in order to make something unique.
So, in this project I’m not only going to use a concrete, but also I’m going to try to embed tiny acrylic pieces into the concrete. The acrylic pieces guide the light from the LED light source on the bottom to the polished concrete surface.
I started with the acrylic. This acrylic piece is 5 mm thick, which is enough for this project. First, I removed the protective film because I need to cut tiny pieces, and the film could make cutting the acrylic harder.
Then, I placed it onto the crosscut sled, and started cutting. While cutting acrylic, I’ve learned two important things: first, the table saw blade needs to be set higher, and second, the crosscut sled needs to be moved faster, which will prevent the acrylic from melting.
From this acrylic piece I got around 60 tiny pieces in total.
Making the Mold
Next, I can move on to the mold. I used 10 mm thick Styrofoam board, but you can use thicker, it doesn’t really matter.
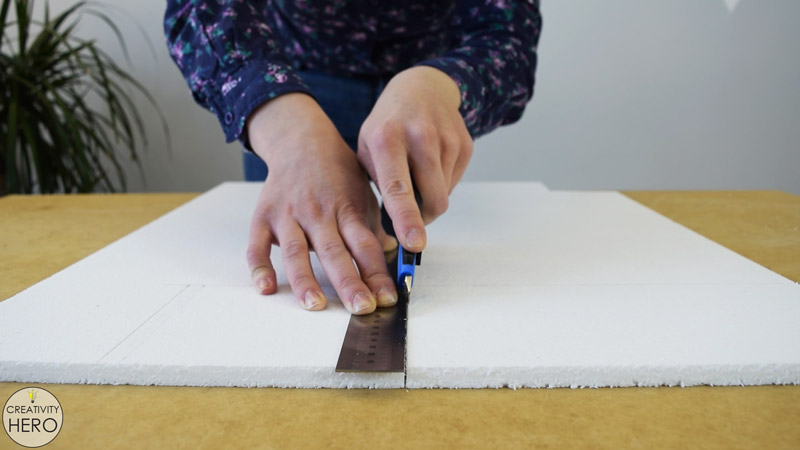
Before cutting, I measured and marked all the dimensions. Then, I cut the Styrofoam to size. For more precision I’m using a metal ruler and a utility knife. This is the best and easiest way to cut Styrofoam.
Combining acrylic and concrete is the trickiest part of this project. The thing is that I need to insert all the acrylic pieces into the Styrofoam, and then to assemble the mold.
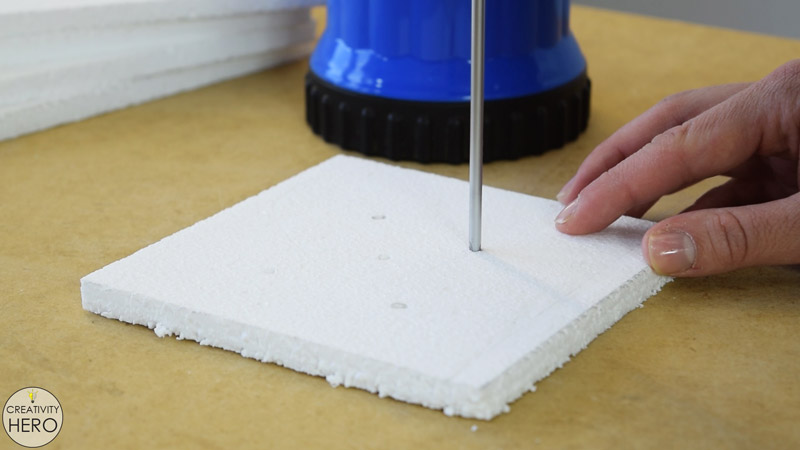
So, I created random holes into the Styrofoam with a hot screwdriver. I heated up the screwdriver onto a portable gas stove and made perfect holes without damaging the Styrofoam.
I repeated the same process onto all Styrofoam pieces and got pretty nice holes where I’m going to insert the acrylic.
Inserting the acrylic into the smallest Styrofoam piece, which will be the bottom of the mold, was very simple because all I needed to do was to push them straight into the holes. To keep the acrylic pieces in place I tied them up with zip tie.
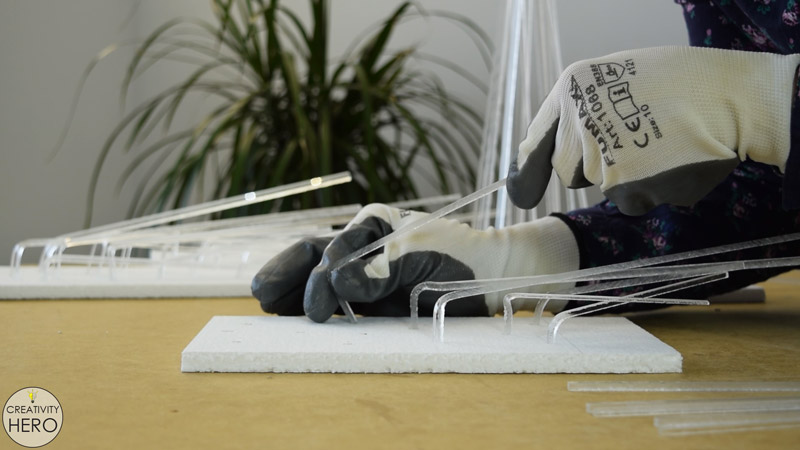
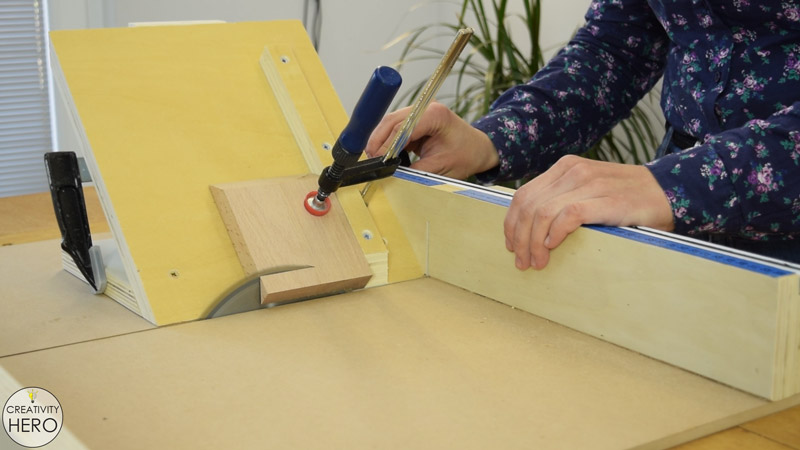
But, this was not the case with the other 4 Styrofoam pieces. Here, I needed to bend the acrylic in order to get the desired shape of the mold.
I used the gas stove, turned it on, and reduced the heat as much as possible. Then, I took one acrylic piece, placed it above the gas stove and waited for about 20 seconds until it softened so that I can easily bend it and make whatever shape I want.
This way I bent all the acrylic pieces and inserted them into the Styrofoam. Bending the acrylic is the most important step that will make assembling the mold possible. When I was done, I tied them up with zip ties.
Some acrylic pieces are so tiny which makes some of the holes a bit loose, so I need to secure them in place. I used a hot glue for that purpose.
In order to prevent the concrete from sticking to the mold, I applied cooking oil all over the surface. I did it with a brush, making sure I don’t miss a spot.
Finally, I can assemble the mold. I cut a bunch of toothpicks in half, which will serve as dowels. I’ve used toothpicks before, and I can say they’re pretty effective.
There are some gaps between the joints, so I decided to fill them up with hot glue. That way I’ll prevent the water from getting out of the mold. Additionally, I secured the mold with an adjustable corner clamp, a masking tape, and a duct tape.
The mold is ready, and now I can make the concrete mix.
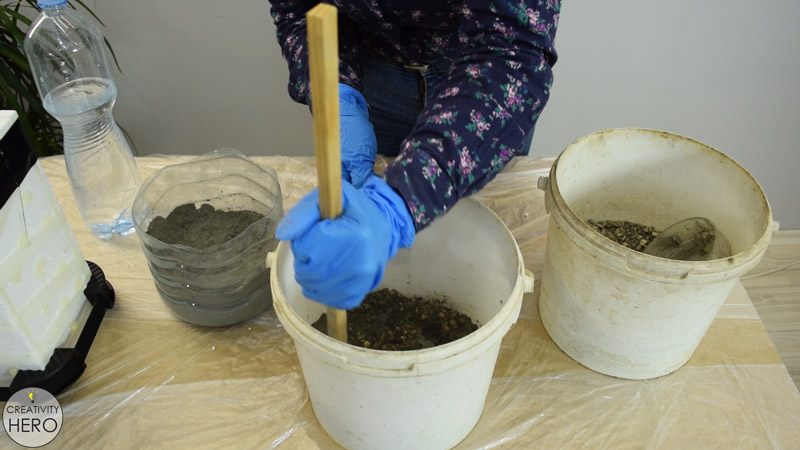
I mixed one part sand and one part cement, and added water until I got nice and thick consistency.
When I was satisfied with the consistency, I poured the concrete into the mold, by constantly vibrating the mold by hand in order to fill in all the voids.
I poured the concrete until it reached around 20 cm height. Then, I additionally vibrated the mold to release the air bubbles.
Once I was done, I let the concrete cure for 48 hours before removing the mold.
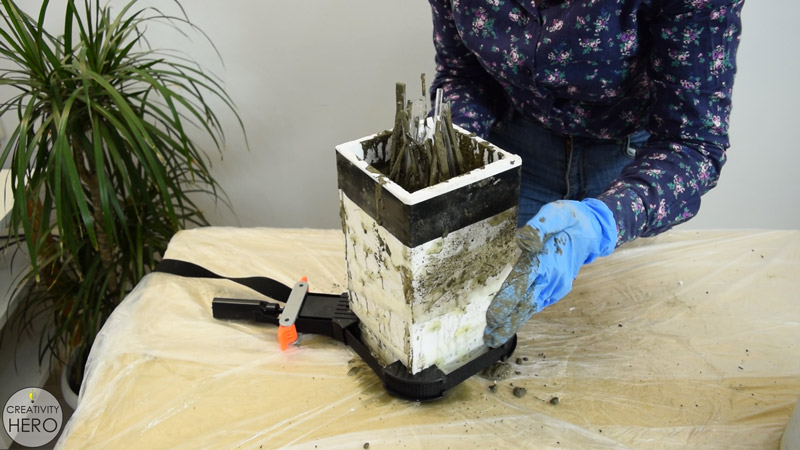
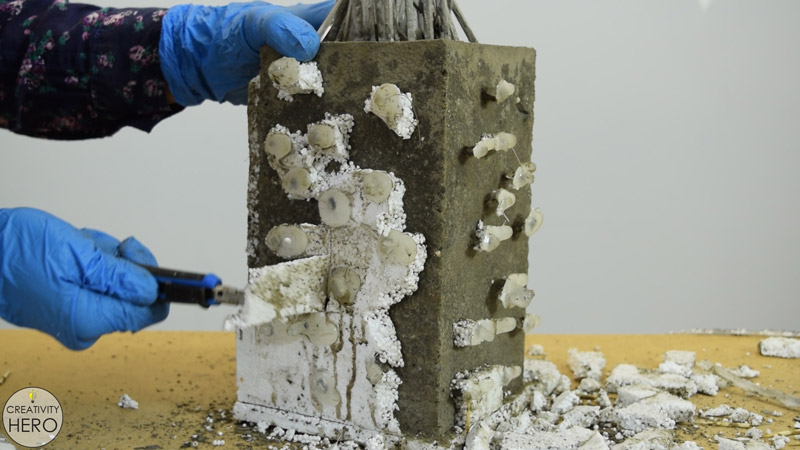
Removing the Mold
After 2 days I removed the mold. I was so excited to do that, because I had no idea how it will turn out. Removing the mold was easy, the only difficulty I had was with the hot glue which stuck onto the acrylic.
But, using a utility knife made everything much easier.
Luckily, the cooking oil prevented the concrete from sticking to the mold. I highly recommend using cooking oil in any concrete project.
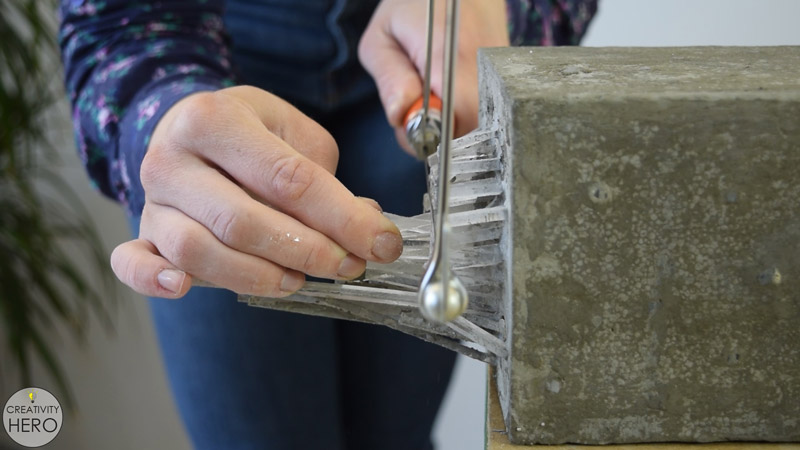
Cutting the Acrylic Flush with the Surface and Sanding
Now I need to make all the acrylic pieces flush with the concrete surface. So, I’m going to cut all the parts of the acrylic that are sticking out of the concrete with a coping saw.
Also, I cut the extra length of the acrylic pieces that will go into the wooden base, and left around 3 cm of it, which will be enough to guide the light from the bottom to the concrete surface.
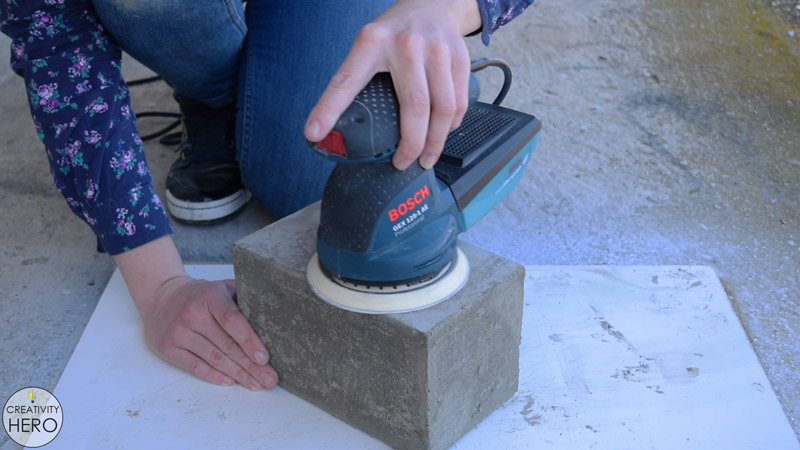
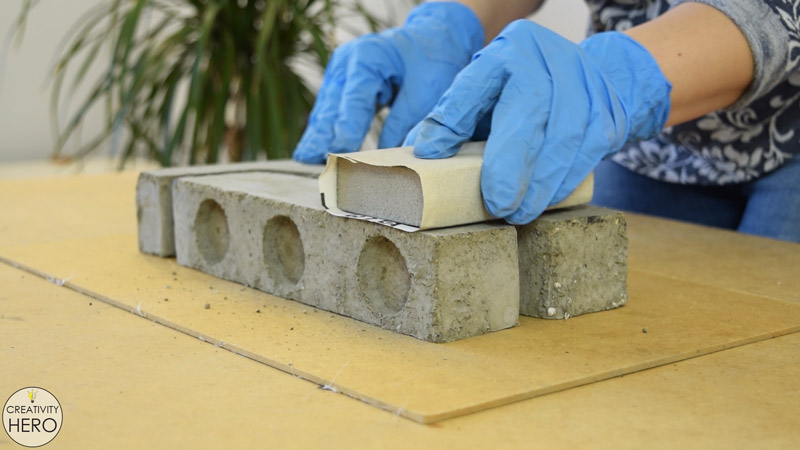
Then, I used my orbital sander to sand the concrete surface, in order to make it smooth and to remove all the imperfections.
Making the Wooden Base
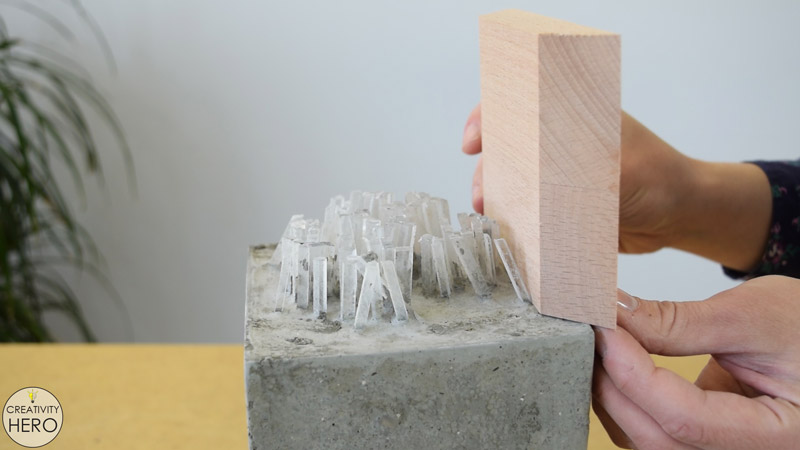
Now it is time to move on to the wooden base. I use a beech wood, and cut 4 identical pieces on my crosscut sled. Their size needs to match the size of the concrete form.
I want to make a small box with a clean look, because I want the focus to be on the concrete and the acrylic.
To achieve a clean look, I’m going to cut all the pieces at a 45 degree angle. So, I made this super easy jig to crosscut at an angle.
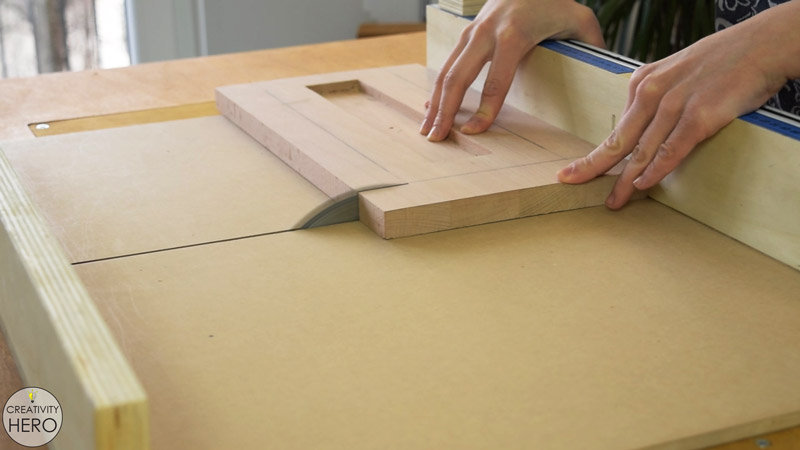
After that, I checked if the wooden pieces match the concrete form. Here, I realized that the ends of the acrylic were closer to the edge, and the wooden pieces couldn’t stay flush with the sides of the concrete.
So, I needed to make some adjustments onto the wood. In fact, I decided to remove parts of the thickness of the wooden pieces onto the crosscut sled. I measured and cut, adjusting the blade all the time in order to remove just as much wood as needed, not more nor less.
That way, I made enough space for the acrylic to fit inside the wooden base.
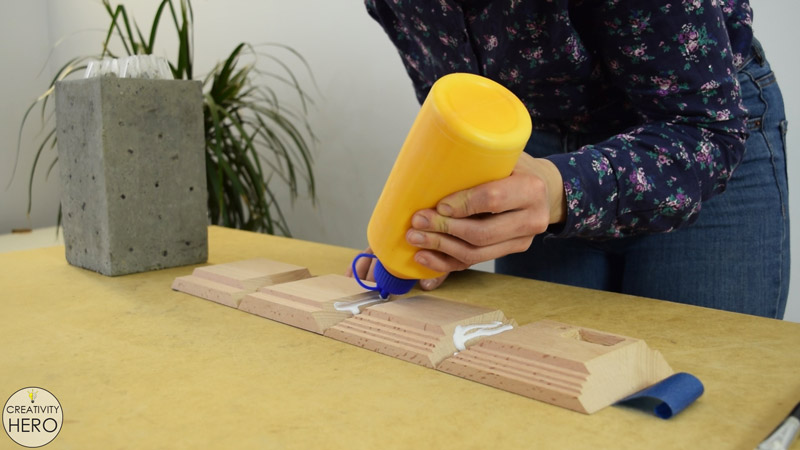
On the bottom of the base I plan to attach a fiberboard piece, to hide the controller and the LEDs. I’m going to make rabbets on each wooden piece, 5 mm wide and 7 mm deep, so when I attach the fiberboard later, it won’t be visible.
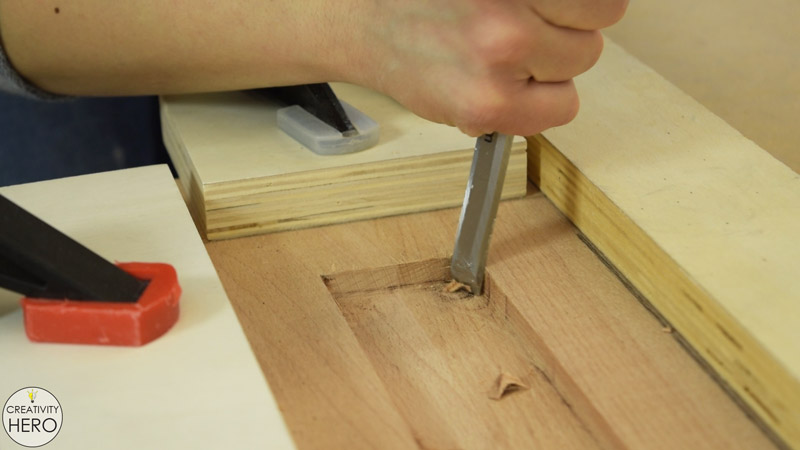
Before assembling the base I need to make a space for the LED controller.
First, I drilled two holes, one for the infrared receiver, and the other for the power plug.
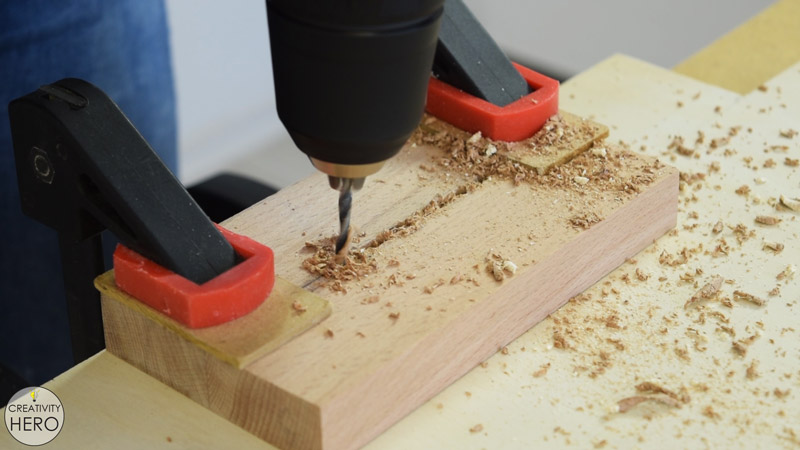
On the other side of the same wooden piece I made a space for the controller using a Forsther bit and a chisel.
Now, I’m going to glue up the mitered corners. Using masking tape as a clamp when gluing mitered corners together works really great.
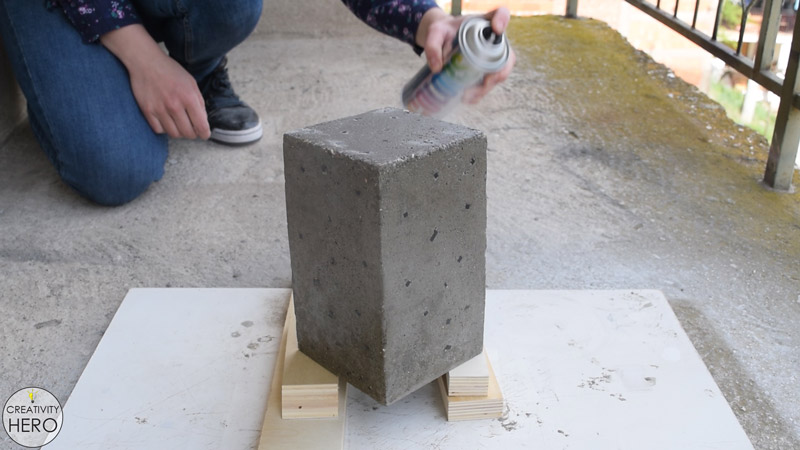
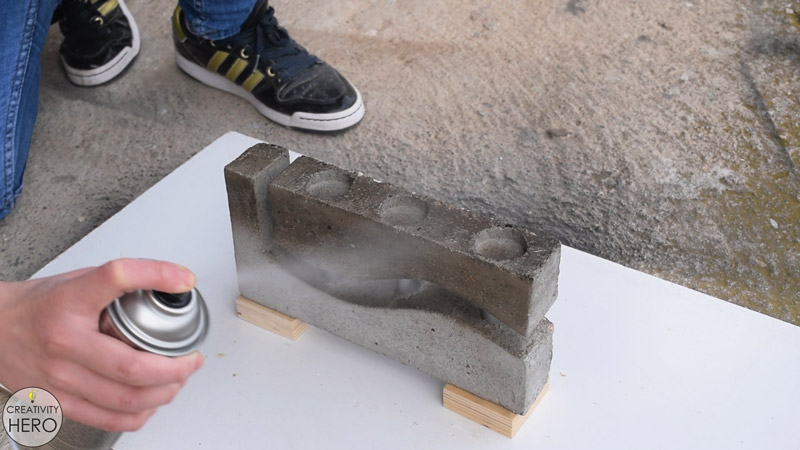
While the base is drying, I can apply finish to the concrete. I cleaned the acrylic, and wiped the dust off of the concrete surface with a wet cloth, and then I applied clear spray paint for concrete.
With this done, the concrete form is completely finished, so I can go back to the base.
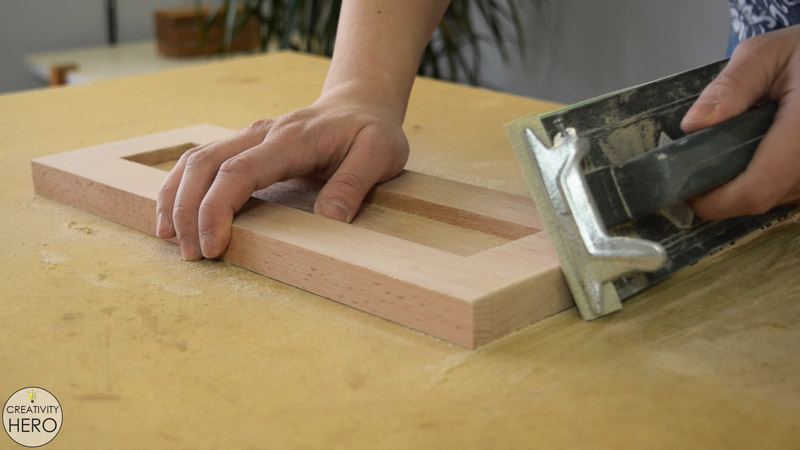
One of the corners had a gap on the joint, so I needed to fill in the gap. I used a combination of wood glue and saw dust, which turned out to be much better than a wood filler.
Once it has dried, I sanded the base with 120, and then with 220 grit sandpaper. And then, I applied one coat of transparent finish to protect the wood.
Installing the Light
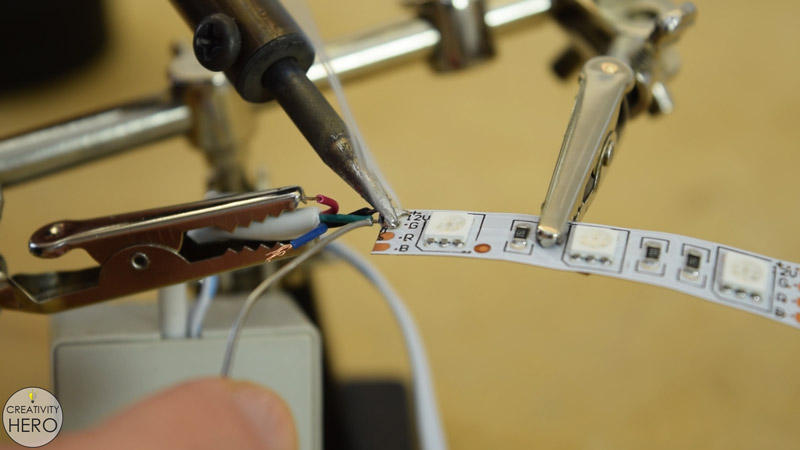
Next, I can move on to the light. I cut around 1 m of this RGB LED strip on the predetermined cutting points. It should give a strong light, which is exactly what I need.
Then, I stripped off the wires on the connector, and soldered them onto the LED strip appropriately.
For this project I’m using 12 V power adapter. Before installing the light into the base, I checked if everything works properly.
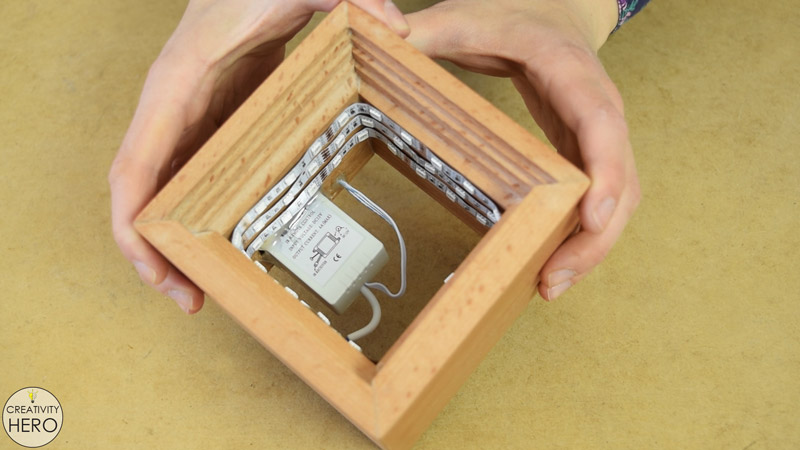
After that, I secured the controller into place with hot glue. I did the same with the infrared receiver.
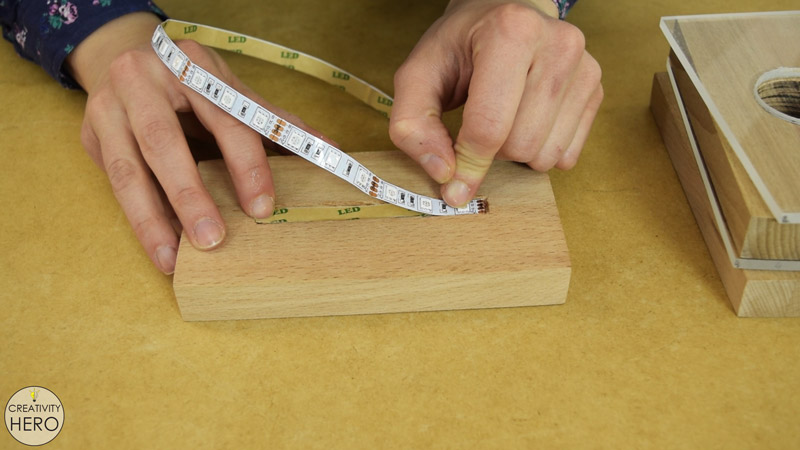
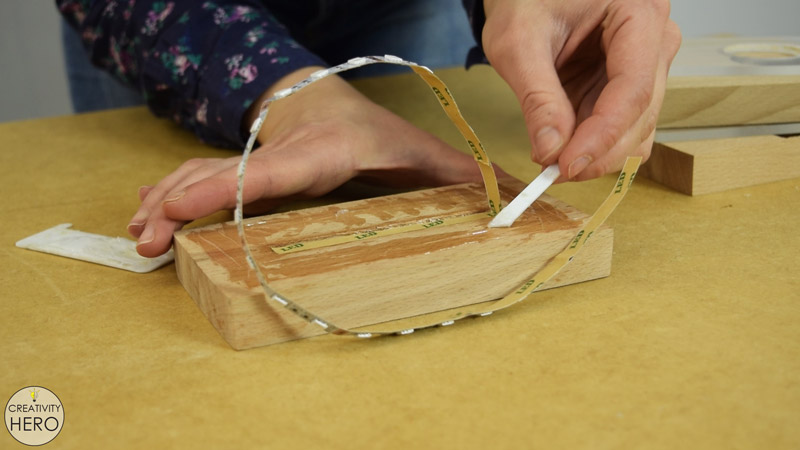
I peeled off the tape cover on the back of the LED strip and stuck it into the base.
Joining All the Pieces Together
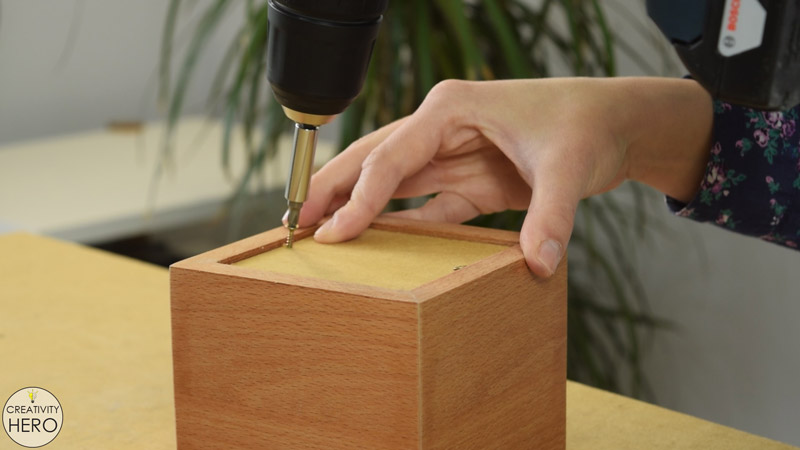
This is a 3 mm thick piece of fiberboard, which I’ll use to cover the bottom. To attach it to the bottom I used only 2 screws, so that I can easily remove it when needed.
The concrete form and the wooden base are completed, so now I can join them together with epoxy. I applied a generous amount of epoxy onto the wood, and then placed the heavy concrete form above it, which will make a strong bond, without using any additional weight.
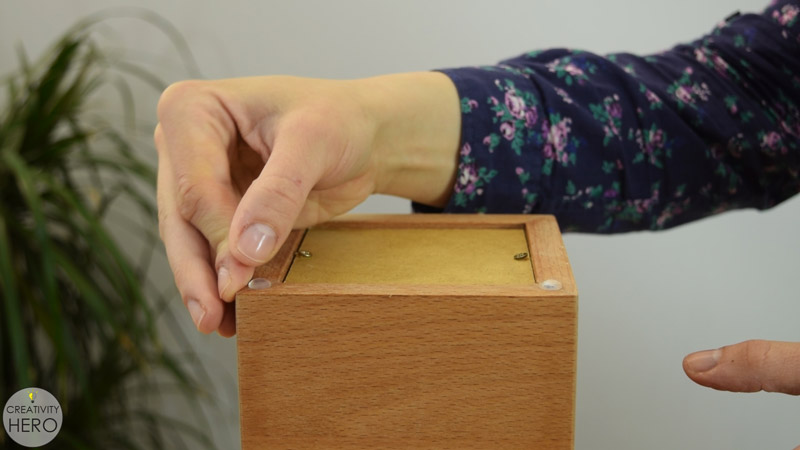
Lastly, I attached silicone pads on the bottom of the lamp to avoid scratching of the surface where it will be placed on.
Now I can turn this concrete lamp on and enjoy this hypnotizing effect. This project was really challenging, and I had so much fun in the entire process of creating this lamp.
If you like this lamp share it with your friends and family, and subscribe to my YouTube channel.
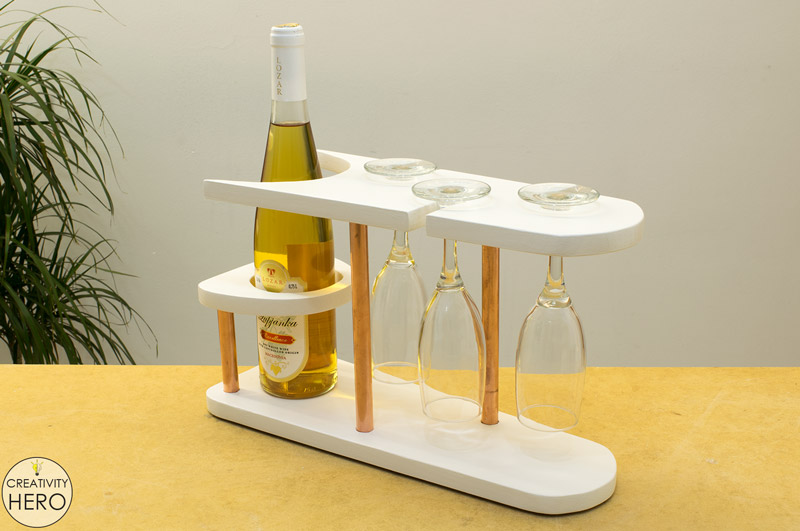
Today I’m going to make a wine rack. This wine rack is designed to hold 1 bottle and 3 wine glasses.
It is made out of pine wood and a copper pipe. The design is actually quite simple, and consists of 4 copper pipe pieces with different length and 3 wooden pieces with different shape, joined together.
In the first place, I drew the design onto 3 separate pieces of paper, including all the holes and cuts that need to be done onto each part.
Here’s the template:
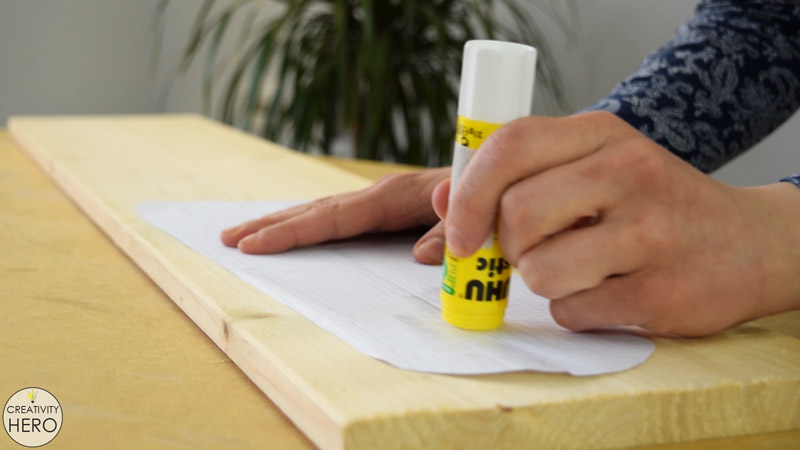
A pine was my choice for this project because it is very easy to work with, and I don’t mind covering it with paint since it is cheap and soft wood.
I applied all-purpose glue stick onto the paper and glued it onto the wood. Therefore, I can easily cut the desired shape.
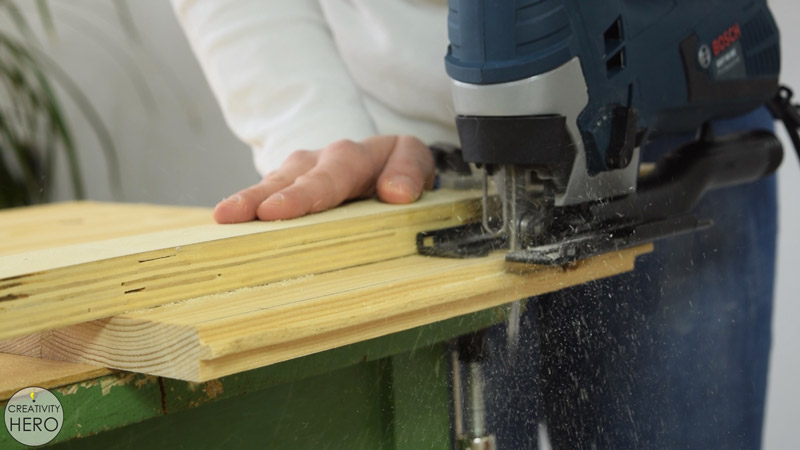
Then, I clamped the board onto the table, and started cutting with a jigsaw, making sure to cut outside the line. Later, I’ll make some adjustments with a rasp. Onto the jigsaw I installed clean cut blade, which helped me avoid tear outs and get clean cuts.
Once I was done with the first piece, I moved on to the second one, and repeated the same process.
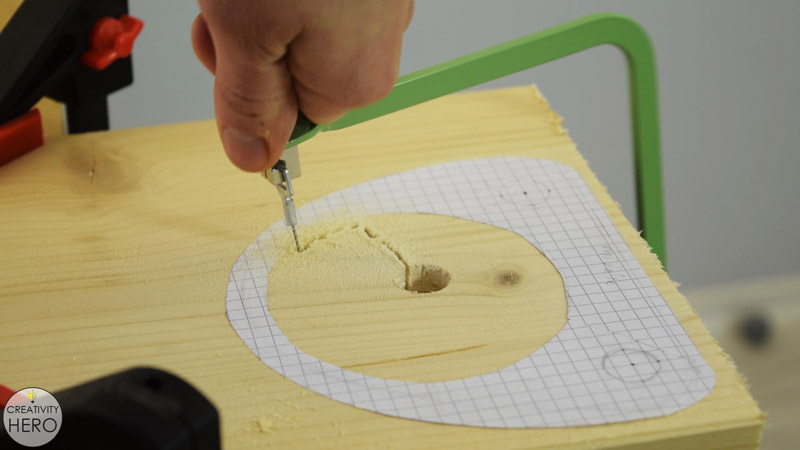
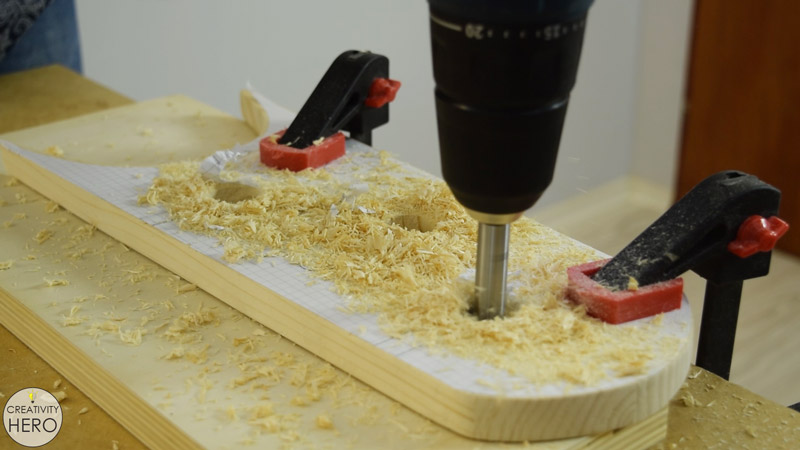
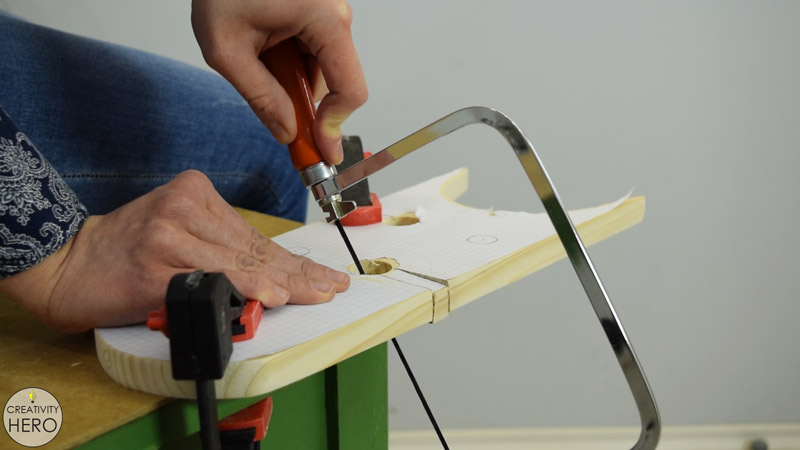
When I got to the smallest piece, I needed to make large opening in the middle, and here’s how I did it:
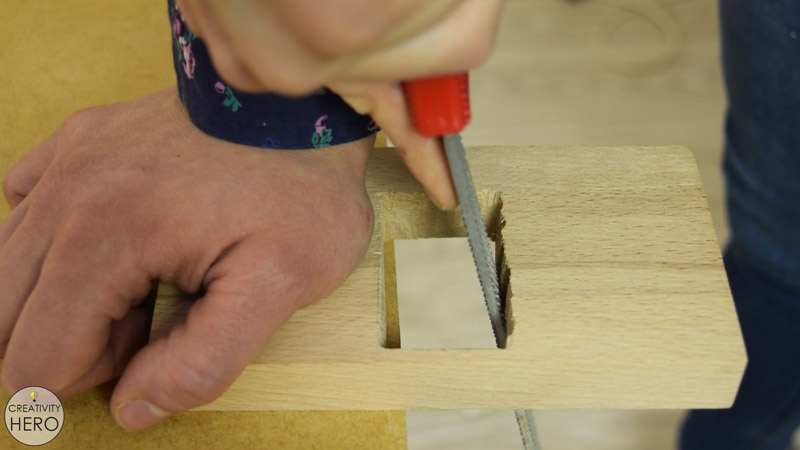
First, I made a 15 mm hole in the middle with a Forstner bit, which is enough space to fit the coping saw blade. Then, I installed the coping saw there, and made the opening.
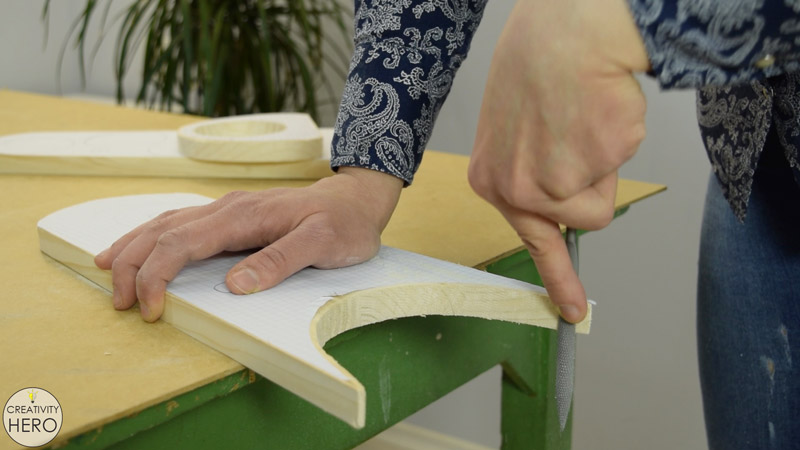
There was too much extra wood that I needed to remove in order to get a perfectly round opening. Hence, I took a rasp and spent some time until I finished.
The opening is done, so I can make the final cut with a jigsaw.
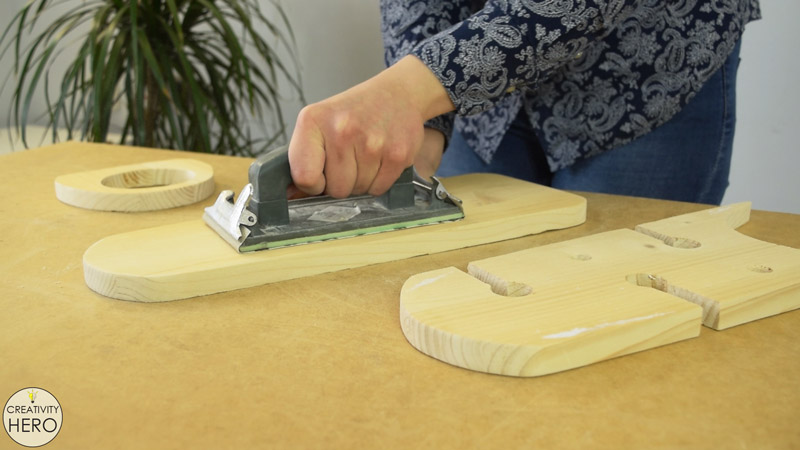
Now I have all three wooden pieces cut to size. Additionally, I need to make some more adjustments with a rasp until I’m happy with the final shapes.
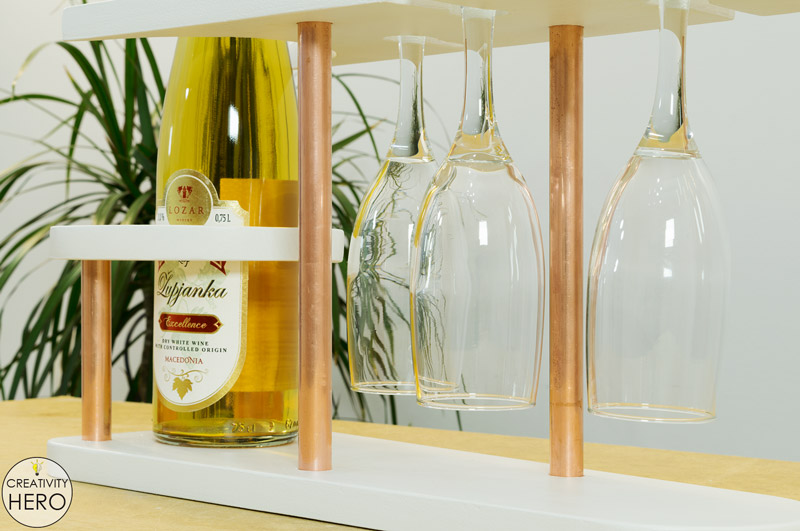
On the piece that will go on the top of the wine rack I need to make 3 holes for wine glasses. Also, I need to make 3 channels that will lead the glasses into the holes.
The holes I made with a 25 mm Forstner bit, which is enough space for the wider glass bottom. For the channels I used a coping saw. The width of the channels is around 13 mm, and it is enough to fit the glass stem.
In fact, having thinner channels and wider holes will keep the glasses in place once I hung them onto the rack.
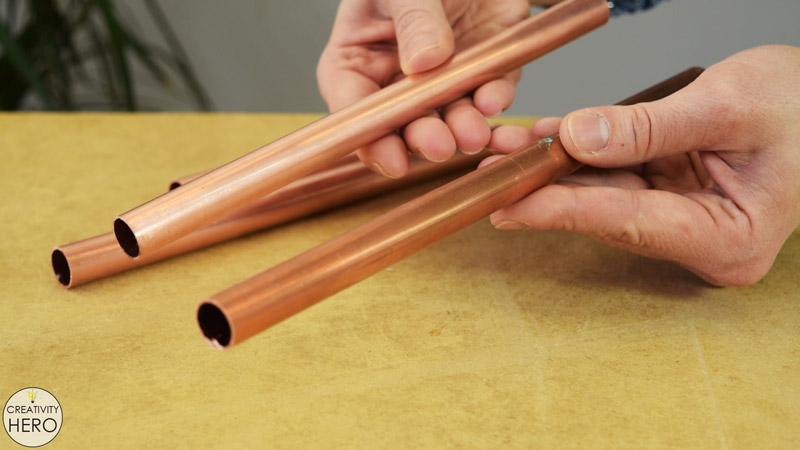
Cutting the Copper Pipes to Size and Drilling Holes for Them into the Wood.
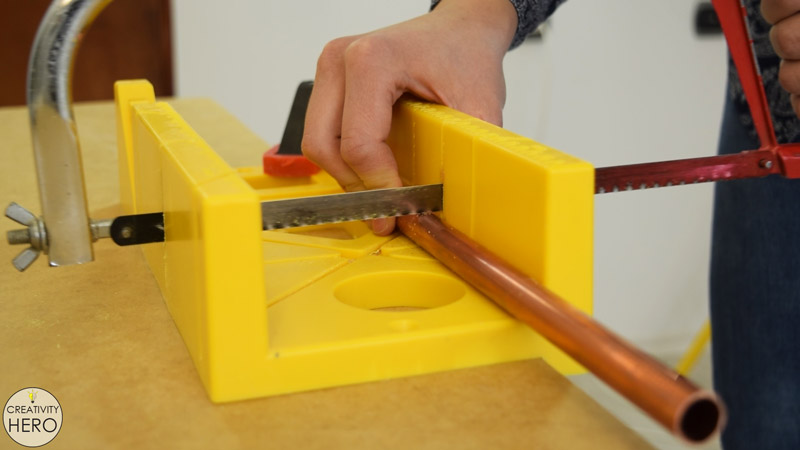
Out of 2 scrap pieces of copper pipes I’ll cut 2 pieces 21 cm long, and 2 pieces 11 cm long. For this purpose I used a hacksaw, but you can use a pipe cutter if you have one.
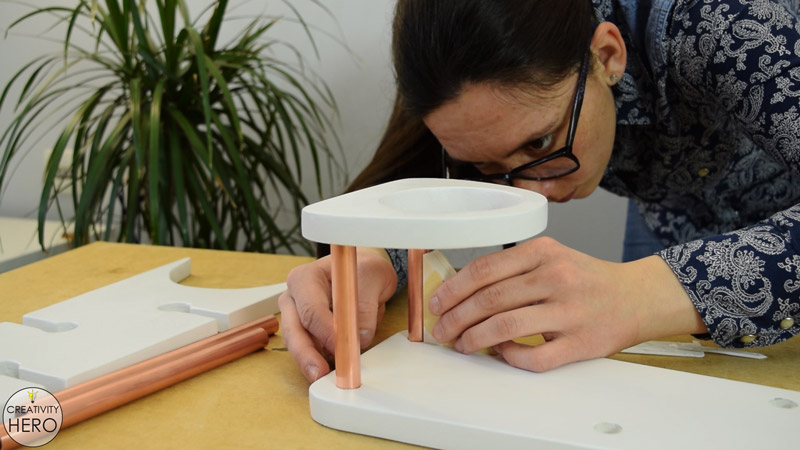
The shorter copper pipes will support the smaller wooden piece in the middle, and the longer copper pipes will support the larger wooden piece on the top.
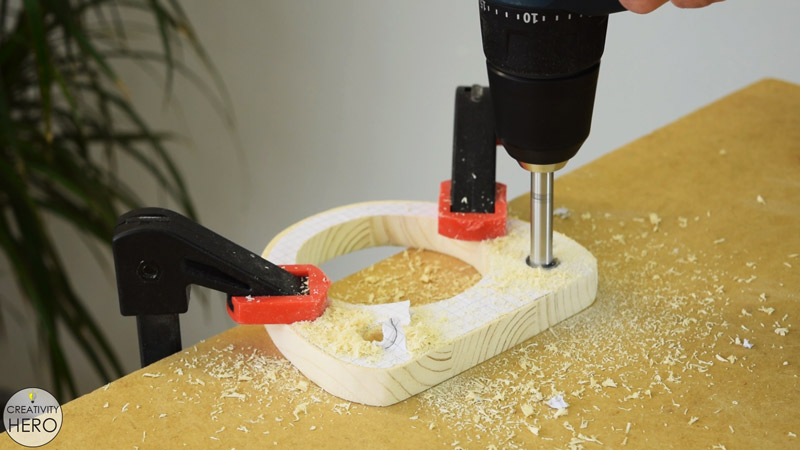
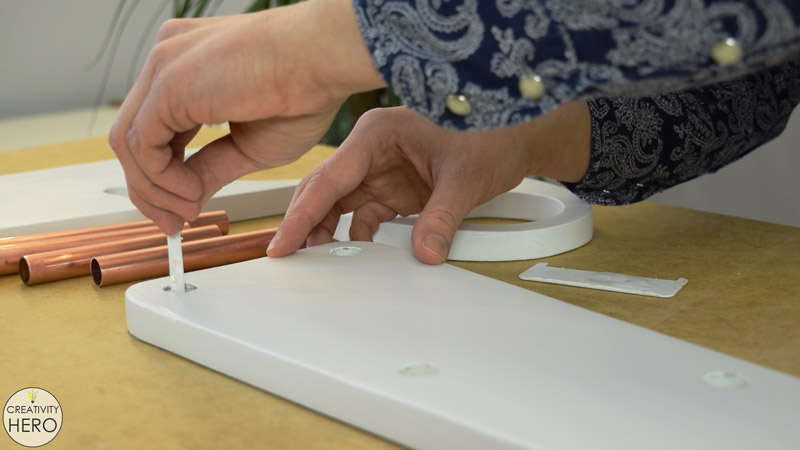
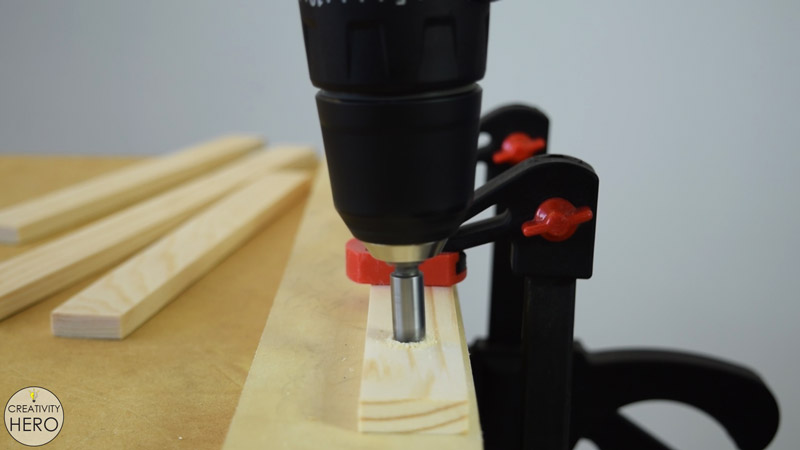
Next, I’m drilling holes on the pre-determined points, where I’ll insert the copper pipes. I’m using 15 mm Forstner bit, and drilling halfway through the wood.
Before drilling these holes double check their position, and make sure the holes on the bottom are parallel with the holes above them, because the copper pipes need to be perpendicular to the wooden pieces.
Sanding All the Parts.
Now that I’m done with all the cuts and holes, I can peel of the paper. Actually, it came off very easy.
The next step is sanding. I used 120, then 220 grit sandpaper, to make the wood as smooth as possible.
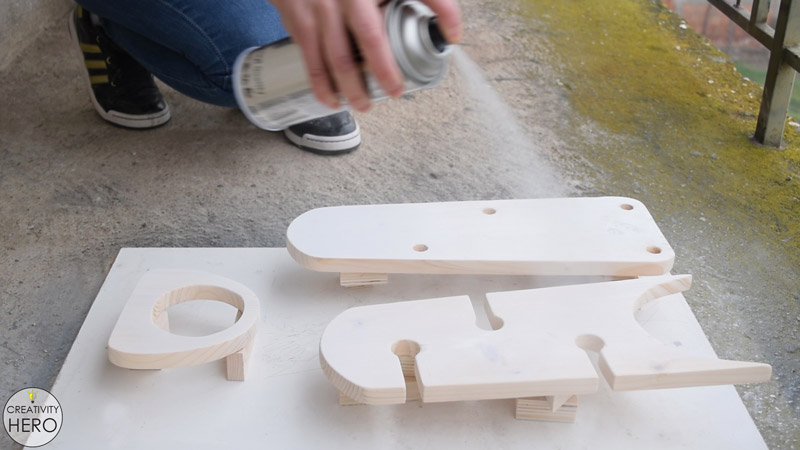
Spray Painting the Wooden Pieces.
Once I finished sanding, I can paint the wooden pieces with white spray paint. I chose white because it matches copper really well.
I applied 3 coats of paint, which was enough to get a nice white color. Then waited at least one hour between each coat.
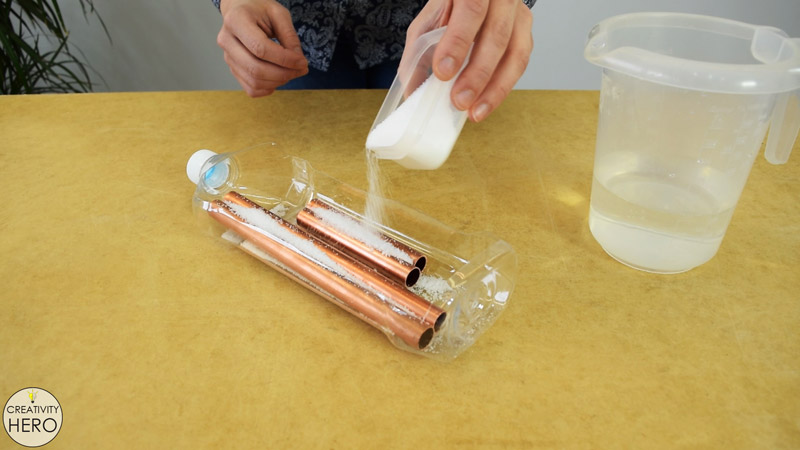
Cleaning the Copper Pipes.
While the paint is drying I can prepare the copper pipes that I previously cut.
To clean them I used salt and vinegar. I placed the pipes into a plastic container and added a little salt and more vinegar until I completely covered the pipes. After a few minutes, I removed the pipes and wiped them off using a clean cotton cloth.
Here you can see the huge difference between tarnished and clean copper. The result is amazing.
I’m using epoxy to secure the copper pipes into the holes. To keep everything clean, I applied epoxy into the holes, and then inserted the pipes. The epoxy will make a strong connection between the copper and the wood.
Additionally, I made sure the pipes are perpendicular to the wood, and left them to dry out.
Finally, I can place a bottle of wine and hang wine glasses onto this wine rack. And that’s pretty much everything about this project.
If you enjoyed this project make sure to hit the like button, share, comment down below and subscribe to my YouTube channel.
Exactly one year ago, in my first video, I made a simple wall clock, and this year I decided to make another, more complex wall clock to celebrate my first anniversary!
In fact, I’m going to make a layered plywood wall clock with a tree ring shape.
Be sure to check the video below for more details!
To make this wall clock I’m using 21 mm thick plywood. It is a pretty large and heavy sheet of plywood, so I measured and cut one piece 60 by 40 cm to make the drawing of the clock much easier.
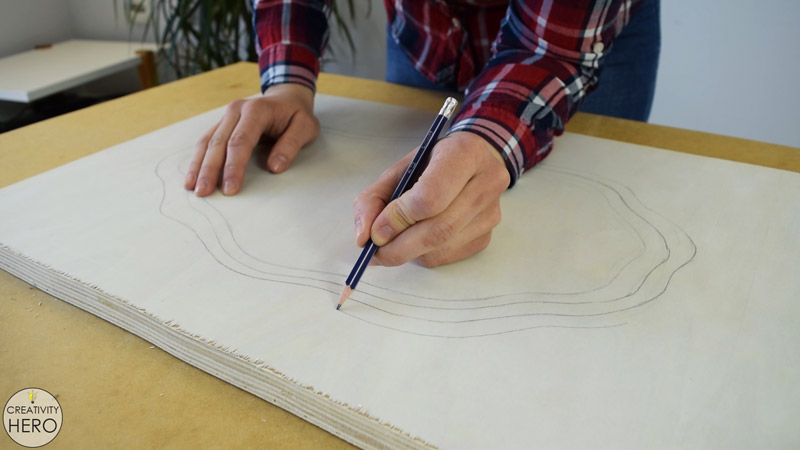
Then, I started drawing the tree ring shape. Initially, I drew 6 rings in total, all with different size, with a nice transition between them. Later you’ll notice that while cutting, I made another, seventh layer, which will improve the complete look of the clock.
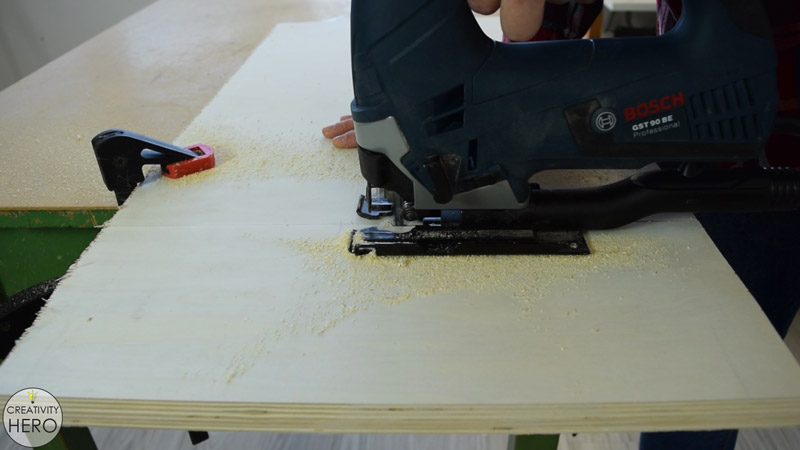
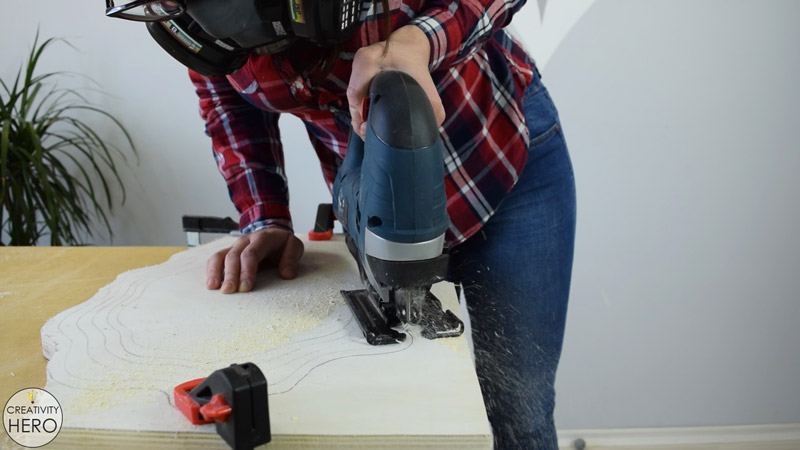
Once I was satisfied with the shape, I took the jigsaw and cut, following the outline of the last, largest layer. This way I got the final size of the clock, which is 55 by 35 cm.
There are some tear outs on the top of the plywood face, but it doesn’t matter because the router will clean everything.
Routing out all the Layers of the Clock.
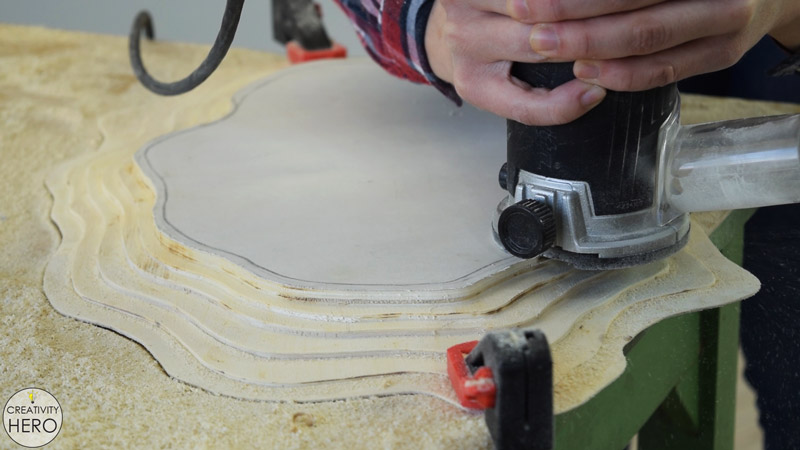
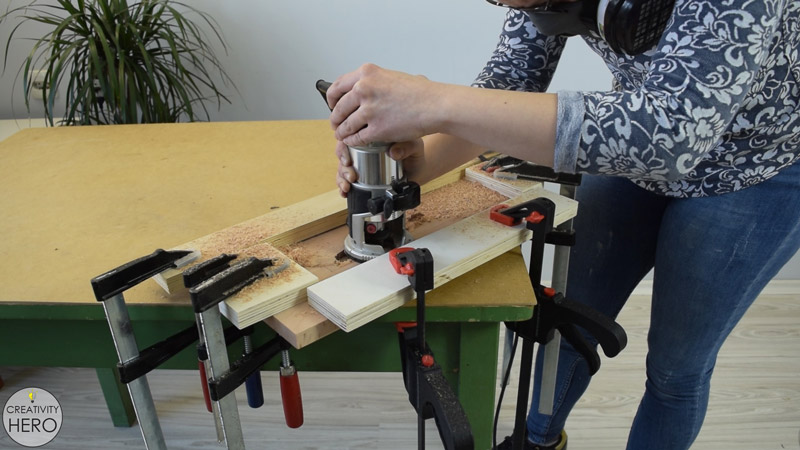
Now, I can move on to revealing all the layers of the plywood with a router. Each layer will be 3 mm high.
The first layer is already shaped with the jigsaw, which means that I’ll start routing out the second one. The total thickness of the plywood is 21 mm, so in order to get 3 mm high layer, I need to set the cutting depth of the router bit to 18 mm.
This layer was the slowest and the hardest to rout out, due to the fact that it is larger and also I needed to remove 18 mm off the plywood with one pass.
For the third one, I set the router bit to 15 mm cutting depth.
As I mentioned earlier, when I thought I almost finished, I realized I needed to create one more layer, in order to make all the layers 3 mm high. In the beginning I thought that it would be more compelling to make the last, smallest layer 6 mm high, instead of 3, but I was wrong.
Now I have 7 layers with 3 mm height. There are some imperfections, and knots here and there, but I think they actually give a character to the clock.
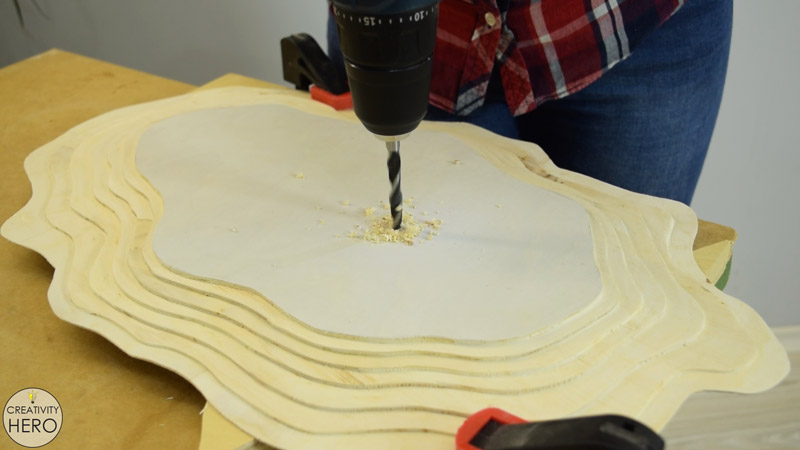
Next, I determined the center of the clock mechanism, and drilled a hole for the threaded shaft to pass through.
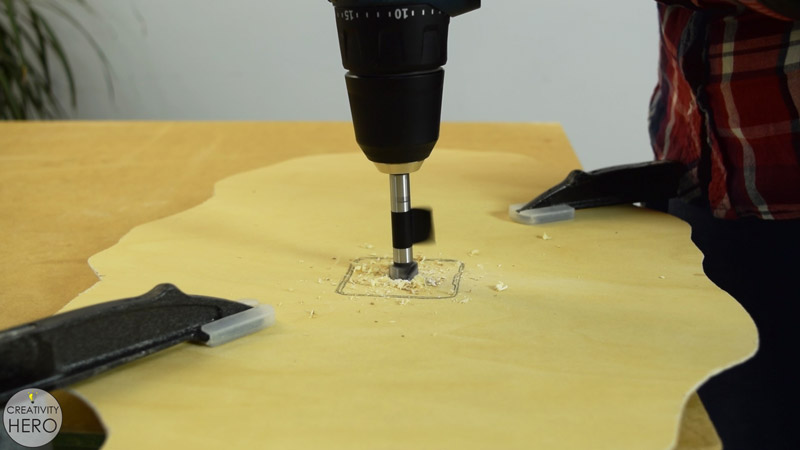
Then, I positioned the clock mechanism on the back side of the clock, and traced the outline. 18 mm of the thickness of this opening need to be removed, so that when the clock mechanism is installed it will stay flush with the surface.
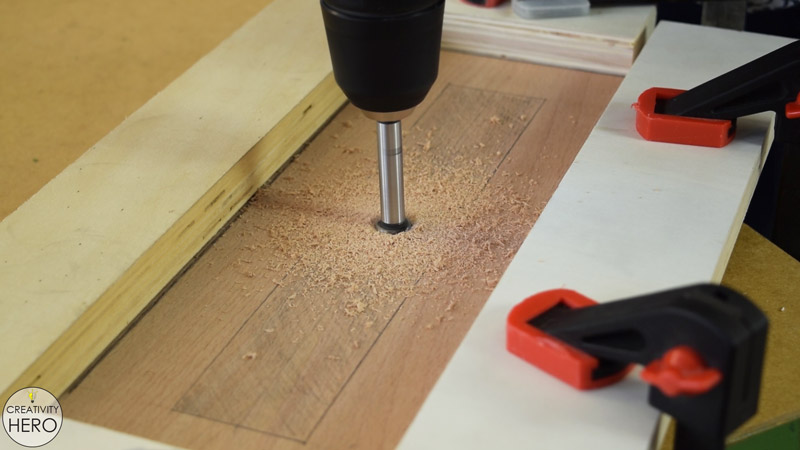
In order to be able to insert the router, I enlarged the hole with a Forstner bit. With this hole done, now I can rout out the opening with the router.
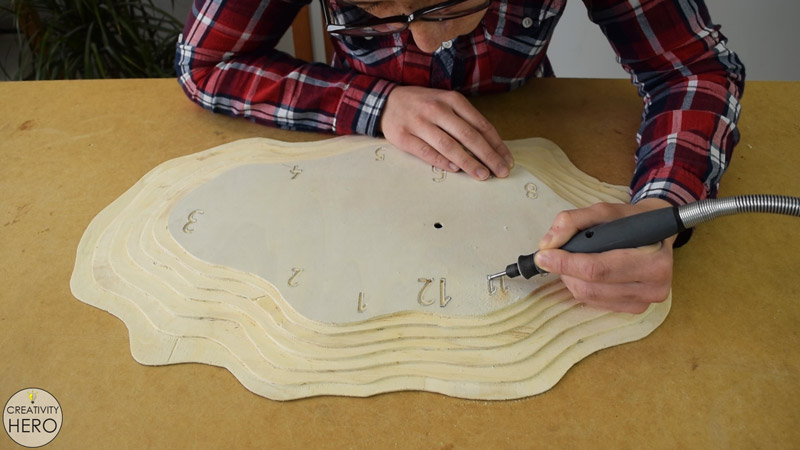
Drawing and Engraving the Numbers.
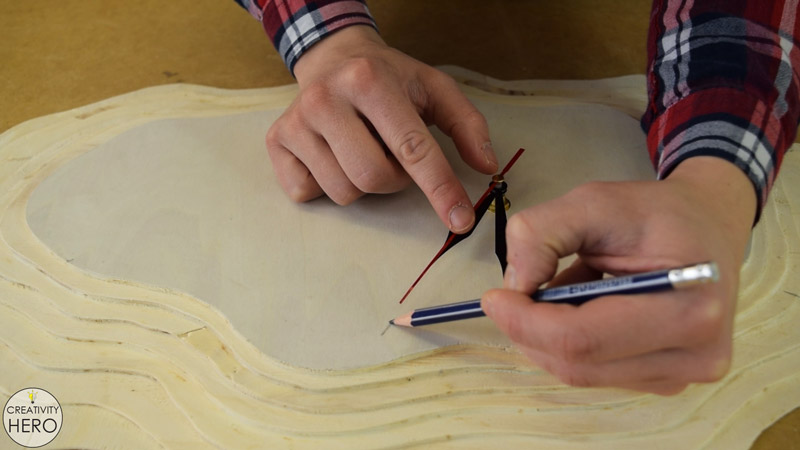
Next, I placed the clock mechanism, and installed the hands. The goal here is to use the hands to mark the exact points for the clock numbers.
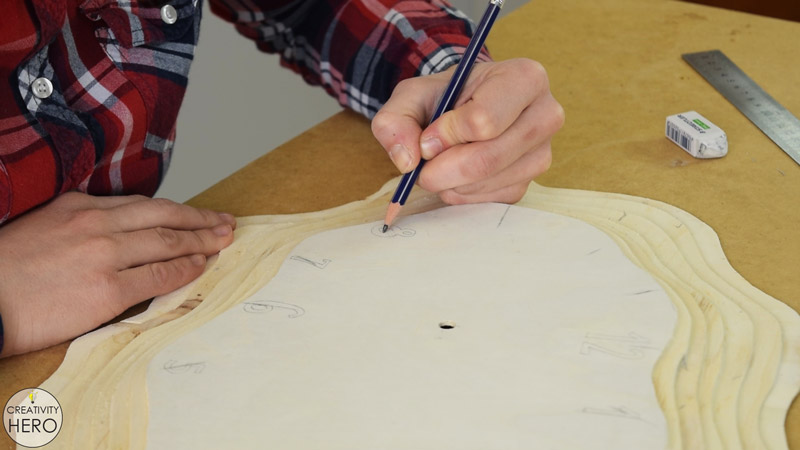
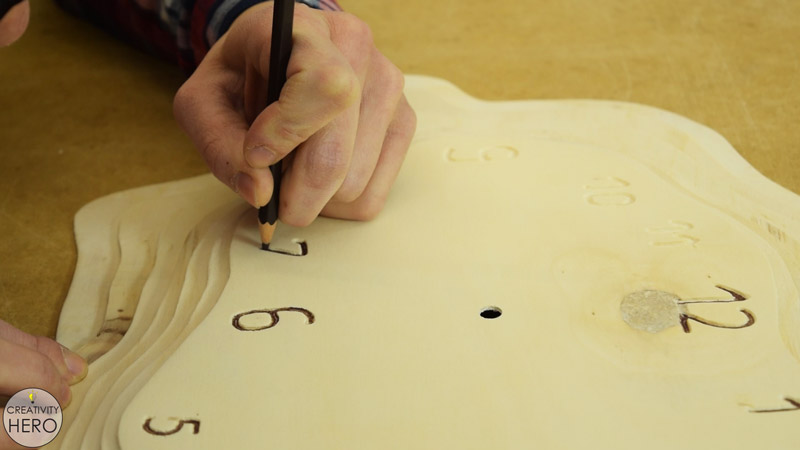
When it comes to the numbers, I wanted to draw them close to the edge of the layer in an interesting order and with different size.
To engrave the numbers I chose a Dremel rotary tool, and inserted the flex shaft with the appropriate engraving bit. I made sure I go deep enough, so that when I sand the surface, the numbers will be still visible enough.
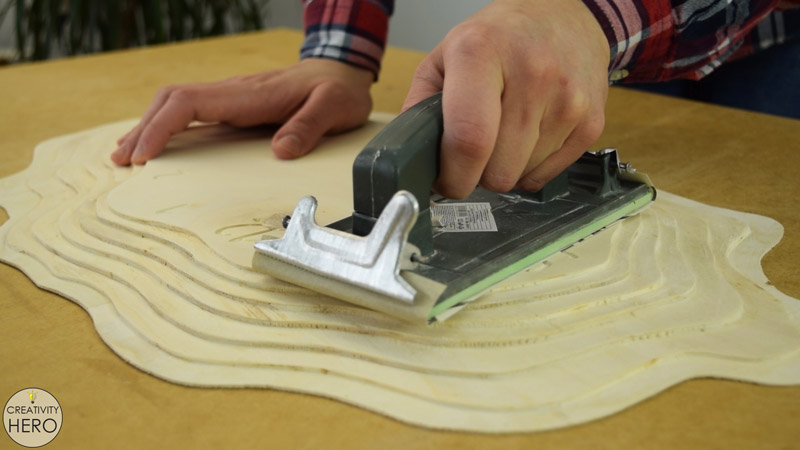
Sanding the Surface.
Once I’m done engraving the numbers, I can hand sand the surface, first with 80 grit sandpaper and then with 180. I want to remove the top layer of the plywood face because it is much brighter than the other layers, and I wanted the clock to have a uniform color.
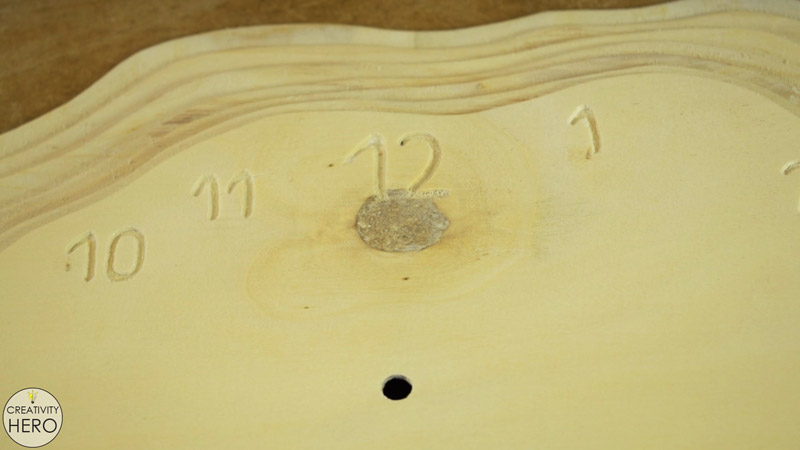
But, when I removed that layer, a knot appeared exactly below the number 12. At first I didn’t like it, but later I realized that it actually makes the clock so special and unique.
I sanded all the layers as well, to remove any burnt areas caused from the old router bit.
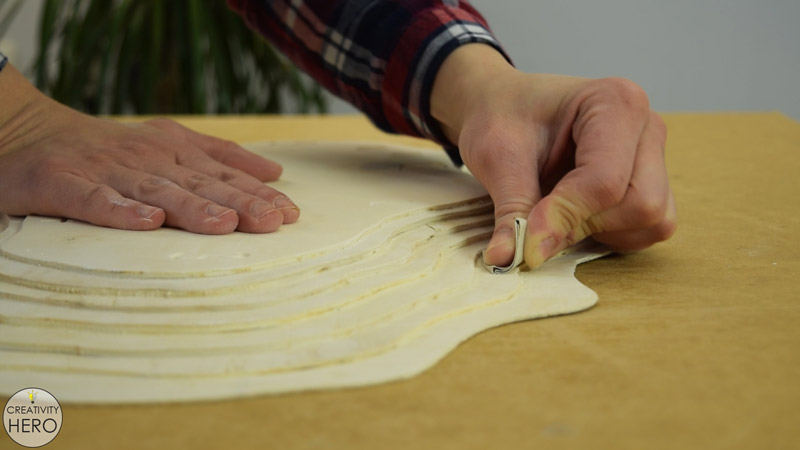
Coloring the Numbers with a Colored Pencil.
To highlight the numbers I decided to make them darker.
My first thoughts were to burn the wood with a soldering iron. But, after a few tests, I realized that my iron is not appropriate for that purpose, since the tip doesn’t reach high temperature, which is essential for wood burning.
After spending a lot of time thinking, I came up with the idea to use color pencil.
Fortunately, I still had some color pencils that I used in my school days, and picked the most suitable brown color.
I just needed to repeat a few times, until I got uniform color of the numbers. Actually, I was pleasantly surprised when I saw how good this came out.
Using color pencil was much easier and faster than wood burning, and I think I achieved the goal. The numbers are visible, and have a really nice color.
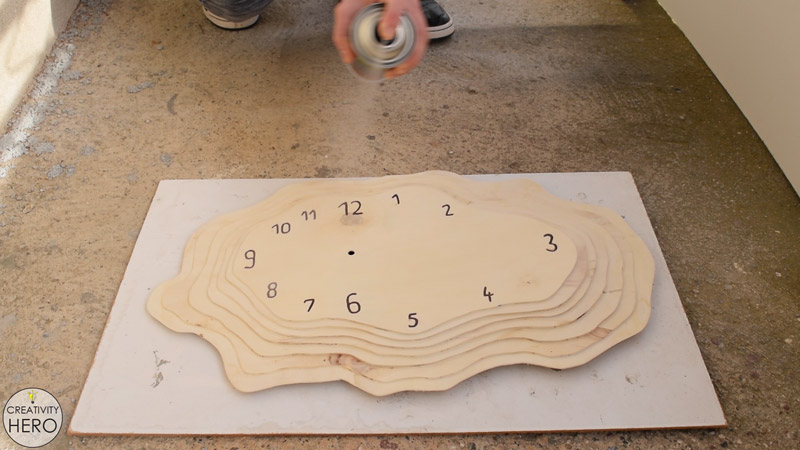
To protect the wood I sprayed one coat of clear fast-drying polyurethane. I wanted to keep the natural color of the plywood with all the imperfections on it.
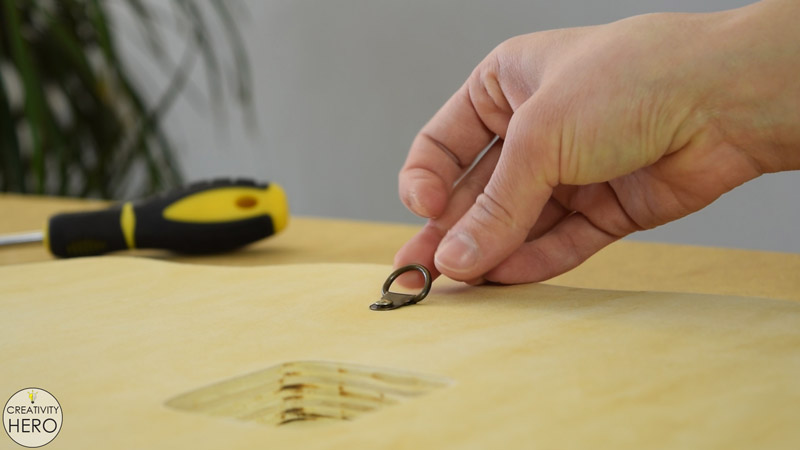
Inserting a D-Ring Hanger.
Once the spray has dried I secured a D-ring hanger on the back side.
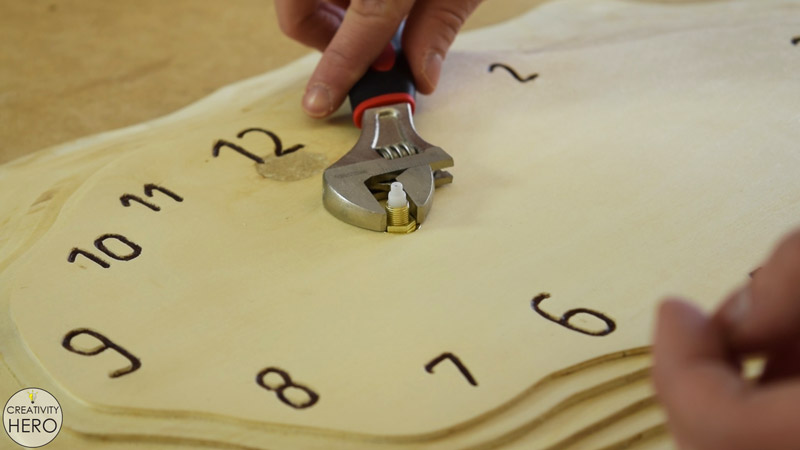
Installing the Clock Mechanism.
Then, I installed the clock mechanism, and placed the hour, the minute and the second hand in order.
Mounting the Wall Clock.
Finally, I mounted the clock on the wall, and I’m done with this project! I think it turned out pretty cool!
If you like this wall clock be sure to like, share, comment down below and subscribe to my YouTube channel.
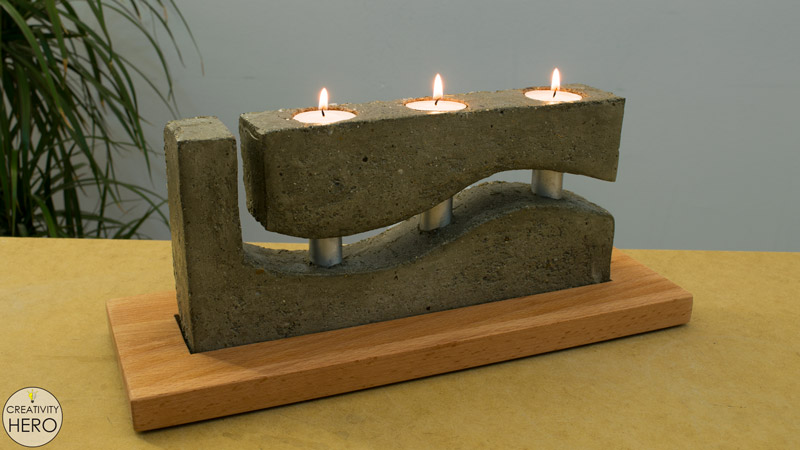
In this article I’ll show you how I made this unique concrete candle holder with a wooden base.
Although this candle holder has an intricate shape, it can be easily achieved with a simple technique for casting concrete.
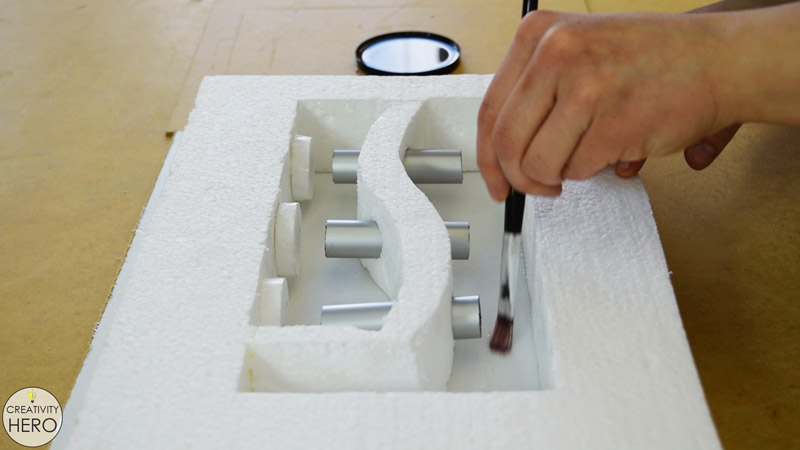
You don’t need any special tools and materials to make such shape. What you actually need is a thick Styrofoam board, a utility knife and your imagination. There’s no limit to the shape variations you can achieve with this method of casting concrete.
In the video below you can see the entire process of creating this beautiful candle holder.
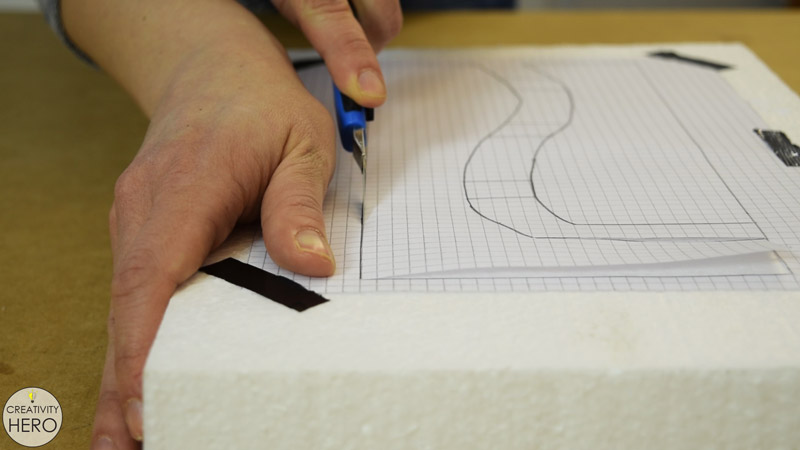
To make the mold for the concrete I took a 5 cm thick Styrofoam board.
On a piece of paper I drew the desired shape of the concrete form, and then stuck it onto the Styrofoam board with a duct tape to prevent any movement while cutting.
I found the sharpest utility knife and started cutting, making sure I follow the lines and keep the knife straight.
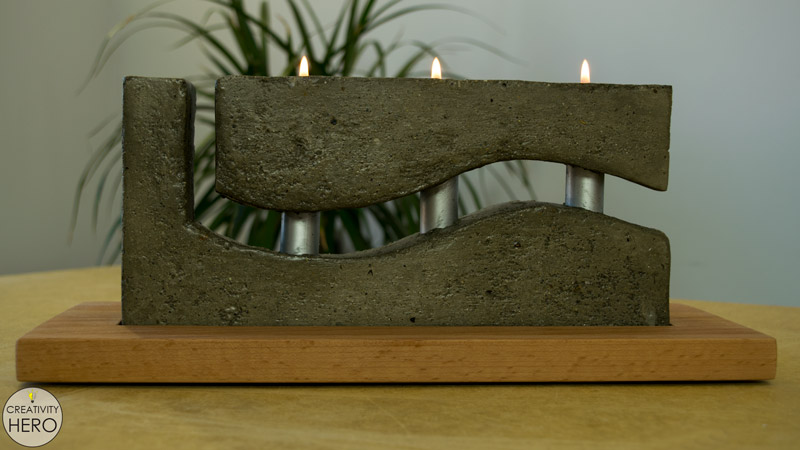
After that I removed the paper, and the two cut-outs as well. Actually I got a rectangle which consists of two parts, and a wavy form in the middle that divides the rectangle.
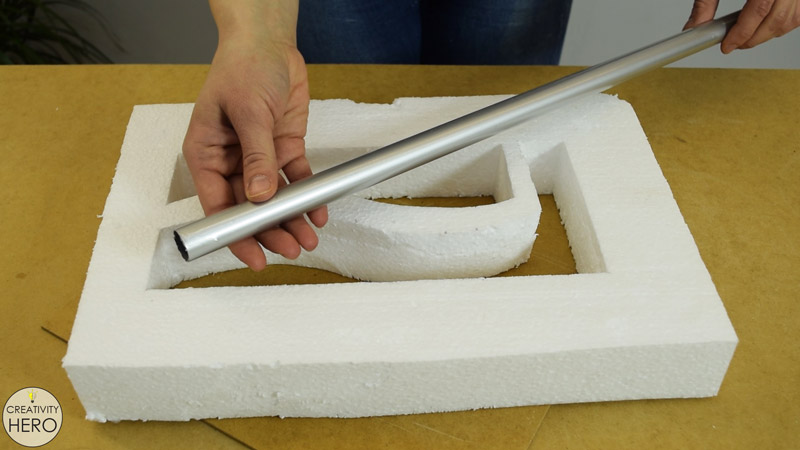
Creating Holes for the Aluminum Pipe.
To get more complex shape of the candle holder, I predetermined three spots where small pieces of this aluminum pipe will be inserted. Those pieces will be a connection between the two concrete parts.
In order to be able to insert the aluminum pipes I need to cut the middle part and return it back later.
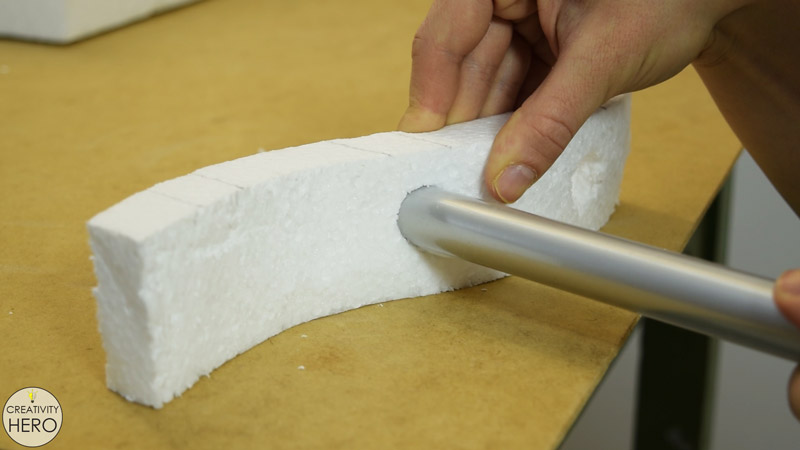
Here’s how the holes for the pipes are made:
First, the pipe needs to be positioned on the foam and rotated very carefully until it has some grip. After that it needs only moderate pressure while rotating, making sure to keep the path of the pipe straight.
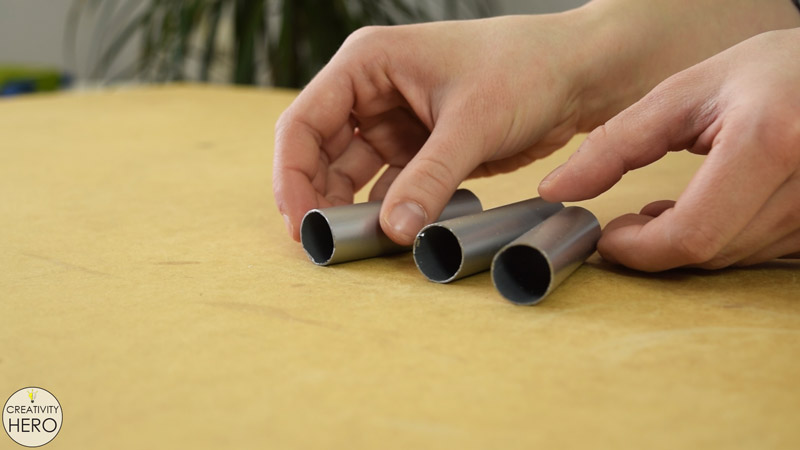
Using a hacksaw I cut the aluminum pipe into three short pieces.
Gluing All the Pieces of the Mold Together.
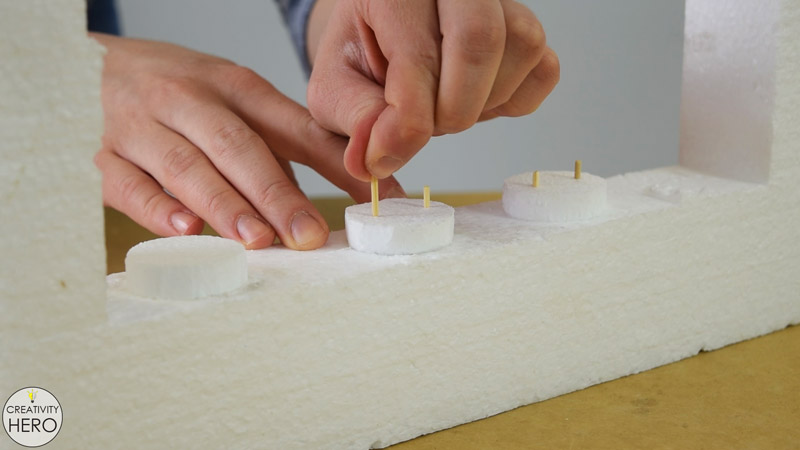
The candle holder needs to have three holes for the tea lights, which are actually the purpose of this project. So, in my workshop I found a small piece of 1 cm thick Styrofoam, which I used to make circles with the same size as the tea lights.
After I found the right spots for the circles, I hot glued them in place. To secure them better I inserted toothpicks into each circle that will serve as dowels.
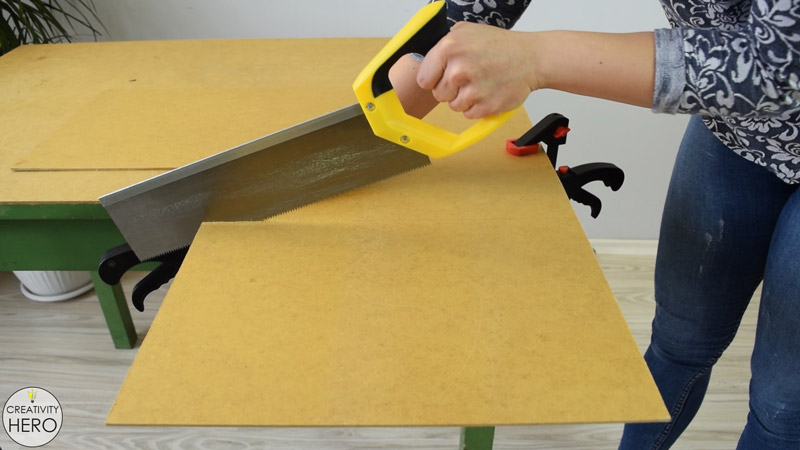
I used a fiberboard for the bottom support of the mold. Using a handsaw I cut a piece of fiberboard and made it a bit larger than the Styrofoam.
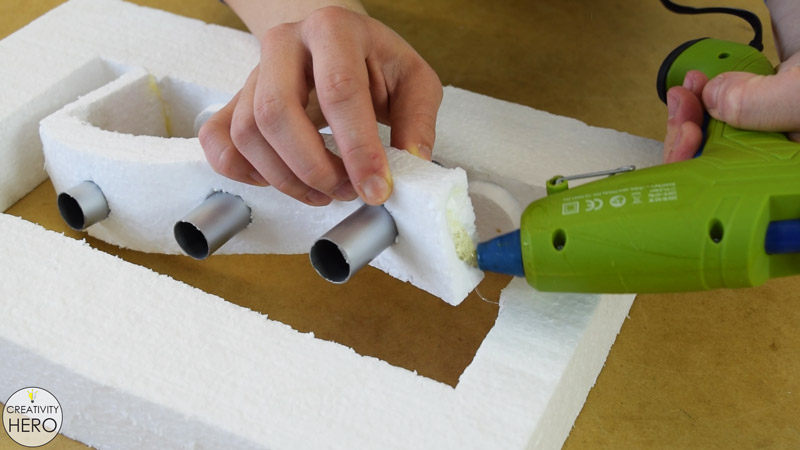
Now I can join all the parts together in order to make a firm mold with the desired shape.
Before gluing the middle, I inserted the aluminum pipes inside the holes that I previously made, and then hot glued it in place.
Here I also reinforced the joints with toothpicks.
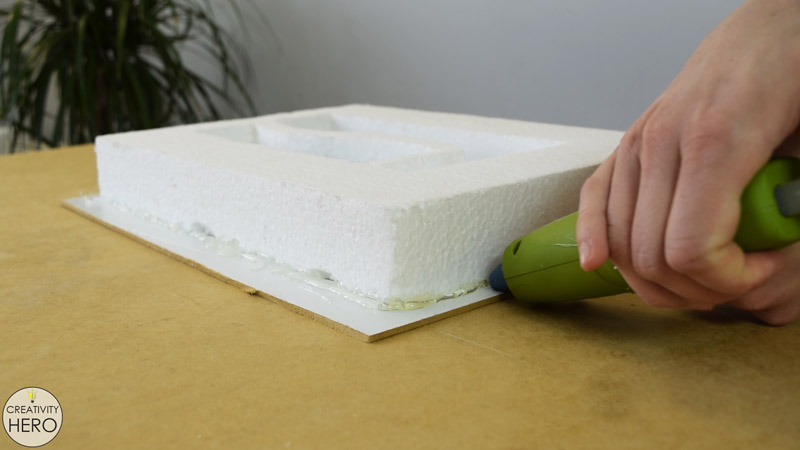
Lastly, I applied a large amount of hot glue onto the entire Styrofoam board and stuck it onto the fiberboard.
An important tip when gluing Styrofoam is to use a low-temperature hot glue gun in order to avoid burning and melting the Styrofoam, which happened in my case.
To make sure the mold is firmly attached onto the fiberboard I applied hot glue from the outside. This way, I’ll prevent the water from the concrete from leaking.
Before making the concrete mix it’s a good idea to use a release agent that will make removing the concrete from the mold after it has cured very easy. So, I spread cooking oil all over the surface with a brush making sure I don’t miss a spot.
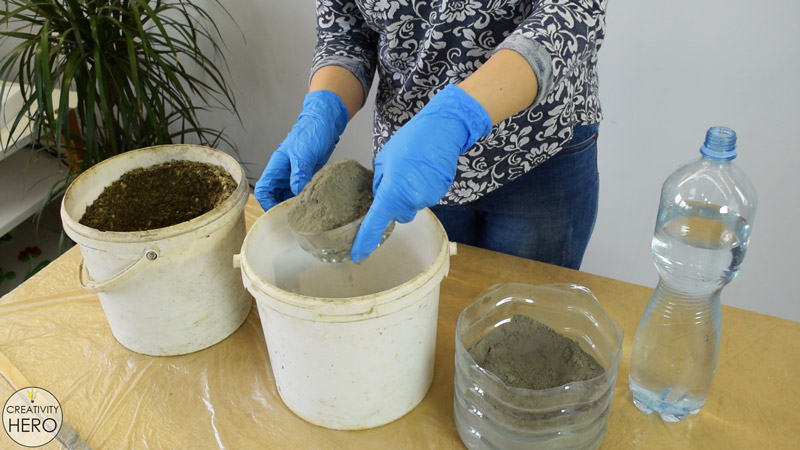
Now I can move on to the concrete mix.
Into a bucket I’m mixing one part sand and one part cement, and gradually adding water. The consistency should be pretty close to the one shown in the video, not too thick, and not too watery.
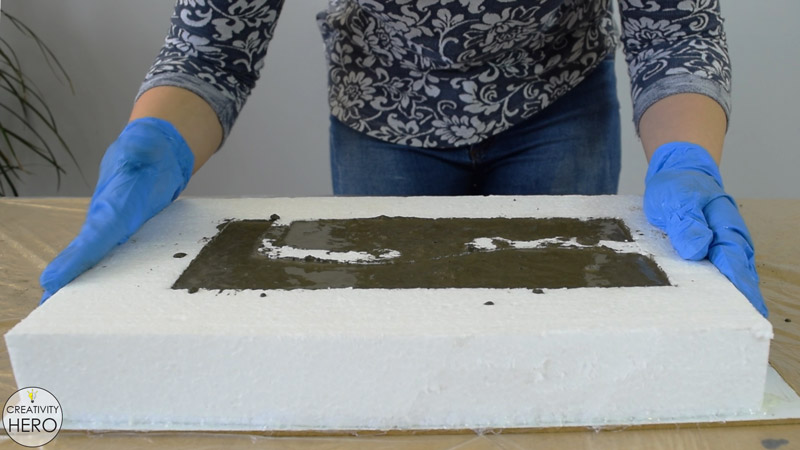
Then, I’m pouring the concrete into the mold. The aluminum pipes need to make a strong connection between the two concrete parts, so I’m using my fingers to fill them inside with concrete.
Lastly, I’m vibrating the mold to release any air bubbles and allow the mix to settle in the voids of the mold.
Now I’m done with the concrete, so I’ll leave it to cure at least 48 hours.
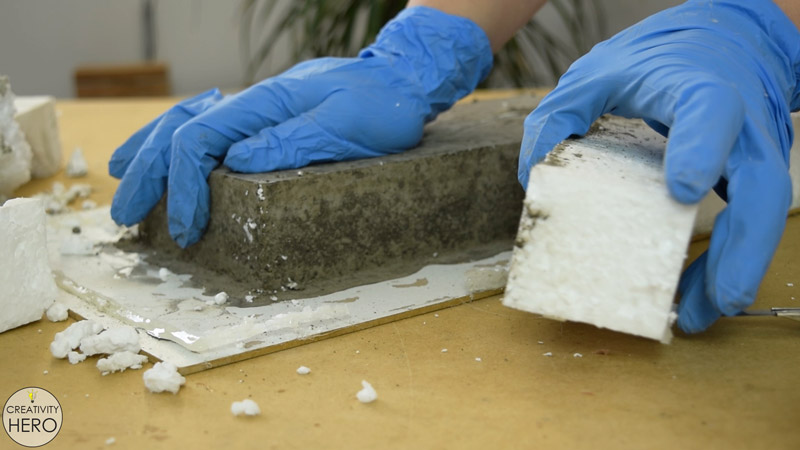
Removing the Mold and Sanding the Concrete Form.
Once it has cured I can remove the mold. Using a utility knife makes the process of removing the mold much easier and faster.
The cooking oil helped a lot, and the Styrofoam came off very easy, which is awesome.
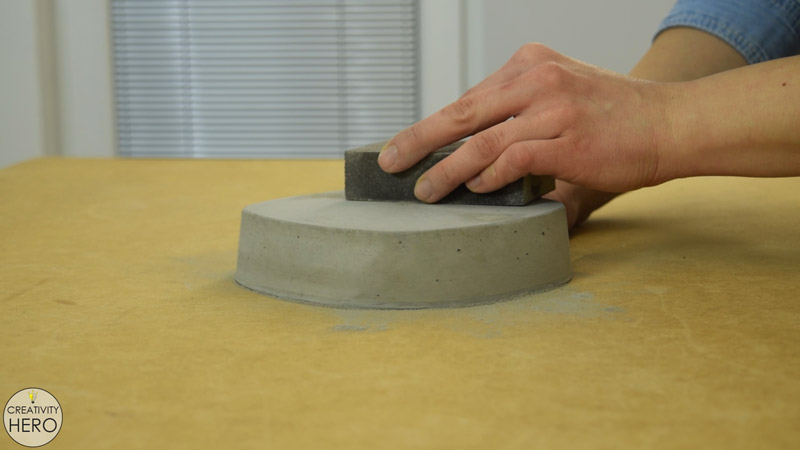
Next, I need to sand the concrete form with 220 grit sandpaper in order to remove the dust, and to make its surface nice and smooth.
Then, I wiped the dust off of the surface, so at this point I’m pretty much done with the concrete.
Making the Wooden Base.
This means that it is time to make the wooden base for which I chose a beech wood.
In order to be able to make all the cuts I need to mark all the dimensions.
Anyhow, in the middle of the base I need to remove 1 cm of the thickness of the wood, and there I’ll actually place the concrete form.
For that purpose I’ll use a router, but I don’t have a plunge router base, so came up with a simple solution that worked great.
Here’s what I actually did:
I drew all the lines and clamped some scrap pieces of wood onto the board, which will serve as guides for the router.
Then, onto the drill I inserted a 15 mm Forstner bit and drilled a hole 10 mm deep. This hole will be a starting point for the router.
After that, I placed the router into the hole and started routing the section out. This time I wasn’t able to install the vacuum cleaner onto the router, so I covered everything in dust.
Anyway, this turned out to be a pretty good way of removing the excess thickness of the wood.
Next, I needed to chisel out the corners to make right angles.
Before cutting the base to its final size, I placed the concrete form inside to check if it is a snug fit.
Everything is OK, so I can finally cut the base to size on my table saw.
If you’re not able to make such base, you can get creative and do something different that will look awesome as well.
Sanding the base.
Once I’m done cutting it’s time to hand sand the surface with 120 grit sandpaper, and then move on to 220 to give it a smooth finish.
Applying Finish.
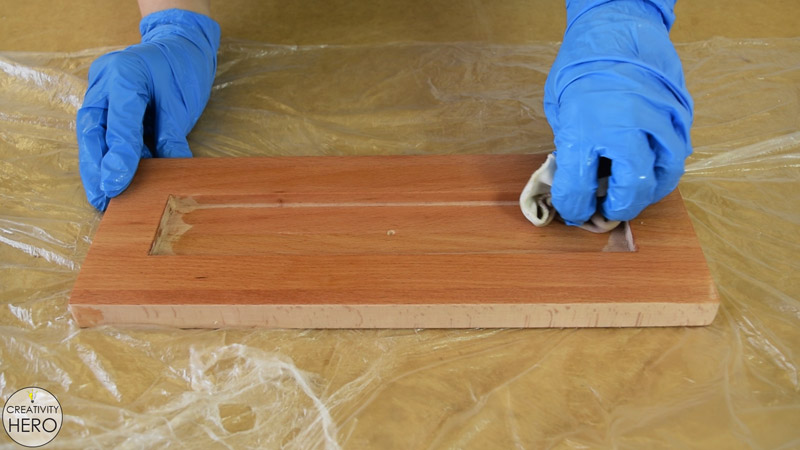
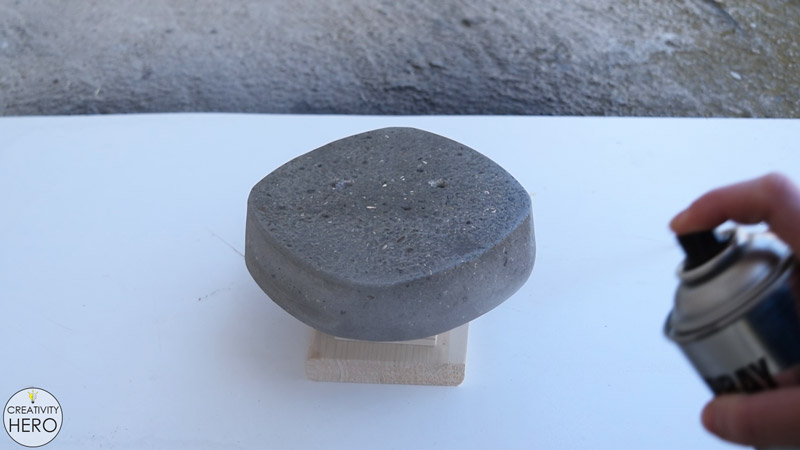
The last step is to apply finish onto both the concrete and the wood.
I sealed the concrete form with a transparent spray paint with satin finish. One coat is quite enough to protect the concrete.
Onto the wood I applied one coat of clear finish as well. This way I’ll protect the wood and bring out the wood grain at the same time.
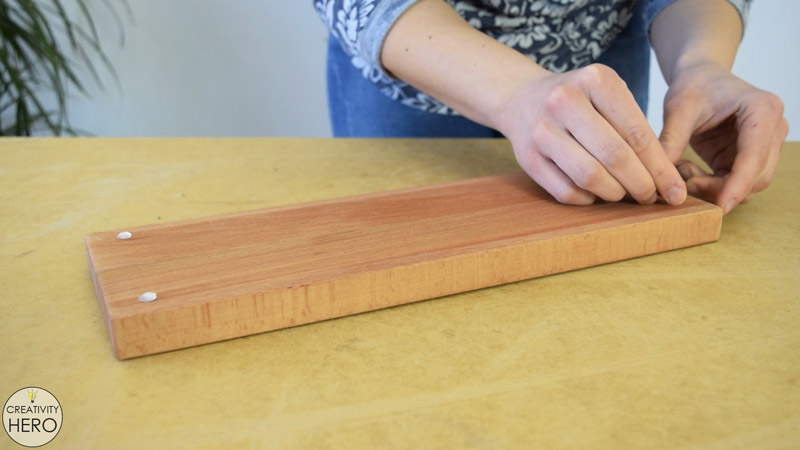
Once the base has dried, I can add self-adhesive cabinet bumpers on the bottom in order to protect the surface where it will be placed on.
Now I can place the candle holder onto the base. You can also glue them together with an epoxy, but I think it’s not necessary.
What’s left to do is to place the tea light candles into the holes, and enjoy the beautiful atmosphere they’re creating.
Concrete is such an interesting material because there are so many things to do with it. You can make forms with different size and shape, add some color, you can do whatever you want. It’s very simple and easy to try, just mix up some concrete and use your creativity to make an amazing project that will impress everyone.
This was a really interesting and fun process of creating such candle holder, and I hope you like it. If you do don’t forget to like, share and subscribe to my YouTube channel.
In this DIY project I’m going to show you how to make a curved wood and acrylic LED desk Lamp with concrete base.
Combining these three materials was a bit challenging, but the end result was beyond my expectations.
Here you’ll learn some tips on how to make a concrete form, how to shape wood, and most interesting: how to bend acrylic.
I’ve already built a wooden acrylic LED lamp, where I actually engraved the acrylic, but this time I decided to go much further, and try something new.
Watch the video below for detailed explanation on how I built this LED desk lamp:
I started with the concrete base. As a mold I’m going to use a plastic ice-cream container with a good size and shape.
To keep the concrete from sticking to the mold I poured cooking oil into the container and spread it all over the surface with a napkin.
I have coarse sand, cement and a bottle of water, so I can mix up some concrete.
Into an old bucket I’m pouring one part cement with one part sand, and slowly adding water. I’m mixing with a stick until I get nice, thick consistency. Using coarse sand will result in very interesting texture of the base.
Once I’m done mixing, I can pour the concrete into the mold until it reaches about 3 cm height.
Then I removed the air bubbles by vibrating the container by hand. You should see air bubbles rising to the top. The more bubbles you relieve from the form, the smoother your form will be.
I let the concrete cure for 2 days before removing the mold. That should be enough time for 3 cm thick concrete form to cure.
Removing the mold was extremely easy, I guess the cooking oil helped a lot. There are still some air bubbles on the surface, which I think look awesome.
Sanding the entire surface with a 220 grit sand paper made a huge difference, as it revealed the beautiful texture of the base.
Body of the Lamp
At this point I’m done with the base, so I can move on to the body of the lamp for which I chose hard wood.
This time I wanted to experiment a little, and make a curved shape which requires a little more time and effort to achieve.
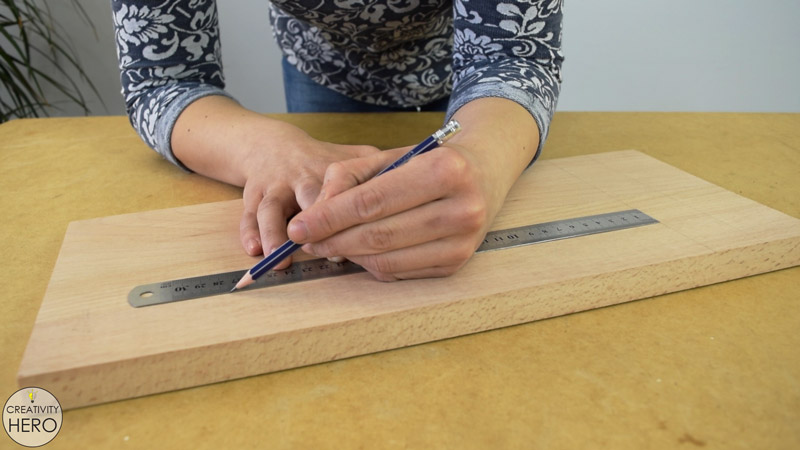
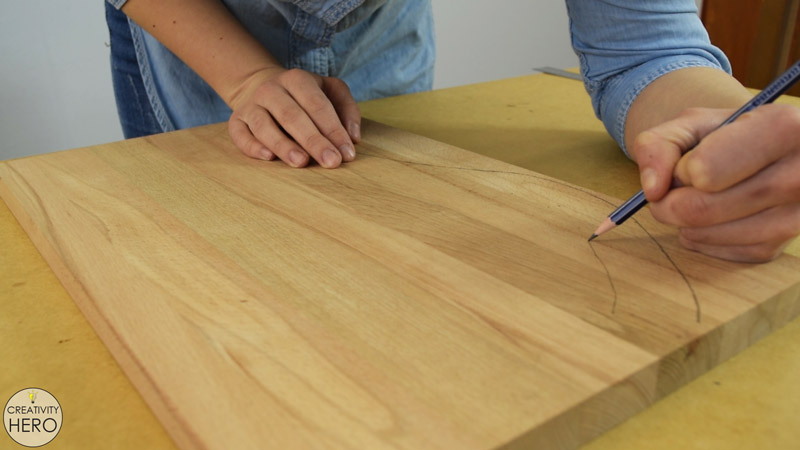
First I’m drawing a curve onto an wooden board.
Then I took a ruler, placed it perpendicular to the curve and marked some dots at 3 cm distance along the curve. By connecting all the dots I’m drawing another curve which is at a constant 3 cm distance from the first one.
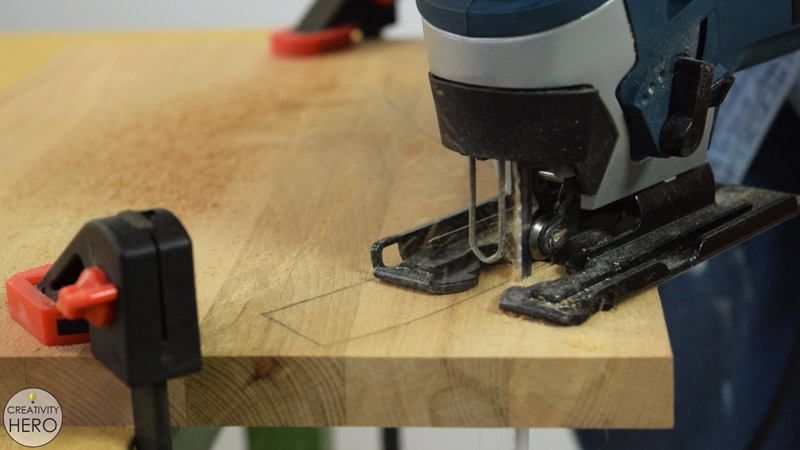
This way I drew an object that I’m going to cut with a jigsaw. So, I clamped down the wooden board and started cutting, making sure I’m as close to the line as possible. Anyway, I’ll make some adjustments with a rasp at the end.
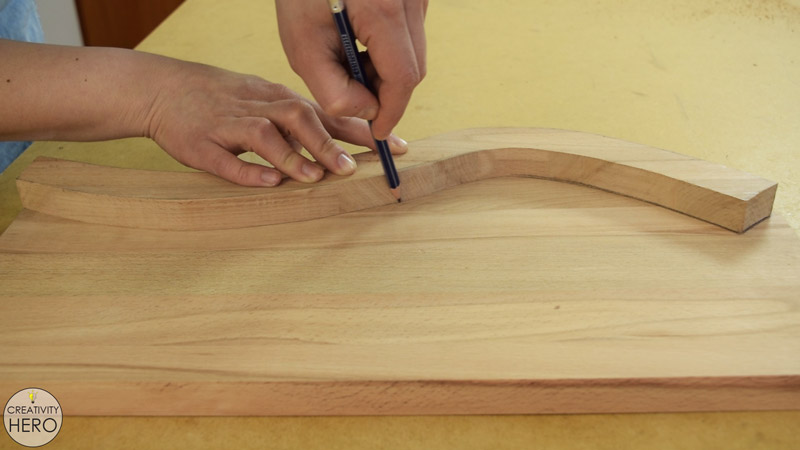
Once I’m done with the first piece, I placed it onto the board and traced its outline with a pencil. Then again, I cut the second piece.
I repeated this step for two more pieces. In fact, I need to cut 4 identical pieces that will be glued together.
From the two middle pieces I need to remove 1 cm of their width, but still leaving around 3 cm on both ends. This space I’ll use for the LEDs and for the acrylic.
I thought I could do this with a coping saw, but after a few minutes I gave up, since it was too slow. However, this is a hard wood, and I need to figure out a faster way of making those cuts.
The only solution I could think of was to cut it with an inverted jigsaw which I made myself. You can check my video on how I built my multipurpose workbench.
So, I installed the jigsaw onto the workbench and started cutting. Cutting without a guide for the jigsaw is not 100% accurate, but I don’t mind, because later I’ll make some adjustments. Moving slowly and carefully I made the cuts.
Then, I clamped down those two pieces and took a rasp to even them out before the assembly.
Curved Wood and Acrylic LED Desk Lamp with Concrete Base 8 – Applying Wood Glue
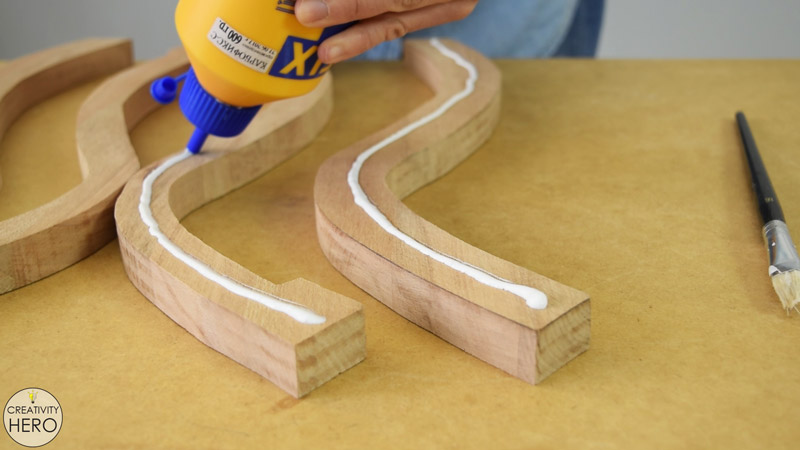
Now, all four pieces are ready to be joined together. To hold everything together I decided to use only a wood glue. I applied a large amount of wood glue to make strong connection between the pieces.
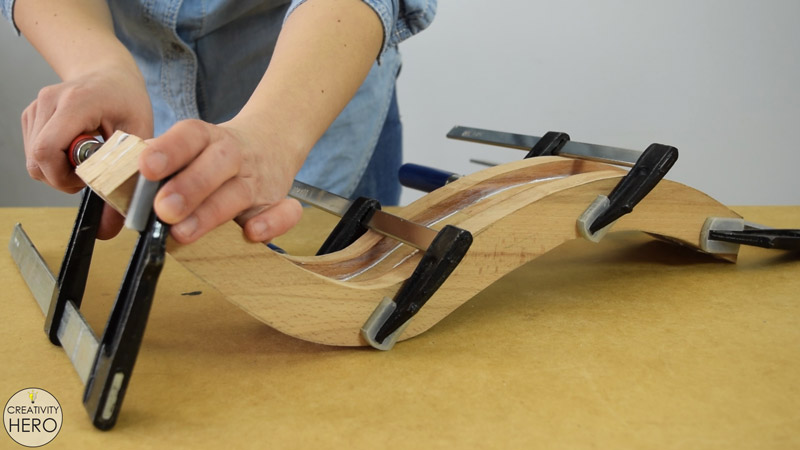
After that I secured it with a few clamps, and left it to completely dry. Once it has dried I noticed a lot of imperfections all over it, so I took a rasp again and evened out the entire surface.
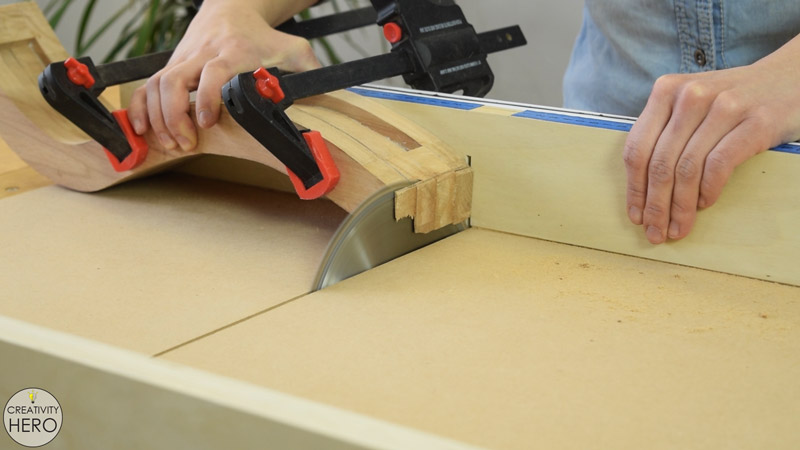
To flatten the top and the bottom of the body I clamped it onto the crosscut sled and made two cuts, removing just a little of the length.
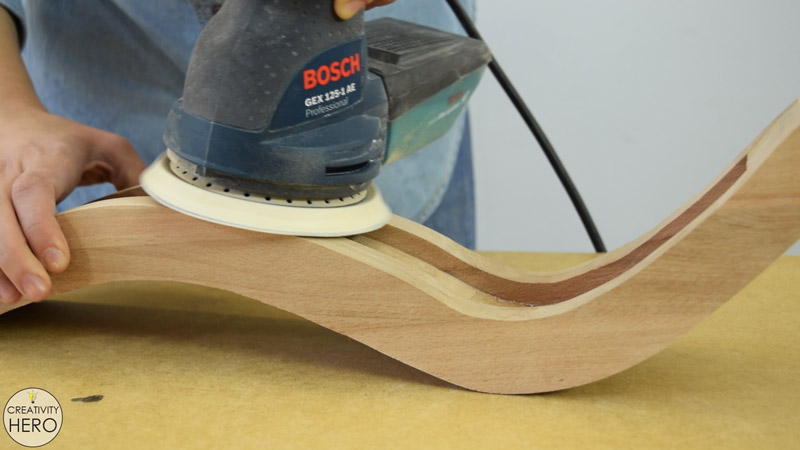
All the cuts are made, so I can move on to sanding. A drum sander would be perfect for sanding curves, but I don’t have one, so an orbital sander and a sanding block are good alternatives.
To speed up the sanding process, I used my orbital sander as much as I could, but for the spots that it couldn’t reach, I used a sanding block.
The body of the lamp is finished, and the next thing I need to do is to make a light cover out of acrylic.
Its width needs to be 4 cm, and in order to determine its length, I used an LED strip because it is flexible, and I can easily measure the space inside the body.
I cut the acrylic on my table saw, using the crosscut sled. Then, I peeled off the protective film, and prepared the acrylic for bending.
The most appropriate way of bending acrylic actually doesn’t require any special tools. This simple technique anyone can try at home.
Here’s how I did it:
I took a portable gas stove, a lighter, protective gloves, the body of the lamp, a wooden piece that I previously cut out of the middle, and an empty can that will help me shape the acrylic.
Then I turned the gas stove on, and reduced the heat as much as I could.
After that, I took the acrylic, and placed it above the gas stove. The distance between the acrylic and the flame should be at least 15 cm in order to avoid air bubbles into the acrylic.
By slowly moving the acrylic back and forth for about 3 minutes I heated half of its surface. Once it reaches the appropriate temperature, you can notice that it starts bending without even touching it.
So, I placed it above the body of the lamp and I bent it with the help of the can. Bending acrylic is actually very easy and satisfying process of making different shapes.
I repeated the same with the other half of the acrylic piece, and finally got the desired shape that fits the body of the lamp perfectly.
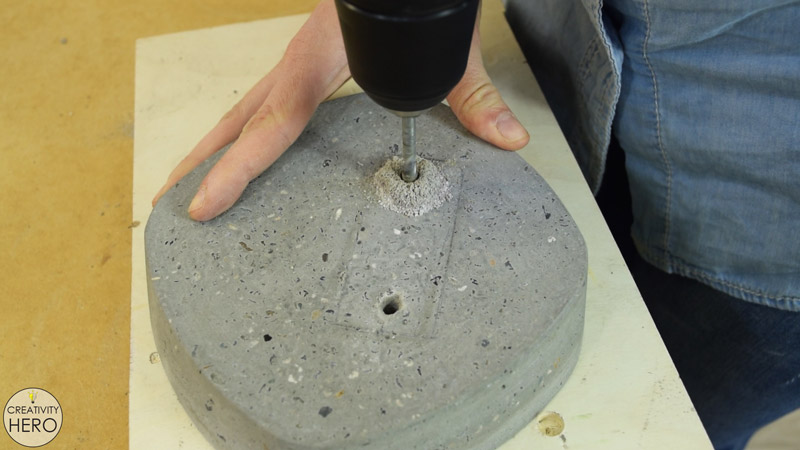
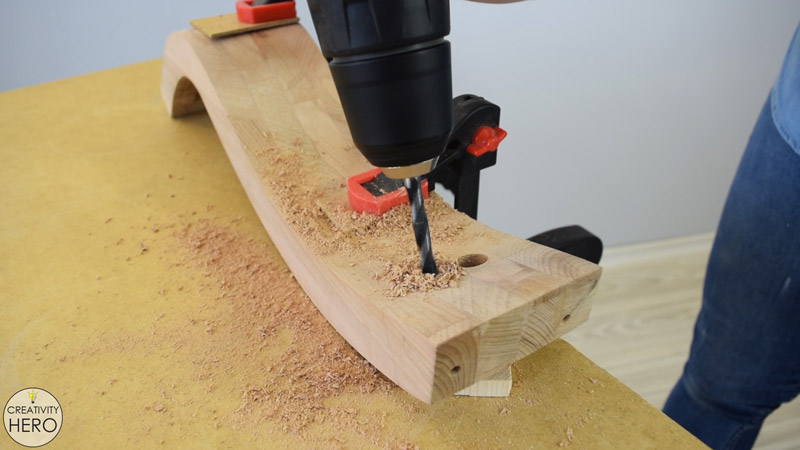
Drilling Holes into the Concrete and the Wood
Now, let’s go back to the concrete base.
I’m going to have two bolts going through the concrete base and into the wood. So, I positioned the body of the lamp onto the base to trace its outline. Then marked the points where I need to drill holes for the bolts.
To drill the holes I inserted a masonry bit into my regular drill, because I don’t have a hammer drill which is meant to drill into concrete.
Anyway, it wasn’t that difficult to make those holes.
Then, I inserted screws into the holes to mark the points where I need to drill into the wood.
After that, I replaced the screws with bolts in order to determine the exact direction of the bolts. Hence, I drilled the holes, making sure I follow the lines.
On the back side of the lamp I’ll have the power switch and the 12V DC power connector. The holes that I’m drilling should be within the opening for the LEDs and the acrylic.
Now that I’m done cutting, drilling and shaping, I can apply finish to each part of the lamp.
To protect and seal the concrete I spray painted it with a transparent spray paint for concrete.
It emphasized the texture of the concrete, made it smooth and most important – dust free.
I added some frosting to the acrylic to help conceal the LEDs, by applying 3 coats of transparent spray paint with satin finish.
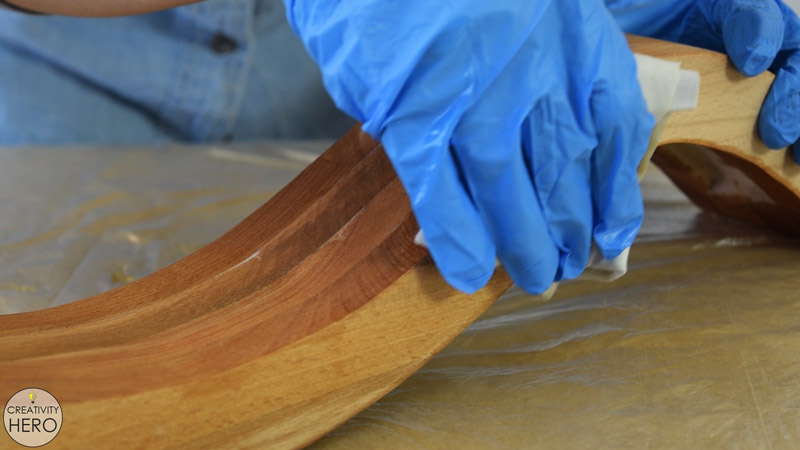
Finally, onto the wood I applied a transparent finish as well. The goal here is to protect the wood and to emphasize the natural wood grain as well.
Installing the Light
Now, let’s install the light.
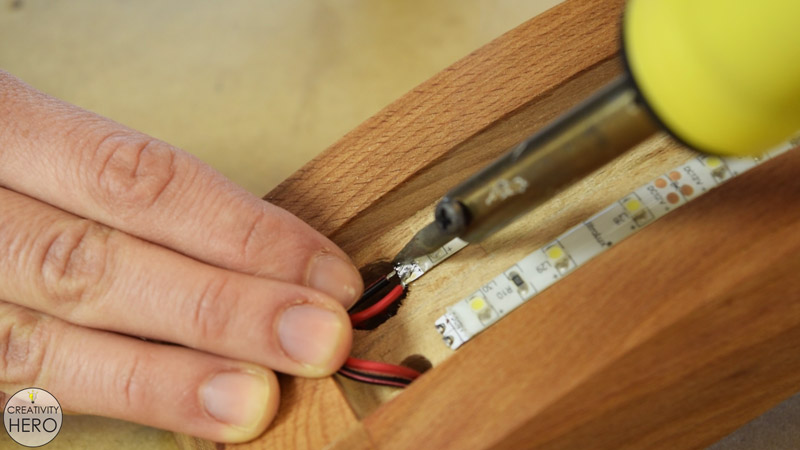
I cut 2 LED strips 42 cm long at the predetermined cut points, and since they’re waterproof, I needed to remove the coating from the copper pads to be able to solder some wires.
I cut a few pieces of red and black, or positive and negative wire, and strip off the insulation of their ends. Then, I soldered the positive and the negative onto the power connector.
Onto the switch I soldered only the positive wire, because later I need to connect the switch to the power connector.
After inserting them onto the back of the lamp, I pulled out the wires and soldered the red wire from the conector to the switch.
Once I peeled off the tape cover on the back of the LEDs, I stuck them onto the lamp. Then I connected the red wire to the positive pad of the LEDs, and the black wire to the negative pad of the LEDs.
Now I can test if it works properly. I inserted the plug into the connector, turned the light on, and placed the acrylic above the light.
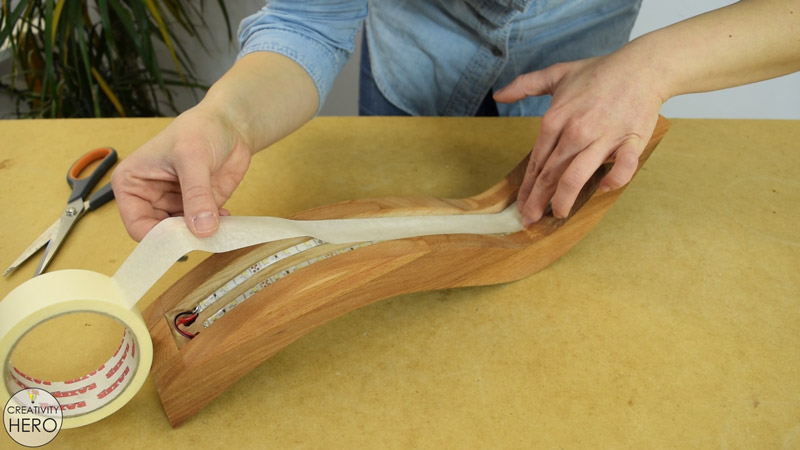
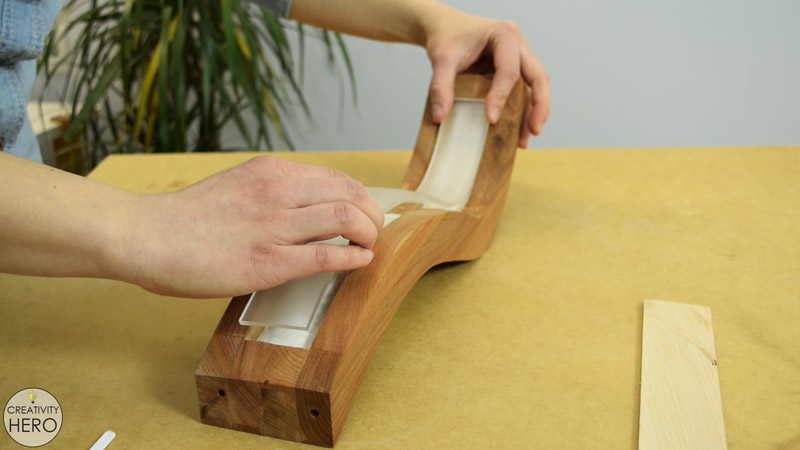
Although I tried to frost the acrylic by applying 3 coats of spray paint, I can still see the LEDs and the wires. So, to make them less visible, I covered the LEDs and the wires with white tape.
Finishing Touches
To secure the acrylic into place I used 5 min epoxy. Just a little epoxy on the top, bottom and the middle is enough to hold the acrylic in place.
Lastly, I clamped the body of the lamp onto the table, and attached the concrete base by screwing two bolts.
To protect the surfaces from scratching I attached some silicone pads.
And that’s it! Simply plug the power cord in and turn the light on from the power switch.
Step 1: Creating a Board out of Pine Wood Flooring.
While cleaning out the basement I noticed a bunch of pine wood flooring boards that stayed there for a long time. So, I picked up one board, in fact half of it and decided to make a wall art.
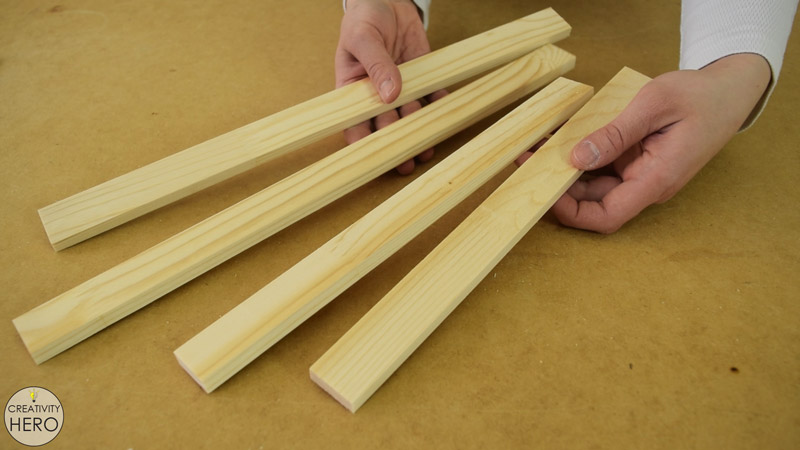
I took my jigsaw and cut 5 pieces around 32 cm long. I didn’t pay too much attention to the cuts because later I’ll make another cuts to the right angle.
Then, I joined these 5 pieces together with a wood glue. They have tongue and groove joints, which is great, so I applied a generous amount of wood glue, without reinforcing them additionally.
A few clamps are just enough to make a strong connection. To flatten the surface, I clamped a scrap wood in the middle across the pieces. I left them to dry overnight before moving on to the next step.
Step 2: Cutting all the Additional Pieces of Wood.
The next day I drew squared lines onto this wooden piece and cut it again with a jigsaw.
But this time I clamped a wooden strip as a guide in order to make straight lines.
Further, I found a few pine strips, out of which I’ll make a frame, and cut them to size with a hand saw. The frame will give a completed look to the entire piece of art.
Also, I took a fiberboard, placed the pine board above to trace its outline and cut it with a hand saw as well.
In fact, this fiberboard piece will serve as a backing board, and will stay behind the cut-out with a picture attached to it.
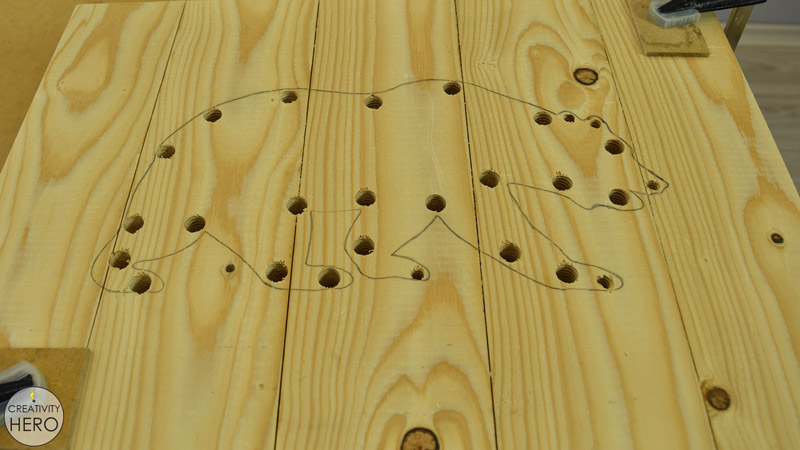
Step 3: Making the Bear Cut-Out with a Drill and a Jigsaw.
Now I’m ready to make the cut-out in the middle of the pine board.
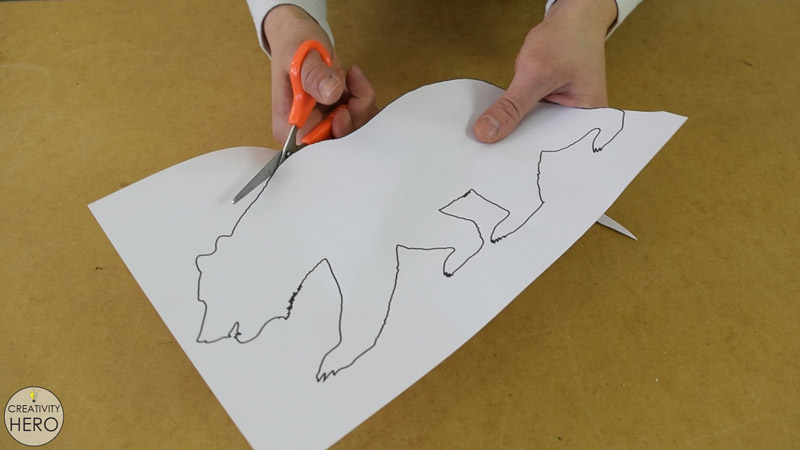
I downloaded a bear outline from Pixabay website. They offer more than million photos, vectors and illustrations which you can download and use for free.
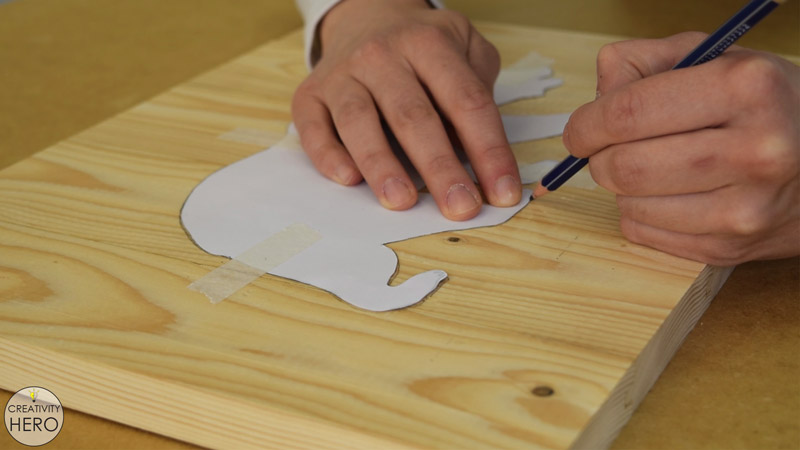
Hence, I cut the bear following the lines, and then traced the outline onto the back of the wooden board, making sure the lines don’t touch any knot, because it can easily fall out and ruin the shape that I want to get.
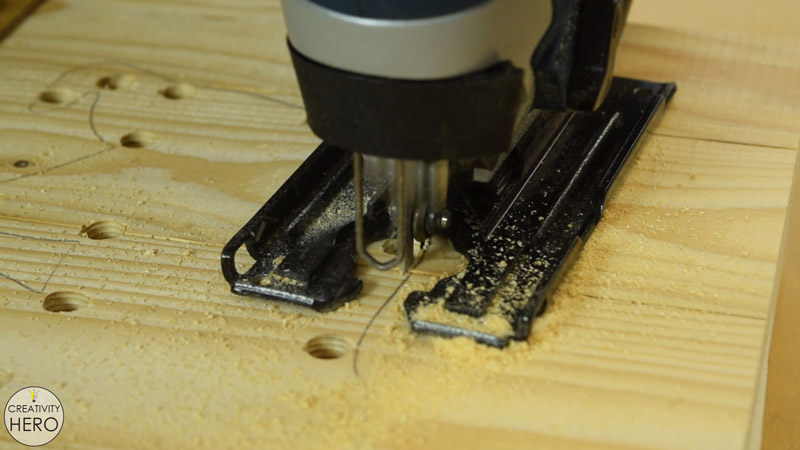
I raised the board by placing it onto a few scrap wood pieces, so that when I cut with the jigsaw the blade won’t damage the table surface.
To make my life easier I drilled as many holes as possible with a 12 mm bit which is enough to fit the jigsaw blade. This way I don’t have to make too many curved cuts with the jigsaw.
Then I started cutting. Making these cuts was very fast and easy.
Moving slowly I tried to keep the blade closer to the line, from the inside, in order to avoid mistakes.
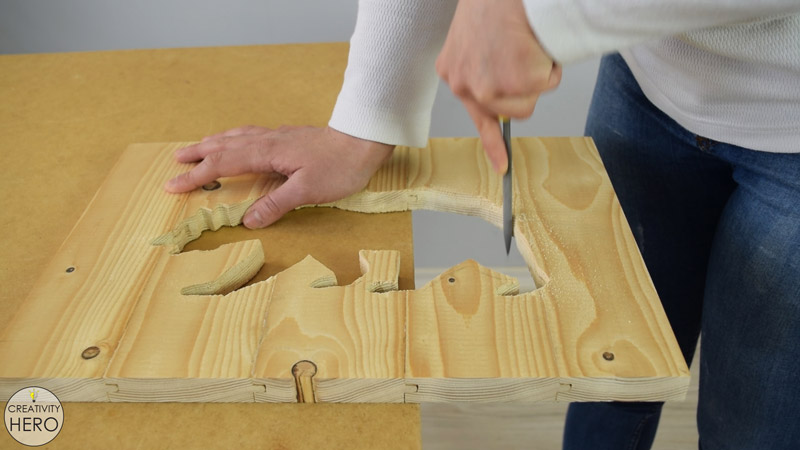
When I was done cutting I removed the cut-out and took a rasp to finish the form.
The rasp did a really good job helping me emphasize all the details of the bear.
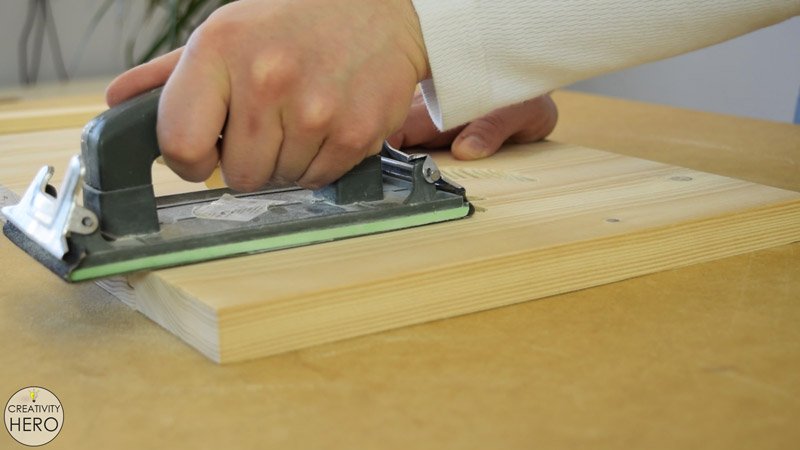
Step 4: Sanding.
Once I’m done with the rasp, I can sand all the pieces with a sanding block. First I took an 80 grit sandpaper, and then continued with 120 grit until the surface became smooth and uniform.
Step 5: Pre-drilling Holes into the Frame Pieces.
Instead of gluing the frame, I decided to secure it with some screws. So, the last thing I need to do before staining is to countersink holes into the pieces which I’ll use to make the frame.
Step 6: Staining and Spray Painting.
Now let’s move on to the most satisfying part of any project: staining.
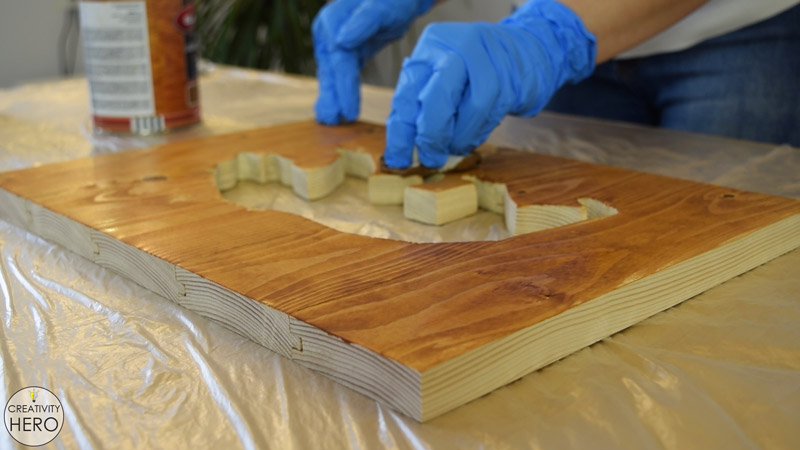
Walnut stain for the cut-out board is exactly what I was looking for. It brings out the natural wood grain creating a beautiful rustic look.
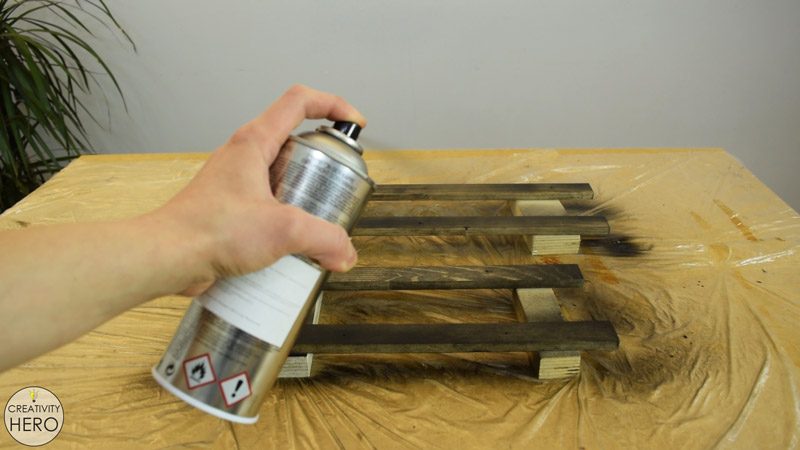
For the frame I chose an ebony stain, which I didn’t like at all. After applying a second coat of the stain it was still too light, so I ended up spray painting it with a black spray paint.
Surprisingly, the black color turned out to be a perfect match for the walnut stain.
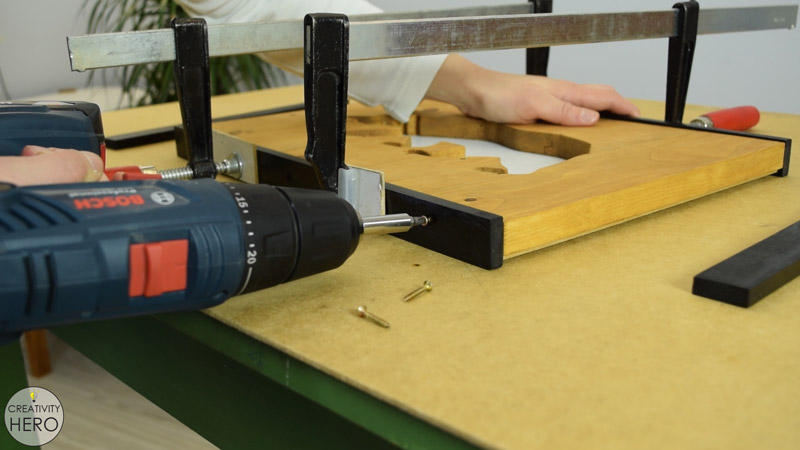
I placed the cut-out board onto 2 layers of fiberboard, because I need to leave enough space for the backing board and for the hanger.
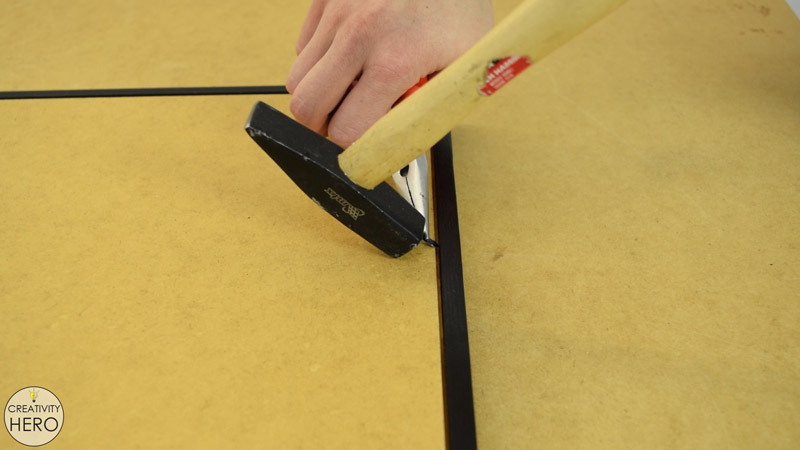
Then I clamped down the black pieces creating a frame and inserted some screws to secure them well. I really like the exposed screws, I think they’re a nice addition to the frame.
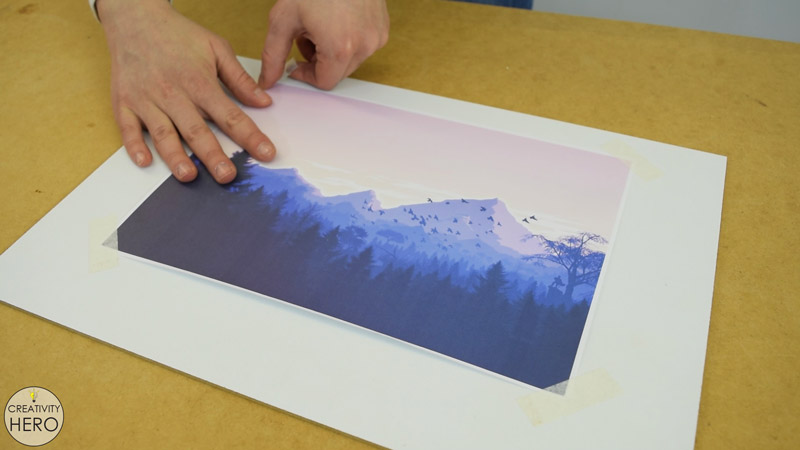
Onto the fiberboard I’m going to attach a landscape illustration which I also downloaded from Pixabay.
I positioned the picture in the right place, and to make it easily replaceable I attached it with a tape. It won’t be visible anyway.
Finally, I can put the backing board and secure it in place with glazier points, which can be bent easily in case you need to switch out the artwork.
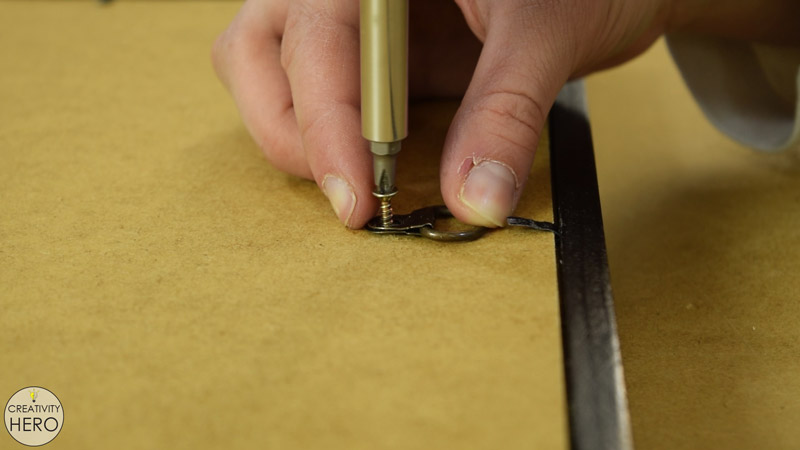
Lastly, I marked the point where I’ll place a D-ring picture frame hanger, and attached it with a screw.
Step 8: Hanging the Wall Art.
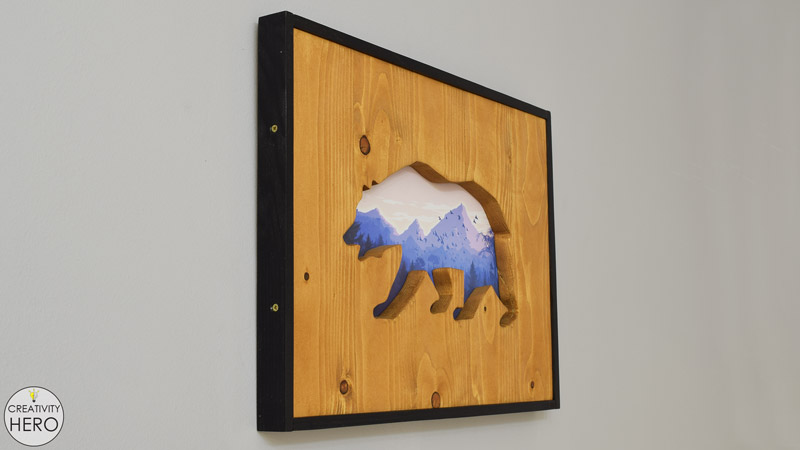
What’s left to do is to hang this piece of art onto the wall.
I think this wall art turned out amazing. Starting from the bear cut-out, the picture within, to the color combination, I like every part of it.
If you like this wall art please like, share and subscribe to my YouTube channel.
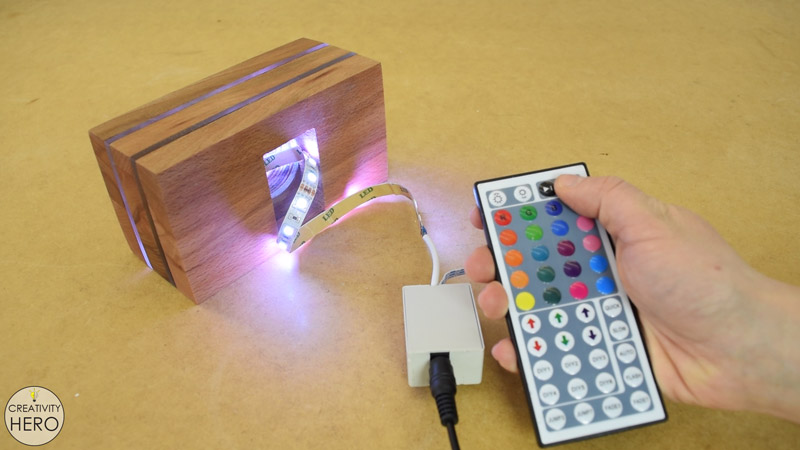
Today’s project on Creativity Hero is a wood and acrylic color changing LED lamp. The combination between wood, acrylic and light is a perfect match between materials that complete each other.
I think it came out wonderful!
Check out my YouTube video on how I made this LED lamp:
First of all, I started with setting up the table saw by placing the crosscut sled and adjusting the stop block and the blade in order to be able to make all the cuts.
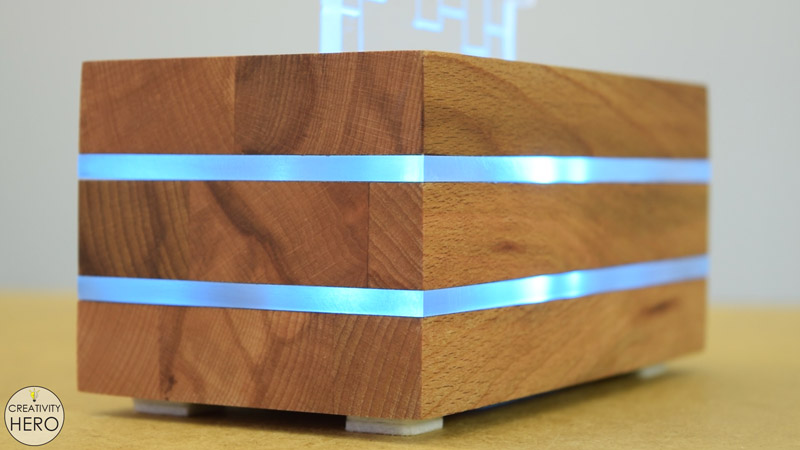
For this project I used a 20 mm thick beech wood, and 5 mm thick acrylic. The base of the lamp is 16 by 9 cm, which means that all of the cuts are repeated.
Only one piece of acrylic needs to be larger, around 28 by 14 cm, which will be placed vertically, on the top of the base. While cutting the acrylic I noticed that when I cut slower, the acrylic started to melt, so I needed to move the sled faster in order to get nice and clean cuts.
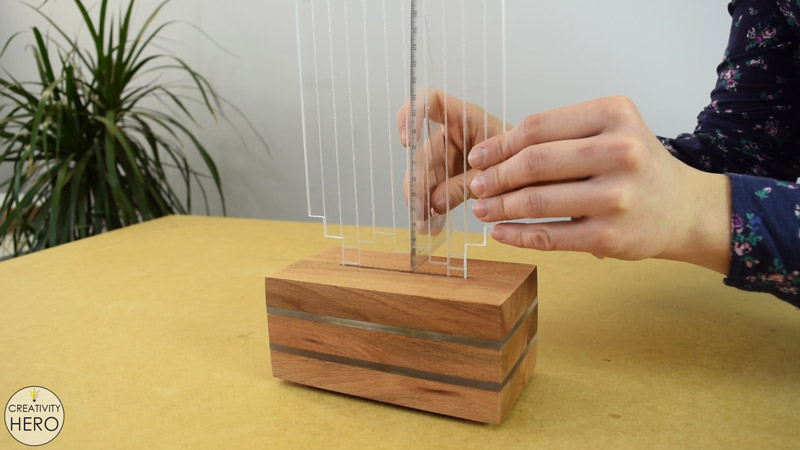
Step 2: Preparing the Acrylic Top for Engraving.
After I made all the cuts I moved on to the larger piece of acrylic that will stay on top of the lamp.
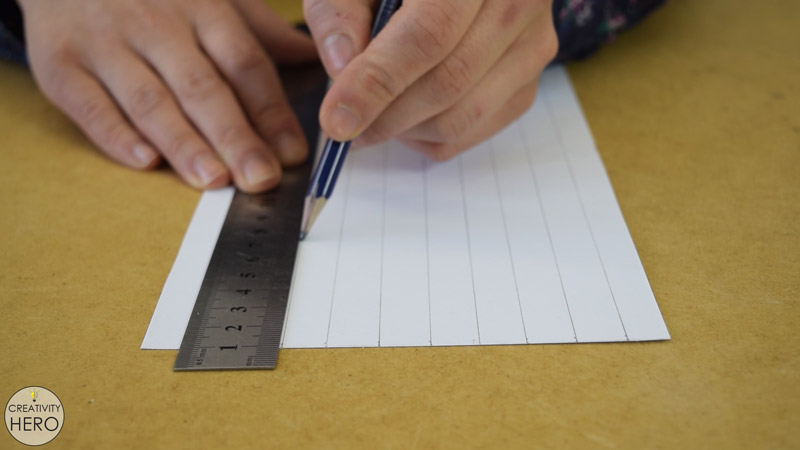
I placed it on a piece of paper, traced the outlines with a pencil and cut it following the lines. Then, I took a ruler and drew some lines.
As a result, I wanted to get a pattern which consists of stripes with the same width, but different length.
I made all the cuts, and I got a nice pattern that I’ll transfer to the acrylic.
To attach the paper on the acrylic I removed the protective film on one side and used a tape to secure it in place.
On the side that I’m going to engrave I didn’t remove the protective film because the acrylic scratches easily.
Step 3: Engraving the Acrylic with Dremel Rotary Tool.
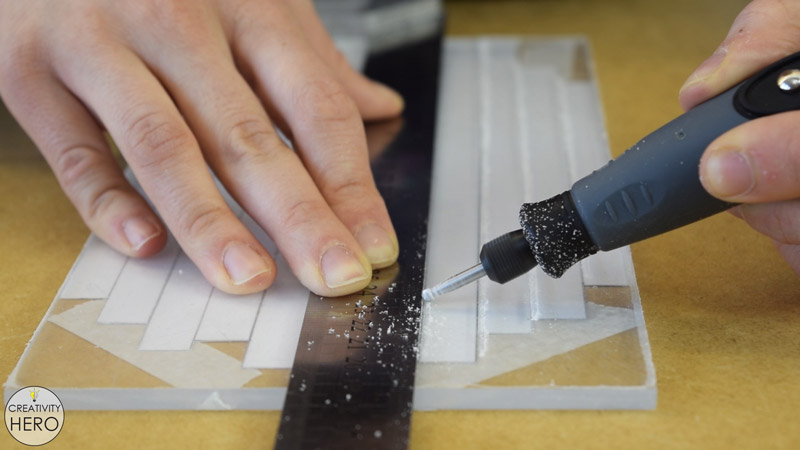
Acrylic engraving is a technique that I’m going to try for the first time, that’s why I chose this simple pattern which will help me achieve modern and clean design of the lamp.
To engrave the acrylic I decided to use my new Dremel rotary tool. I won this multi tool as a grand prize on Instructables contest Workshop Hacks Challenge.
The package includes so many accessories and attachments that can be used in any project, which is awesome for makers and DIYers.
For this project I attached the flex shaft extension and inserted an engraving bit which makes engraving much easier and accurate.
Now I’m ready to start. A metal ruler can help a lot in making perfectly straight lines, I highly recommend using one for this purpose.
Once I’m done engraving, I can make all the additional cuts with a coping saw. All the cuts should to be done at a right angle, so I need to be careful here.
At this point I’m done with the larger acrylic piece, so I can move on to the base.
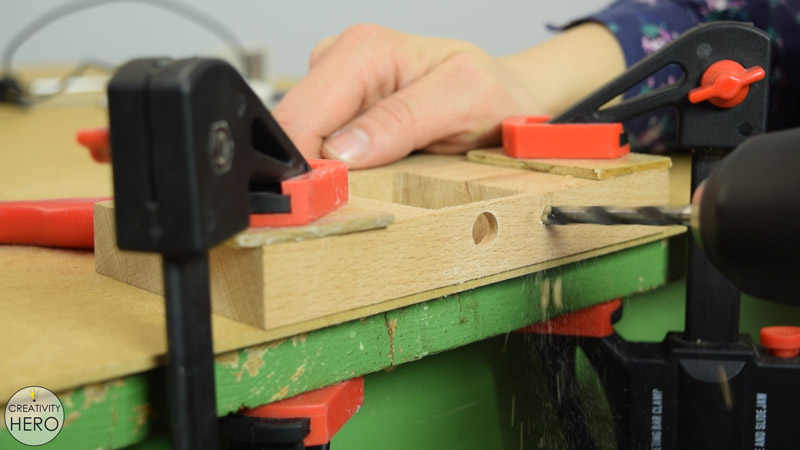
Step 4: Making Holes in the Middle of the Lamp Base for the LEDs.
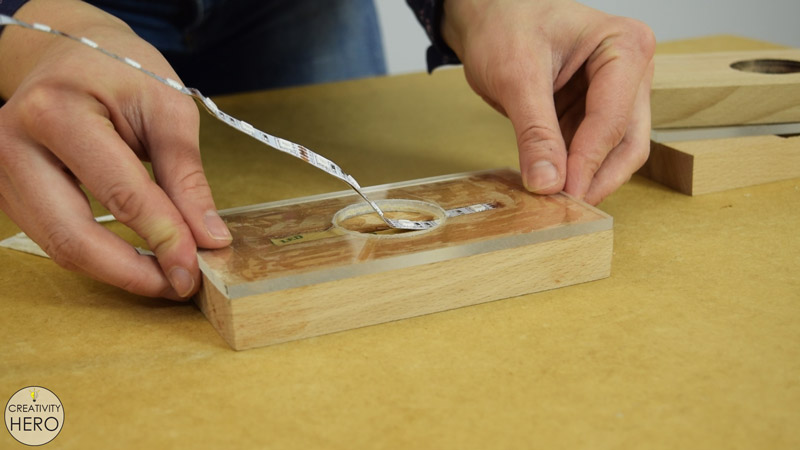
I marked the center points of these pieces of wood and acrylic that will be placed in the middle of the base.
The openings for the LEDs I made using a 35 mm hole saw bit that I attached onto the drill.
A scrap wood underneath is a great way to protect the table surface from damage.
Step 5: Making a Slot on the Top of The Base for the Engraved Acrylic Piece.
On the top of the lamp base I need to make an opening large enough to fit the engraved acrylic piece. Placing the acrylic vertically in the middle I traced its outline with a pencil. So, I drilled as many holes as needed inside the outline, and after that removed the excess with a rasp.
LEDs will be placed right below the acrylic, so I need to make a space for them by chiseling out a groove around 10 mm wide and 4 mm deep.
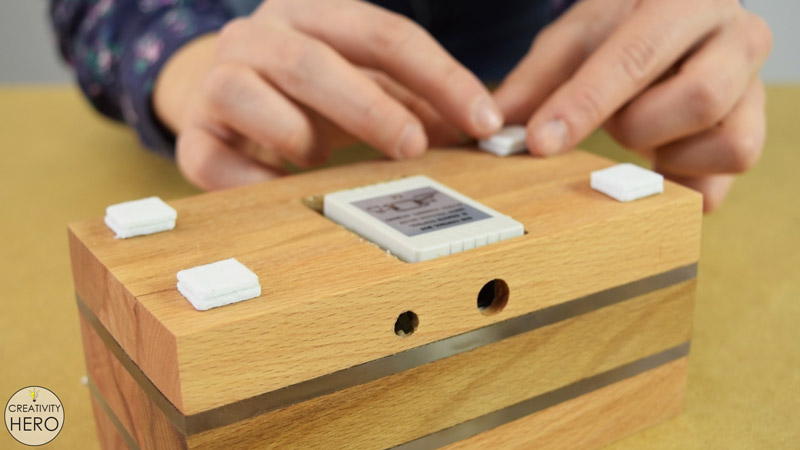
Step 6: Working on the Bottom of the Lamp.
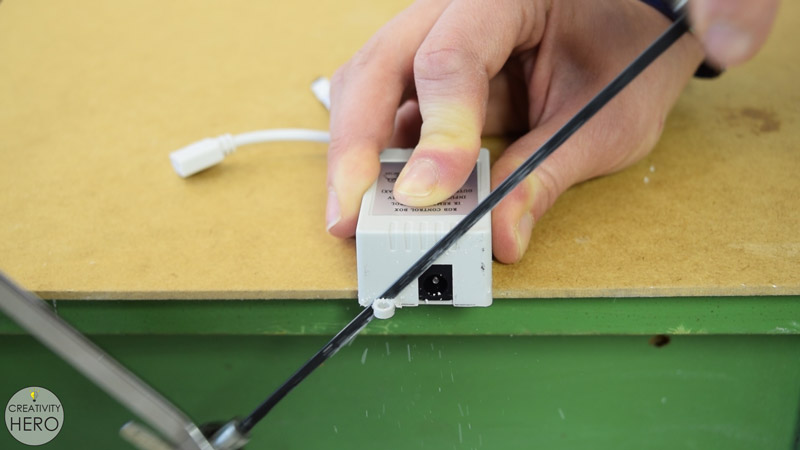
The LED controller I’ll place into the bottom of the base. Even though it is quite big, I must find a way to insert it into the bottom.
Instead of mounting it with some screws, I’ll attach it with a hot glue only, so I’m cutting of these mounting holes in order to flatten the box.
On that wooden piece I need to make a large opening for the controller. To make the opening I drilled a hole with 12 mm bit, and then inserted a coping saw into the hole to make the cut. Using a rasp I made some adjustments.
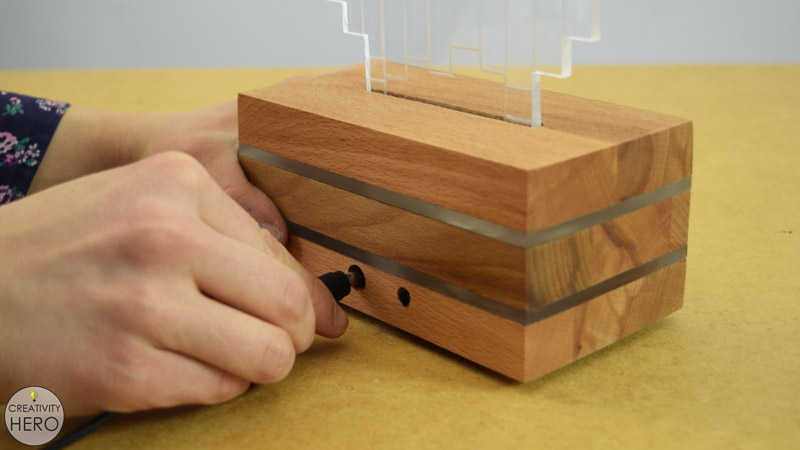
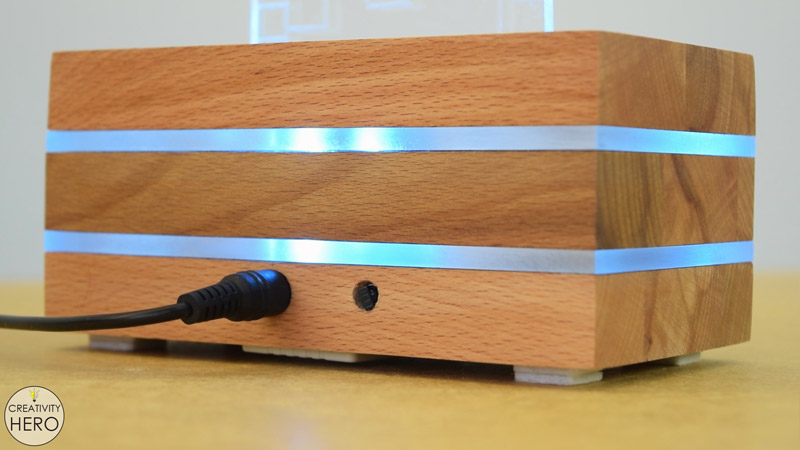
Now I’m drilling 2 holes on the back side of the bottom, one larger for the adapter, and another smaller for the Infrared receiver.
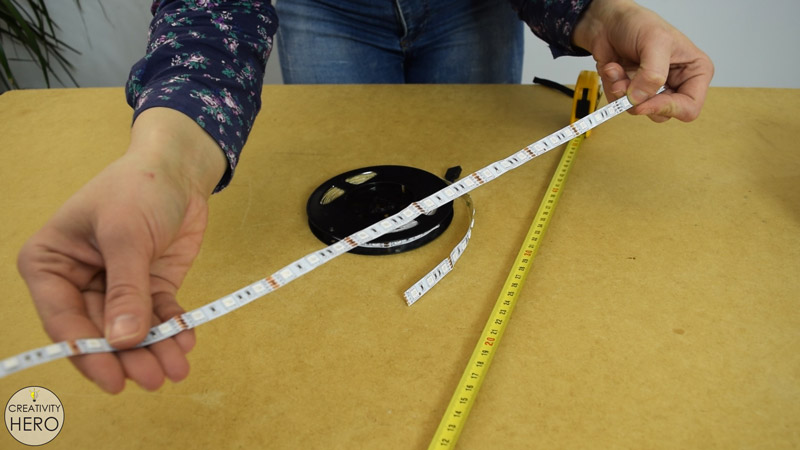
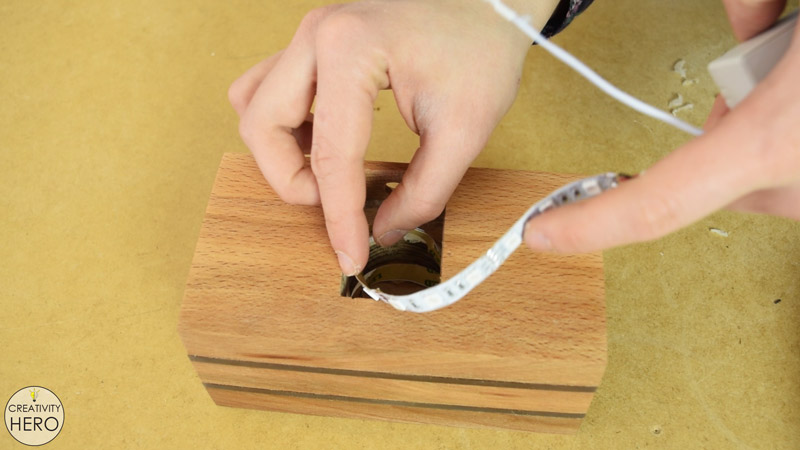
Step 7: Cutting the LED Strip.
The lamp base can fit 50 cm long LED strip, so I’m carefully cutting with scissors along the designated lines, in between the copper pads.
The last step before putting all the parts together is removing the protective film from the acrylic.
Step 8: Assembling the Lamp.
To assemble the lamp I started from the top and glued the LEDs into the groove that I previously made with an epoxy.
Then continued gluing the other pieces with an epoxy making sure I don’t damage the LEDs. Epoxy is the one of the best adhesives for gluing acrylic to wood and I highly recommend it.
Once I put all the parts together I clamp it down and wait until it is completely dry.
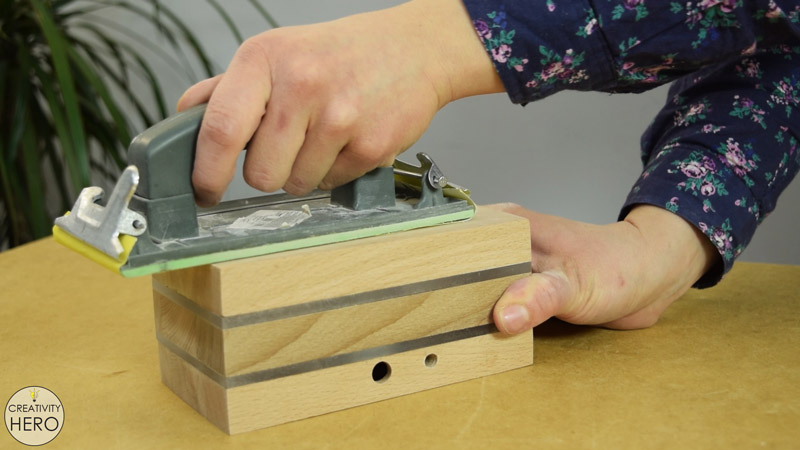
Step 9: Sanding and Applying Finish onto the Base.
I temporarily put the LEDs inside the hole, protecting them with a masking tape in order to be able to sand the base.
Then I lightly sanded the entire base to make it nice and smooth.
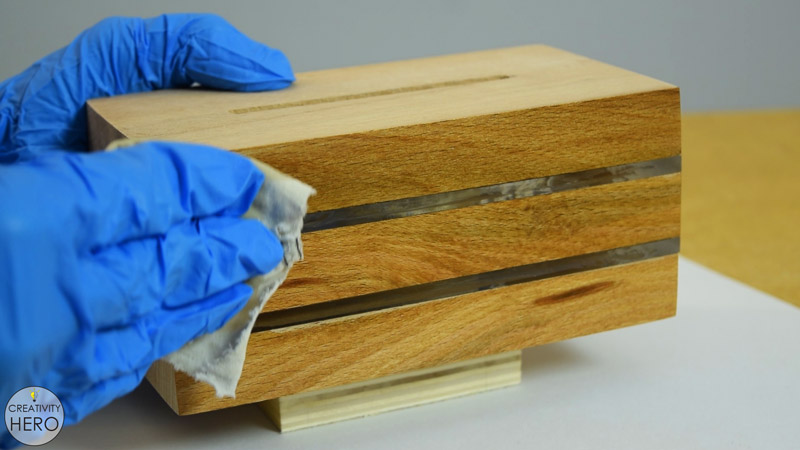
With that done I can apply a transparent finish to emphasize the natural beauty of the wood.
Step 10: Installing the Lights.
Now let’s move on to the controller installation.
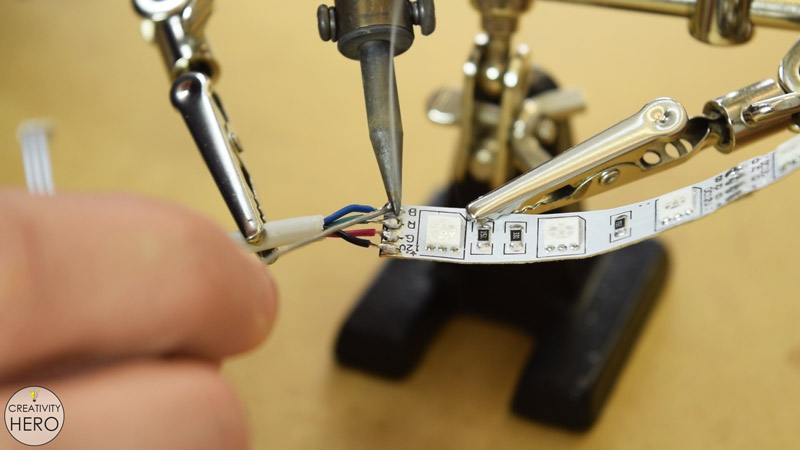
Since the cable on the controller is a little long I need to cut it off. I cut half of its length and removed around 1 cm of the outer insulation. It consists of 4 wires, 1 common positive and 3 negative wires for each of the 3 channels.
I exposed the ends of the wires using wire strippers and then soldered them onto the coper pads of the LED strip. Here you can notice that although the colors of the wires are in order, they don’t match the letters on the coper pads. The green wire I solder onto the R, and the red wire onto the G.
To check if they work properly I plugged the 12V adapter into the controller.
Everything works great, so I can glue the controller on the bottom of the base with a hot glue.
Hence, I carefully placed the LEDs inside the base. Then inserted the IR receiver into the hole, and finally secured the controller in place by hot gluing it.
To make sure the bottom doesn’t scratch the table surface I’m cutting out some squares out of felt for feet. 2 squares in each corner will make enough space for the controller.
Step 12: Securing the Engraved Acrylic Piece into the Slot on the Top.
Lastly, I removed the protective film from the engraved acrylic piece and used an epoxy to secure it into the slot.
Using the right angle ruler I’m making sure that it is positioned correctly and leaving it to dry.
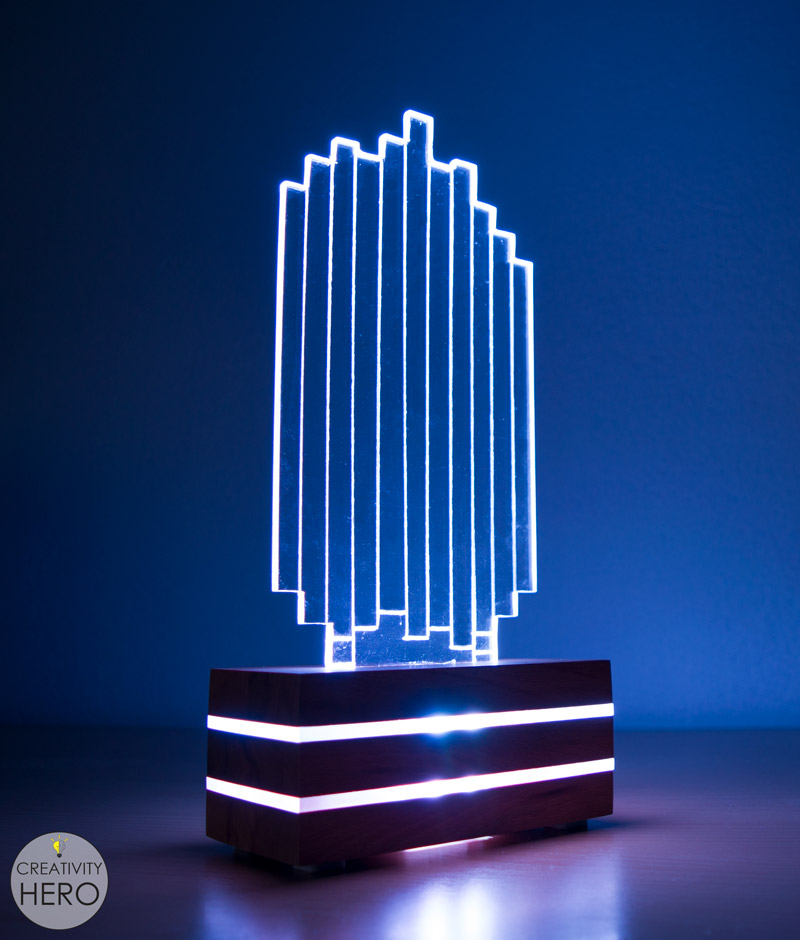
This means that the LED lamp is complete.
Now I can turn it on and enjoy this amazing color changing lamp.
It is very simple and modern, and I think it would make a perfect accent in a living room.
This was a really interesting and fun process of creating such lamp. I hope you like it. If you do please like, share and subscribe to my YouTube channel.
We use cookies to ensure that we give you the best experience on our website. If you continue to use this site we will assume that you are happy with it.