Home Blog Page 3

DIY Colorful Rectangular Wooden Wall Shelf

0
DIY Colorful Rectangular Wooden Wall Shelf 0000000

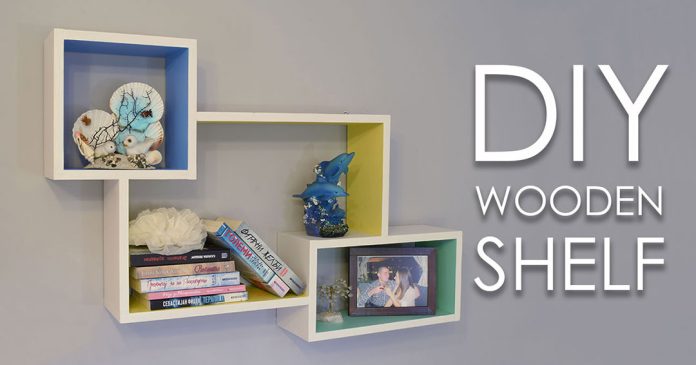
In today’s video I’ll build this colorful rectangular wooden wall shelf. It consists of three rectangles joined together, creating this contemporary artistic look.

I was very excited to finish this project and the end result exceeded my expectations.

So, let’s start building it.

Here are the materials I used:

Types of tools I used:

Disclosure: As an Amazon Associate I earn from qualifying purchases.

Related: How To Build A Wooden Desk Lamp | DIY Project

Step 1: Marking the boards.
DIY Colorful Rectangular Wooden Wall Shelf 1

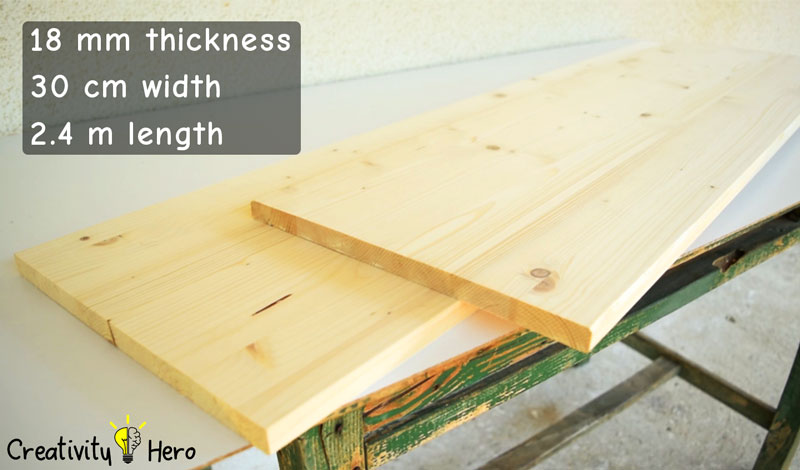
For this project I’m using two solid wood boards. They are 18 mm thick and 30 cm wide, with total length of 2.4 m. I decided the depth of the shelf to be 15 cm, which is exactly half of the initial width of the boards.
DIY Colorful Rectangular Wooden Wall Shelf 2

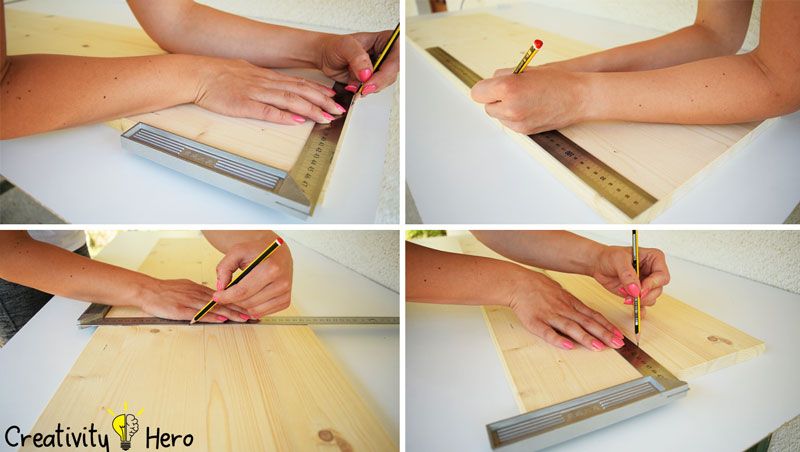
I made the design of the shelf, determined the exact dimensions, and marked them onto the boards with a pencil and a square ruler for precision.

Step 2: Cutting the boards with a Jigsaw.
DIY Colorful Rectangular Wooden Wall Shelf 3

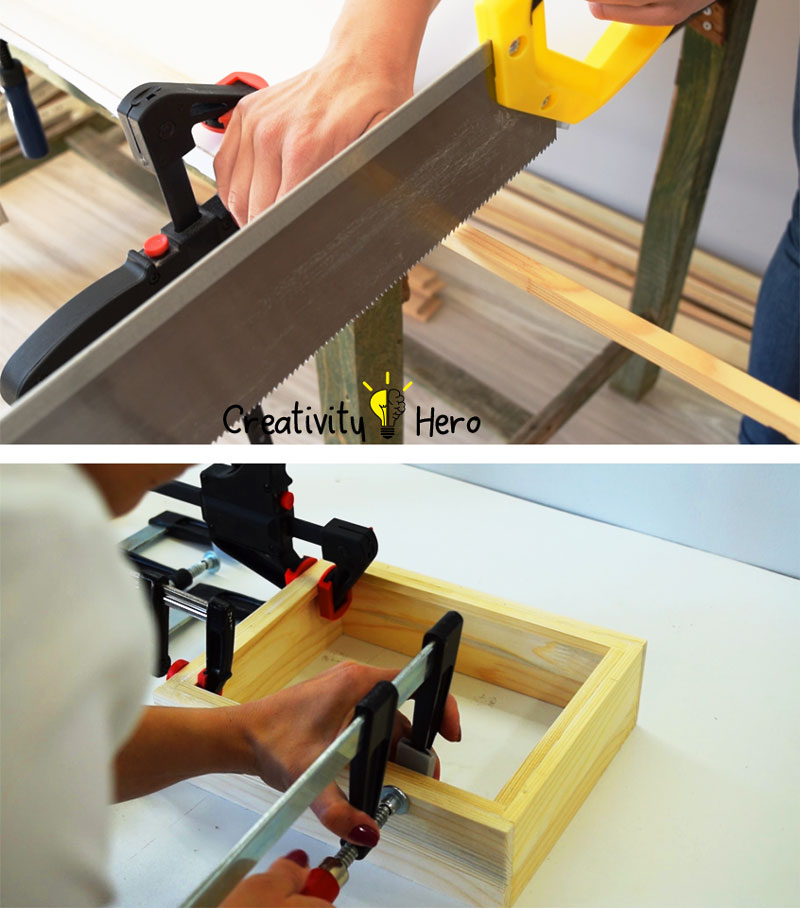
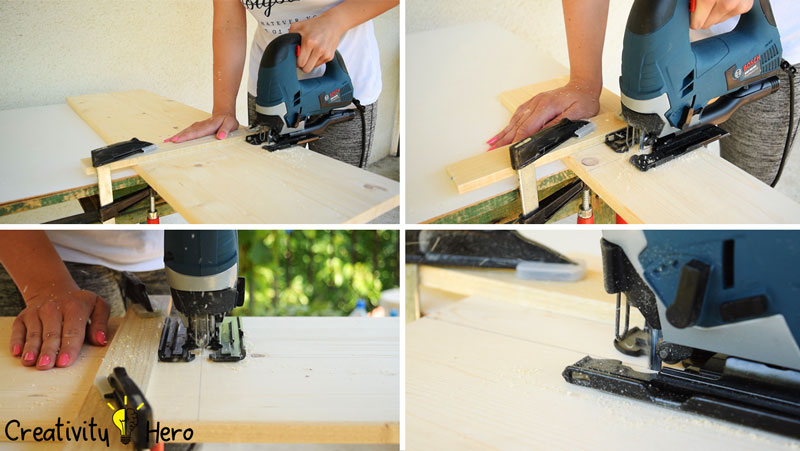
After that, I’ve cut all the pieces with a jigsaw. If you don’t have a jigsaw, or some other power cutting tool, a hand saw will do the same work for you.

I’ve never used a jigsaw before, but this project requires so many cuts, which means that if I used a hand saw it would take me ages to cut the boards. So, it saved me a lot of time and energy.

I used a piece of wood as a guide along with some clamps to make straight cuts.

All you need to do is to draw a line onto the board where you’d like to make your cut. Measure from your pencil line the same distance you measured on your saw and draw another line. Do this to both sides then clamp your guide onto these marks. Adjust till it is as perfect as you want.

Then, start your cut. While cutting keep the saws shoe against your guide and you will get a nice straight cut. Cut slow and steady.
DIY Colorful Rectangular Wooden Wall Shelf 4

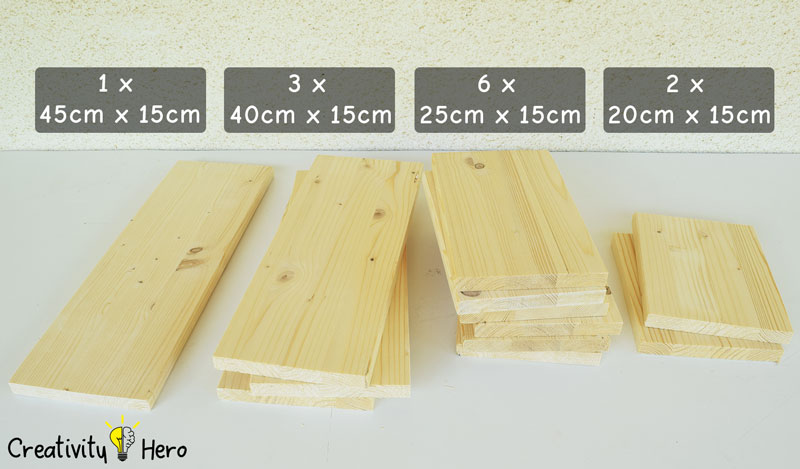
Now I have 1 piece of wood 45 cm long, 3 pieces 40 cm long, 6 pieces 25 cm long and 2 pieces 20 cm long.

Step 3: Sanding the pieces of wood.
DIY Colorful Rectangular Wooden Wall Shelf 5

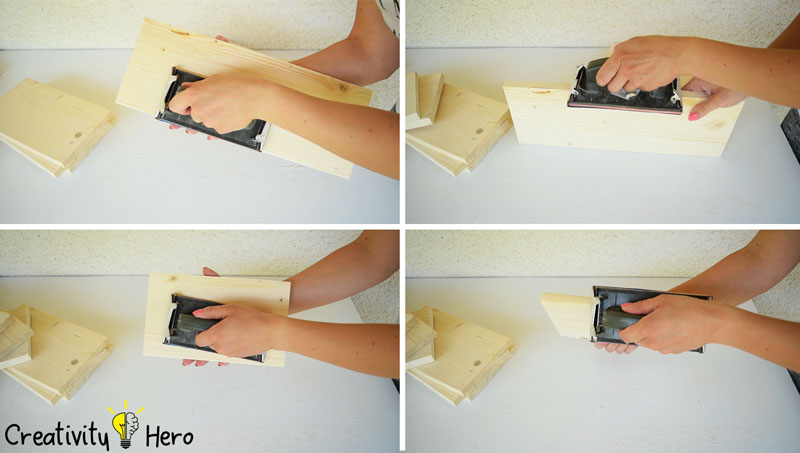
Before assembling the shelf together I’m going to sand it down first with a 120 grit sand paper, and then with 220, which is enough to make everything nice and smooth.

It took me some time until I finished, but it was much easier to sand the pieces of wood one by one, instead the whole shelf after it is assembled.

Step 4: Gluing the pieces together.
DIY Colorful Rectangular Wooden Wall Shelf 6

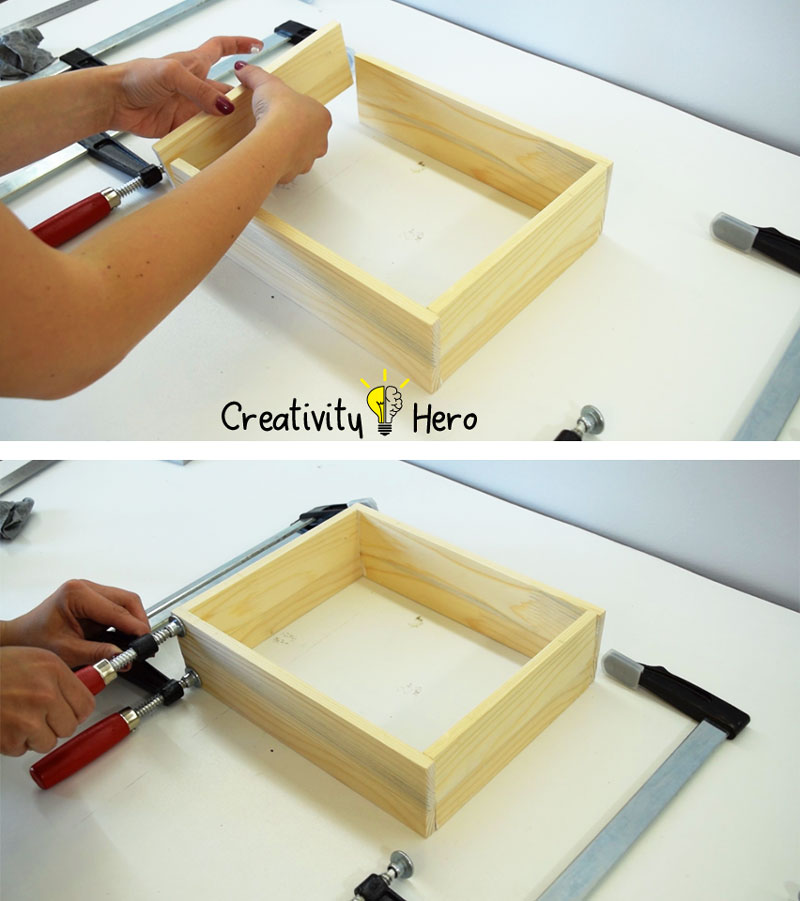
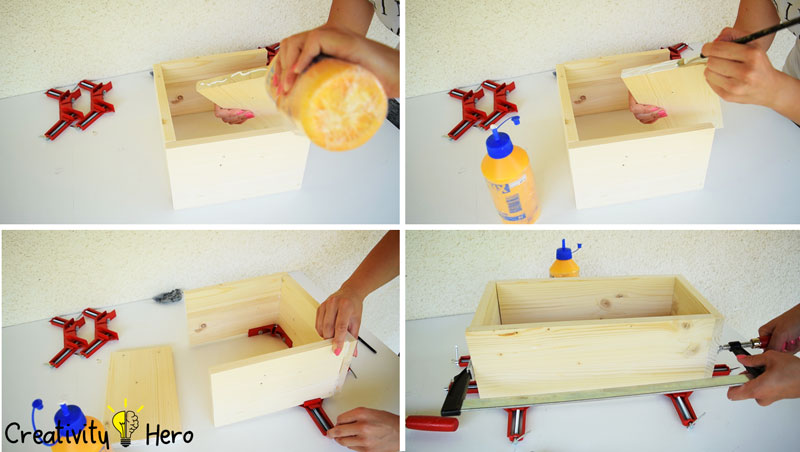
When it comes to joinery technique, I decided to glue the pieces of wood together using only a wood glue and clamps. I’ve made a few projects applying the same technique, and the creations turned out to be very tight and safe to use.

I applied a nice coat of wood glue onto the joining parts of the wood, and used 90 degree angle clamps and F-clamps to hold everything in place.
DIY Colorful Rectangular Wooden Wall Shelf 7

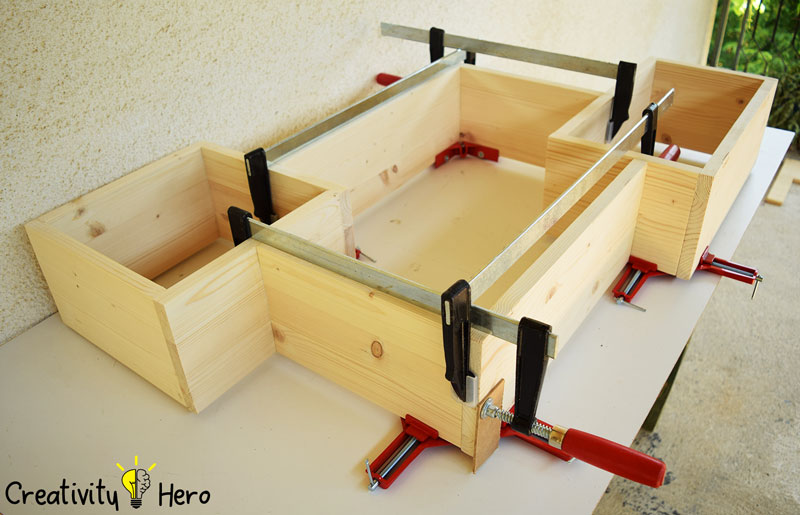
It was much easier for me to glue the whole rectangles first, and then to attach the parts of the divided rectangle in the middle. I left it to dry out for a few hours.

Step 5: Painting the shelf.
DIY Colorful Rectangular Wooden Wall Shelf 8

With that done, now it is time to add some color on the shelf. I’ve been thinking a lot about the color, because I wanted to combine white with some other colors and make it look more stylish and attractive. So, I decided to stain the two whole rectangles with a wood stain, and to paint the middle part white.

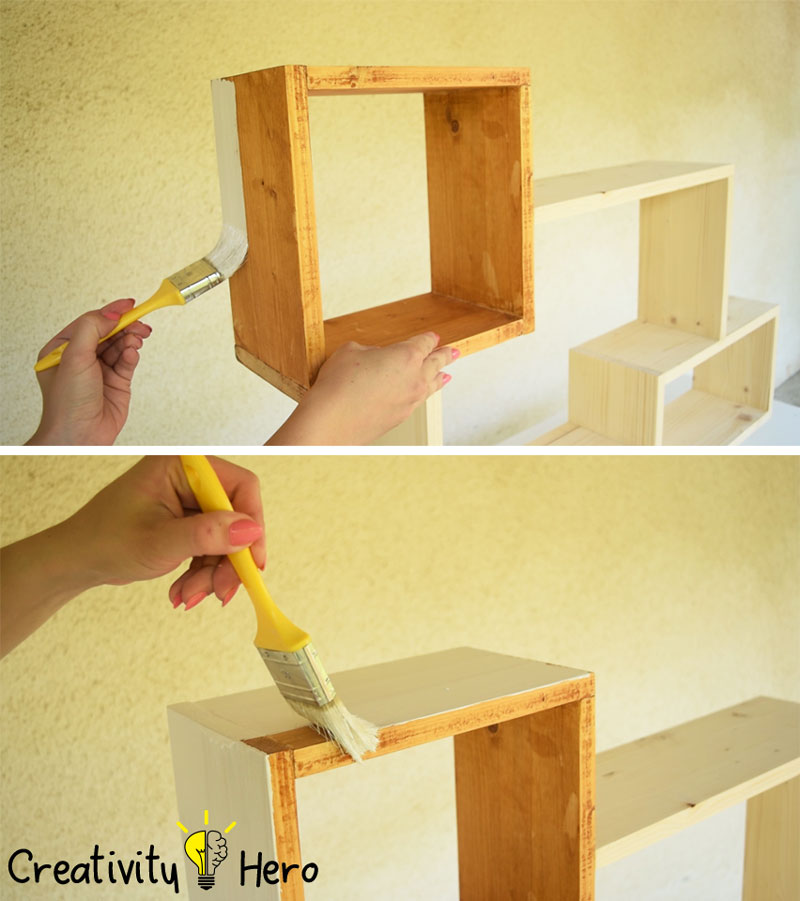
But, when I started staining the first rectangle I didn’t like how it turned out at all. As you can see, there are a lot of imperfections on the wood which I can’t fix with a sand paper, so it looks so rough and messed up.

I wasn’t sure how I was going to fix this problem, but fortunately, I found white oil based paint, and some universal tints in different colors. So, I started with the stained rectangle, because I wanted to see what will happen when I paint it white.
DIY Colorful Rectangular Wooden Wall Shelf 9

The paint covered all the imperfections, and looked pretty well. I was very satisfied with how it turned out. I continued painting the entire shelf white from the outside. There was no difference in the color between the rectangles.

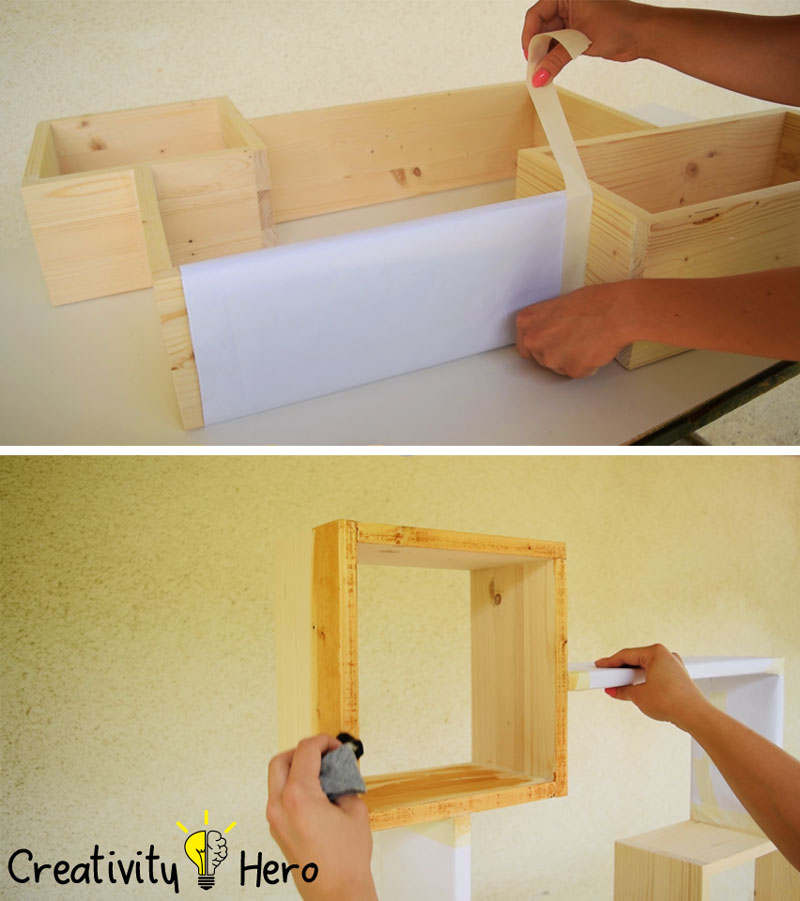
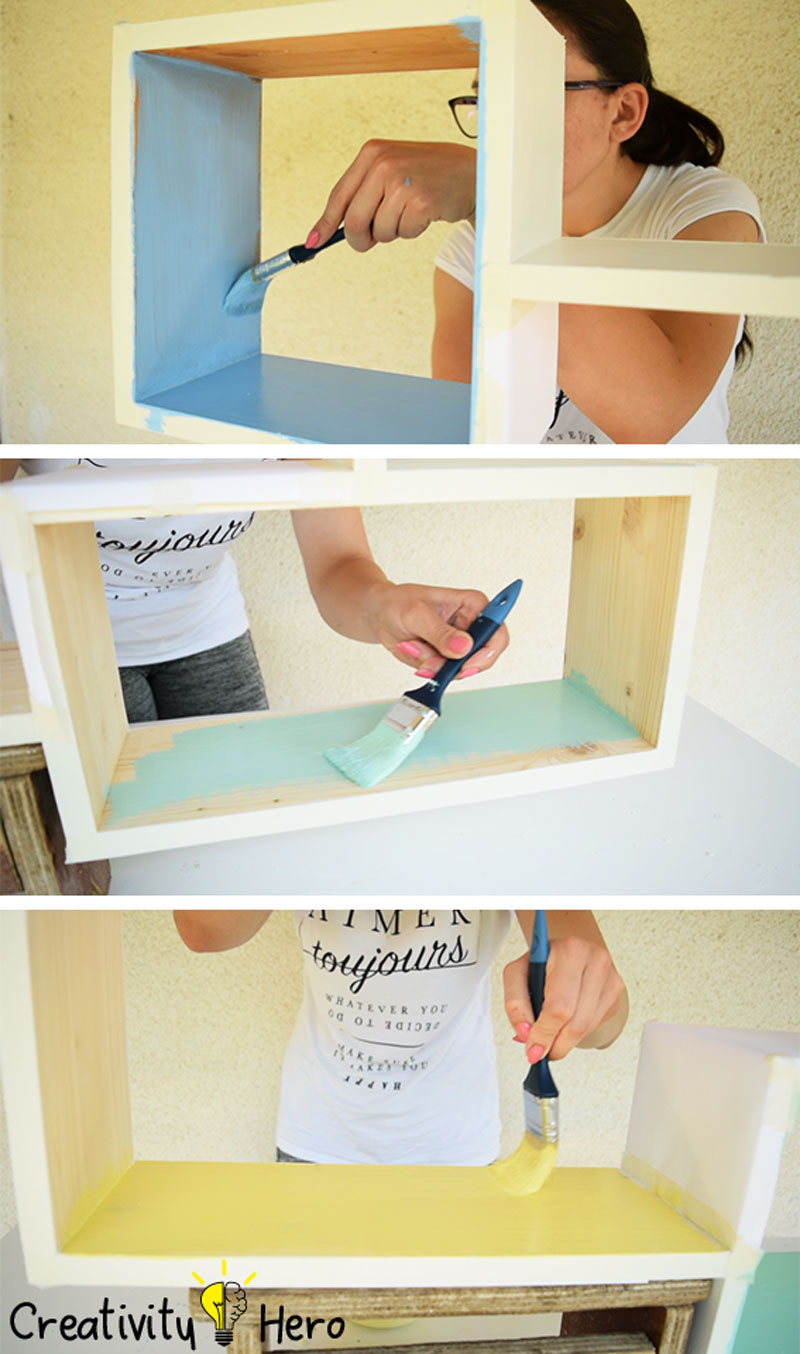
As there are three different parts of the shelf, I wanted to paint their inside in three different colors. I picked blue, yellow and green tint, and put a few drops into the white paint to get nice bright colors.
DIY Colorful Rectangular Wooden Wall Shelf 10

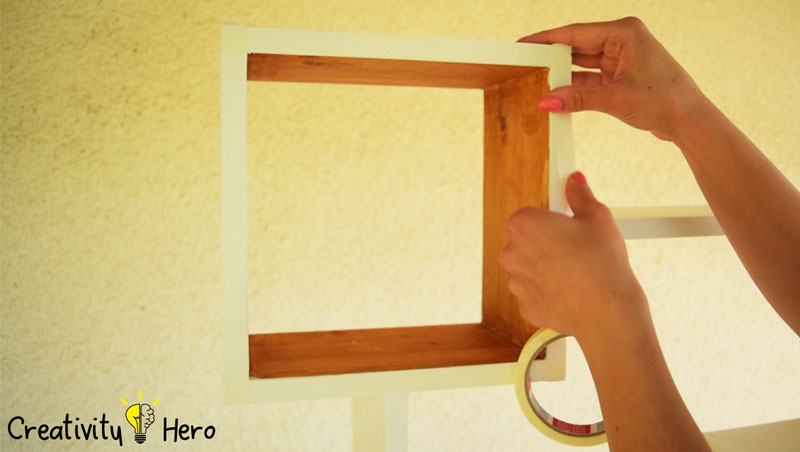
Before painting the inside, I put a painters tape to keep clean, sharp paint lines and to protect the surface from unwanted drips and splatters.
DIY Colorful Rectangular Wooden Wall Shelf 11

The colors were perfect, exactly as I expected, and actually I liked this idea much more than the previous one.

I removed the tape, and left it to dry overnight.

Step 6: Hanging the shelf on the wall.
DIY Colorful Rectangular Wooden Wall Shelf 12

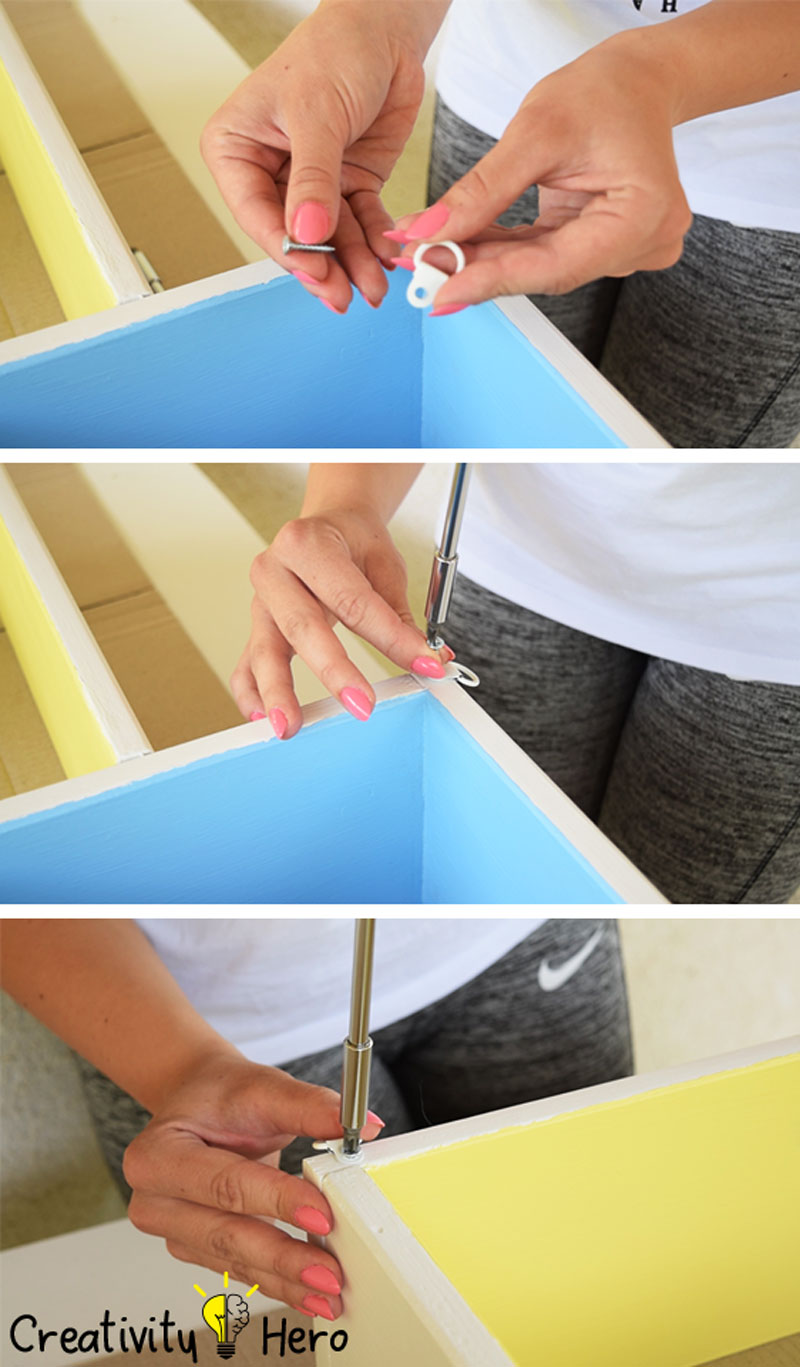
To mount this shelf to the wall I’m going to use plastic screw drywall anchors, and some picture hangers.

Although I wanted to use sawtooth hangers, I couldn’t find in the place where I live, so I used two D-ring hangers instead. They were silver, but I painted them white to match with the shelf color. I secured them with screws on the back side of the shelf and realized that I really liked the way they looked on the shelf.

You can use tape or you can have somebody hold the shelf in place until you find the right spot for it.

Then, mount the shelf to the wall.

Step 7: Putting some decorations on the shelf.
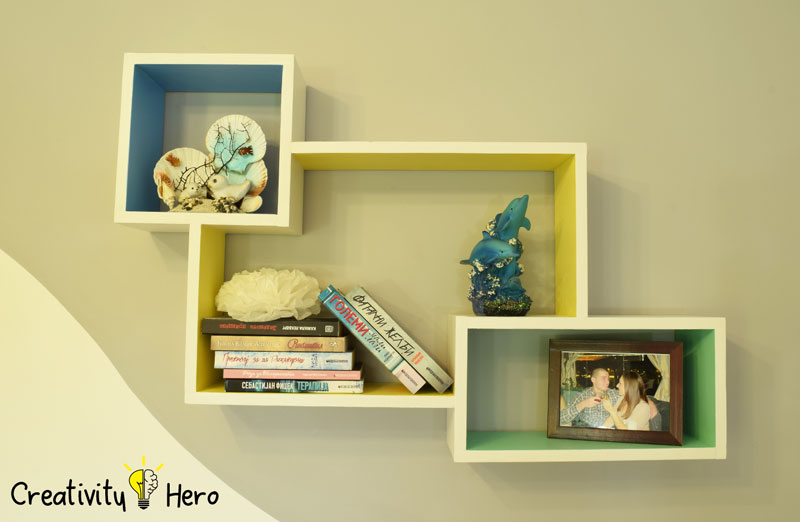
DIY Colorful Rectangular Wooden Wall Shelf 13

After I’m done with it I can now put some decorations on it. I’ve put my favorite books, a photo frame and some other interesting things that were hidden somewhere else in my room and didn’t have the opportunity to be seen until now.

I hope I inspired you to use your imagination and create something that will make your room look unique and beautiful.

Let me know what you think about this project down in the comments, and also don’t forget to hit the like button and subscribe to my YouTube channel.

How To Create A 3D Paper Cut Light Box | DIY Project

13
How To Create A 3D Paper Cut Light Box DIY Project 0

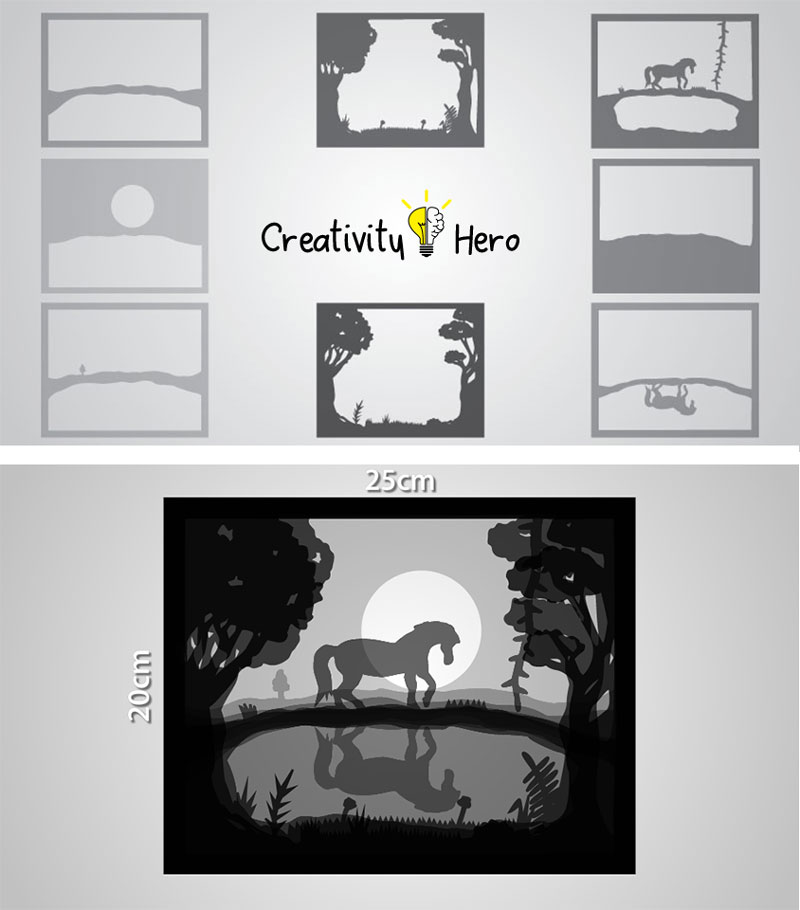
Inspired by the artists Hari & Deepti and their beautiful artwork I decided to create a 3D paper cut light box.

It can be used as a wonderful home decor, or a unique birthday or wedding gift. You can mount it on a wall, or place it on a desk and enjoy its charming beauty.

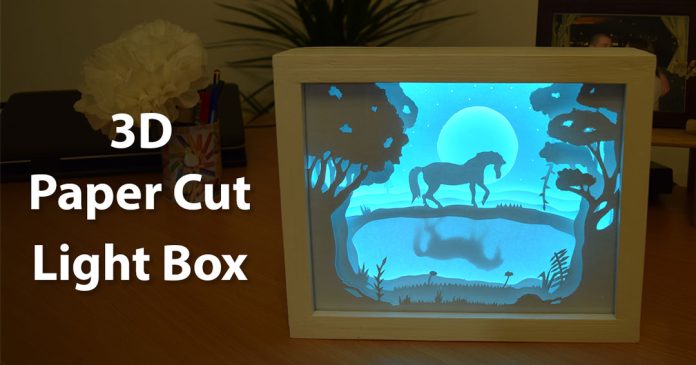
Basically, this light box consists of paper cut outs layered on each other in a box with a glass panel. LED lights are placed behind all the layers, which makes each layer glow, giving this 3D look.

In this video I’ll show you how I made this light box step by step, and also I’ll give you some tips that will help you achieve the desired effect.

Here are the materials I used:

Types of tools I used:

Disclosure: As an Amazon Associate I earn from qualifying purchases.

Related: How To Build A Wooden Desk Lamp | DIY Project

Step 1: Make your own design, or download and print out the template.

I created the design for this light box and made a template.

How To Create A 3D Paper Cut Light Box DIY Project 1

You can download it here:


So, the first thing you need to do is to download and print out the template. It’s made for a 20 x 25 cm light box (8 x 10 inches), but you can scale it up and down if needed. You can also make your own unique design.

I recommend using 170 grams white card stock, because it’s stiff enough to stand up and thin enough to let the light pass through.

How To Create A 3D Paper Cut Light Box DIY Project 2

So, draw the first layer of your design onto the card stock and add a border on each layer, around 1 cm. This will help you glue the layers much easier. You’ll never see anything here.

Step 2: Cut the layers using an X-Acto knife.

How To Create A 3D Paper Cut Light Box DIY Project 4

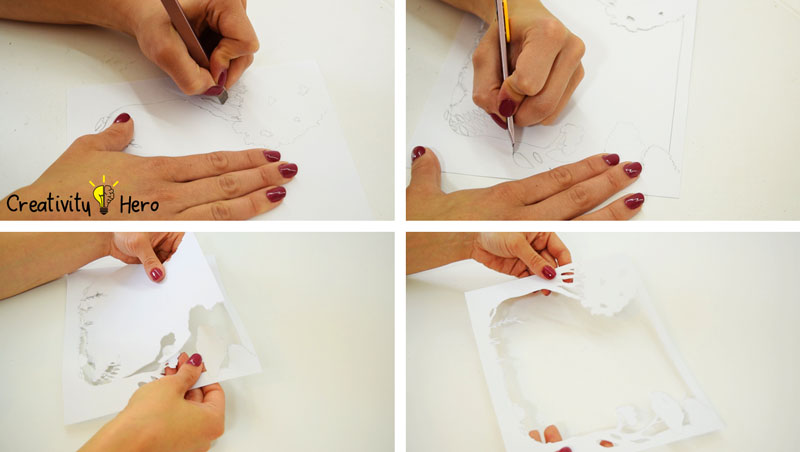
Once you’re done with the first layer, cut it out using an X-Acto knife. X-acto knife is an original cutting tool designed to deliver the sharpest, most accurate cut on your projects.

I didn’t have one at home, so I used this utility knife, and it turned out quite well.

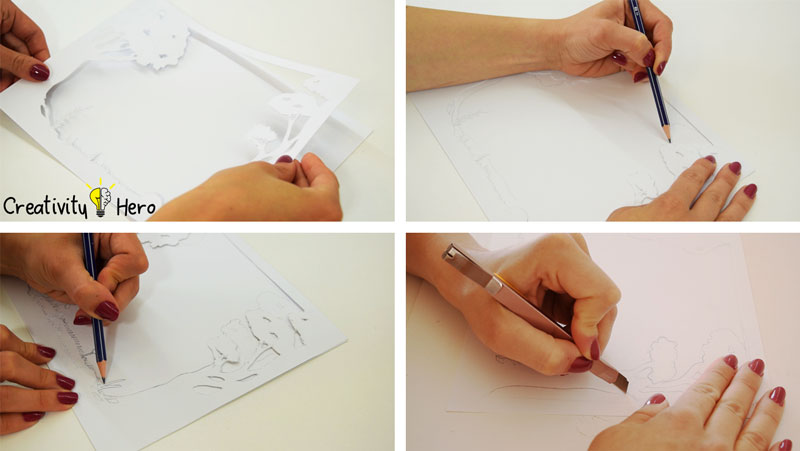
After that, place the first layer onto another piece of card stock, and draw the next layer. Remove the first layer and finish the second one. Cut it out, and repeat this process until you are done with all the layers.

How To Create A 3D Paper Cut Light Box DIY Project 5

The more layers you make, the better the effect you get.

Step 3: Create a water reflection effect.

How To Create A 3D Paper Cut Light Box DIY Project

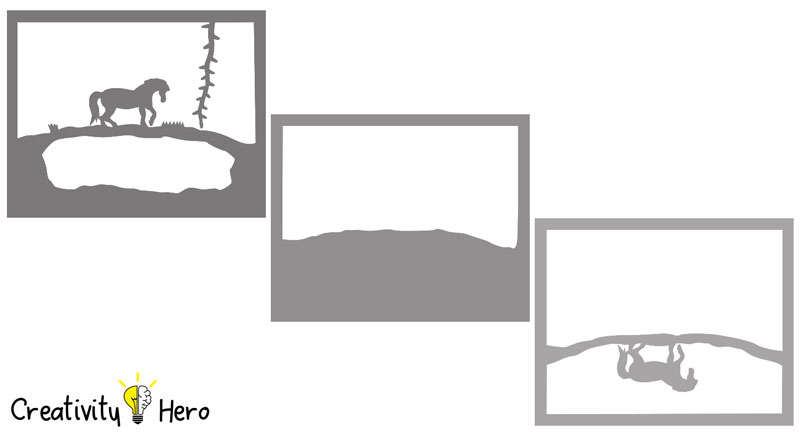
As you can see, my 4th layer is without design with one half missing. This is because I wanted to create a water reflection effect.

This is how it works: this layer will be placed behind the layer with a horse and in front of the “upside down” layer. The paper left in the 4th layer will hide the reflection at first but it will appear when the light is on.

I cut the upper half of the layer because I wanted the moon and the stars on the last layer to be brighter. For this layer I used an 80 grams copy paper, for a better transparency effect.

Don’t forget about the borders!

Step 4: Make a moon and stars.

How To Create A 3D Paper Cut Light Box DIY Project 7

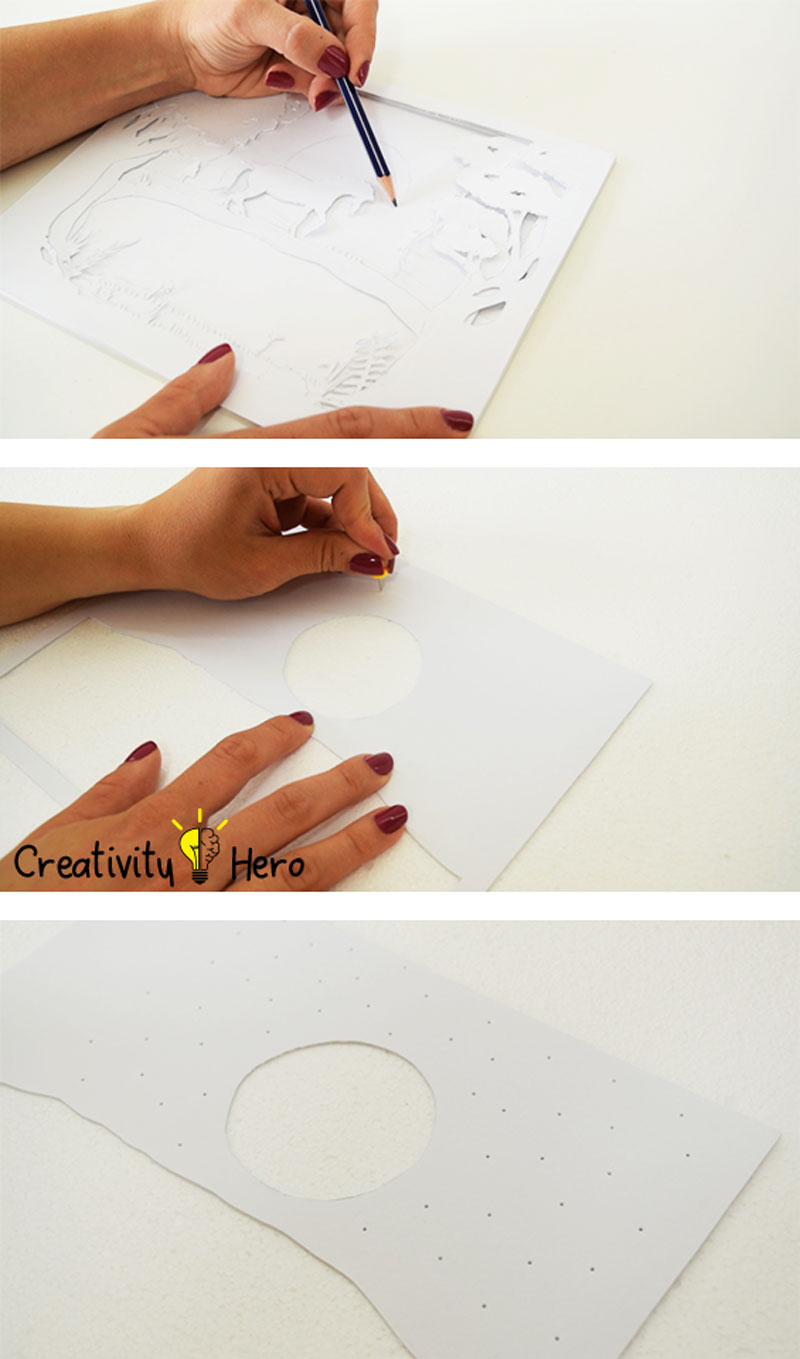
On the last layer I made a large moon and stars. For the moon, I’ve cut a circle with my utility knife, and for the stars I’ve put the card stock onto a foam board and made small holes with a pin.

Step 5: Reassemble the layers and glue them together.

How To Create A 3D Paper Cut Light Box DIY Project 8

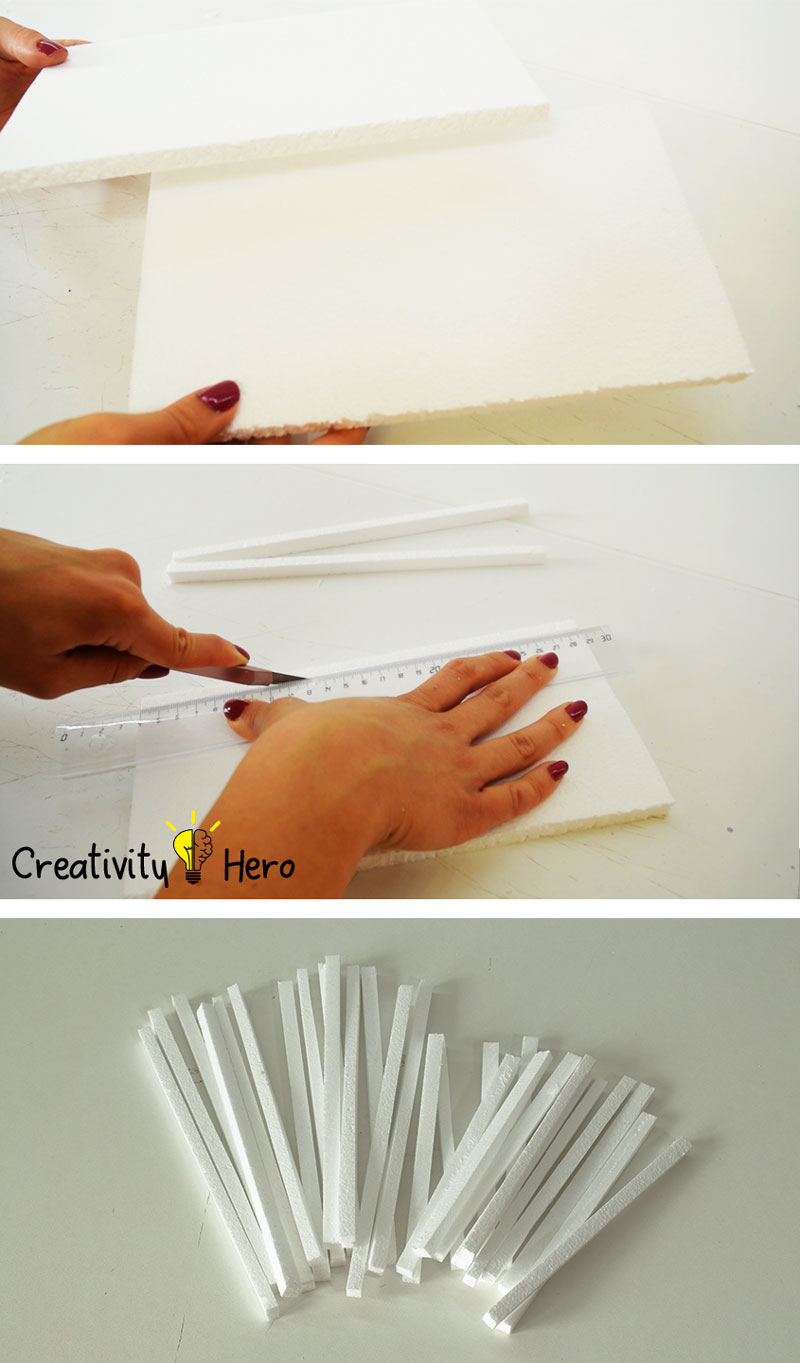
The layers are reassembled with foam spacers in between each one. This gives the image the appearance of depth and creates a 3D effect.

I cut out the foam spacers. They are all 1 cm wide. I cut 12 spacers 25 cm long, and another 12 spacers 18 cm long. There should be 4 spacers on each layer.

How To Create A 3D Paper Cut Light Box DIY Project 9

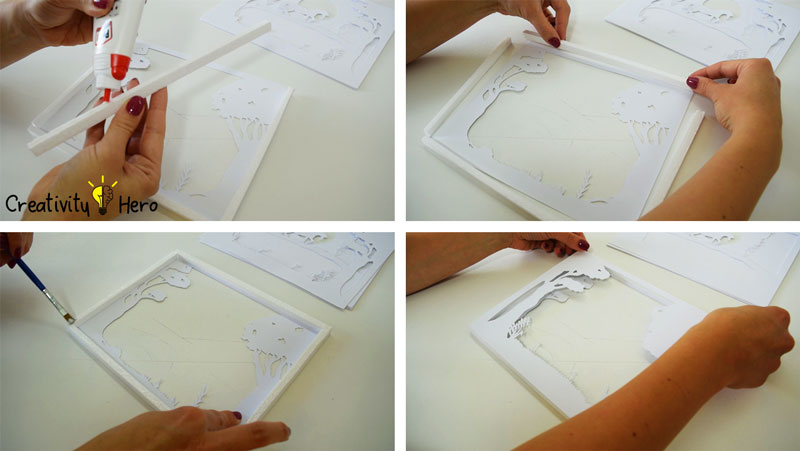
Then, I glued the layers together. I’m going to glue spacers around the edges of the first layer and then glue the next layer on top of it. Make sure the layers are properly lined up. Repeat this process until all the layers are glued together.

How To Create A 3D Paper Cut Light Box DIY Project 10

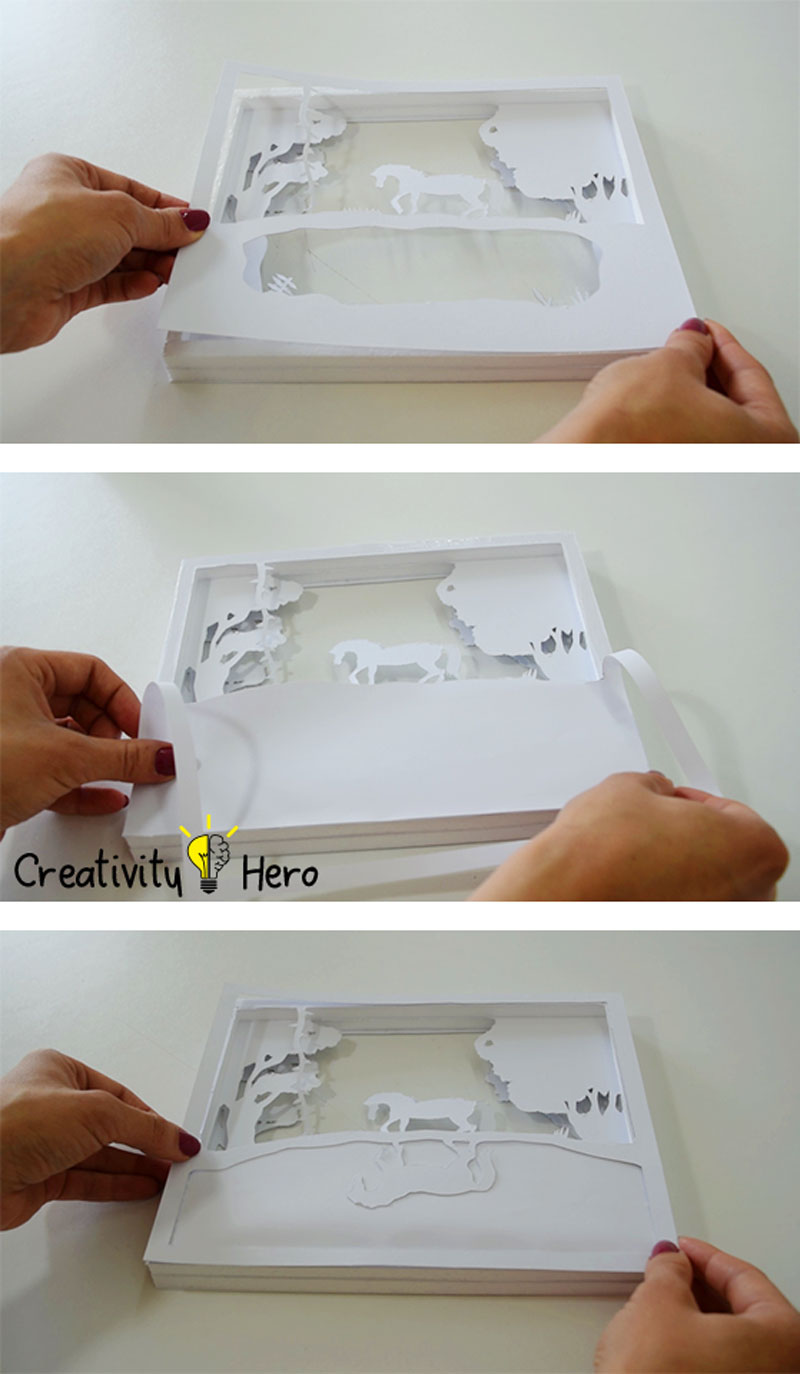
To get a reflection effect, you don’t have to separate those three layers with spacers, instead you should glue them together. The water layer goes behind the horse layer, and then the upside down layer goes behind the water layer.

Now, you have all the layers!

Step 6: Build a wooden box.

How To Create A 3D Paper Cut Light Box DIY Project 11

Now, it is time to build the wooden box. You can also buy pre-made boxes, but I like working with wood, so I created mine.

Measure the thickness of your paper layers plus about 2 cm space for lights, frame and a glass panel. The depth of my box is 8 cm. You can leave more space if you want, because mine was a tight fit.

I used a hand saw to cut 2 pieces 27 cm long, and 2 pieces 20 cm long. Then, I glued the box with a wood glue and used some clamps to hold everything in place while it dried.

Step 7: Build a frame inside the box to keep the glass panel in place.

How To Create A 3D Paper Cut Light Box DIY Project 12

To keep the glass in place I needed to make another frame inside the box with a wood stripe 1 x 1 cm. So, I cut 2 pieces 25 cm long and 2 pieces 18 cm long. I glued them inside the box and left them to dry out.

Step 8: Paint the light box.

How To Create A 3D Paper Cut Light Box DIY Project 13

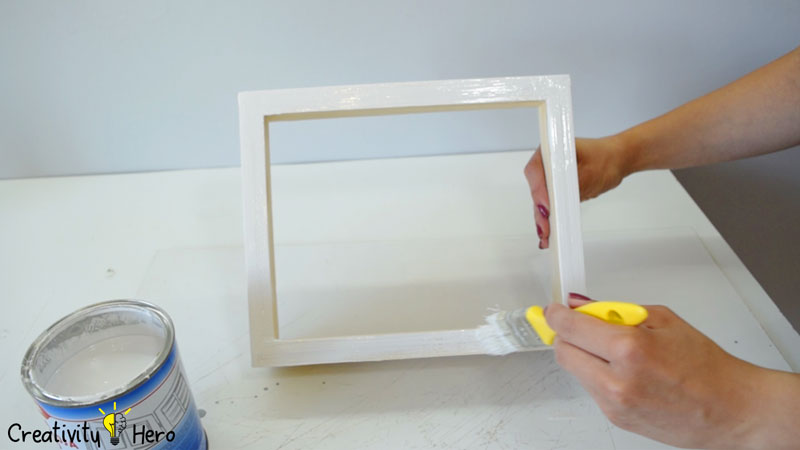
After that, we need to paint the light box. You can paint the outside however you want, but paint the back piece white, so you don’t have to cover it with a piece of card stock. I painted the entire box white.

Step 9: Make a back for the light box.

How To Create A 3D Paper Cut Light Box DIY Project 15

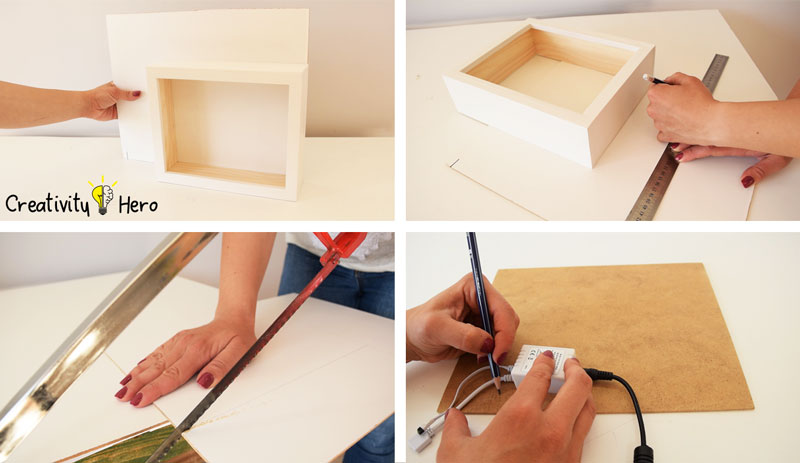
For the back piece I used a piece of plywood, white on one side, so I needed to paint the back side, because as I already said, I wanted my box to be completely white. The dimensions of the plywood are 27 by 22 cm, 3 mm thick.

I made a 5 by 15 mm hole for the lights power to fit through.

Step 10: Put all the pieces together.

How To Create A 3D Paper Cut Light Box DIY Project 16

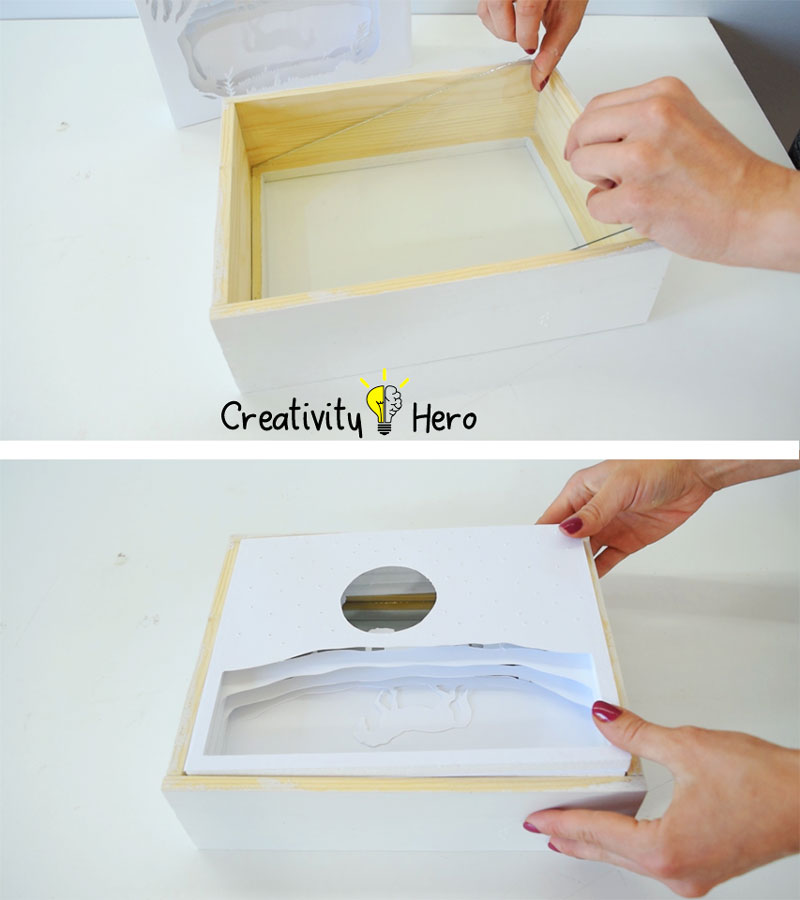
Once they’re dry, I can put the glass into the box, and then push the card stock and foam core layers into the light box until they touch the glass.

Don’t forget to clean the glass from the inside, because you won’t be able to remove the layers without ruining them.

Step 11: Put some lights in the box.

How To Create A 3D Paper Cut Light Box DIY Project 17

Now, let’s put some lights in the box.

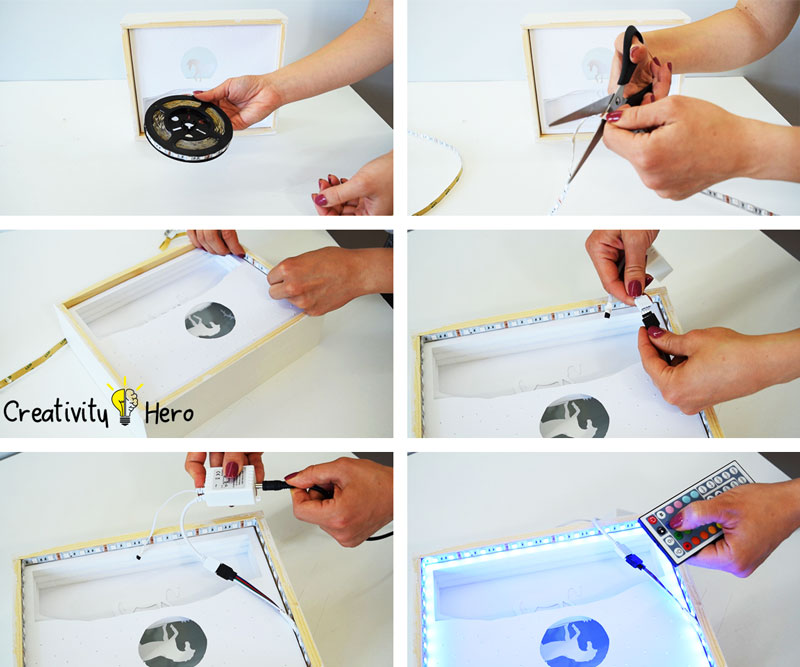
I had 200 grams card stock, and I wasn’t sure how much the light will pass through all the layers. So, I decided to put a light strip all around the box. I cut the lights to the right length, around 90 cm and stuck inside the box. You can put them wherever you want!

You can use different light sources, for example fairy lights, or LED lights, it depends on you. I highly recommend using RGB LED strip lights because they are self-adhesive, flexible, you can cut them to size, and you can easily change colors, which will provide better effect. Also, they barely generate any heat. So, they are perfect for this kind of project.

How To Create A 3D Paper Cut Light Box DIY Project 18

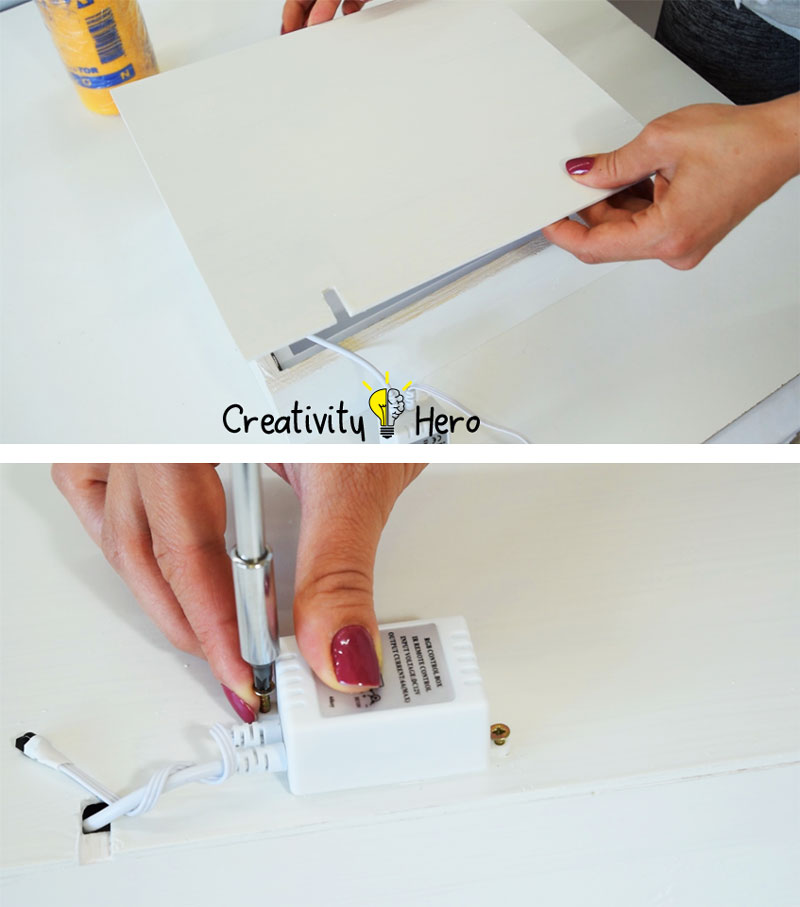
Once I’m done with the lights, I tread the power cord through and glued the back down.

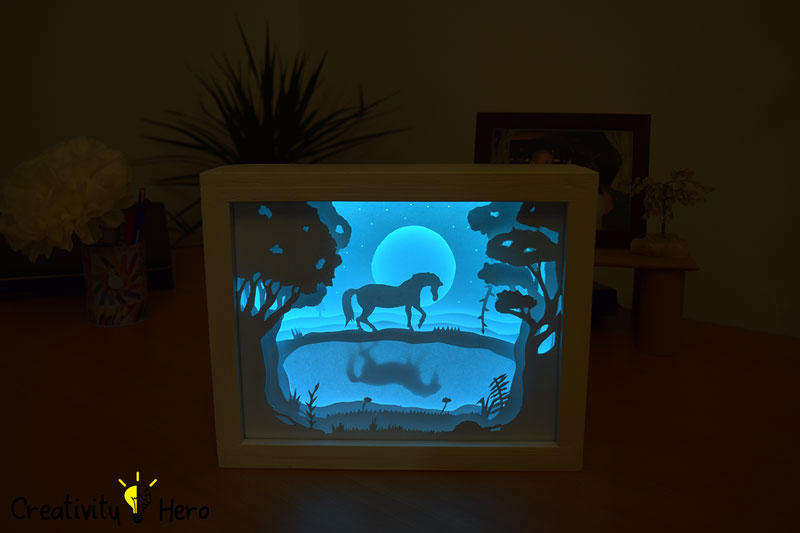
Now your 3D paper cut light box is complete.

Turn your light box on and admire the amazing result!

How To Create A 3D Paper Cut Light Box DIY Project 19

Thank you so much for watching. I hope you enjoyed this wonderful DIY. If you liked this video give me a thumbs up and subscribe to my YouTube channel.
10 Simple Life Hacks With Toilet Paper Rolls

0
10 Simple Life Hacks With Toilet Paper Rolls 0

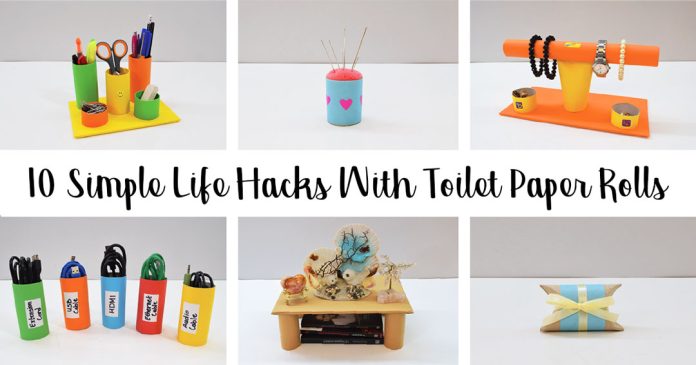
In this video I’m going to show you 10 simple life hacks with toilet paper rolls.

We all know the obvious use for toilet paper, but what about those toilet paper rolls that you throw away? Stop doing that! Those paper rolls can come in handy.

From pretty packaging for gifts to handy hacks that are guaranteed to make your life easier, here are 10 brilliant toilet paper roll life hacks you don’t want to miss!

Types of tools I used:

Disclosure: As an Amazon Associate I earn from qualifying purchases.

Related: DIY Glass Bottle Home Decor – 3 Simple Ideas

1. Create a pretty desk organizer.

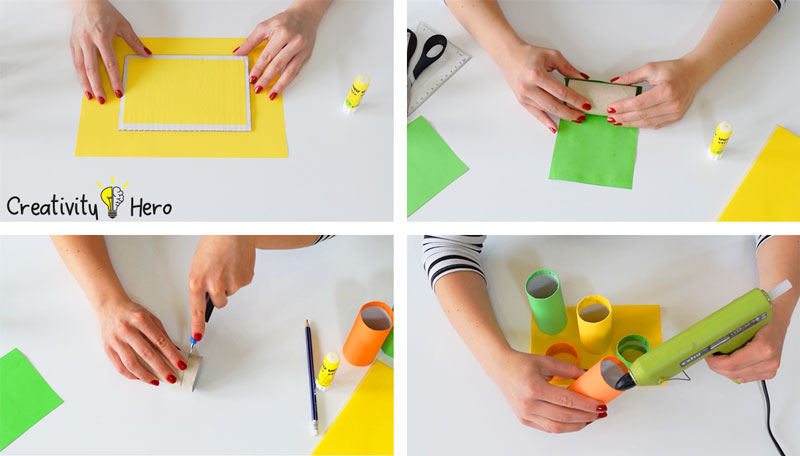
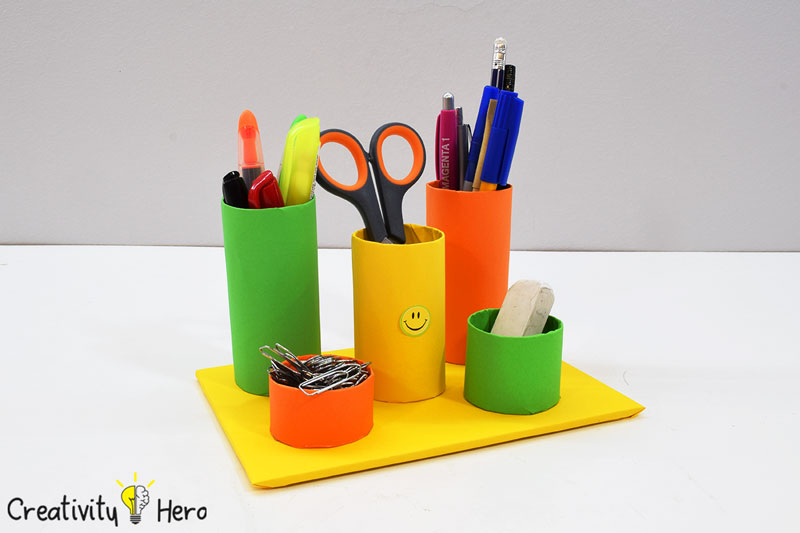
This is such an amazing hack. Cut toilet paper rolls to different heights, wrap them in fun papers, glue them on a piece of cardboard and make a cute organizer for your desk.

10 Simple Life Hacks With Toilet Paper Rolls 111

10 Simple Life Hacks With Toilet Paper Rolls 1

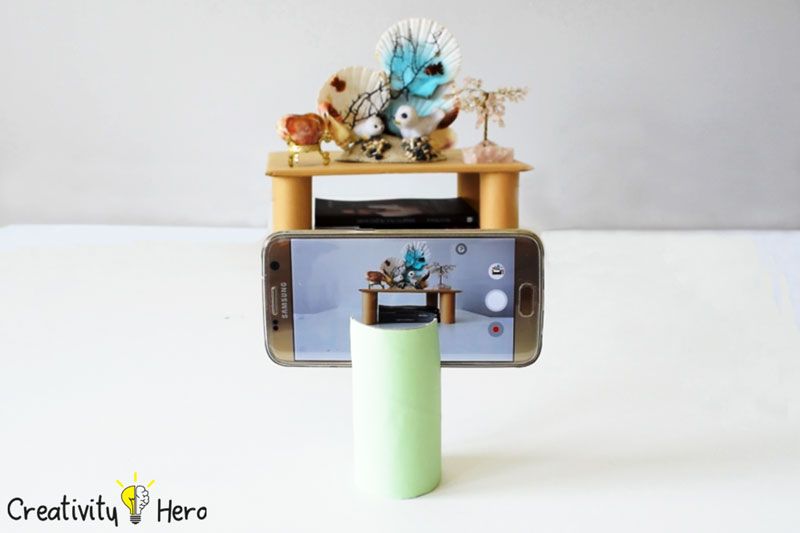
2. Make a functional phone holder.

Although you can always buy a phone holder, it would be nice to be able to create one by yourself. This easy DIY phone holder will ensure stability while taking pictures and recording videos. And it only takes 1 minute to make it.

10 Simple Life Hacks With Toilet Paper Rolls 222

10 Simple Life Hacks With Toilet Paper Rolls 2

3. Build a simple desk shelf.

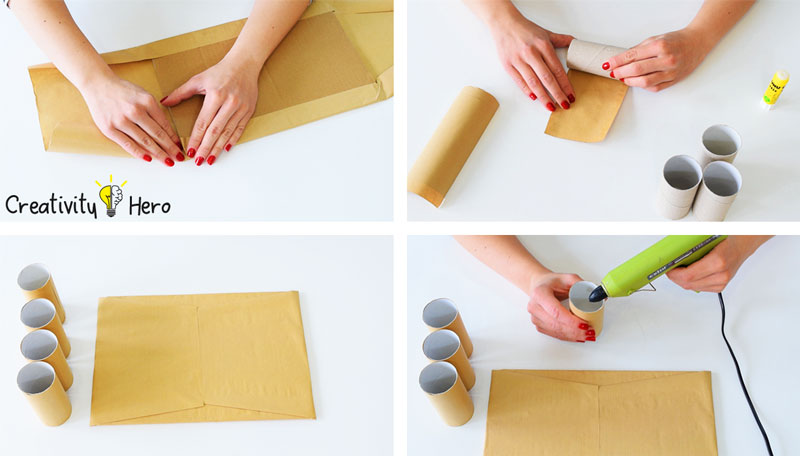
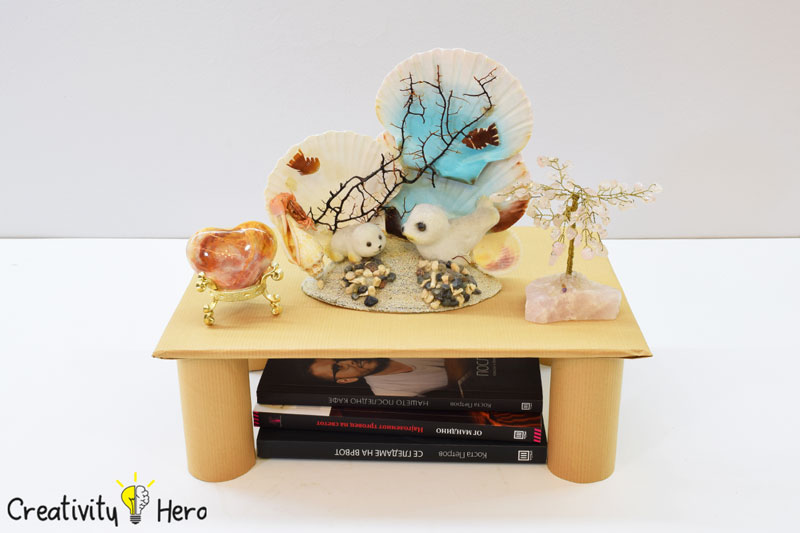
You only need 4 paper rolls and 1 piece of cardboard to make this beautiful desk shelf. It’s one of my favorite projects out of toilet paper rolls because it’s a space saver and a perfect decoration for my desk.

10 Simple Life Hacks With Toilet Paper Rolls 333

10 Simple Life Hacks With Toilet Paper Rolls 3

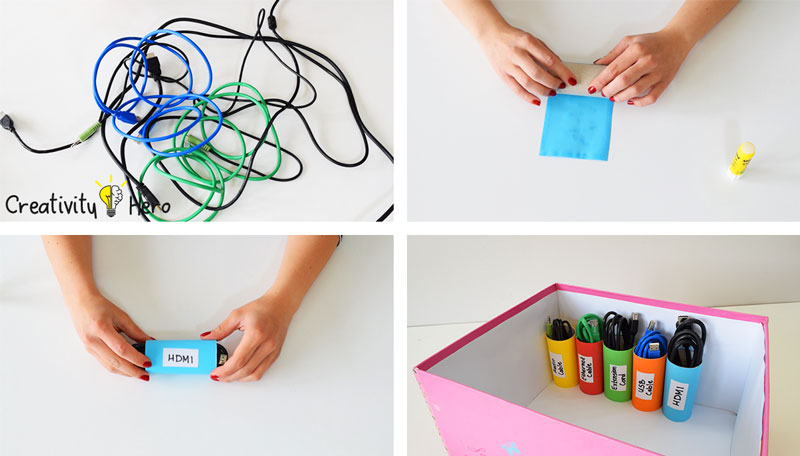
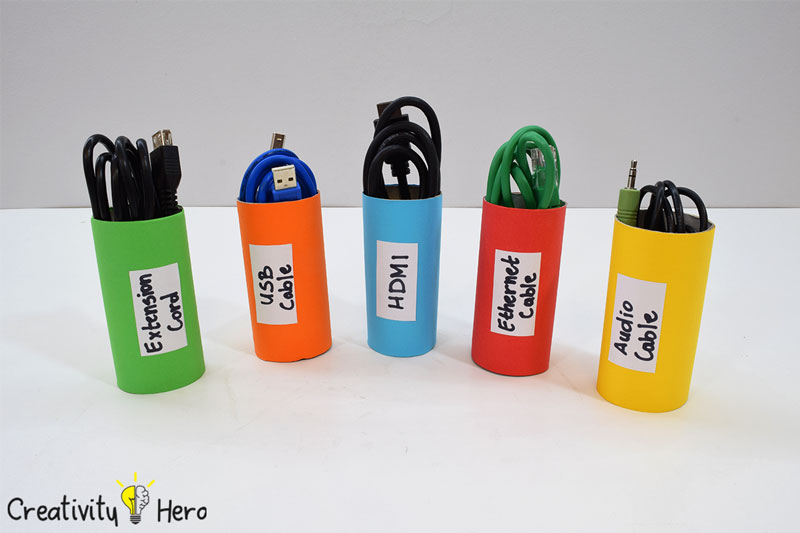
4. Keep cords organized.

This is a great general hack. Nothing can be more out-of-control than stray cords. When you don’t need them, instead of letting them tangle and take up room, use toilet paper rolls to separate them into! You can also make them look much prettier by wrapping them in papers with different colors and mark each one of them.

10 Simple Life Hacks With Toilet Paper Rolls 444

10 Simple Life Hacks With Toilet Paper Rolls 4

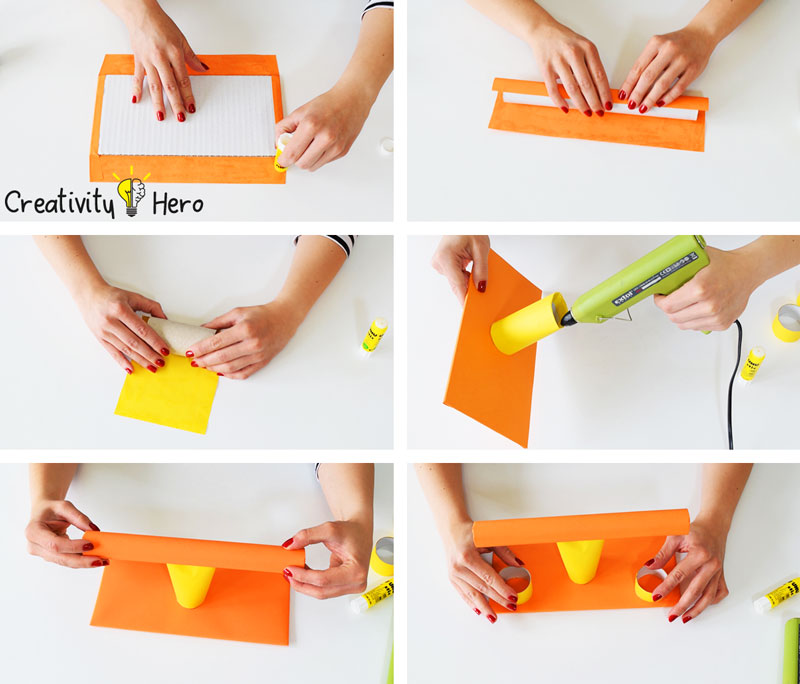
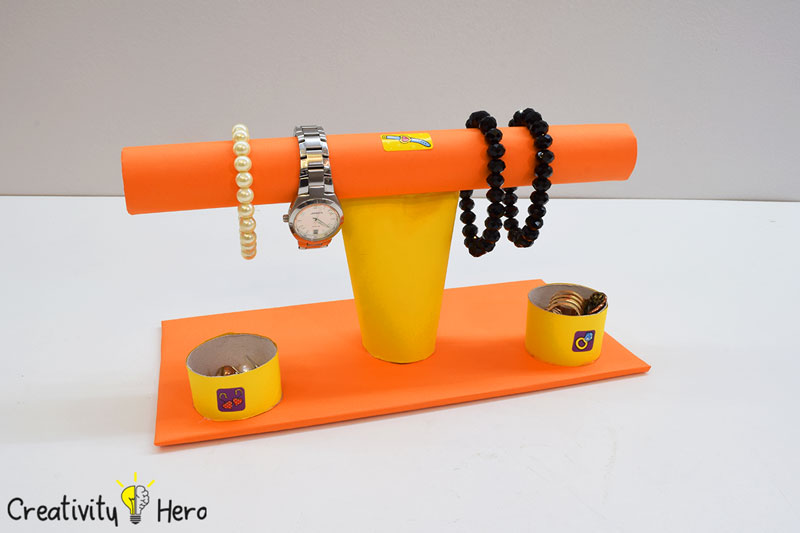
5. Make a lovely jewelry display.

This project is such a handy craft! Never let your jewelry get disorganized and tangled again with this DIY jewelry display. I made it out of cardboard rolls from paper towels and toilet paper.

The best thing of all is that you can personalize it any way you’d like! I use mine to display bracelets, rings and earrings.

10 Simple Life Hacks With Toilet Paper Rolls 555

10 Simple Life Hacks With Toilet Paper Rolls 5

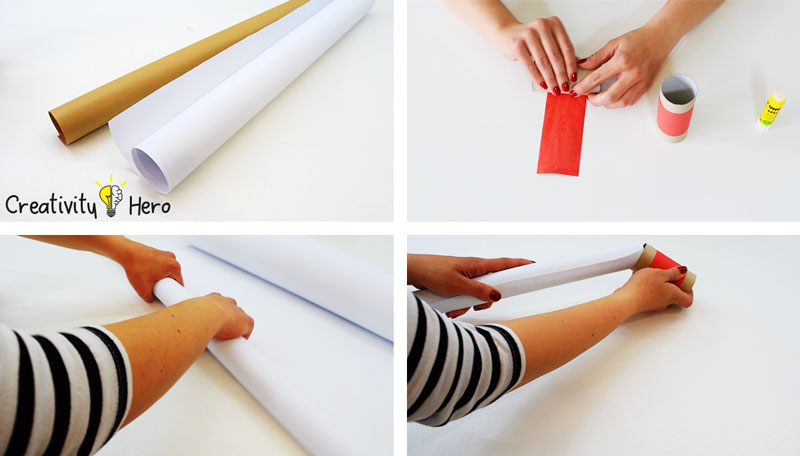
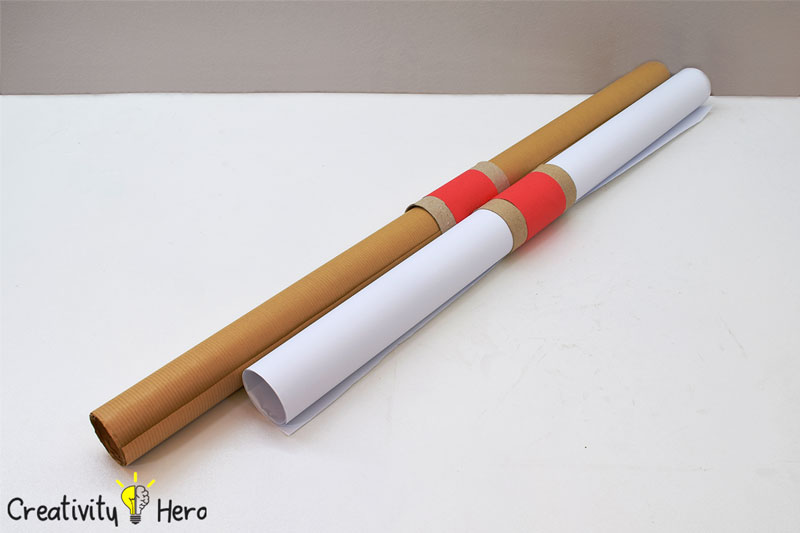
6. Wrap paper in place.

Wrapping paper can cost a pretty penny, and when we use it and toss it aside, the paper tends to unroll, tear and become unusable. So, you want to store it safely so that it doesn’t get crumpled in between birthdays or holidays.

Keep wrapping paper in place by securing it around the middle with a toilet paper roll.

10 Simple Life Hacks With Toilet Paper Rolls 666

10 Simple Life Hacks With Toilet Paper Rolls 6

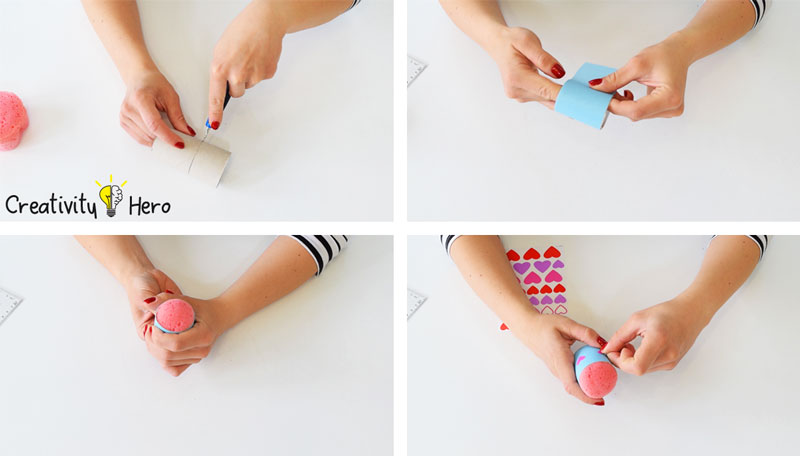
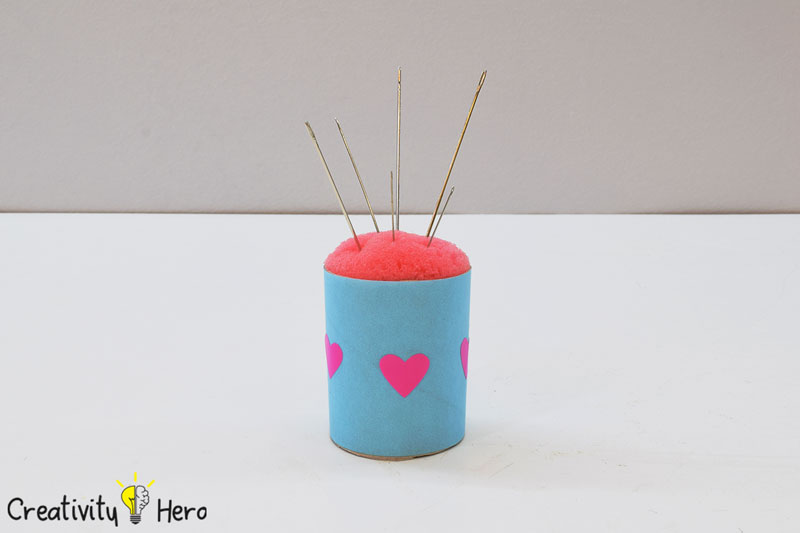
7. Create a cute pincushion.

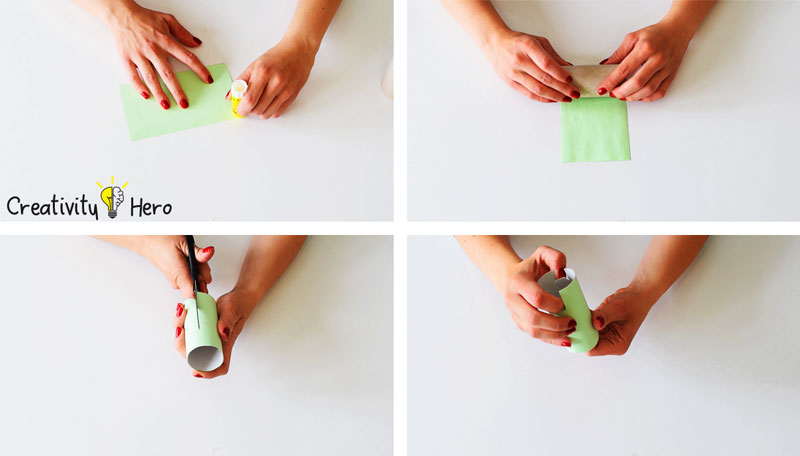
Keep your needles and pins in a pincushion at all times to avoid accidental punctures. This pincushion is very easy to make, all you need is a toilet paper roll wrapped in a self-adhesive paper, and a sponge.

10 Simple Life Hacks With Toilet Paper Rolls 777

10 Simple Life Hacks With Toilet Paper Rolls 7

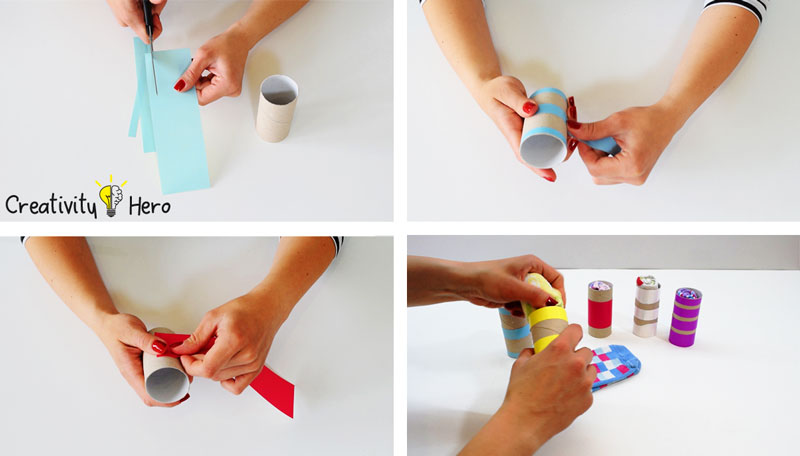
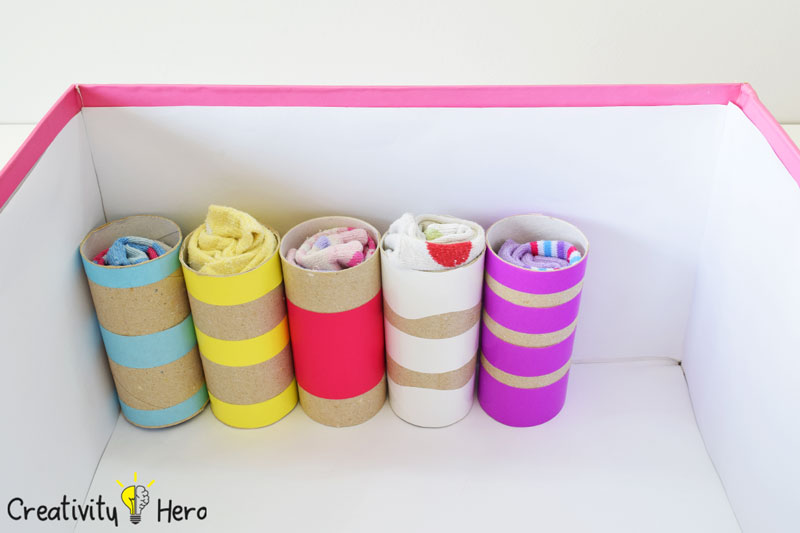
8. Keep socks organized.

Keep your socks organized and untangled by separating them into toilet paper rolls. Add a decorative touch with tape or paper and put your socks inside the rolls.

10 Simple Life Hacks With Toilet Paper Rolls 888

10 Simple Life Hacks With Toilet Paper Rolls 8

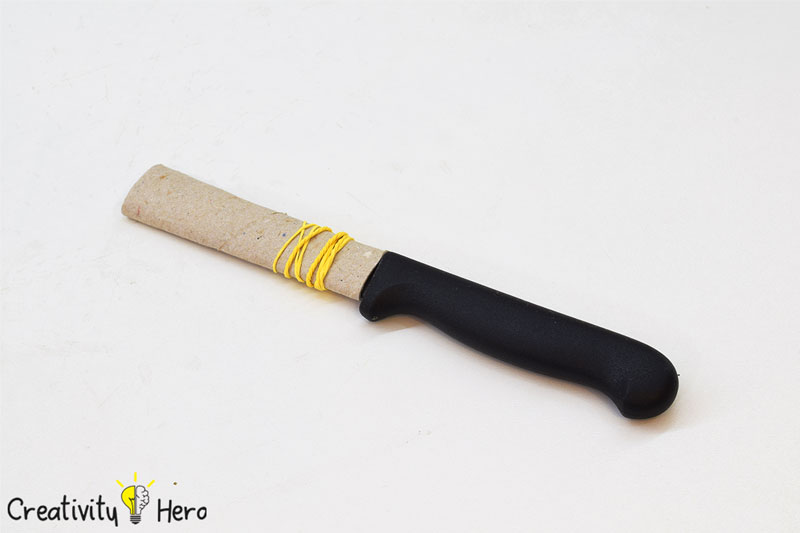
9. Secure sharp knifes.

If you need to secure sharp knifes and keep them away from your kids, a toilet paper roll and a rubber band is the perfect combination to make a cheap, protective option.

10 Simple Life Hacks With Toilet Paper Rolls 999

10 Simple Life Hacks With Toilet Paper Rolls 9

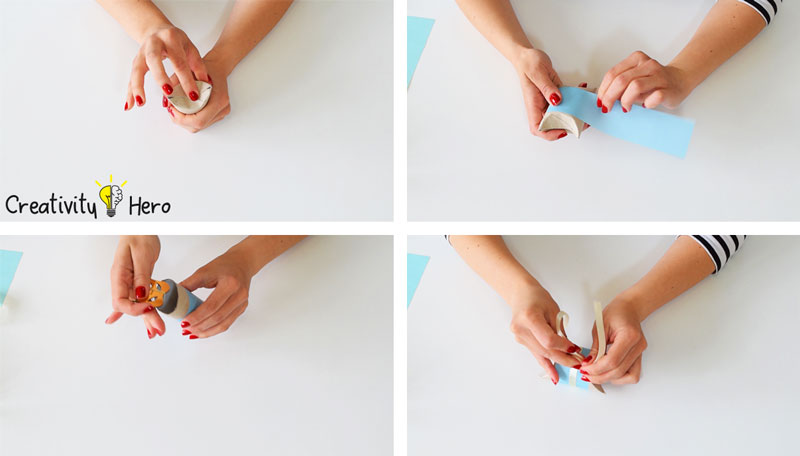
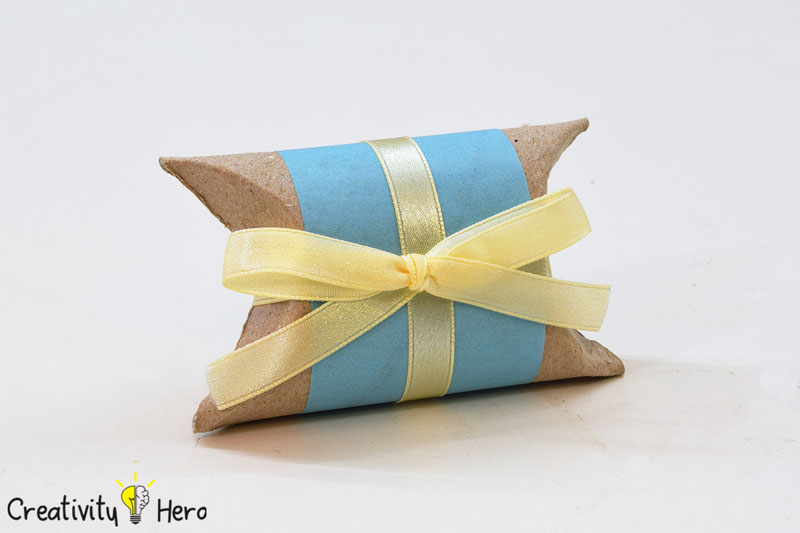
10. Create a pillow gift box.

Create pillow boxes for gifts and small items. Decorate them with scrapbook paper, tape, twine, ribbon or something else to make them look prettier.

10 Simple Life Hacks With Toilet Paper Rolls 100

10 Simple Life Hacks With Toilet Paper Rolls 10

That little toilet paper roll can be used for so many amazing DIY projects.

Have you ever used your creativity to make some simple and useful DIYs out of toilet paper rolls? Share your ideas in the comments section below.

Thank you so much for watching! If you like this video give me a thumbs up and subscribe to my YouTube channel.
How To Make A Hanging Clothespin Photo Frame | DIY Project

0
How To Make A Hanging Clothespin Photo Frame DIY Project 0

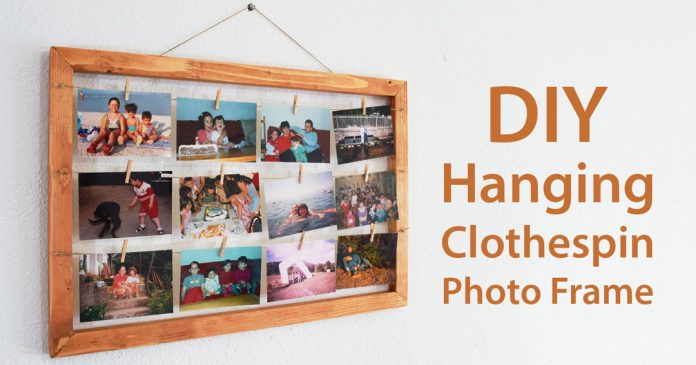
In this video I’m going to show you how to make a really cute hanging clothespin photo frame. You can create a perfect addition to your home with this amazing DIY frame.

It’s simple, easy and fun to make and my favorite part of this project is hanging the photos that remind me of my childhood.

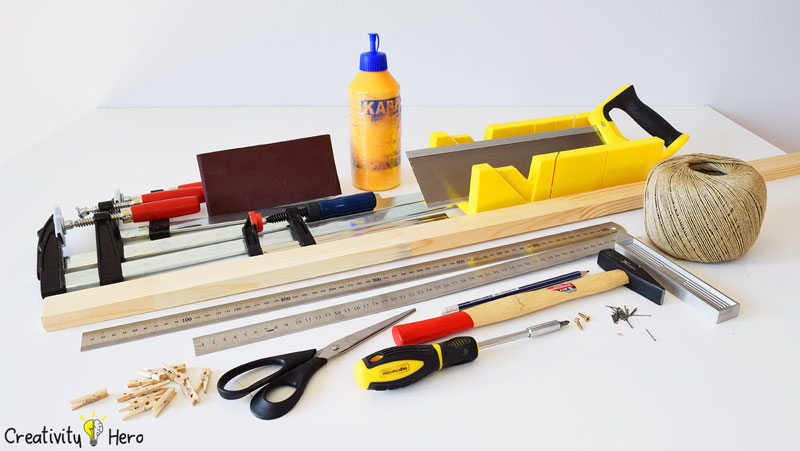
Here are the materials I used:

How To Make A Hanging Clothespin Photo Frame DIY Project 1

Types of tools I used:

Disclosure: As an Amazon Associate I earn from qualifying purchases.

Related: DIY Colorful Rectangular Wooden Wall Shelf

Dimensions:
– Frame dimensions: 60 x 40 cm
– Inner space: 54 x 34 cm

Twine strips distance (position of the nails from top to bottom):
– 2 cm
– 12.5 cm
– 23 cm

Frame hanger (position of the screws):
– 12 cm on both ends

Step 1: Measuring and cutting the wood strip using a hand saw and a miter box.

How To Make A Hanging Clothespin Photo Frame DIY Project 2

This wood strip is 3 cm wide and 2 cm thick.  The dimensions of the frame are 60 x 40 centimeters, so I measured two 60s and two 40s with a ruler.

Then I cut those pieces at a 45 degree angle using a handsaw and a miter box. The miter box helped me a lot because it has precut slits, which guide the saw in the correct angle.

Once I’m done cutting I’m going to sand down the miters lightly with 120 grit sandpaper to make sure they’re smooth and line up well. So, I have 4 perfectly aligned pieces and I just have to glue them together.

Step 2: Gluing the joints.

How To Make A Hanging Clothespin Photo Frame DIY Project 3

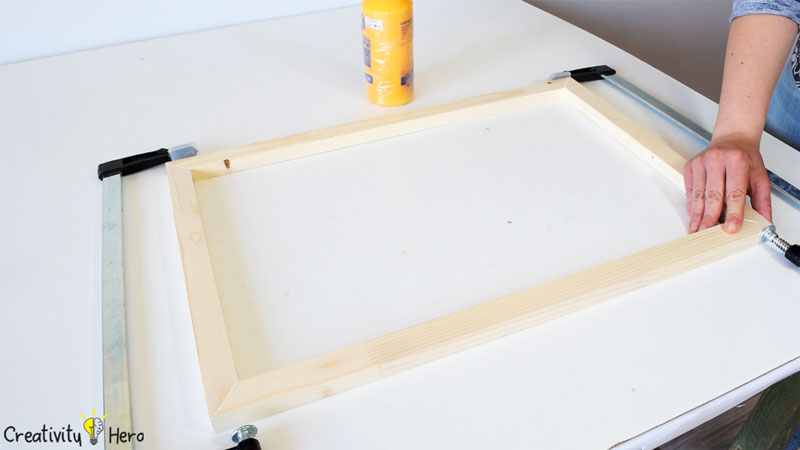
I glued all the joints at the same time, using a wood glue and 2 clamps. I wasn’t sure about clamping all the joints with f-clamps, but it actually turned out pretty well.

It needed several hours to completely dry.

Step 3: Sanding the frame.

How To Make A Hanging Clothespin Photo Frame DIY Project 4

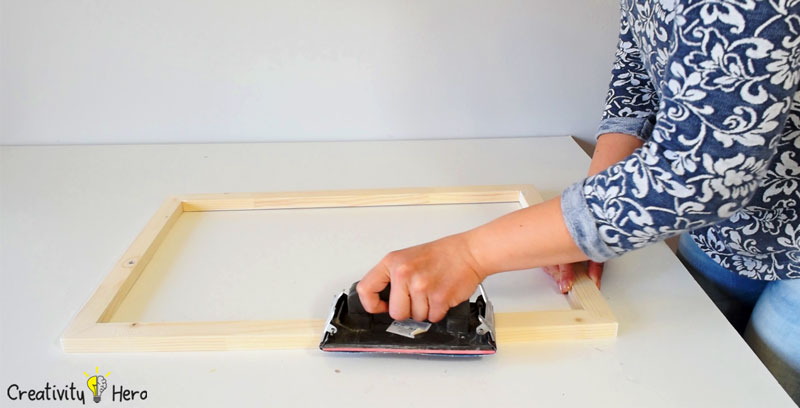
To get rid of wood splinters and grains I am going to sand the frame first with a 120 grit sandpaper, and then with 220 to smooth the surface before applying stain.

Step 4: Staining the frame with wood stain.

How To Make A Hanging Clothespin Photo Frame DIY Project 5

I can now move on to staining it with wood stain.

I just carefully applied a nice coat of stain with a rack making sure to cover the entire frame. I gave the stain the entire day to dry.

Step 5: Marking all the points where the nails and the screws will be driven into.

How To Make A Hanging Clothespin Photo Frame DIY Project 6

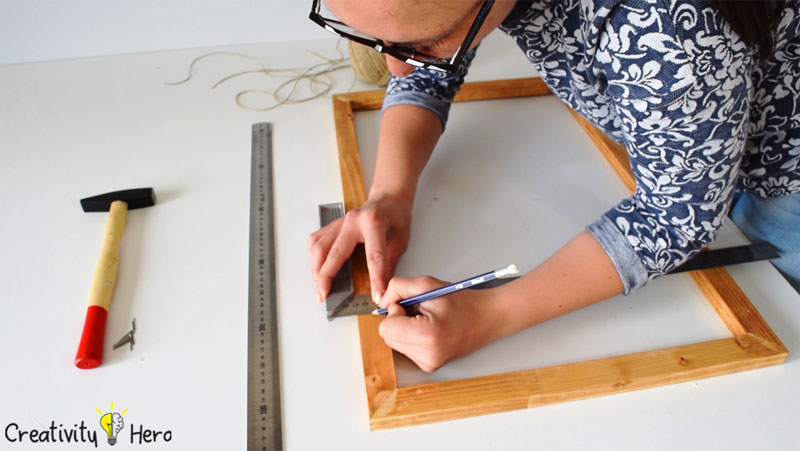
Once the frame has the opportunity to dry, it is time to mark all the points where the nails and the screws will be driven into.

This frame has a 54 x 34 cm inner space, so I have to remember that and divide it properly, making 3 rows for the photos.

Be sure to measure and mark with a precision on both sides of the frame to keep your rows of twine straight.

I wanted at least half centimeter space between each row of photos, which will give a nice and even look of the frame.

Step 6: Driving the nails and the screws into the frame.

How To Make A Hanging Clothespin Photo Frame DIY Project 7

I’m driving the nails into the wood with a mallet, leaving enough space so that the twine could be easily wrapped and knotted around them.

Also, I’m driving two screws on the back side of the frame with a screwdriver. I’ll use them to hang the frame on the wall.

Step 7: Wrapping and knotting the twine.

How To Make A Hanging Clothespin Photo Frame DIY Project 8

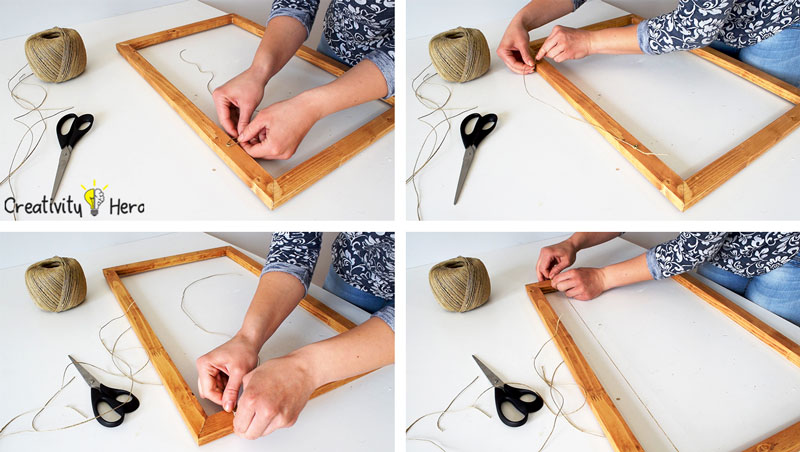
The next step is wrapping and knotting the hemp twine around the nails and the screws. I needed to use thin twine because these clothespins are so tiny.

Make sure to cut the strings a little longer, so it would be easier to make tight knots without using any glue or stapler.

First, I made the frame hanger by fastening one string around the screws.

Then, I fastened the other strings to the nails.

You can make the twine straight or you can leave it a bit loose, it’s all up to you.

Step 8: Hanging the photos with mini clothespins.

How To Make A Hanging Clothespin Photo Frame DIY Project 10

Now I’ll hang the photos with these mini clothespins that I got online.

I have total of 12 photos, 3 rows with 4 photos in a row. I’ve used some old photos, a memories from my childhood. The size of the photos is 8.9 by 12.7 cm.

And that’s it.

Now I have my own DIY clothespin photo frame that fits my room perfectly. I’m happy with how it turned out.

I hope you enjoyed this simple DIY project. If you liked this video give me a thumbs up and subscribe to my YouTube channel.
DIY Glass Bottle Home Decor – 3 Simple Ideas

0
DIY Glass Bottle Home Decor – 3 Simple Ideas 0

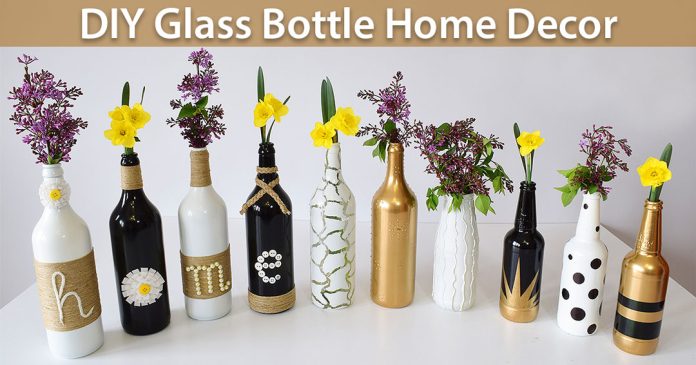
Today I’m going to show you how to create a glass bottle home decor using simple materials available at your home.

This fantastic home decor is pretty easy to make and fairly inexpensive.

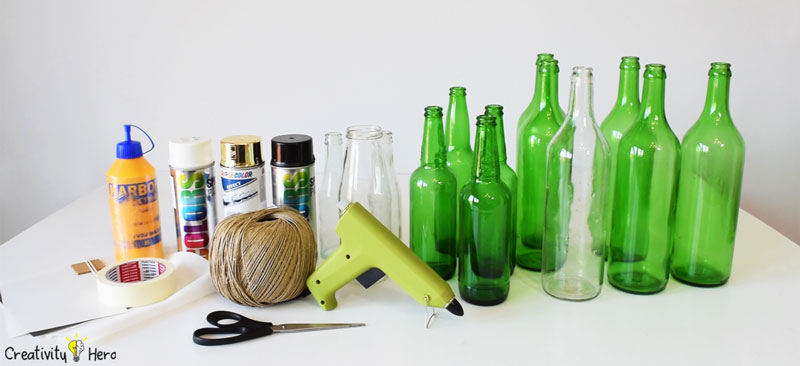
Here are the materials I used:

DIY Glass Bottle Home Decor – 3 Simple Ideas 0

Types of tools I used:

Disclosure: As an Amazon Associate I earn from qualifying purchases.

Related: 10 Simple Life Hacks With Toilet Paper Rolls

I’ll show you 3 different methods of creating some wonderful home décor out of bottles to brighten up any room.

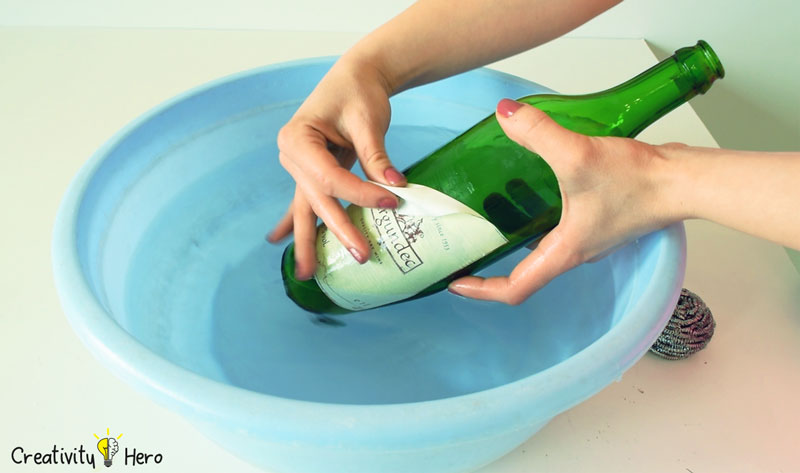
For this project we need clean glass bottles. So, I peeled up all the labels. To take off difficult labels, I used hot water and metal scrubber.

DIY Glass Bottle Home Decor – 3 Simple Ideas 1

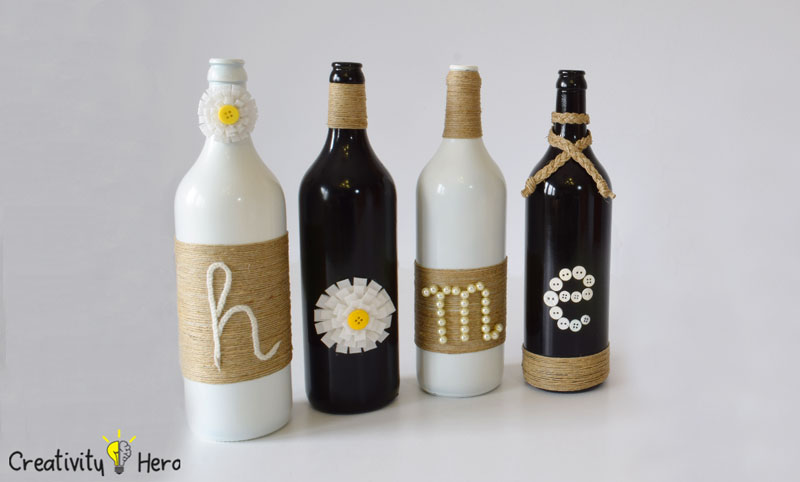
Method 1: Wrapping bottles with twine

The first method is wrapping bottles with twine.

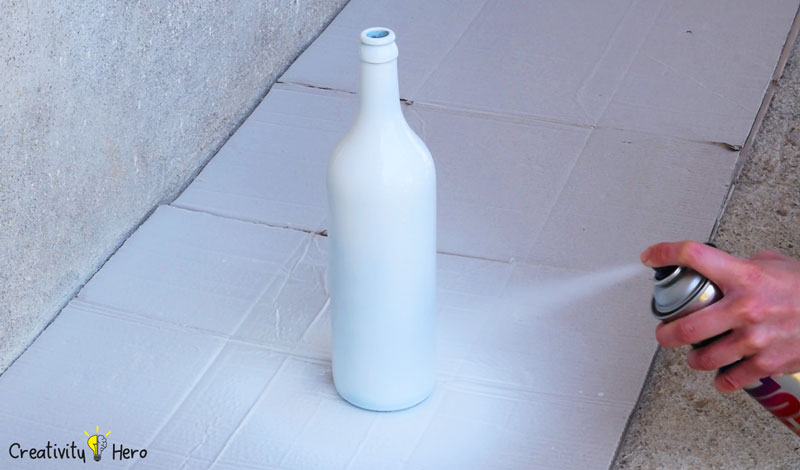
The very first thing to do is to spray paint the bottles. It’s crucial to work outside when using it. I made 2 white and 2 black bottles.

DIY Glass Bottle Home Decor – 3 Simple Ideas 2

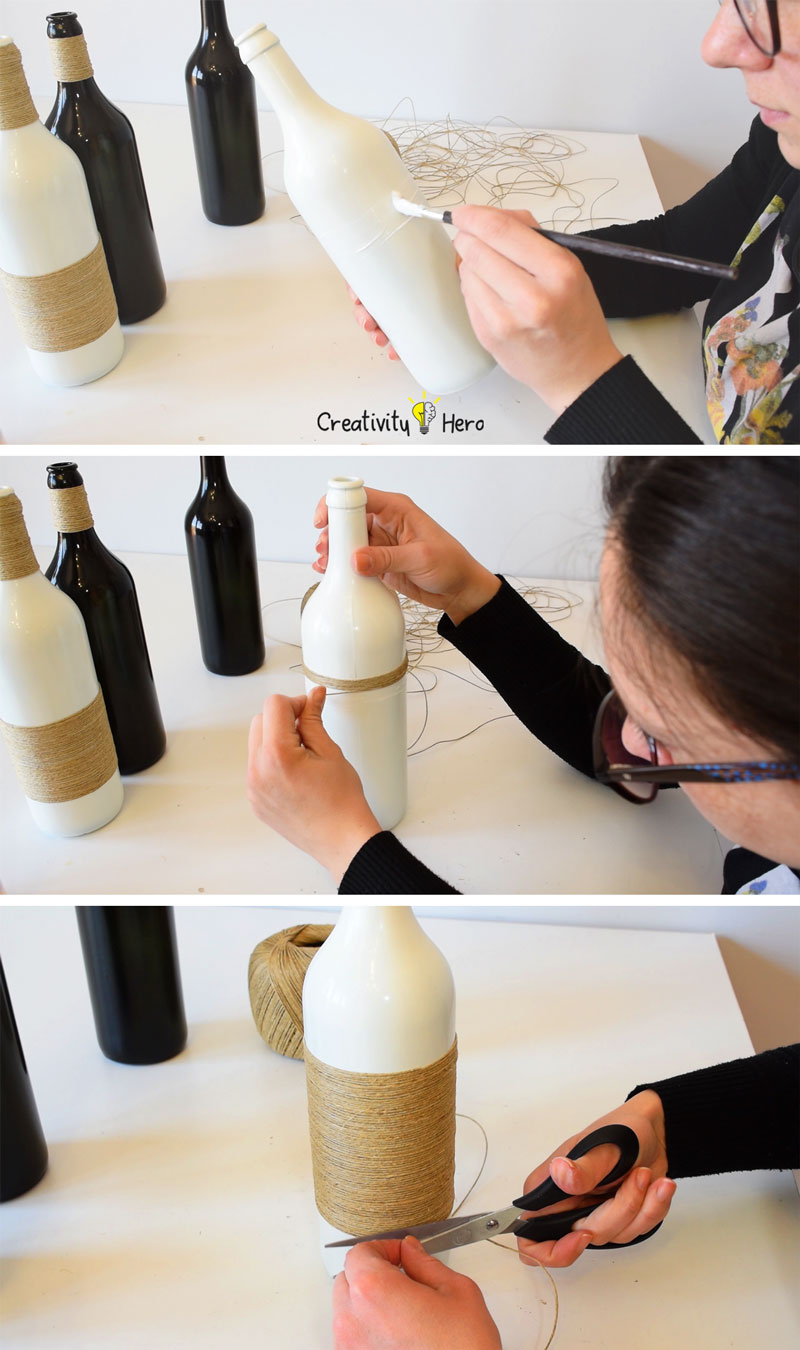
Now, I’m just going to spread a thin layer of glue in a small section, around 2 cm. We just want to work in small sections at a time so it doesn’t dry too fast. Be careful with the glue, you don’t want to put too much of it, because you’ll make a real mess.

DIY Glass Bottle Home Decor – 3 Simple Ideas 3

I’ll start wrapping around, making sure I don’t leave any space. Take your time at the very beginning because you want it to look very nice. You just want to make sure that it lines up well. Push it a little bit with your fingers if it gets off track and if there’s a lot of space in between your string.

Once you’re done wrapping you need to cut it on the same side where the beginning is and then make sure the end of the twine is secured.

I made a braid out of the twine and glued it to the neck of the last black bottle.

Let them dry for a little while before putting letters on the bottles.

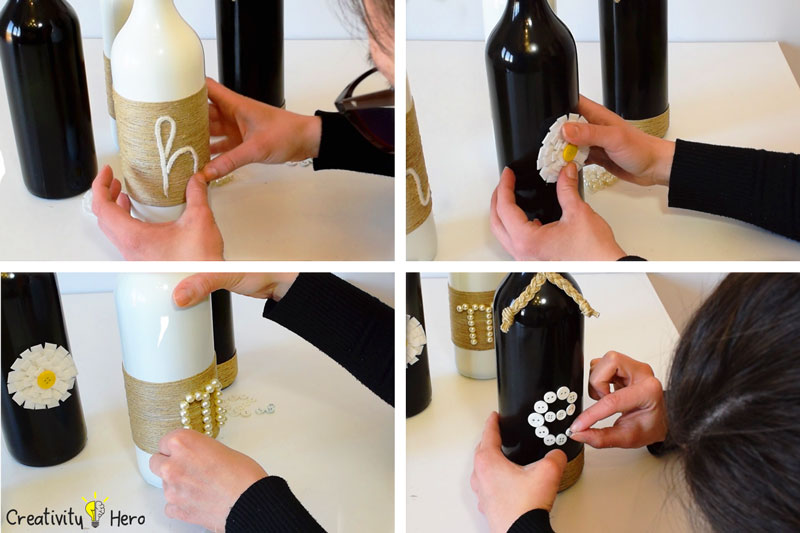
Now it’s time to create the letters. I’m going to make white letters using some pearls, buttons, yarn, and handmade flower. I also use a white glue and a hot glue.

DIY Glass Bottle Home Decor – 3 Simple Ideas 4

So, I started making the letter H with white yarn. I stuck it to the bottle with white glue because it allows me to adjust the yarn very easily and make a perfect letter.

Then to make the letter O I used this white flower that I made myself. It is actually very easy and fun to make.

I used a strip of fabric 3 cm wide and around 40 cm long. Then, I folded the fabric in half and glued it with a hot glue. I cut the loops about halfway along. I made a circle from a thin cardboard and glued the fabric around it, creating a flower. At the end, I added yellow button to make the flower look more realistic.

For the letter M I used these pearls from an old necklace, and carefully glued them.

Finally for the letter E I use white buttons. The buttons were actually color buttons but I painted them white.

Also, I glued small flower to the neck of the first white bottle to make it more pretty.

DIY Glass Bottle Home Decor – 3 Simple Ideas 13

These are my favorite bottles. I really like them.

Method 2: Creating patterns with tape and self-adhesive paper

The second method is creating patterns with tape and self-adhesive paper.

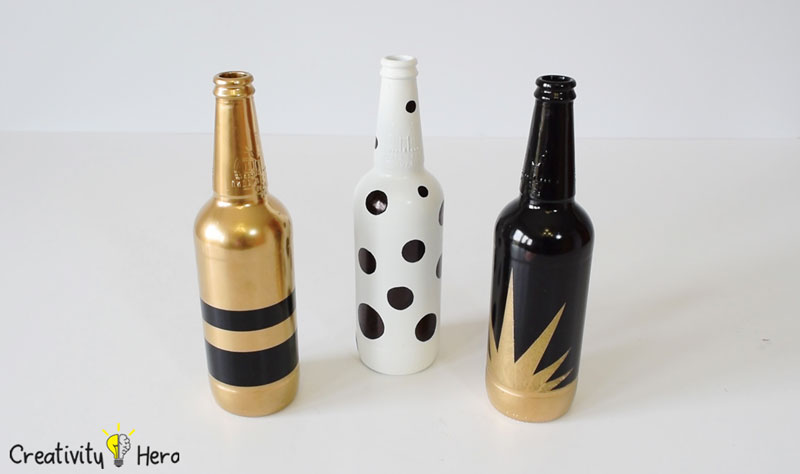
First, I spray painted the beer bottles with black and gold spray paint.

DIY Glass Bottle Home Decor – 3 Simple Ideas 5

To take it to the next level, I used self-adhesive paper and tape and started making patterns.

DIY Glass Bottle Home Decor – 3 Simple Ideas 6

I’ve cut stripes, different sizes of circles and triangles and stuck them to the bottles creating stripes, dots and a sun burst. Use your imagination to create whatever patterns you want. Make sure your tape and paper are not too sticky, otherwise the paint will come out when you peel them up.

After that, I spray painted the bottles with different colors to create contrast with the patterns.

DIY Glass Bottle Home Decor – 3 Simple Ideas 7

Finally, I removed the tape and the paper of the bottles carefully.

DIY Glass Bottle Home Decor – 3 Simple Ideas 8

Now I’ve got a beautiful piece of art.

Method 3: Decorating bottles with hot glue and white glue

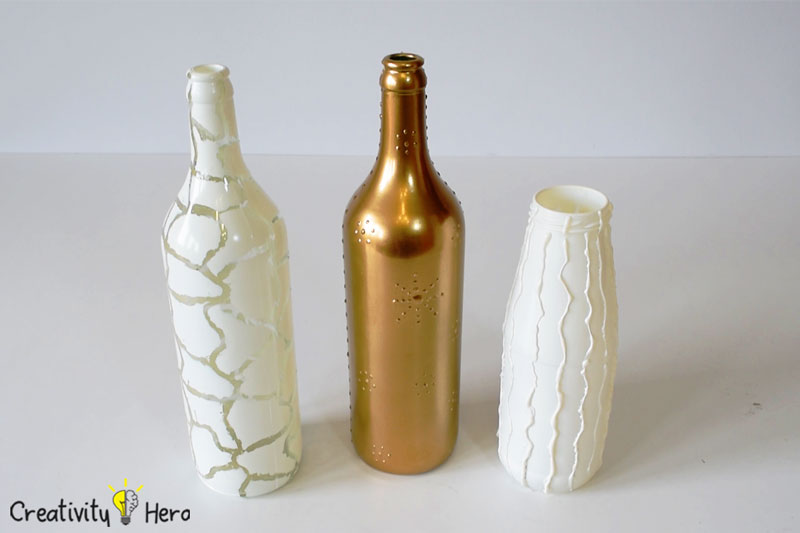
The third method is decorating bottles with white glue and hot glue. Just to warn you: It takes a lot of skill to work with a glue gun, but it’s worth the try.

DIY Glass Bottle Home Decor – 3 Simple Ideas 9

On the first bottle I’m going to make an abstract pattern. Like abstract rectangles. You can make whatever you want. There are no rules. But I think the abstract ones are the easiest.

I also did the other bottle with hot glue, making some kind of vertical curved lines.

For the third one I used white glue to create dotted designs that pop out from the bottle.

I really enjoyed doing this. I let them dry for about 30 minutes before spray painting.

DIY Glass Bottle Home Decor – 3 Simple Ideas 10

For the bottles covered with hot glue I used white spray paint, and for the one covered with white glue I used gold one.

The final step is to take the glue off of the bottles. It came off very easy. I decided to leave the other white bottle as it is, because I kinda liked its design.

DIY Glass Bottle Home Decor – 3 Simple Ideas 11

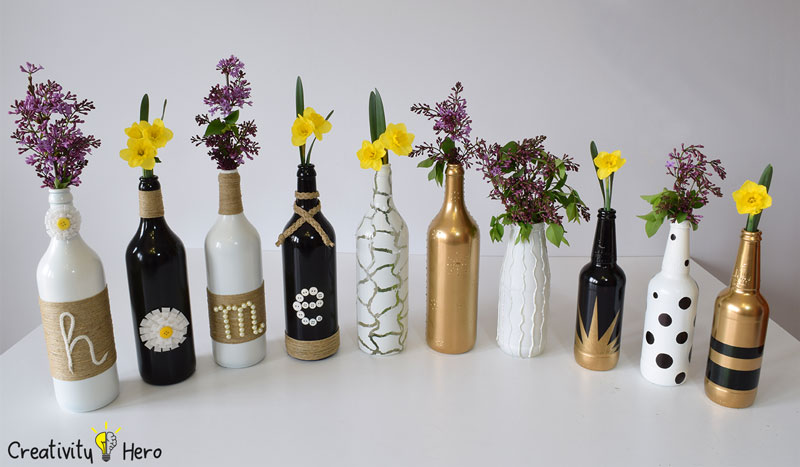
So, at the end I added these beautiful flowers to give them more special touch.

DIY Glass Bottle Home Decor – 3 Simple Ideas 12

It took me whole day to finish all the bottles, but the end result is amazing.

I hope you enjoyed this beautiful DIY. If you liked this video give me a thumbs up and subscribe to my YouTube channel.
How To Build A Wooden Desk Lamp | DIY Project

15
How To Build A Wooden Desk Lamp DIY Project Featured

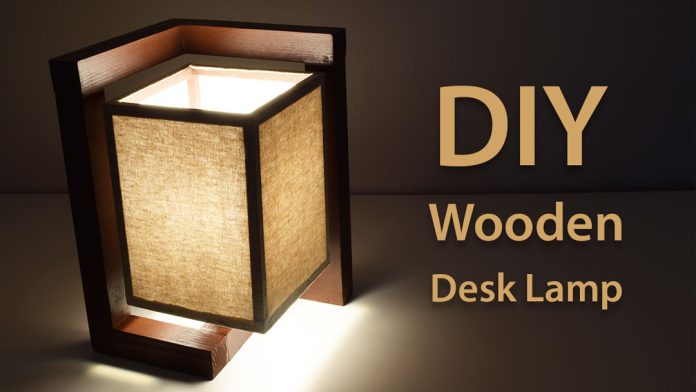
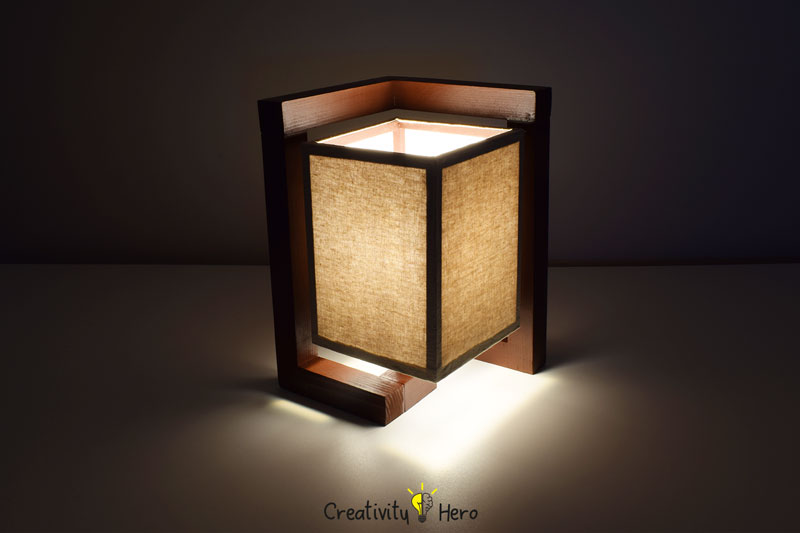
Today I am going to show you how to make this gorgeous looking wooden desk lamp using simple hand tools.

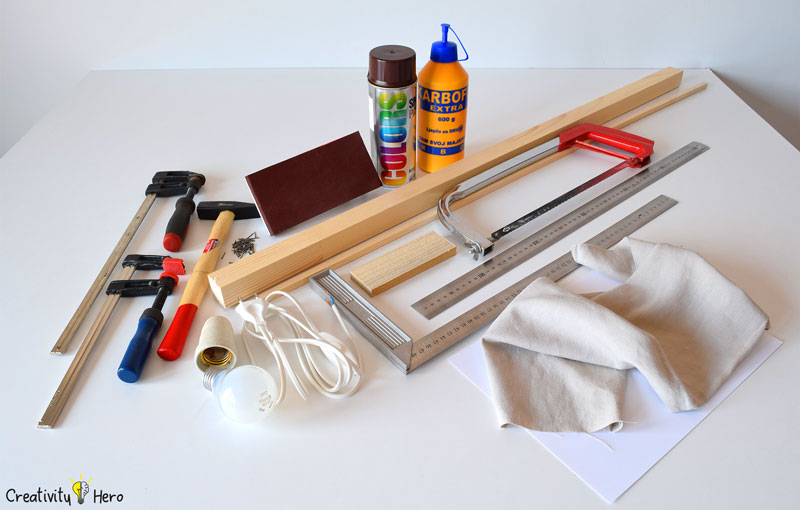
Here are the materials I used:

How To Build A Wooden Desk Lamp DIY Project 1

Types of tools I used:

Disclosure: As an Amazon Associate I earn from qualifying purchases.

Related: How To Make A Modern Wooden Clock | DIY Project

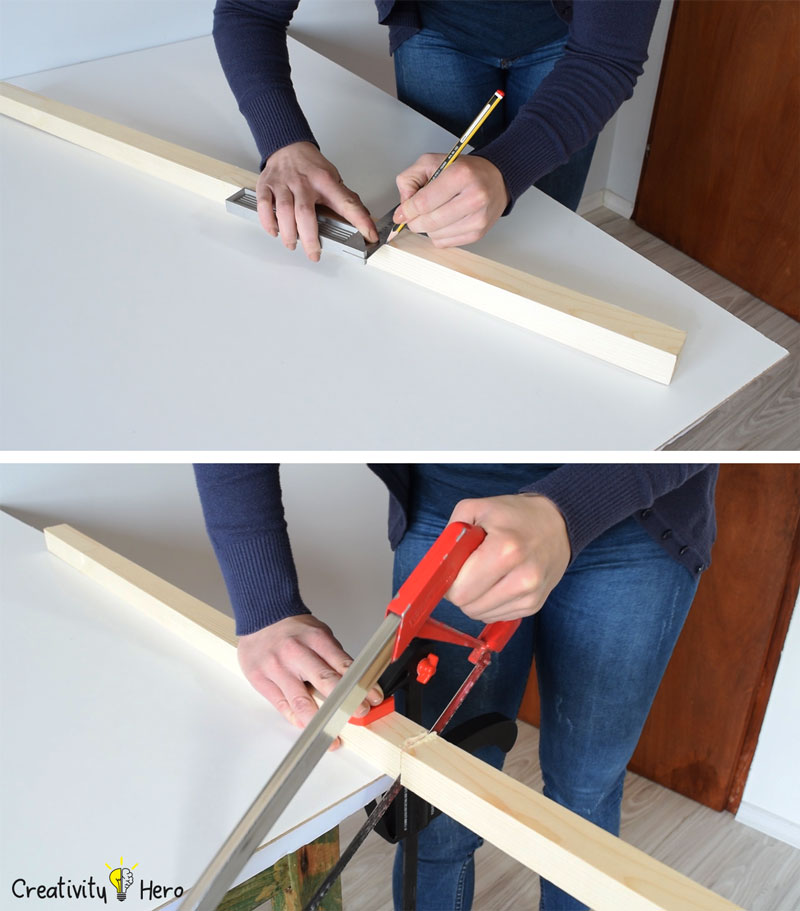
Step 1: Marking and cutting the board using a handsaw.

How To Build A Wooden Desk Lamp DIY Project 2

First, I marked all the dimensions needed for the lamp base.

It is a solid wood board 3 cm wide, 3 cm thick with following dimensions:
– 2 x 27 cm
– 1 x 20 cm
– 1 x 17 cm
– 1 x 11 cm
– 1 x 8 cm
– 1 x 6 cm
– 1 x 3 cm

Then, I cut the board using a handsaw.

Step 2: Sanding the edges and gluing all the pieces together.

How To Build A Wooden Desk Lamp DIY Project 4

Next, I’m sanding the edges of the pieces that I’ve cut to make them even, so it would be easier to work with the glue.

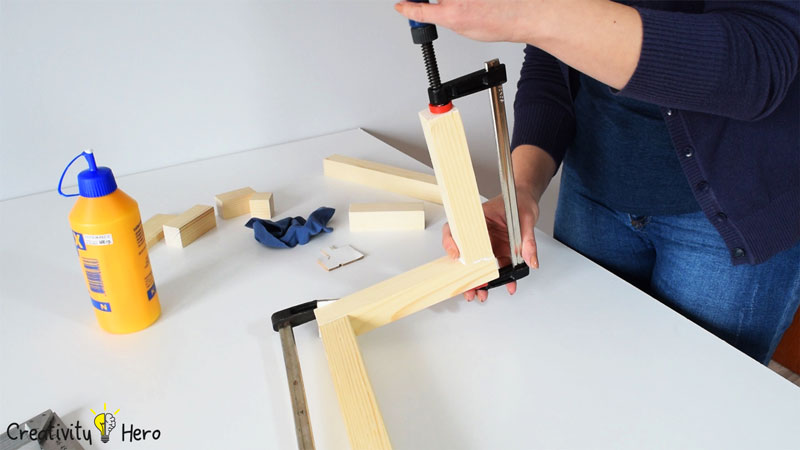
To get the desired shape I glued all the pieces of wood together using a wood glue, a square ruler and some clamps. You need a lot of patience because you can’t glue all at once, but it’s definitely worth the time.

Step 3: Drilling a hole for the cord.

How To Build A Wooden Desk Lamp DIY Project 5

Before gluing the last piece of wood I marked the center point of the lampshade and drilled a hole for the cord 4,5 cm deep using 6 mm bit.

I extended the hole from the back side of the same piece of wood at a 45 degree angle so it would be much easier for the cord to pass through.

Then I glued up this last piece of the lamp base.

Step 4: Marking and cutting the second board.

How To Build A Wooden Desk Lamp DIY Project 6

Now, let’s move on to the lampshade frame.

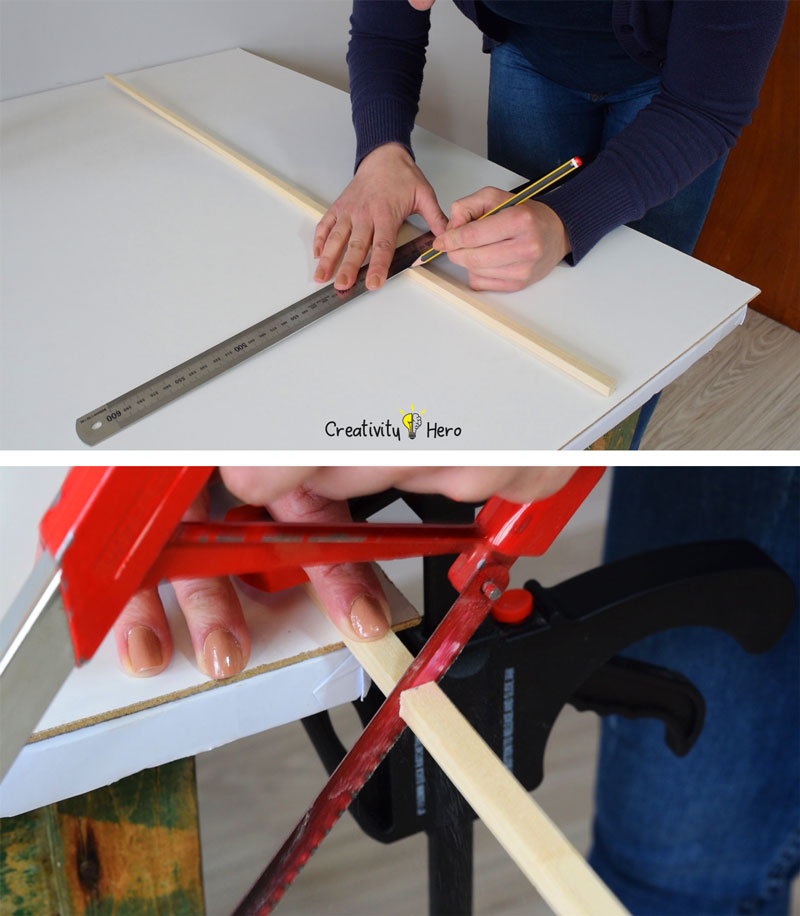
I marked the dimensions of the second board. It is 1 cm wide, 1 cm thick. I made a cuboid frame, 20 cm high and 15 cm wide, so I cut 4 pieces 20 cm long and 8 pieces 13 cm long.

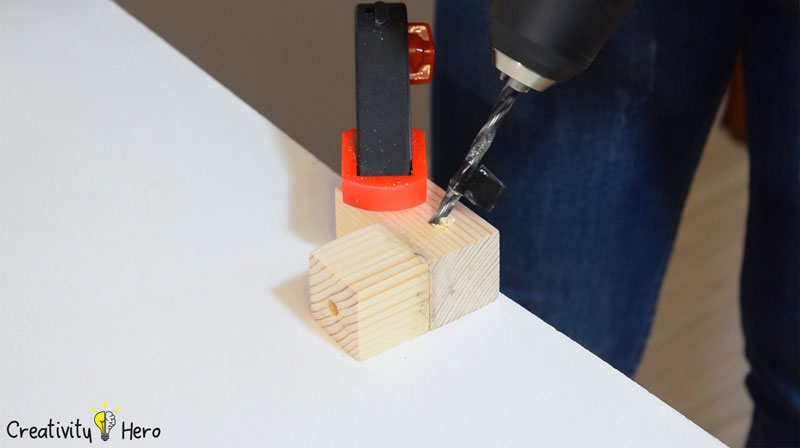
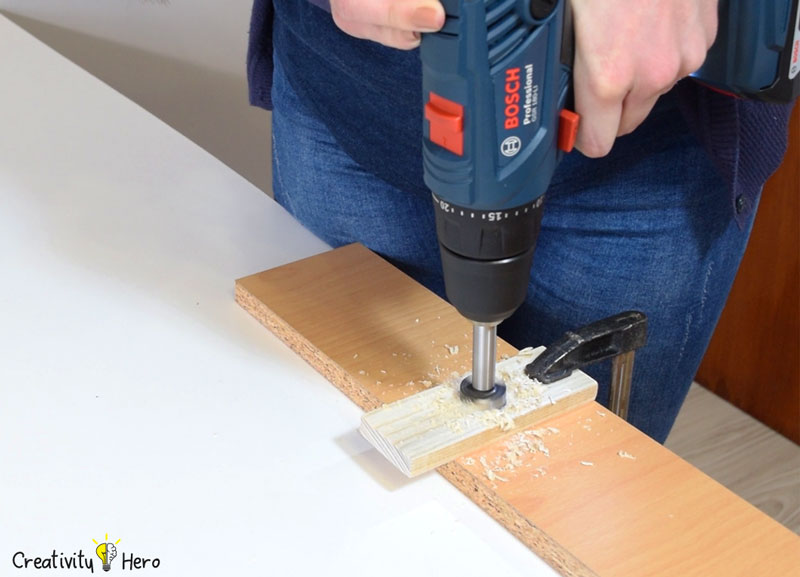
The last and most important piece of wood is the frame support with size 5 x 13 cm. I used a 30 millimeter bit to countersink a hole 1 centimeter deep.

How To Build A Wooden Desk Lamp DIY Project 7

Then I used 6 millimeter bit to drill a hole all the way through so that it perfectly matched the center of the base.

Step 5: Building the lampshade frame.

How To Build A Wooden Desk Lamp DIY Project 8

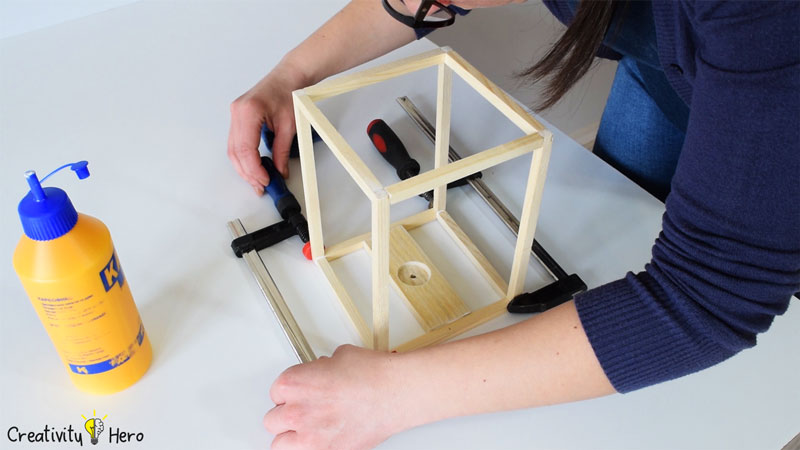
The next step is building the cuboid frame. I glued all the pieces together and used square ruler along with the clamps to make a perfect right angle.

Step 6: Sanding all the pieces.

How To Build A Wooden Desk Lamp DIY Project 9

To make everything nice and level I am going to hit with a 120 grit sand paper which should make a quick work of all the unevenness.

Step 7: Spray painting the base and the frame.

How To Build A Wooden Desk Lamp DIY Project 10

Then, I finished it off with a spray paint.

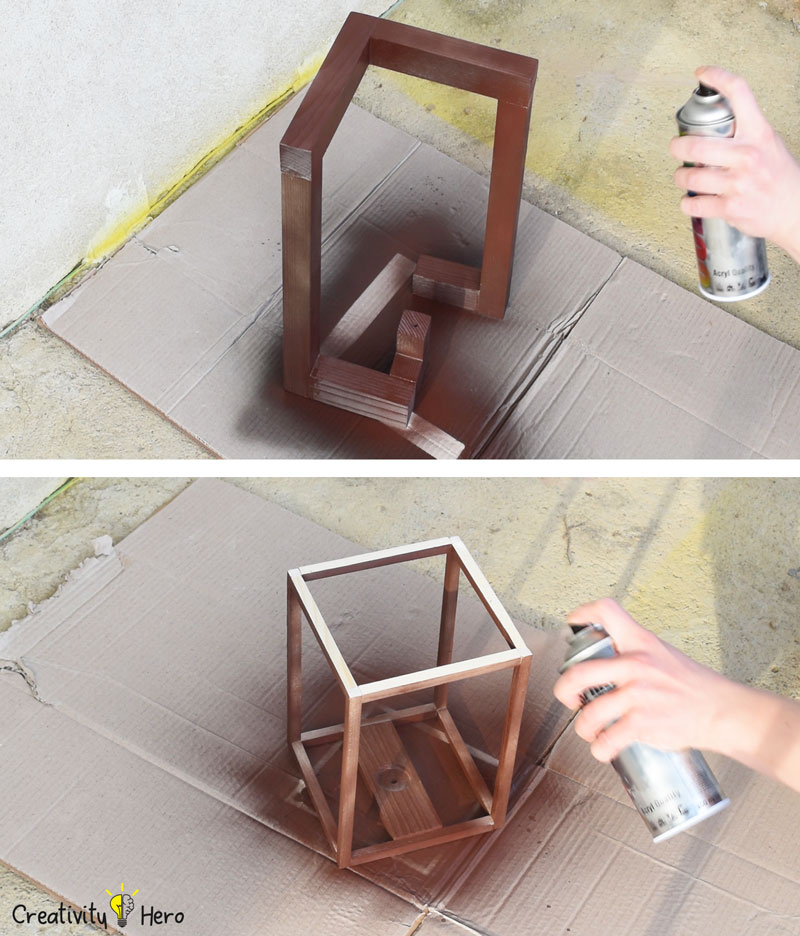
I painted both the base and the frame with a chocolate brown spray paint because I wanted to create more contrast between them and the lampshade.

I applied 2 coats of spray paint and left it to dry out.

Step 8: Making the lampshade.

How To Build A Wooden Desk Lamp DIY Project 11

After that, I moved on to making the lampshade.

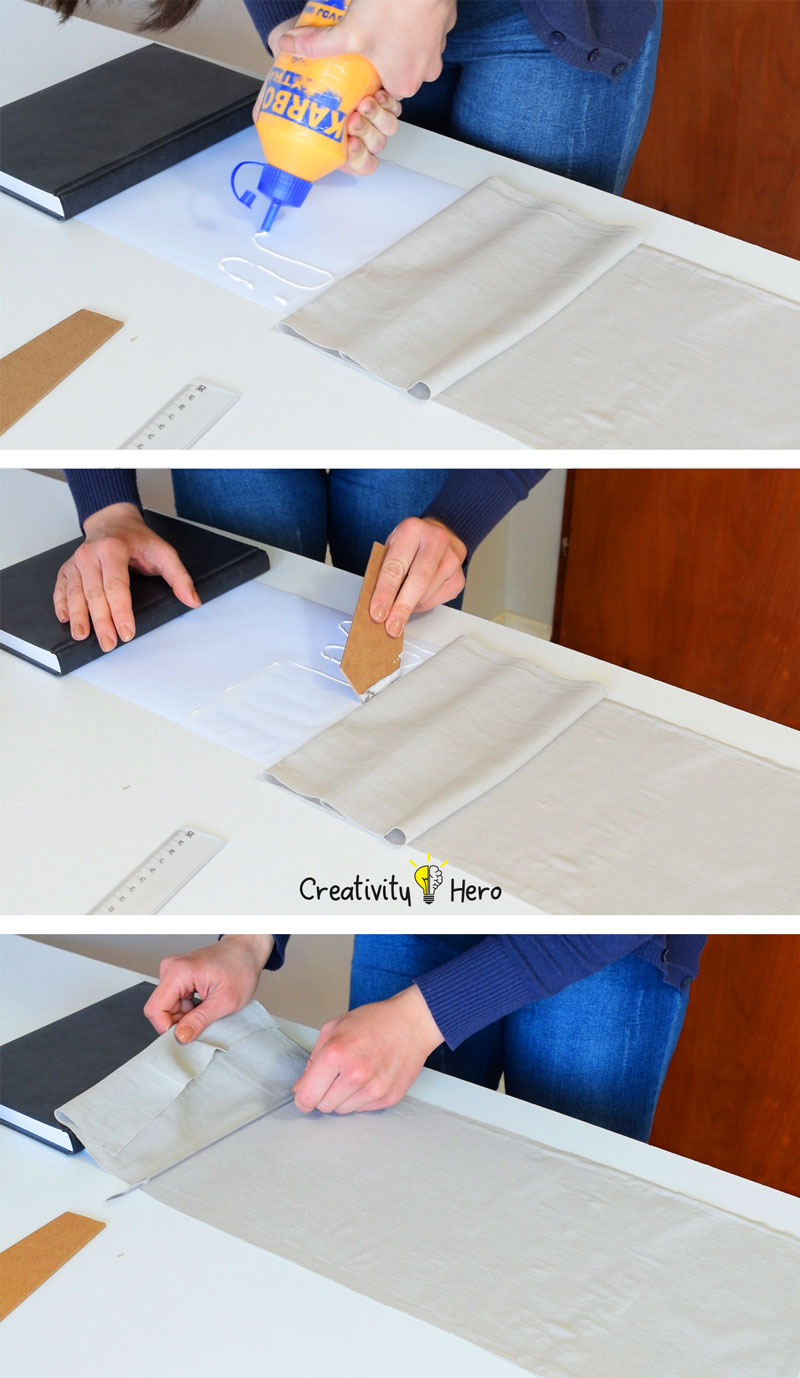
I used a paper roll and cut 62 by 21 cm of it. I also cut the linen fabric 63 x 23 cm so that I could easily glue it to the paper and fold the edges to get nice and smooth look.

It took me some time until I finished gluing the fabric to the paper, because I wanted to make sure everything was lined up.

I decided to use a wood glue and it actually turned out quite well. The glue wasn’t drying too fast, so I had some time to adjust the fabric to the paper with a ruler.

Step 9: Gluing the lampshade to the frame.

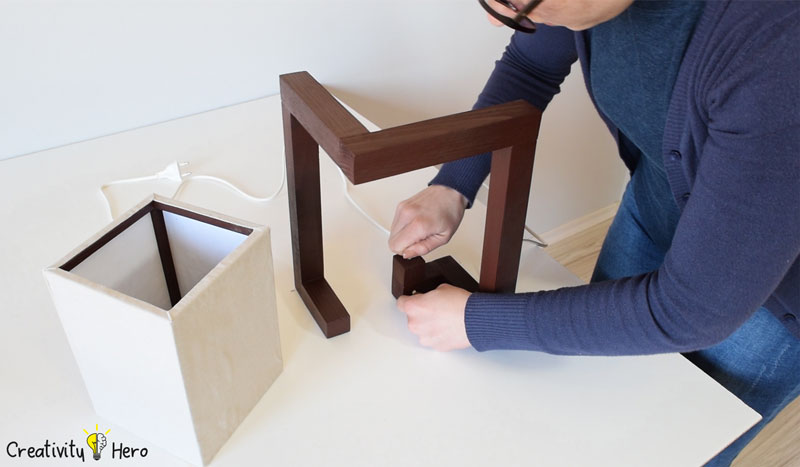
How To Build A Wooden Desk Lamp DIY Project 12

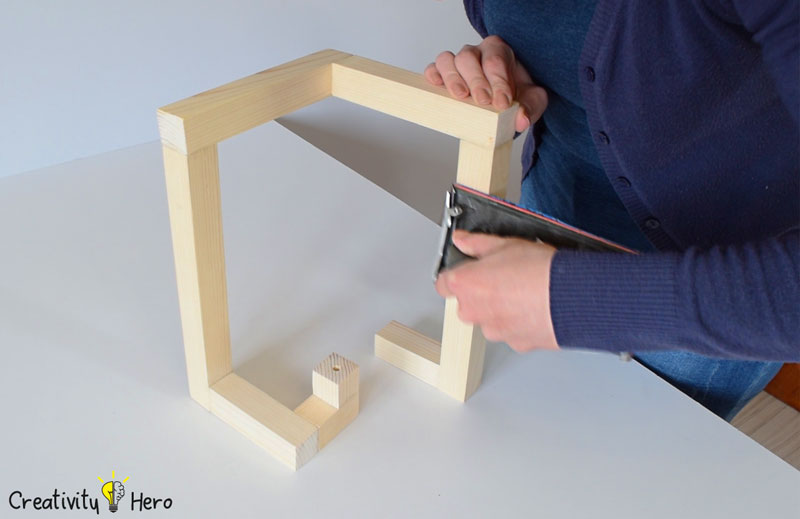
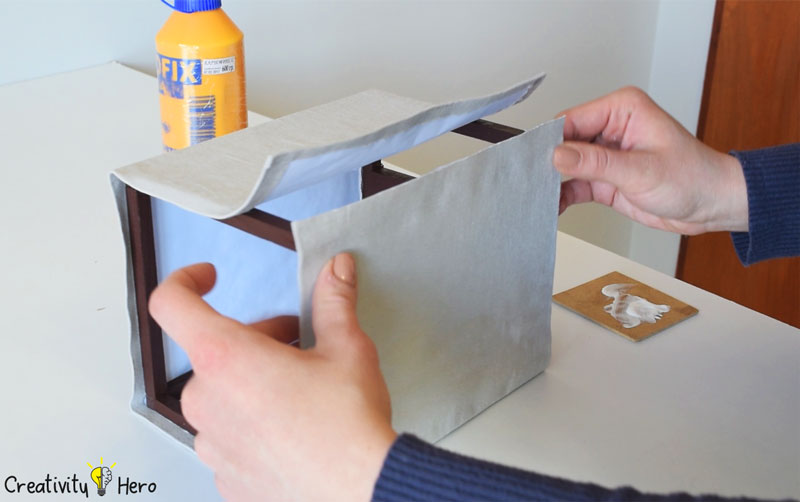
I glued up the lampshade to the frame. It is very important to do this carefully, one side at a time, because you need to align the edges of the frame with the edges of the shade.

I folded the fabric on the top of the frame to get the desired look, but you can skip this step simply by cutting the paper 20 cm wide at the beginning.

Step 10: Putting all the pieces together.

How To Build A Wooden Desk Lamp DIY Project 13

Now I can finally put all the pieces together.

I’m mixing up some 5 minute epoxy to stick the socket.

I made sure everything was lined up and then used wood glue to stick the lampshade to the base. I held it with finger pressure for only a few minutes until the glue started to harden.

I suggest using LED light bulb because it produces a very small insignificant amount of heat.

How To Build A Wooden Desk Lamp DIY Project 14

Thank you so much for watching and if you enjoyed this video hit the like button and also subscribe to my YouTube channel.
How To Make A Modern Wooden Clock | DIY Project

0
How To Make A Modern Wooden Clock DIY Project Featured

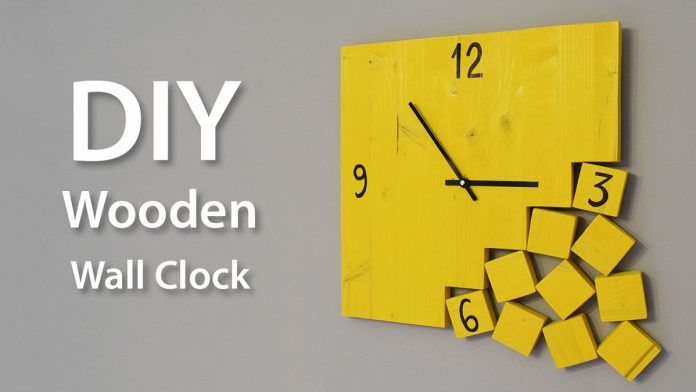
In this video I am going to show you how to make this modern looking wooden clock. The design is very simple and fun to make. So, let’s begin!

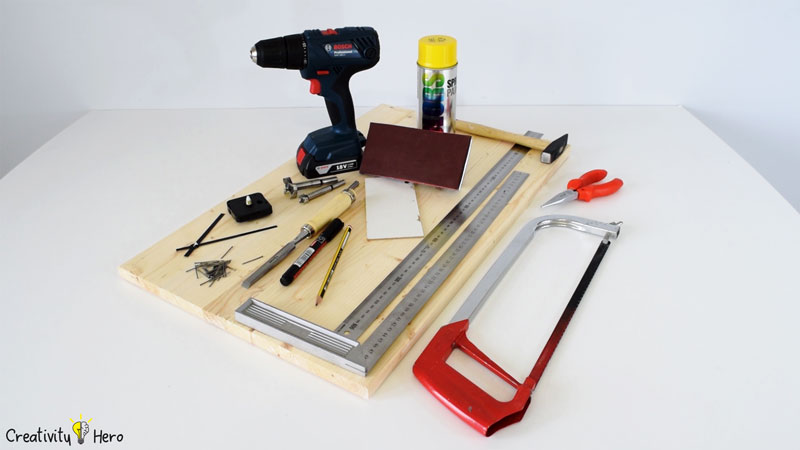
Materials that I used for this project:

How To Make A Modern Wooden Clock DIY Project 1

Tools that I used for this project:

Disclosure: As an Amazon Associate I earn from qualifying purchases.

Related: How To Build A Wooden Desk Lamp | DIY Project

Step 1: Cutting the Wood Panel.
How To Make A Modern Wooden Clock DIY Project 2

For this project I’m using a solid 18 mm thick wood panel, but you can always use different type of wood that you already have at home.

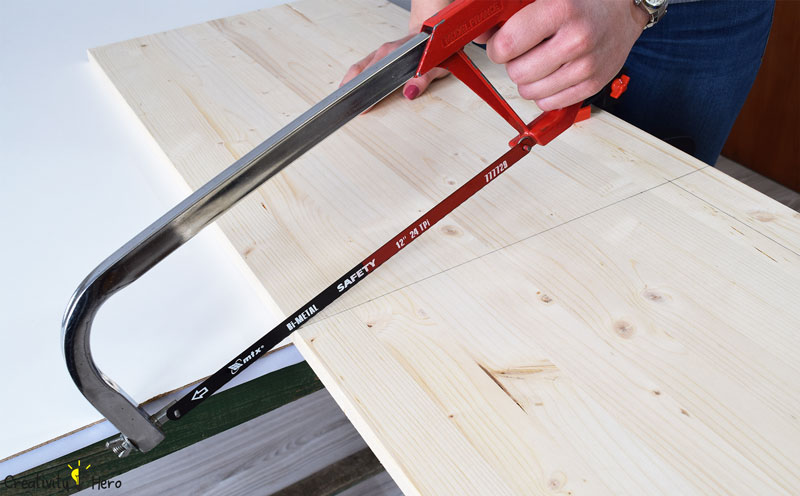
To begin I am going to cut the wood panel at 35 x 35 cm using a handsaw. You can make larger or smaller clock depending on the space on the wall where you want to place it.

I wanted to make a wooden clock that looks like it’s falling apart, so I drew 10 5 x 5 cm squares on the bottom right corner and cut them.

Step 2: Making a Slot for the Mechanism.

How To Make A Modern Wooden Clock DIY Project 3

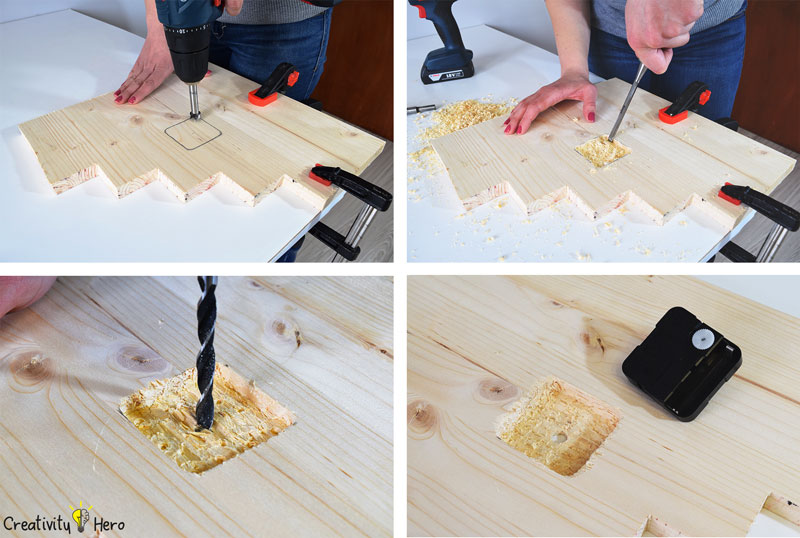
Next, I found the center point of the clock on the back of the panel. I made a slot for the mechanism using a drill with two different sizes of forstner bit.
I used a chisel to make the perfect size of the slot. Then I drilled the hole for the shaft of the clock.

Step 3 : Sanding the Pieces of Wood.

How To Make A Modern Wooden Clock DIY Project 5

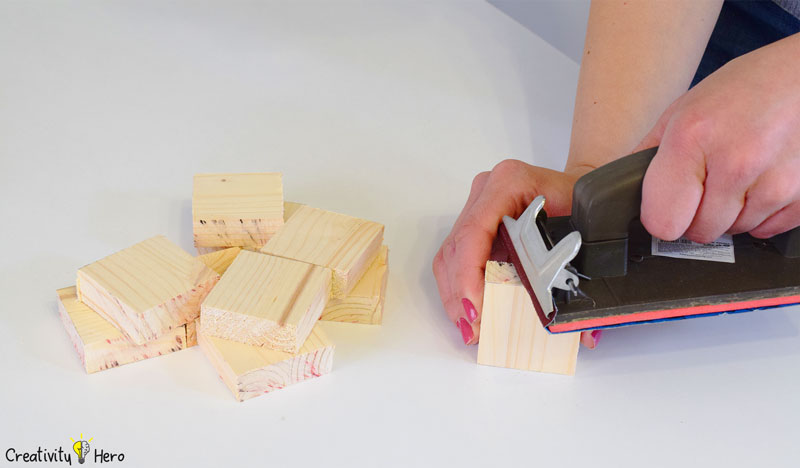
Once I’m done cutting and drilling I do a little sanding using a 120 grit sandpaper.

Step 4: Connecting All the Pieces Together.

How To Make A Modern Wooden Clock DIY Project 6

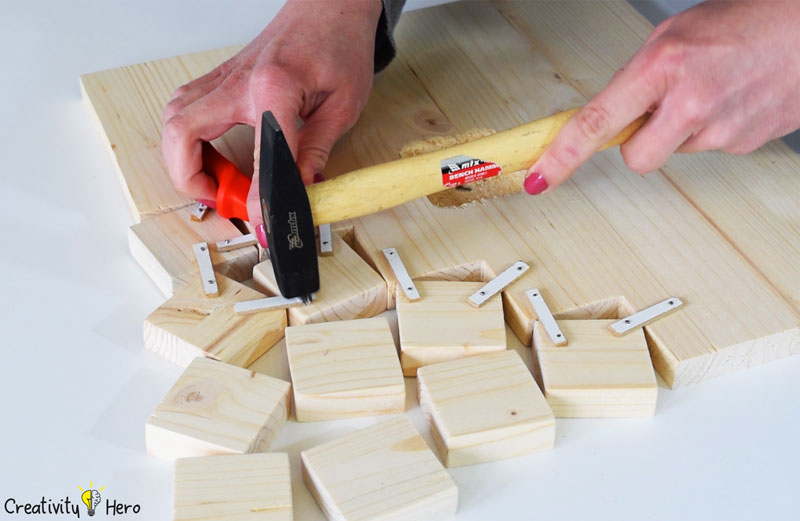
Now, it is time to connect all the pieces together. I thought the easiest way to connect them is using a plywood and nails. I chose 3 mm thick plywood and cut 18 0.7 x 4 cm pieces of it. Then I connected all the squares using 13 mm long nails and a mallet.

Make sure to place all the pieces of plywood on the connection points of the squares. That way they won’t be visible on the front side of the clock.

Step 5: Spray Painting the Clock.

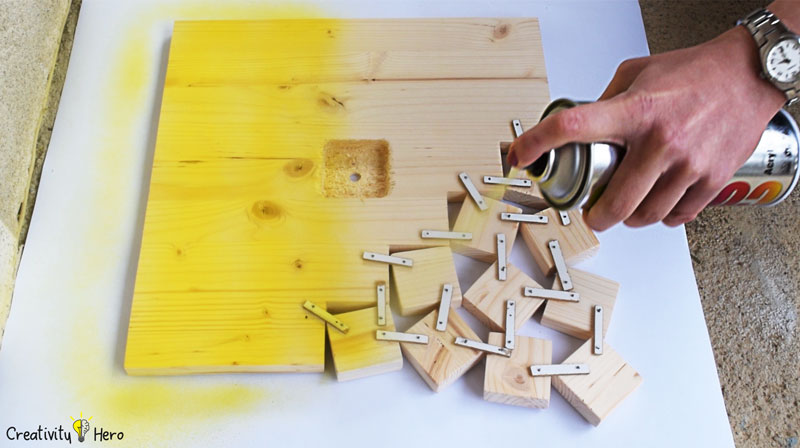
How To Make A Modern Wooden Clock DIY Project 7

The next step is to spray both sides of the clock. I used yellow spray paint, but you can choose any color you want.

The secret to get a perfect paint job is to spray from at least 20 cm distance, always keep your hand moving and put a several lighter coats to avoid drips. Leave it until it’s completely dry before you draw the clock numbers.

Step 6: Drawing Numbers.

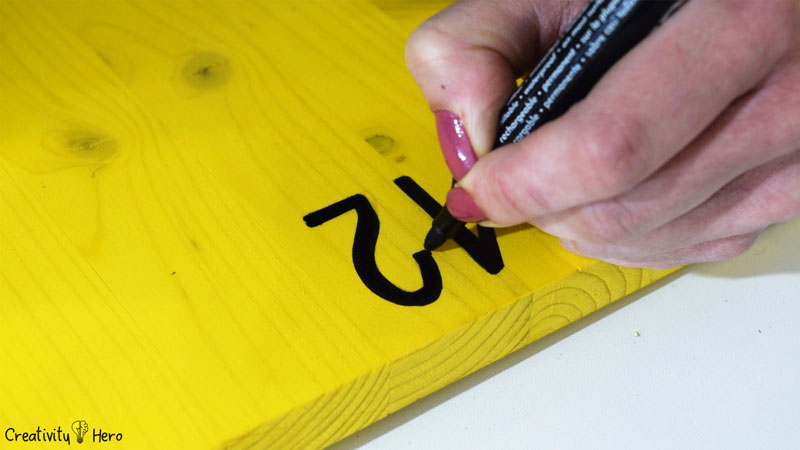
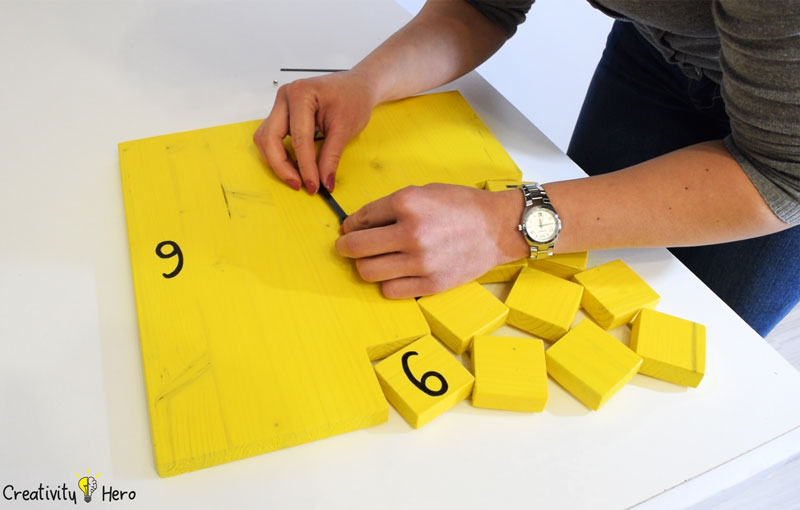
How To Make A Modern Wooden Clock DIY Project 8

I drew the numbers 3, 6, 9 and 12 with a pencil because it is much easier to make corrections with a rubber and then repeated them with a black permanent marker.

Step 7: Making a Hanger for the Clock.

How To Make A Modern Wooden Clock DIY Project 9

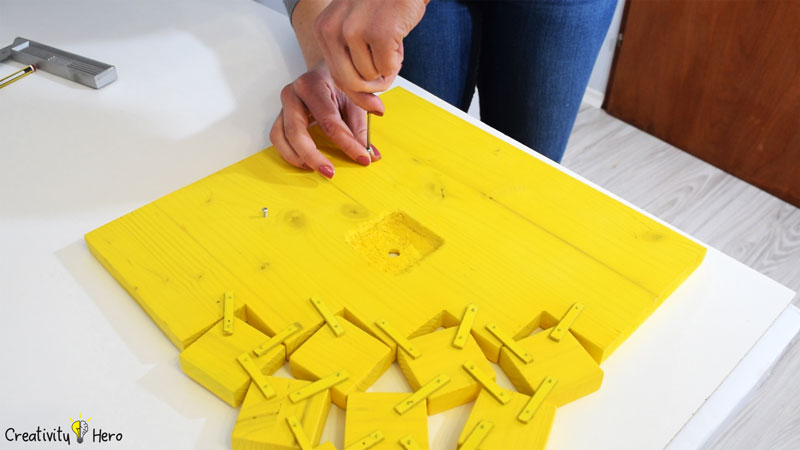
I used two screws and a wire for the hanger. Make it wide enough so that you can easily move it horizontally when hanging this wooden clock on the wall.
Step 8: Installing the Mechanism.
How To Make A Modern Wooden Clock DIY Project 10

The final step is installing the mechanism and adding the hour hand followed by the minutes.
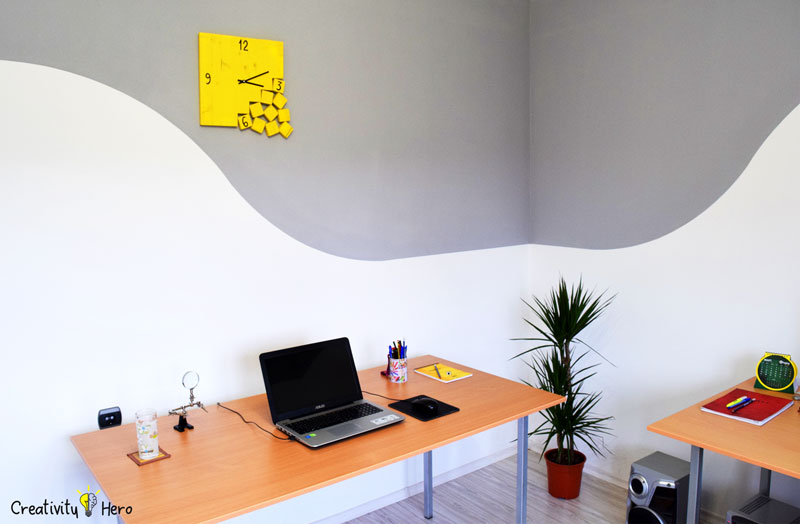
This is the final result.

How To Make A Modern Wooden Clock DIY Project 11

Let me know what you think in the comments section below.

If you like this video give me a thumbs up and be sure to subscribe to my YouTube channel.