


In this article I’ll show you how I made this unique concrete candle holder with a wooden base.
Although this candle holder has an intricate shape, it can be easily achieved with a simple technique for casting concrete.
You don’t need any special tools and materials to make such shape. What you actually need is a thick Styrofoam board, a utility knife and your imagination. There’s no limit to the shape variations you can achieve with this method of casting concrete.
In the video below you can see the entire process of creating this beautiful candle holder.
Materials:
- Styrofoam board
- Aluminum pipe
- Quikrete
- Spray paint
- Shellac
- Protective gloves
- Cabinet bumpers
- Tea lights
Tools:
- Router
- Circular saw
- Cordless drill
- Forstner drill bit
- Utility knife
- Chisel
- Hacksaw
- Sanding block
- Glue gun
Disclosure: As an Amazon Associate I earn from qualifying purchases.
Dimensions:
- Concrete form: 28 x 13 x 5 cm
- Wooden base: 36 x 14 x 2 cm
So, let’s get started!
Related: Curved Wood and Acrylic LED Desk Lamp with Concrete Base | Bending Acrylic
Shaping the Mold for the Concrete.
To make the mold for the concrete I took a 5 cm thick Styrofoam board.

On a piece of paper I drew the desired shape of the concrete form, and then stuck it onto the Styrofoam board with a duct tape to prevent any movement while cutting.
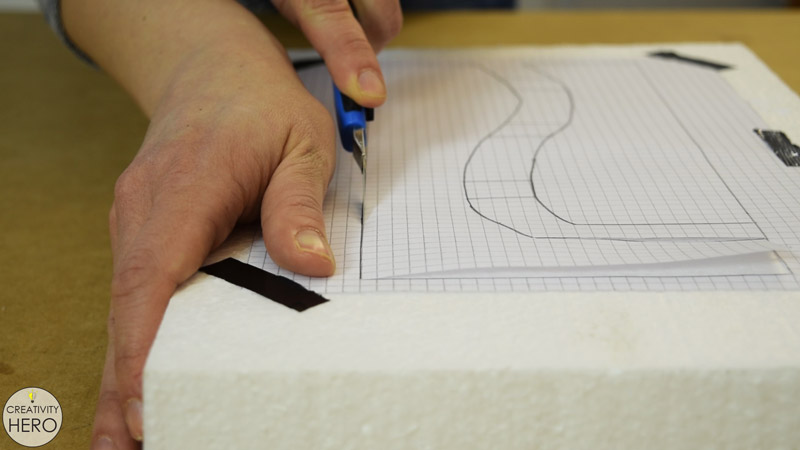
I found the sharpest utility knife and started cutting, making sure I follow the lines and keep the knife straight.
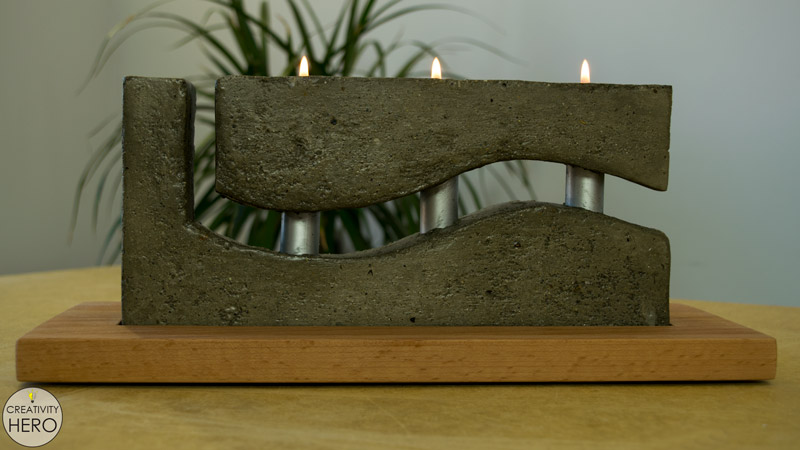
After that I removed the paper, and the two cut-outs as well. Actually I got a rectangle which consists of two parts, and a wavy form in the middle that divides the rectangle.
Creating Holes for the Aluminum Pipe.
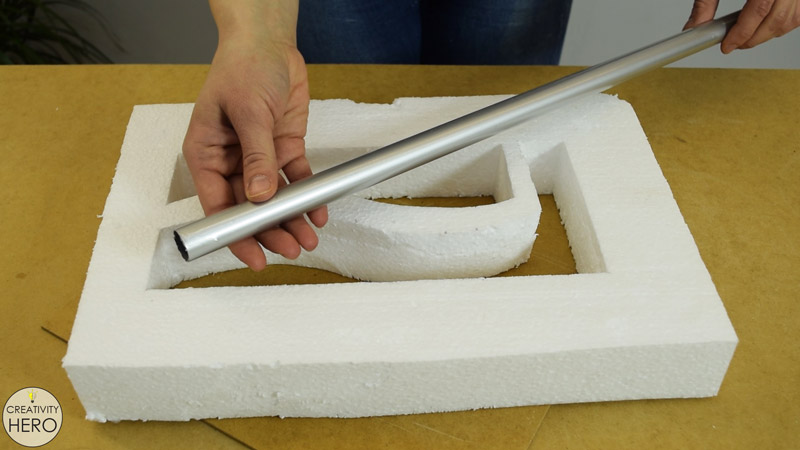
To get more complex shape of the candle holder, I predetermined three spots where small pieces of this aluminum pipe will be inserted. Those pieces will be a connection between the two concrete parts.
In order to be able to insert the aluminum pipes I need to cut the middle part and return it back later.
Here’s how the holes for the pipes are made:
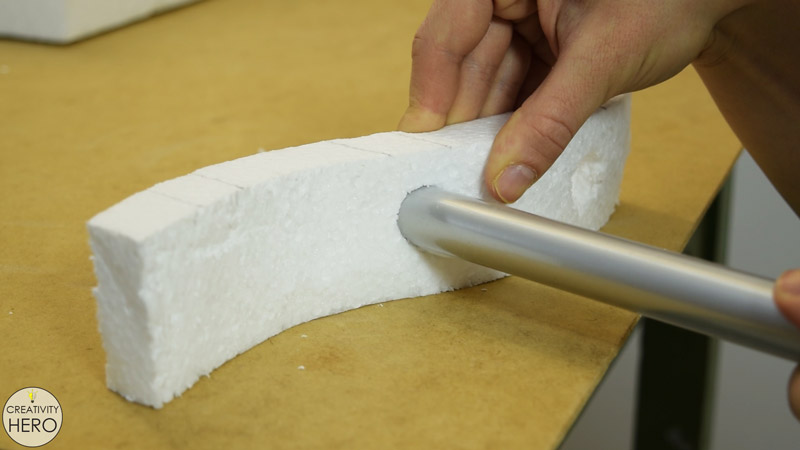
First, the pipe needs to be positioned on the foam and rotated very carefully until it has some grip. After that it needs only moderate pressure while rotating, making sure to keep the path of the pipe straight.
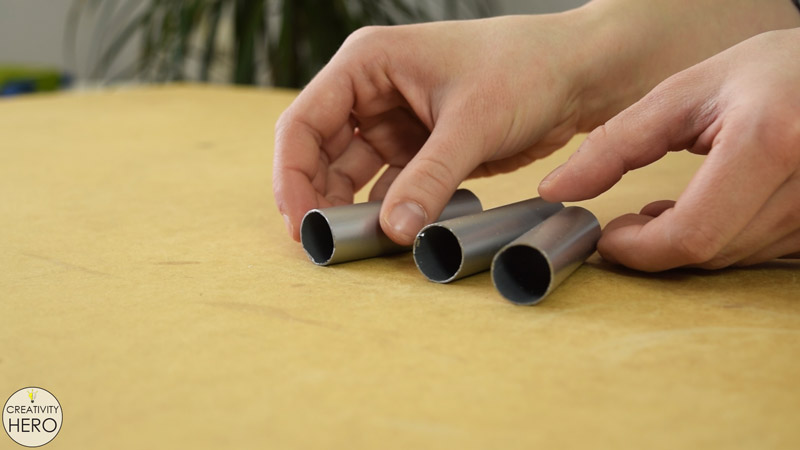
Using a hacksaw I cut the aluminum pipe into three short pieces.
Gluing All the Pieces of the Mold Together.
The candle holder needs to have three holes for the tea lights, which are actually the purpose of this project. So, in my workshop I found a small piece of 1 cm thick Styrofoam, which I used to make circles with the same size as the tea lights.
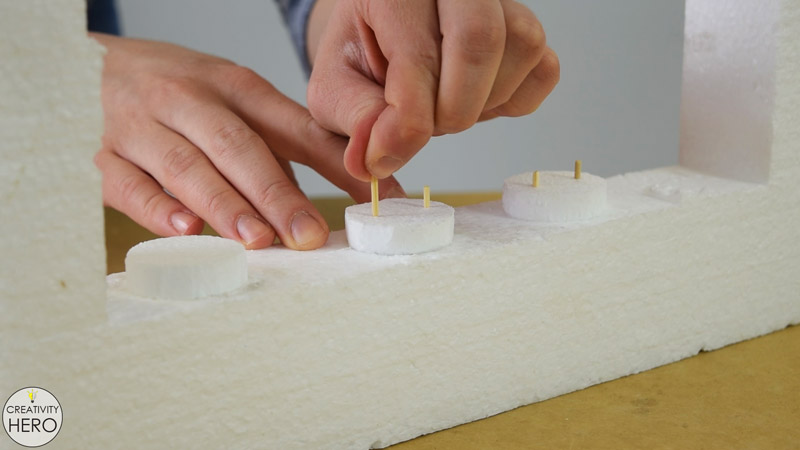
After I found the right spots for the circles, I hot glued them in place. To secure them better I inserted toothpicks into each circle that will serve as dowels.
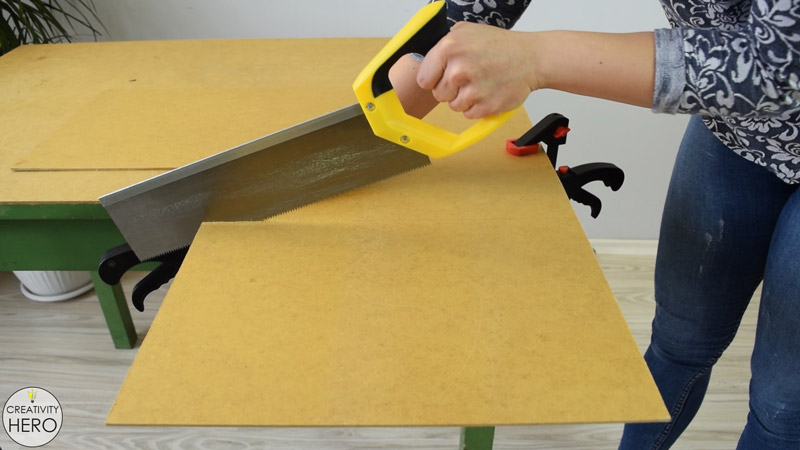
I used a fiberboard for the bottom support of the mold. Using a handsaw I cut a piece of fiberboard and made it a bit larger than the Styrofoam.
Now I can join all the parts together in order to make a firm mold with the desired shape.
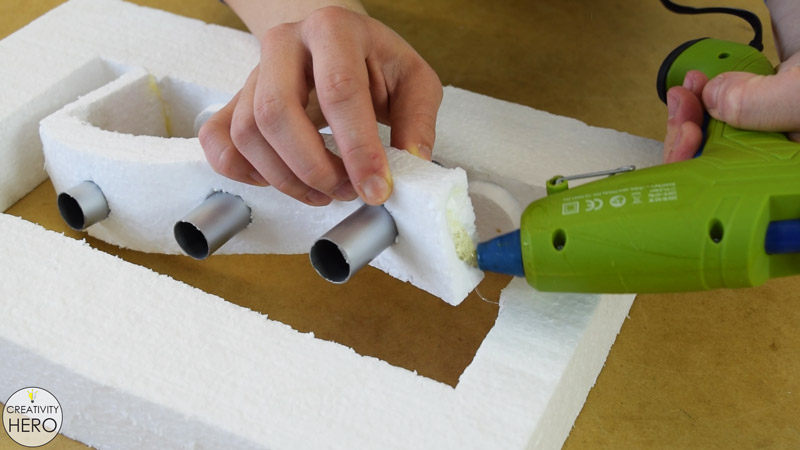
Before gluing the middle, I inserted the aluminum pipes inside the holes that I previously made, and then hot glued it in place.
Here I also reinforced the joints with toothpicks.
Lastly, I applied a large amount of hot glue onto the entire Styrofoam board and stuck it onto the fiberboard.
An important tip when gluing Styrofoam is to use a low-temperature hot glue gun in order to avoid burning and melting the Styrofoam, which happened in my case.
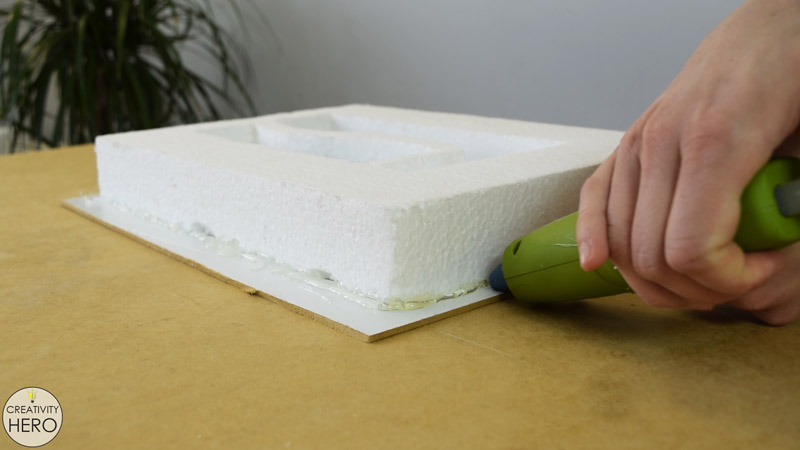
To make sure the mold is firmly attached onto the fiberboard I applied hot glue from the outside. This way, I’ll prevent the water from the concrete from leaking.
Related: How To Build A Wooden Desk Lamp | DIY Project
Making the Concrete Mix.
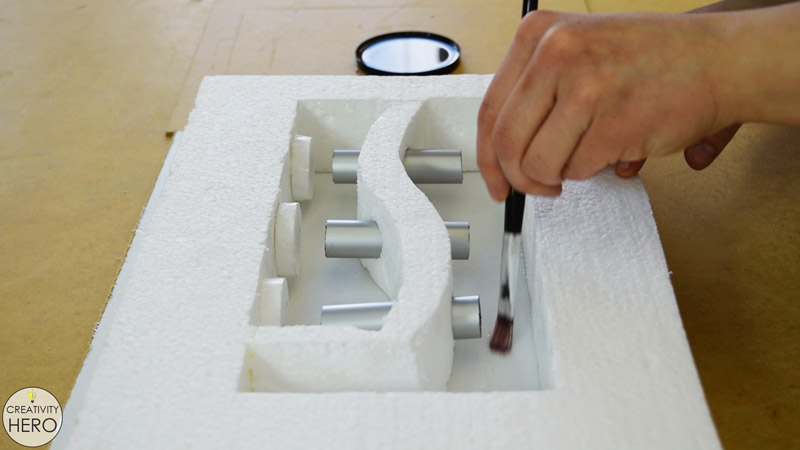
Before making the concrete mix it’s a good idea to use a release agent that will make removing the concrete from the mold after it has cured very easy. So, I spread cooking oil all over the surface with a brush making sure I don’t miss a spot.
Now I can move on to the concrete mix.
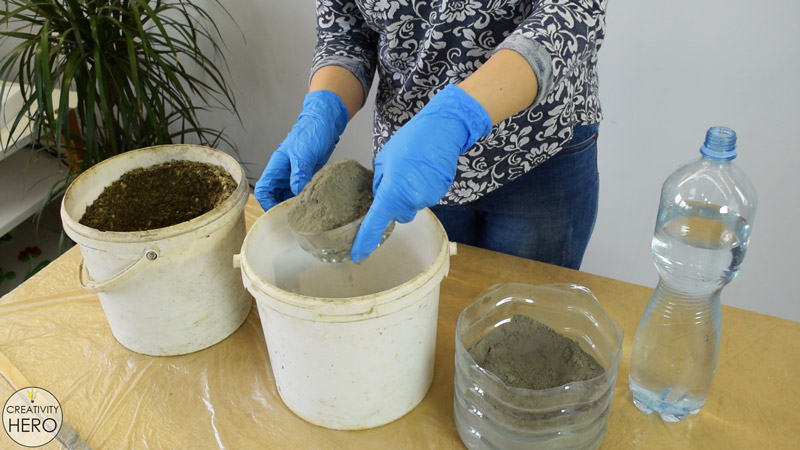
Into a bucket I’m mixing one part sand and one part cement, and gradually adding water. The consistency should be pretty close to the one shown in the video, not too thick, and not too watery.
Then, I’m pouring the concrete into the mold. The aluminum pipes need to make a strong connection between the two concrete parts, so I’m using my fingers to fill them inside with concrete.
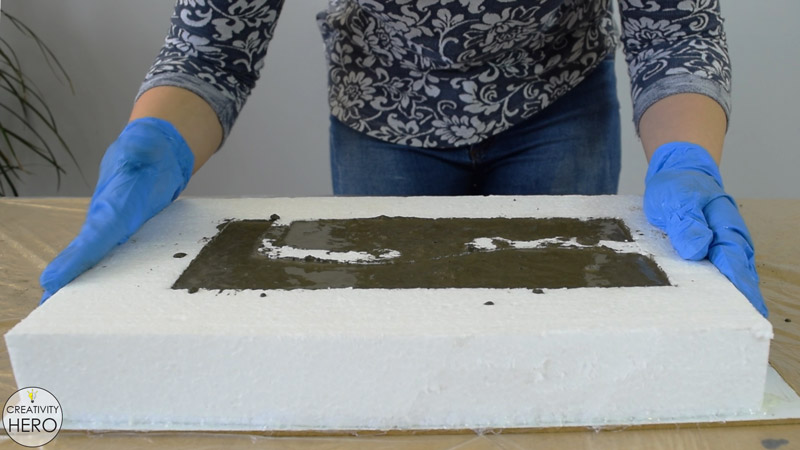
Lastly, I’m vibrating the mold to release any air bubbles and allow the mix to settle in the voids of the mold.
Now I’m done with the concrete, so I’ll leave it to cure at least 48 hours.
Removing the Mold and Sanding the Concrete Form.
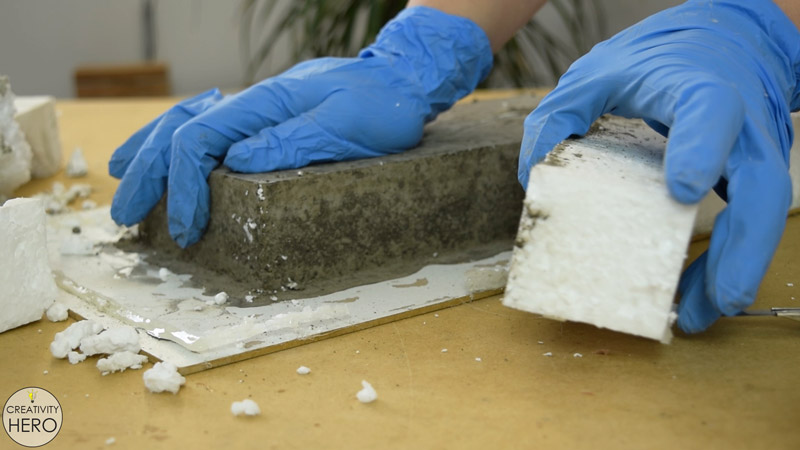
Once it has cured I can remove the mold. Using a utility knife makes the process of removing the mold much easier and faster.
The cooking oil helped a lot, and the Styrofoam came off very easy, which is awesome.
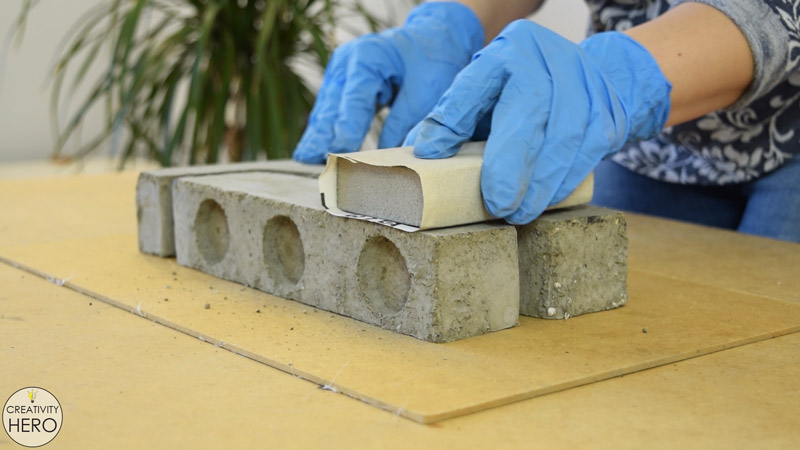
Next, I need to sand the concrete form with 220 grit sandpaper in order to remove the dust, and to make its surface nice and smooth.
Then, I wiped the dust off of the surface, so at this point I’m pretty much done with the concrete.
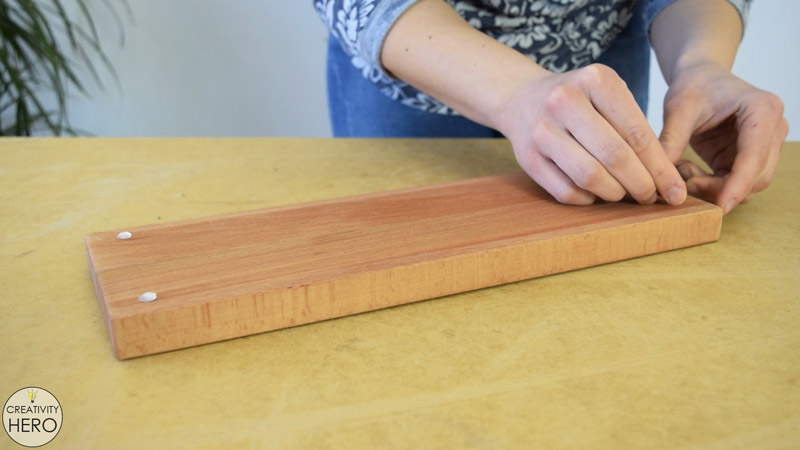
Making the Wooden Base.
This means that it is time to make the wooden base for which I chose a beech wood.
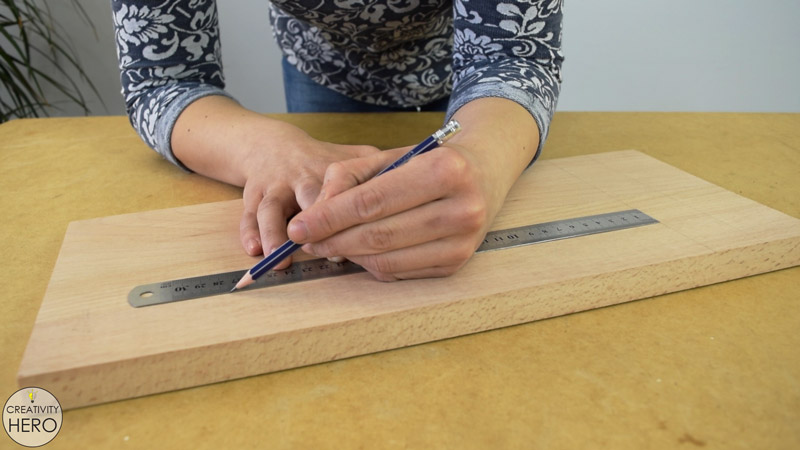
In order to be able to make all the cuts I need to mark all the dimensions.
Anyhow, in the middle of the base I need to remove 1 cm of the thickness of the wood, and there I’ll actually place the concrete form.
For that purpose I’ll use a router, but I don’t have a plunge router base, so came up with a simple solution that worked great.
Here’s what I actually did:
I drew all the lines and clamped some scrap pieces of wood onto the board, which will serve as guides for the router.
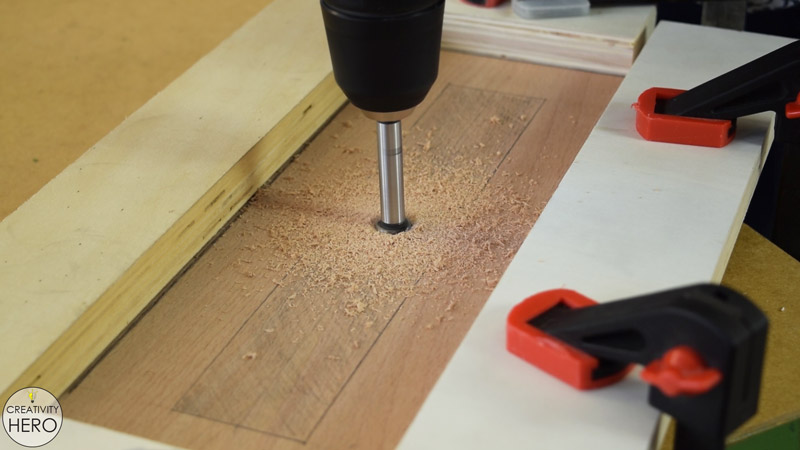
Then, onto the drill I inserted a 15 mm Forstner bit and drilled a hole 10 mm deep. This hole will be a starting point for the router.
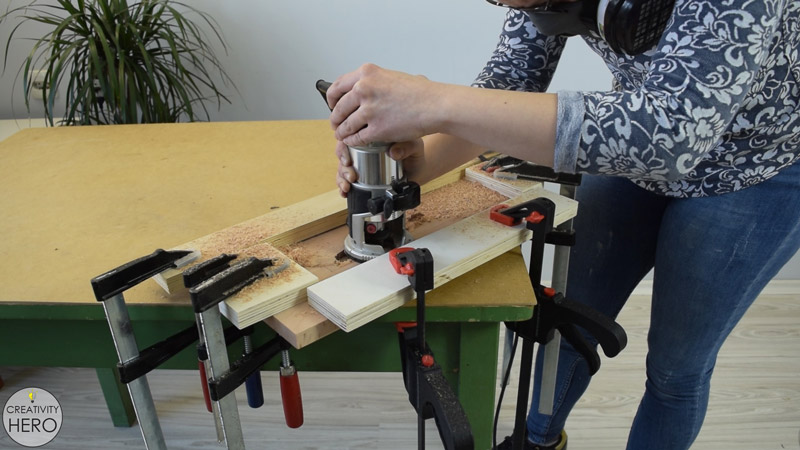
After that, I placed the router into the hole and started routing the section out. This time I wasn’t able to install the vacuum cleaner onto the router, so I covered everything in dust.
Anyway, this turned out to be a pretty good way of removing the excess thickness of the wood.
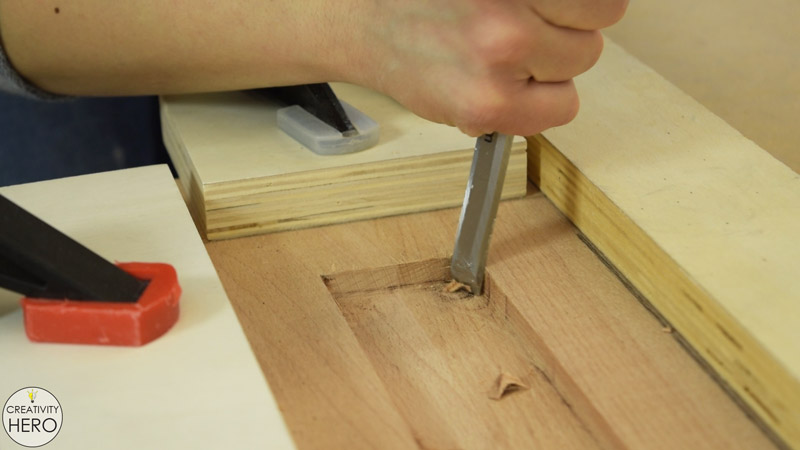
Next, I needed to chisel out the corners to make right angles.
Before cutting the base to its final size, I placed the concrete form inside to check if it is a snug fit.
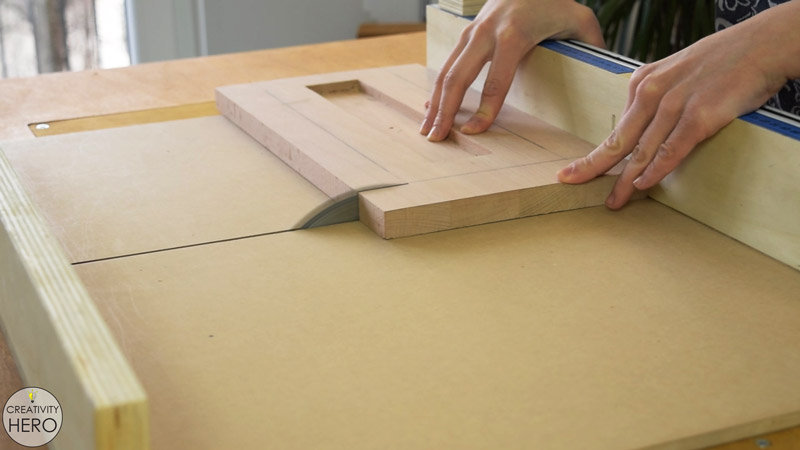
Everything is OK, so I can finally cut the base to size on my table saw.
If you’re not able to make such base, you can get creative and do something different that will look awesome as well.
Sanding the base.
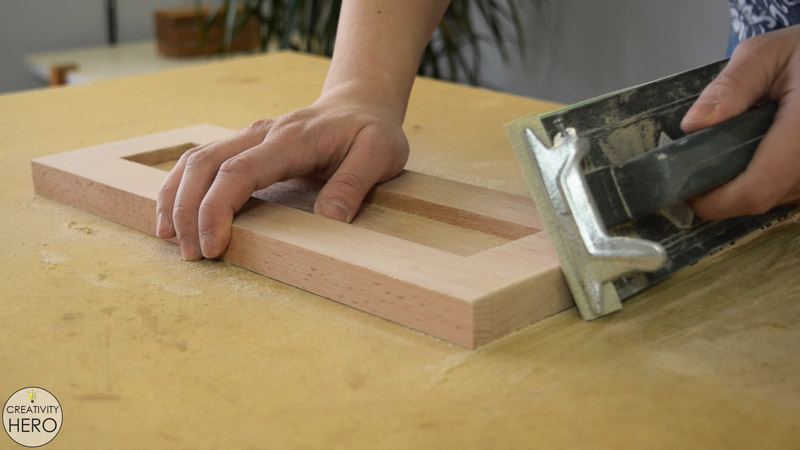
Once I’m done cutting it’s time to hand sand the surface with 120 grit sandpaper, and then move on to 220 to give it a smooth finish.
Applying Finish.
The last step is to apply finish onto both the concrete and the wood.
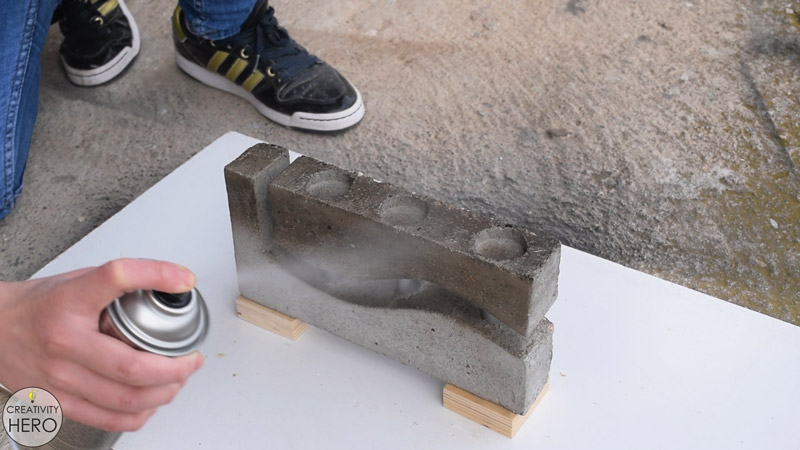
I sealed the concrete form with a transparent spray paint with satin finish. One coat is quite enough to protect the concrete.
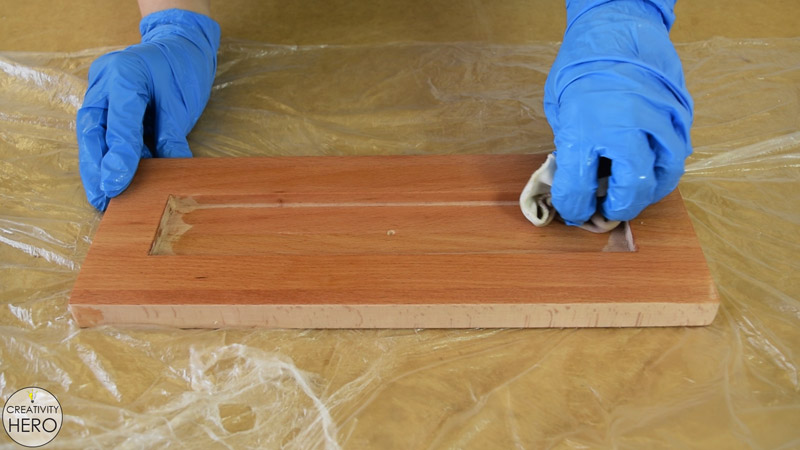
Onto the wood I applied one coat of clear finish as well. This way I’ll protect the wood and bring out the wood grain at the same time.
You may also like: DIY Mid-Century Modern Side Table / End Table
Completing the Candle Holder.
Once the base has dried, I can add self-adhesive cabinet bumpers on the bottom in order to protect the surface where it will be placed on.
Now I can place the candle holder onto the base. You can also glue them together with an epoxy, but I think it’s not necessary.
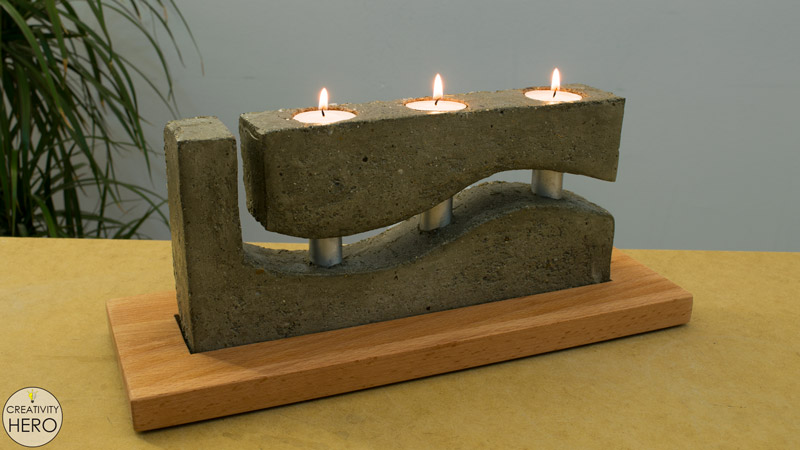
What’s left to do is to place the tea light candles into the holes, and enjoy the beautiful atmosphere they’re creating.
Concrete is such an interesting material because there are so many things to do with it. You can make forms with different size and shape, add some color, you can do whatever you want. It’s very simple and easy to try, just mix up some concrete and use your creativity to make an amazing project that will impress everyone.
This was a really interesting and fun process of creating such candle holder, and I hope you like it. If you do don’t forget to like, share and subscribe to my YouTube channel.
