


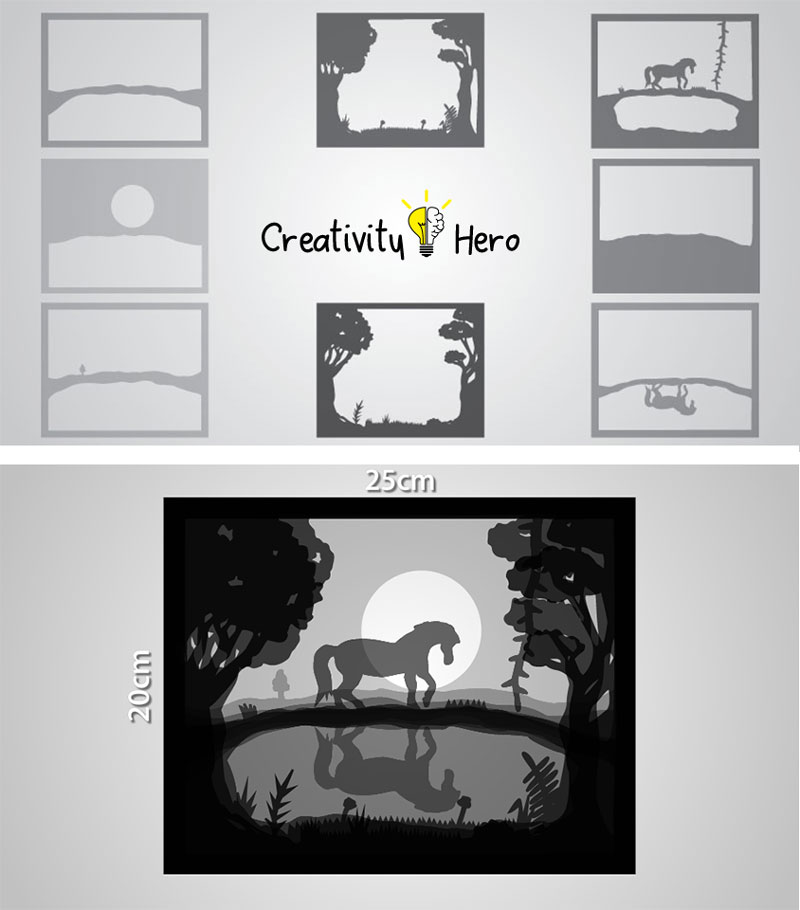
Inspired by the artists Hari & Deepti and their beautiful artwork I decided to create a 3D paper cut light box.
It can be used as a wonderful home decor, or a unique birthday or wedding gift. You can mount it on a wall, or place it on a desk and enjoy its charming beauty.
Basically, this light box consists of paper cut outs layered on each other in a box with a glass panel. LED lights are placed behind all the layers, which makes each layer glow, giving this 3D look.
In this video I’ll show you how I made this light box step by step, and also I’ll give you some tips that will help you achieve the desired effect.
Here are the materials I used:
- Wood board 8 x 1 cm (2 x 27 cm; 2 x 20 cm) (your local hardware store)
- Wood stripe 1 x 1 cm (2 x 25 cm; 2 x 18 cm) (your local hardware store)
- Plywood 22 x 27 cm (your local hardware store)
- White card stock (170 grams thickness)
- Copy paper (80 grams thickness)
- Foam core board
- Glass panel 20 x 25 cm (you can use glass from old photo frame)
- RGB LED strip lights
- White glue
- Wood glue
- Paint
- Screws 4 x 16 mm
- Pins
Types of tools I used:
Disclosure: As an Amazon Associate I earn from qualifying purchases.
Related: How To Build A Wooden Desk Lamp | DIY Project
Step 1: Make your own design, or download and print out the template.
I created the design for this light box and made a template.
You can download it here:
So, the first thing you need to do is to download and print out the template. It’s made for a 20 x 25 cm light box (8 x 10 inches), but you can scale it up and down if needed. You can also make your own unique design.
I recommend using 170 grams white card stock, because it’s stiff enough to stand up and thin enough to let the light pass through.

So, draw the first layer of your design onto the card stock and add a border on each layer, around 1 cm. This will help you glue the layers much easier. You’ll never see anything here.
Step 2: Cut the layers using an X-Acto knife.
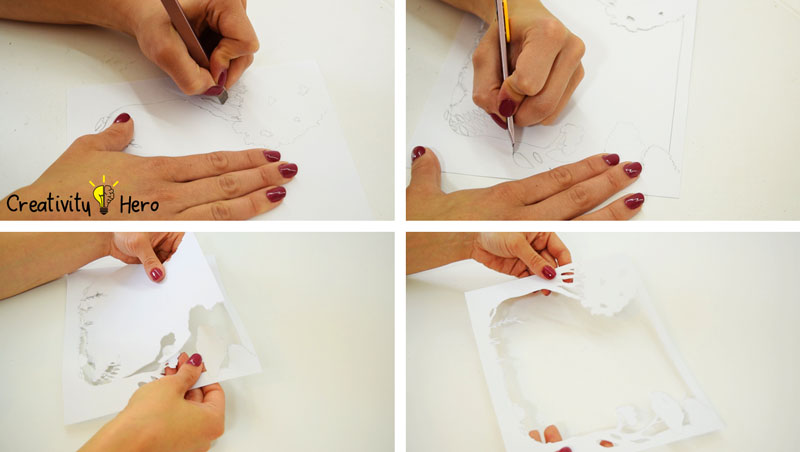
Once you’re done with the first layer, cut it out using an X-Acto knife. X-acto knife is an original cutting tool designed to deliver the sharpest, most accurate cut on your projects.
I didn’t have one at home, so I used this utility knife, and it turned out quite well.
After that, place the first layer onto another piece of card stock, and draw the next layer. Remove the first layer and finish the second one. Cut it out, and repeat this process until you are done with all the layers.
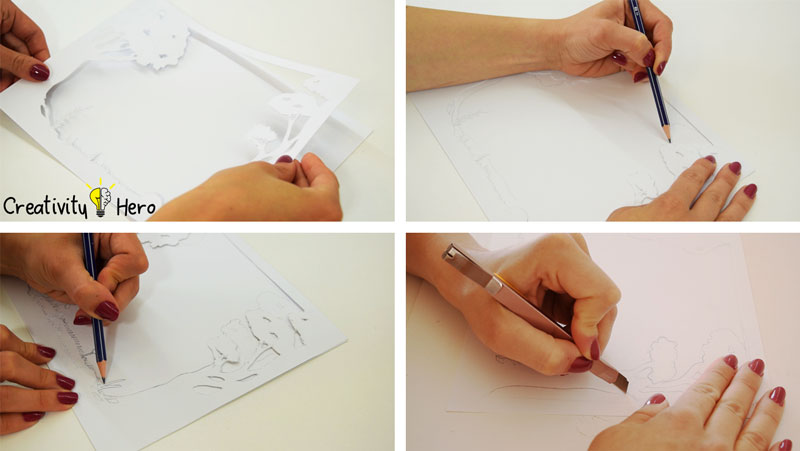
The more layers you make, the better the effect you get.
Step 3: Create a water reflection effect.
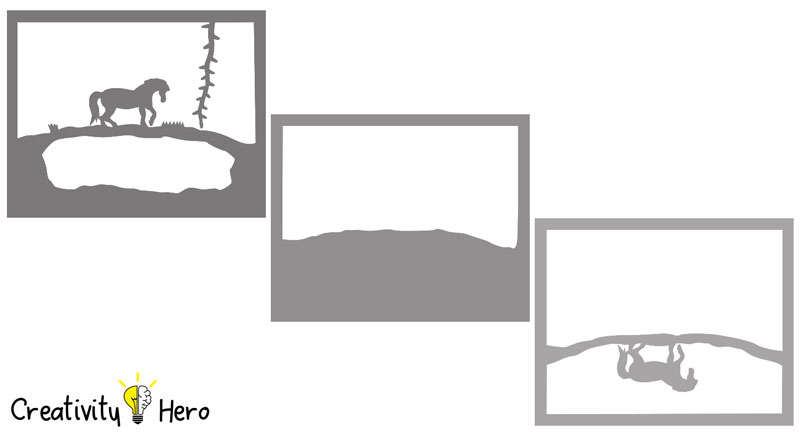
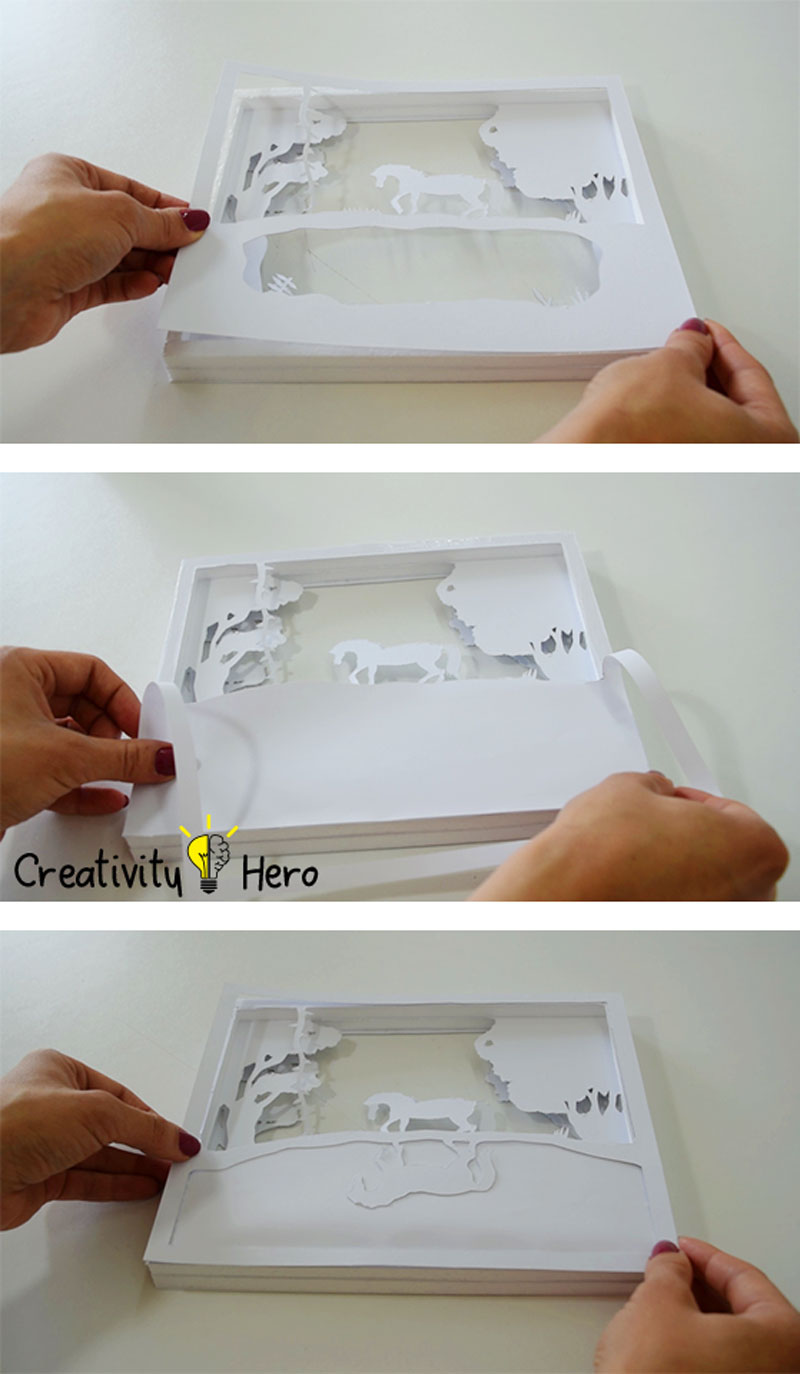
As you can see, my 4th layer is without design with one half missing. This is because I wanted to create a water reflection effect.
This is how it works: this layer will be placed behind the layer with a horse and in front of the “upside down” layer. The paper left in the 4th layer will hide the reflection at first but it will appear when the light is on.
I cut the upper half of the layer because I wanted the moon and the stars on the last layer to be brighter. For this layer I used an 80 grams copy paper, for a better transparency effect.
Don’t forget about the borders!
Step 4: Make a moon and stars.
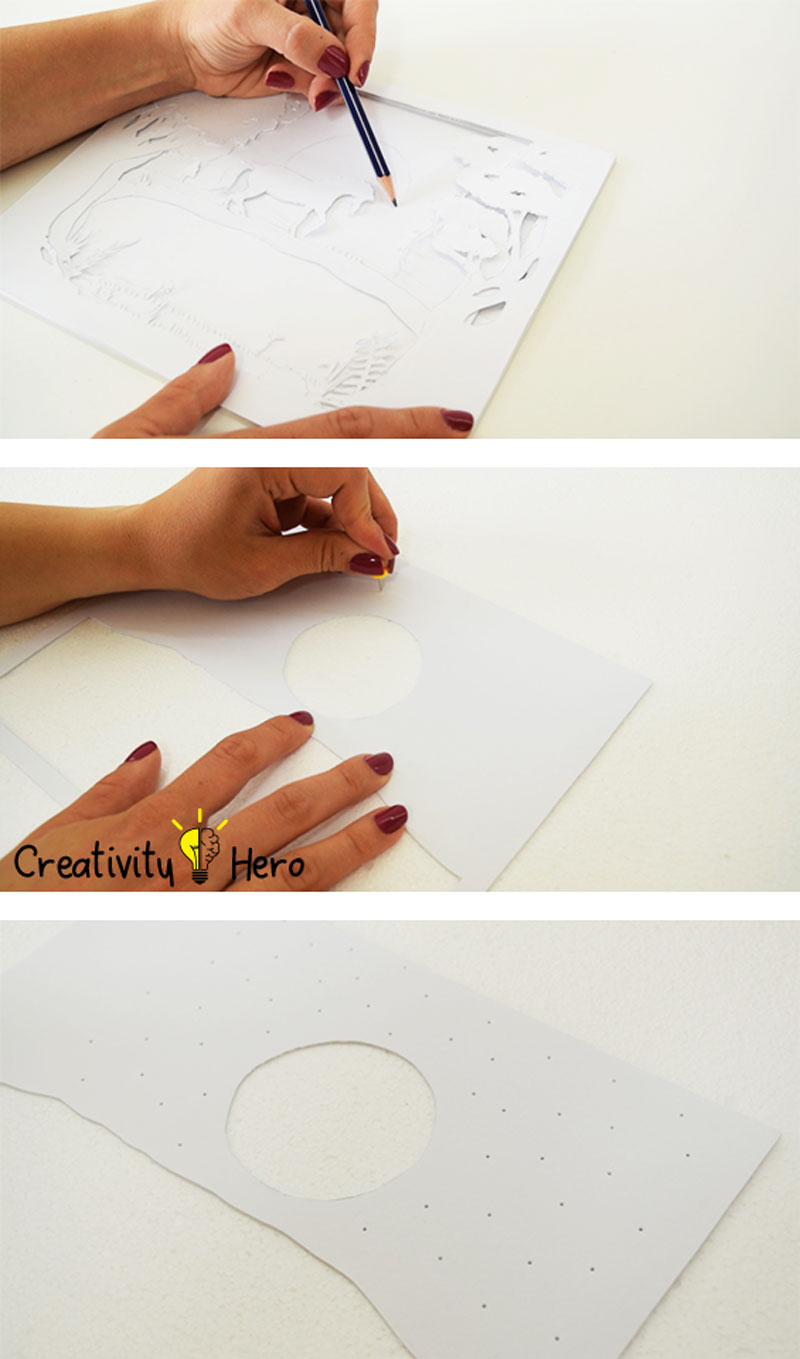
On the last layer I made a large moon and stars. For the moon, I’ve cut a circle with my utility knife, and for the stars I’ve put the card stock onto a foam board and made small holes with a pin.
Step 5: Reassemble the layers and glue them together.
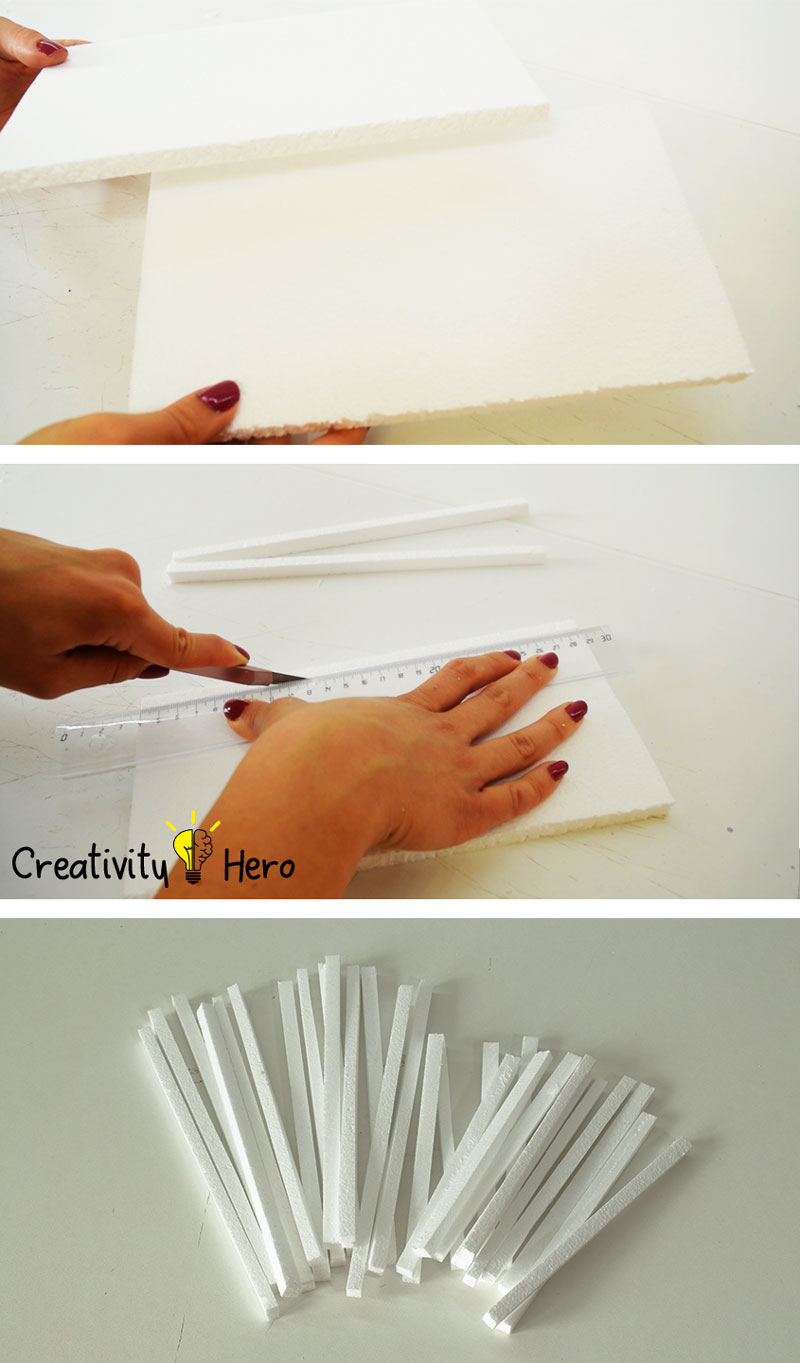
The layers are reassembled with foam spacers in between each one. This gives the image the appearance of depth and creates a 3D effect.
I cut out the foam spacers. They are all 1 cm wide. I cut 12 spacers 25 cm long, and another 12 spacers 18 cm long. There should be 4 spacers on each layer.
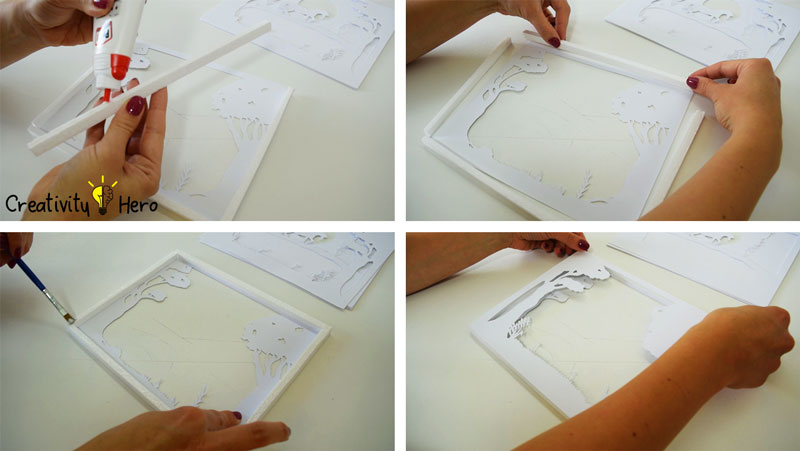
Then, I glued the layers together. I’m going to glue spacers around the edges of the first layer and then glue the next layer on top of it. Make sure the layers are properly lined up. Repeat this process until all the layers are glued together.
To get a reflection effect, you don’t have to separate those three layers with spacers, instead you should glue them together. The water layer goes behind the horse layer, and then the upside down layer goes behind the water layer.
Now, you have all the layers!
Step 6: Build a wooden box.
Now, it is time to build the wooden box. You can also buy pre-made boxes, but I like working with wood, so I created mine.
Measure the thickness of your paper layers plus about 2 cm space for lights, frame and a glass panel. The depth of my box is 8 cm. You can leave more space if you want, because mine was a tight fit.
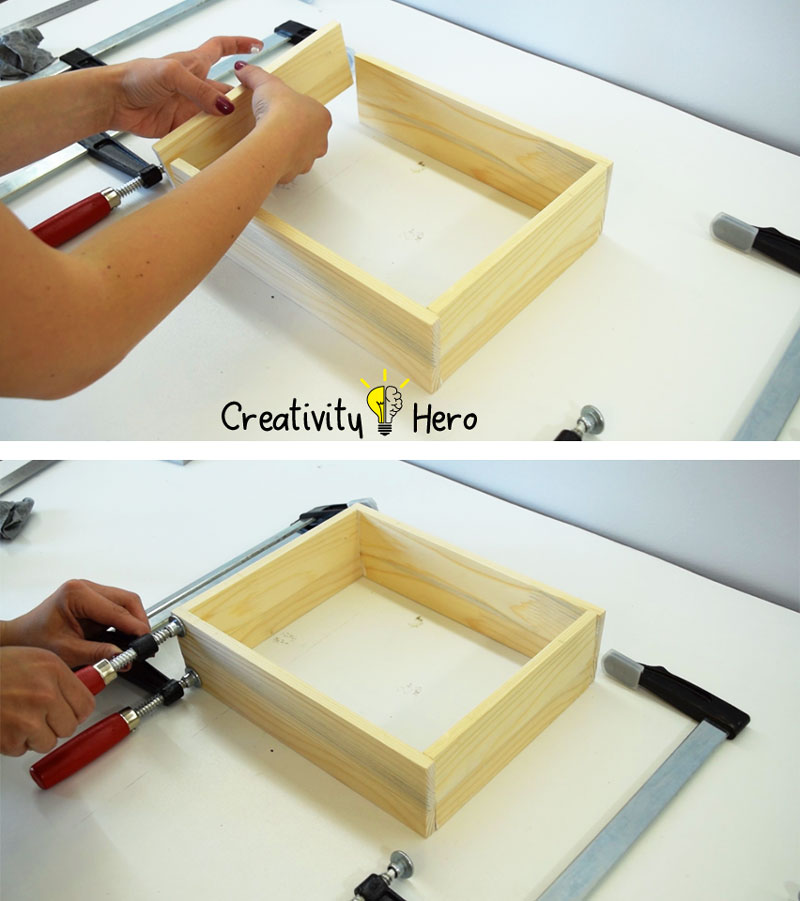
I used a hand saw to cut 2 pieces 27 cm long, and 2 pieces 20 cm long. Then, I glued the box with a wood glue and used some clamps to hold everything in place while it dried.
Step 7: Build a frame inside the box to keep the glass panel in place.
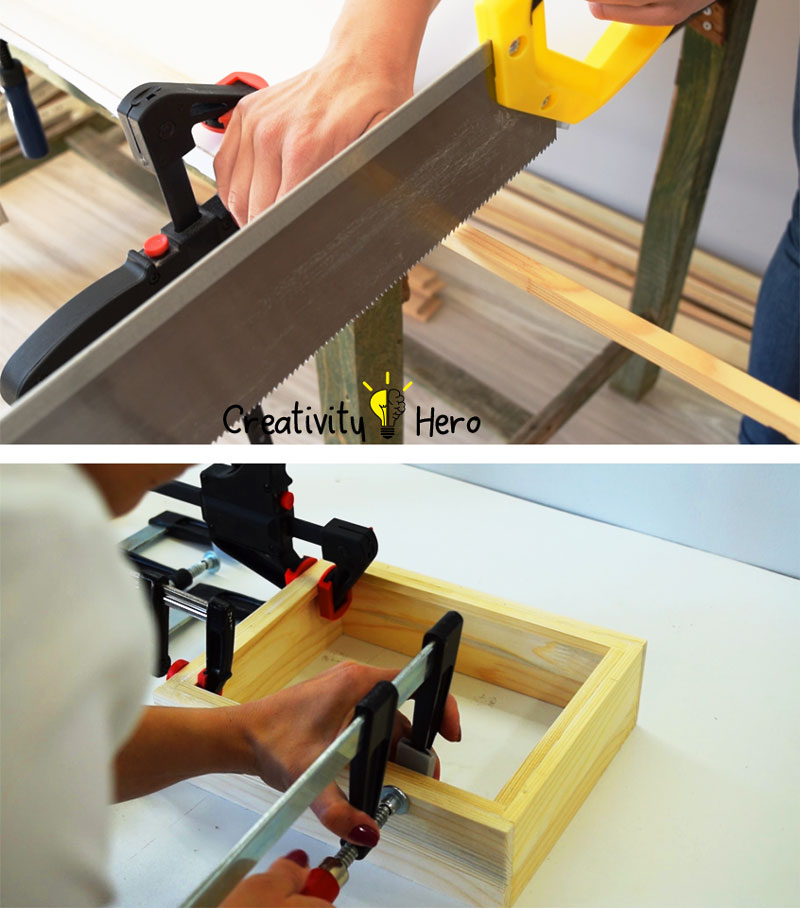
To keep the glass in place I needed to make another frame inside the box with a wood stripe 1 x 1 cm. So, I cut 2 pieces 25 cm long and 2 pieces 18 cm long. I glued them inside the box and left them to dry out.
Step 8: Paint the light box.
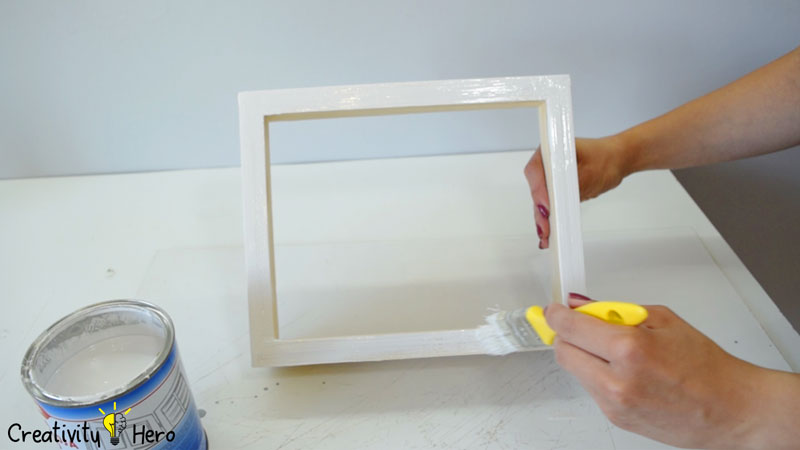
After that, we need to paint the light box. You can paint the outside however you want, but paint the back piece white, so you don’t have to cover it with a piece of card stock. I painted the entire box white.
Step 9: Make a back for the light box.
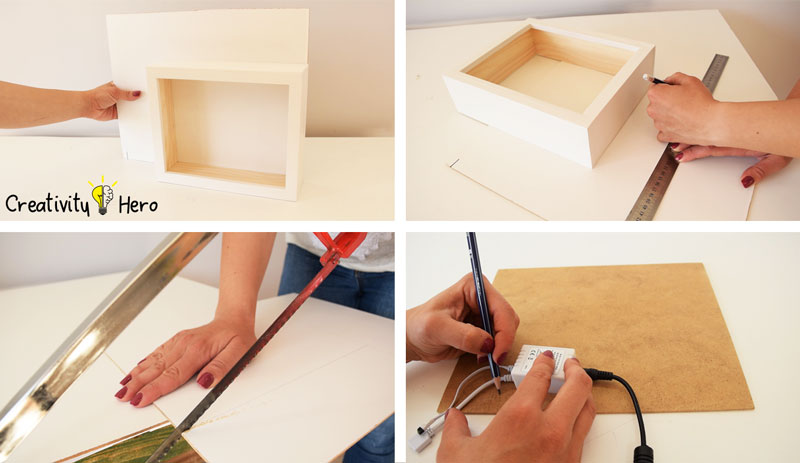
For the back piece I used a piece of plywood, white on one side, so I needed to paint the back side, because as I already said, I wanted my box to be completely white. The dimensions of the plywood are 27 by 22 cm, 3 mm thick.
I made a 5 by 15 mm hole for the lights power to fit through.
Step 10: Put all the pieces together.
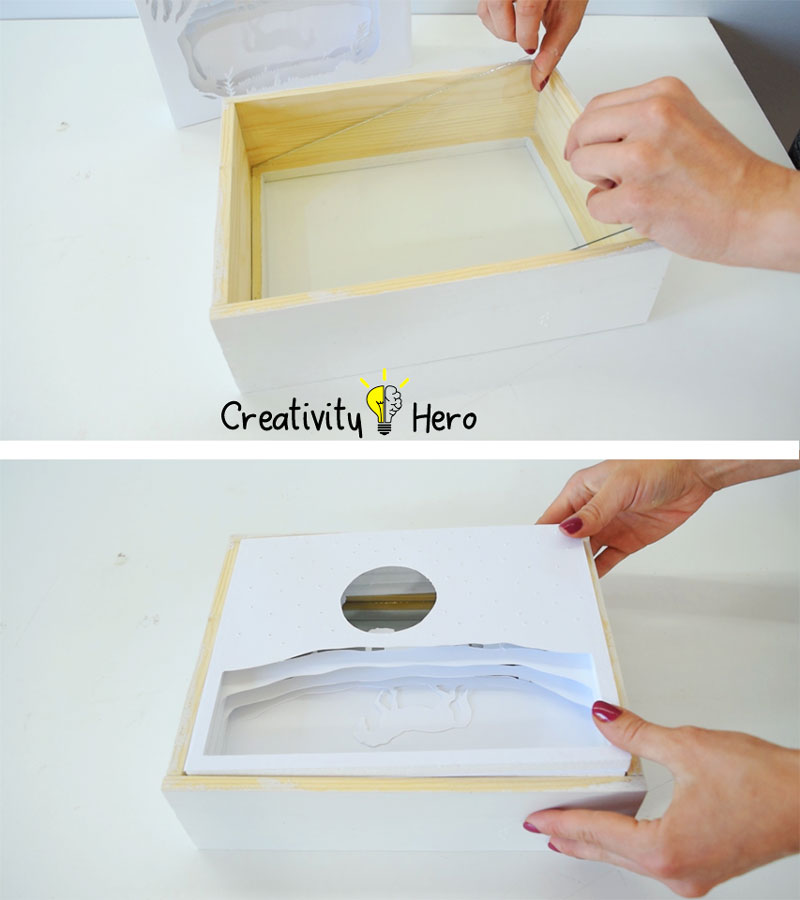
Once they’re dry, I can put the glass into the box, and then push the card stock and foam core layers into the light box until they touch the glass.
Don’t forget to clean the glass from the inside, because you won’t be able to remove the layers without ruining them.
Step 11: Put some lights in the box.
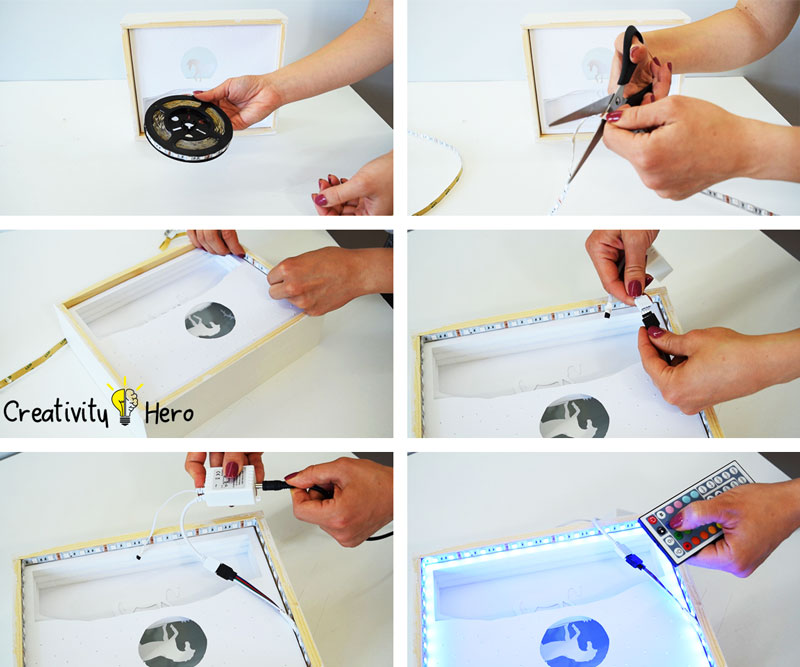
Now, let’s put some lights in the box.
I had 200 grams card stock, and I wasn’t sure how much the light will pass through all the layers. So, I decided to put a light strip all around the box. I cut the lights to the right length, around 90 cm and stuck inside the box. You can put them wherever you want!
You can use different light sources, for example fairy lights, or LED lights, it depends on you. I highly recommend using RGB LED strip lights because they are self-adhesive, flexible, you can cut them to size, and you can easily change colors, which will provide better effect. Also, they barely generate any heat. So, they are perfect for this kind of project.
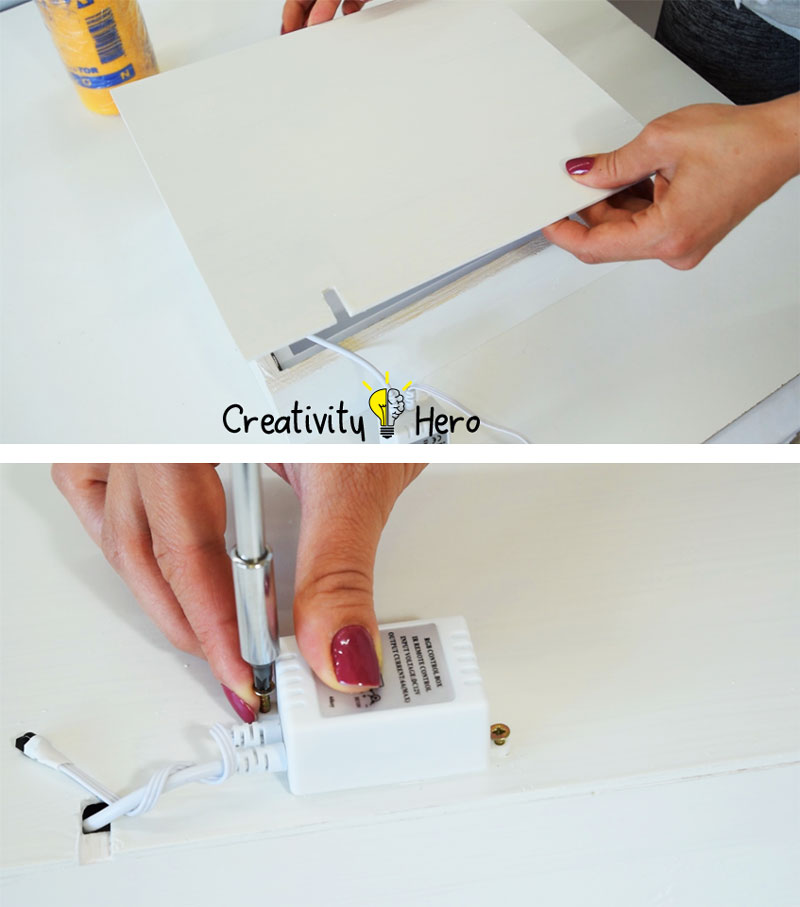
Once I’m done with the lights, I tread the power cord through and glued the back down.
Now your 3D paper cut light box is complete.
Turn your light box on and admire the amazing result!

Thank you so much for watching. I hope you enjoyed this wonderful DIY. If you liked this video give me a thumbs up and subscribe to my YouTube channel.

Hello Marija,
I am very interested in your works with this kind of light box. It’s awesome.
I want to ask you that which software you use for design the template.
Thank you very much.
Thank you very much! It is actually hand-drawn. After I drew that on the cardboard, I took pictures of the layers, and than I traced each picture in Adobe Illustrator. You can find the template here in this post.
Amazing! You’re skillful and talented!
Thank you so much! 🙂
this is out of this world, i am speechless. I cant open it. what is a rar file. i am familirar with this 🙁
Hi, beautiful job here! Wondering if you’d be willing to share what your power source is, is that remote control? Maybe you even have an affiliate link I could use to purchase? Thanks for taking the time to put this together, can’t wait to try it myself. 🙂
Hi Molly! Thank you so much! I used RGB LED strip lights in this project. A remote control is included in the package. I’ve put a link to the RGB LED strip lights in the materials list, you can check that out. Also, I’d be happy to see some pictures once you’re done with your project. 😀
thanks so much! happy to have found your site, it’s great!
I’m happy to hear that Molly! Thank you! 😀
A great and detailed tutorial! Thank you very much, i just finished my own version to give away on christmas.
Thank you, I’m glad to hear that!
Thank you marija
TY for the tutorial! I started making this for my Wife , it’s going to be integrated into her office bureau.