


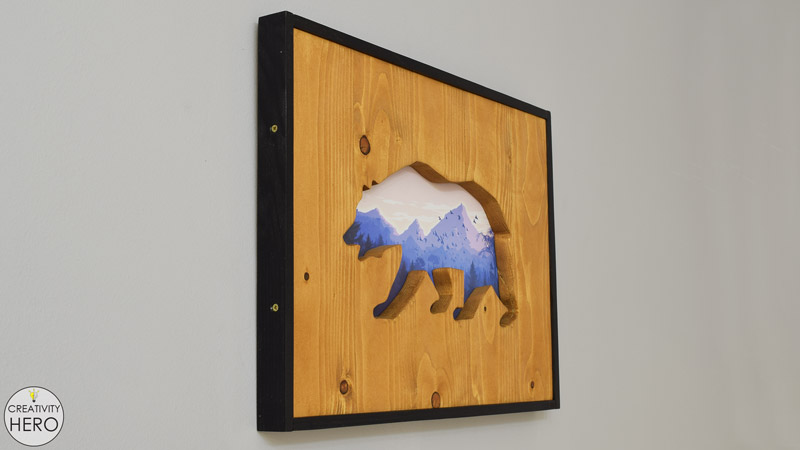
This time I wanted to try something different and make a wall art, which in fact will be an animal shaped wood cut-out and place a picture within.
It was a really fun project, and I think this reclaimed wood wall art came out pretty cool.
For this project I’ll try to use just a couple of power tools: a jigsaw and a drill.
Check out my YouTube video on how I made this wall art:
Here are the materials I used:
- Pine wood flooring board (your local hardware store)
- Fiberboard (your local hardware store)
- D-Ring picture frame hanger
- Walnut stain
- Black spray paint
- Wood glue
- Glazier points
Types of tools I used:
Disclosure: As an Amazon Associate I earn from qualifying purchases.
- Dimensions of the cut-out board: 30 x 42 cm
- Pine strips: 2 pieces 3 x 30 cm; 2 pieces 3 x 44 cm
- Fiberboard: 29,6 x 41,6 cm
Related: How To Create A 3D Paper Cut Light Box | DIY Project
So, let’s get started.
Step 1: Creating a Board out of Pine Wood Flooring.
While cleaning out the basement I noticed a bunch of pine wood flooring boards that stayed there for a long time. So, I picked up one board, in fact half of it and decided to make a wall art.
I took my jigsaw and cut 5 pieces around 32 cm long. I didn’t pay too much attention to the cuts because later I’ll make another cuts to the right angle.

Then, I joined these 5 pieces together with a wood glue. They have tongue and groove joints, which is great, so I applied a generous amount of wood glue, without reinforcing them additionally.
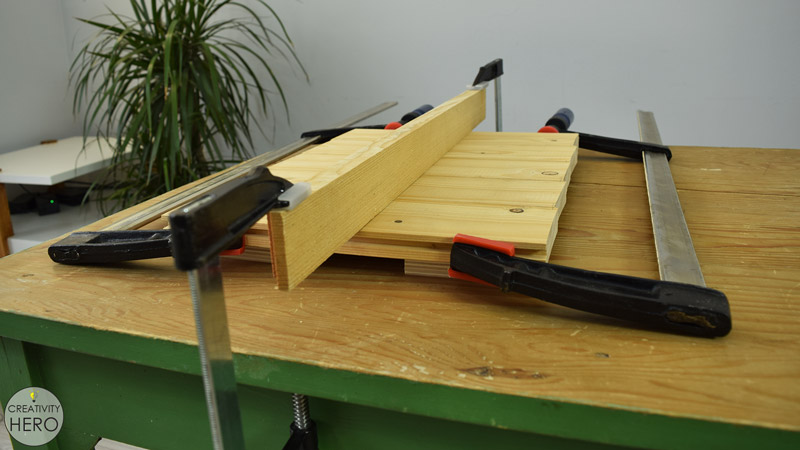
A few clamps are just enough to make a strong connection. To flatten the surface, I clamped a scrap wood in the middle across the pieces. I left them to dry overnight before moving on to the next step.
Step 2: Cutting all the Additional Pieces of Wood.
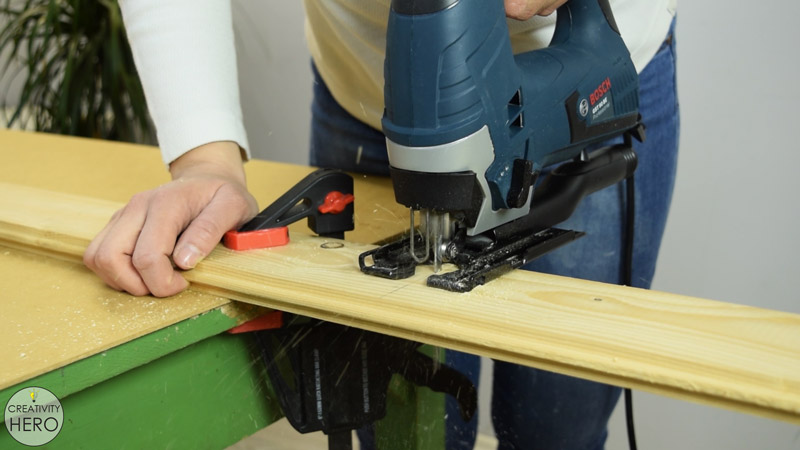
The next day I drew squared lines onto this wooden piece and cut it again with a jigsaw.
But this time I clamped a wooden strip as a guide in order to make straight lines.
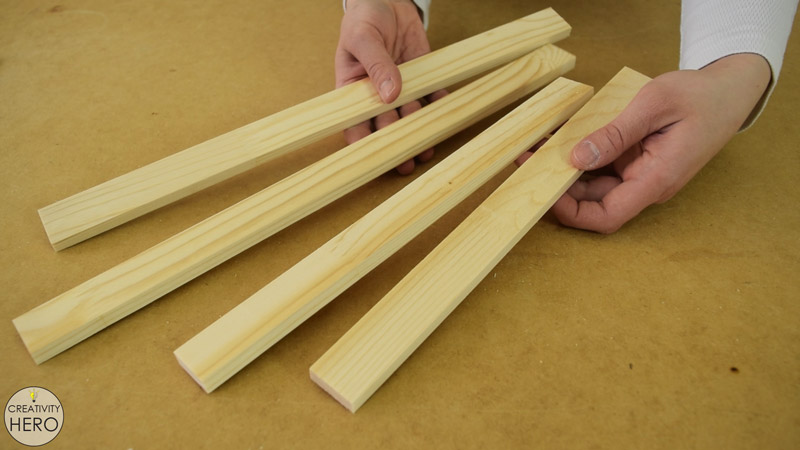
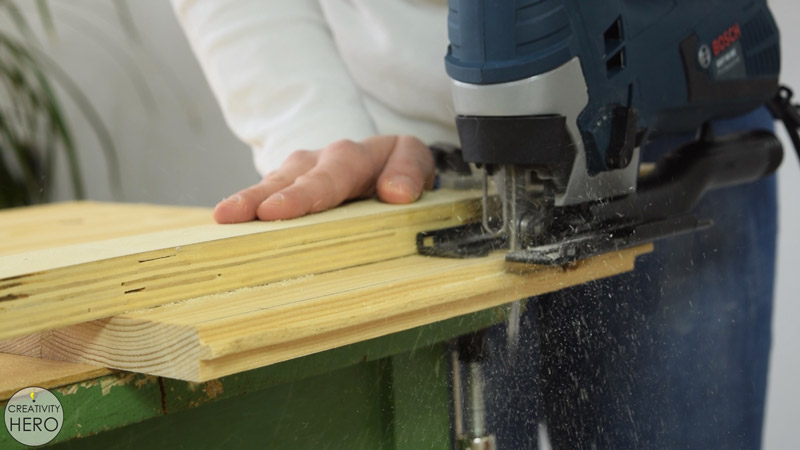
Further, I found a few pine strips, out of which I’ll make a frame, and cut them to size with a hand saw. The frame will give a completed look to the entire piece of art.

Also, I took a fiberboard, placed the pine board above to trace its outline and cut it with a hand saw as well.
In fact, this fiberboard piece will serve as a backing board, and will stay behind the cut-out with a picture attached to it.
Step 3: Making the Bear Cut-Out with a Drill and a Jigsaw.
Now I’m ready to make the cut-out in the middle of the pine board.
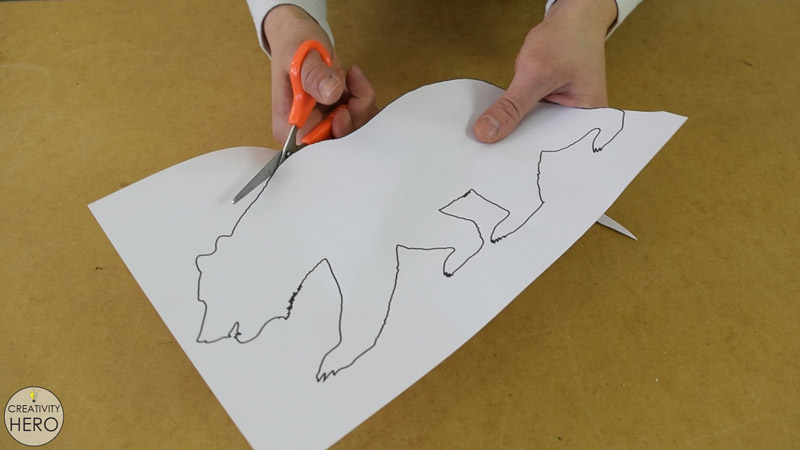
I downloaded a bear outline from Pixabay website. They offer more than million photos, vectors and illustrations which you can download and use for free.
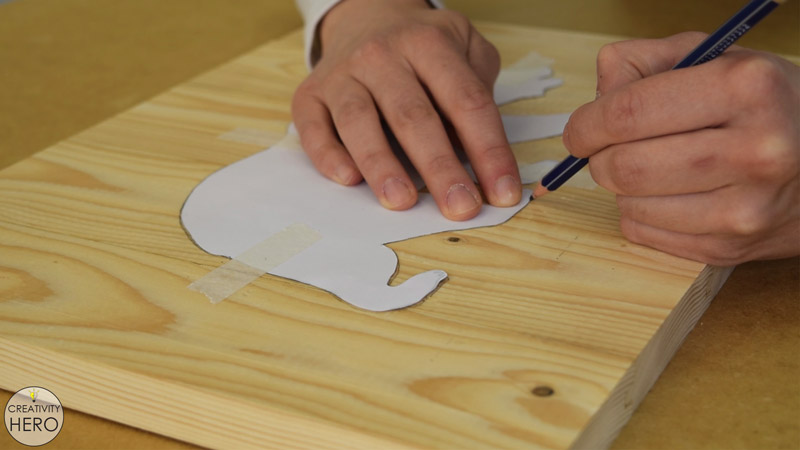
Hence, I cut the bear following the lines, and then traced the outline onto the back of the wooden board, making sure the lines don’t touch any knot, because it can easily fall out and ruin the shape that I want to get.
Related: How to Make Flower of Life Out of Toilet Paper Rolls
I raised the board by placing it onto a few scrap wood pieces, so that when I cut with the jigsaw the blade won’t damage the table surface.
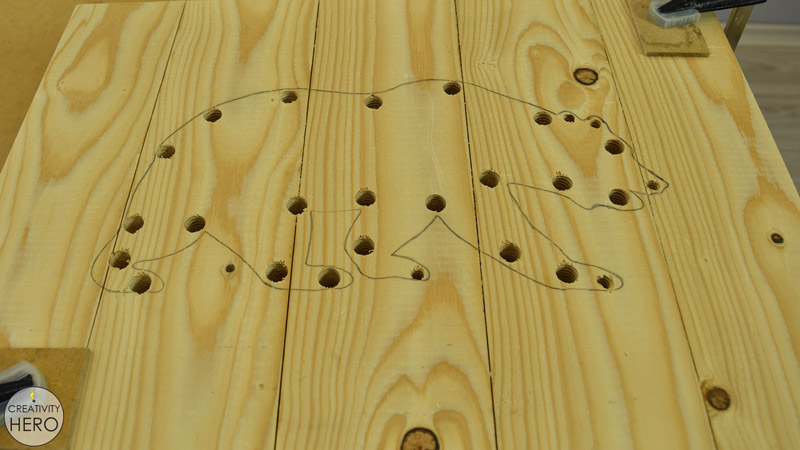
To make my life easier I drilled as many holes as possible with a 12 mm bit which is enough to fit the jigsaw blade. This way I don’t have to make too many curved cuts with the jigsaw.
Then I started cutting. Making these cuts was very fast and easy.
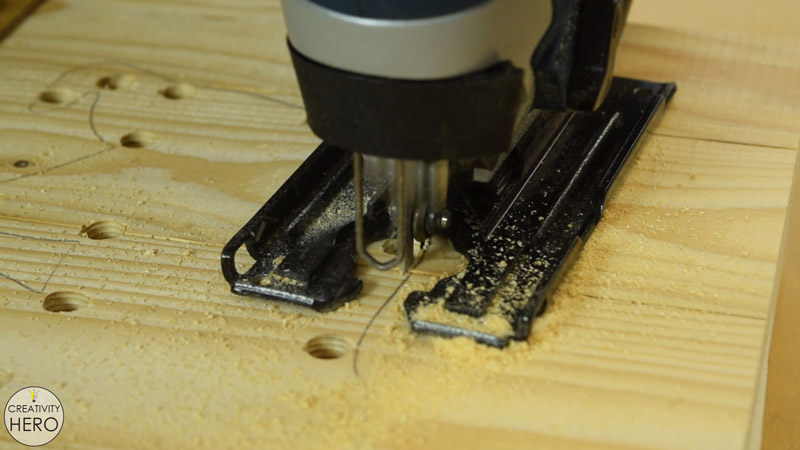
Moving slowly I tried to keep the blade closer to the line, from the inside, in order to avoid mistakes.
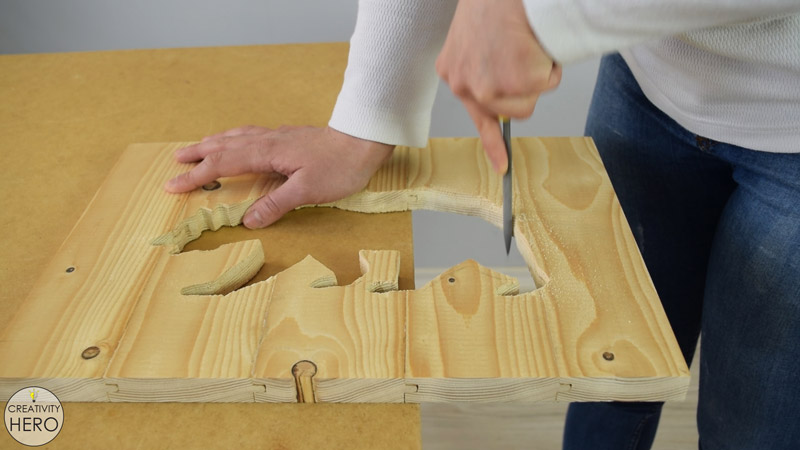
When I was done cutting I removed the cut-out and took a rasp to finish the form.
The rasp did a really good job helping me emphasize all the details of the bear.
Step 4: Sanding.
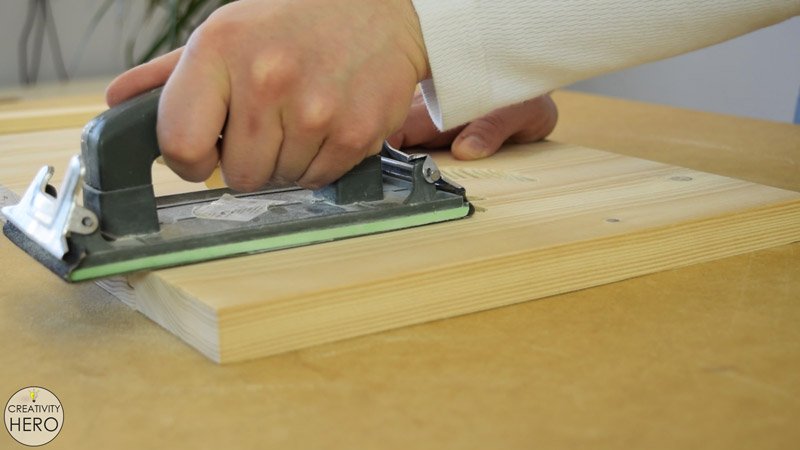
Once I’m done with the rasp, I can sand all the pieces with a sanding block. First I took an 80 grit sandpaper, and then continued with 120 grit until the surface became smooth and uniform.
Step 5: Pre-drilling Holes into the Frame Pieces.
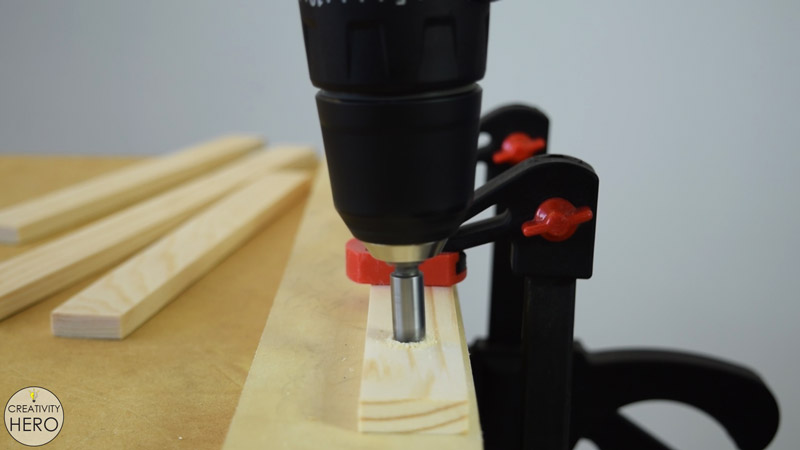
Instead of gluing the frame, I decided to secure it with some screws. So, the last thing I need to do before staining is to countersink holes into the pieces which I’ll use to make the frame.
Step 6: Staining and Spray Painting.
Now let’s move on to the most satisfying part of any project: staining.
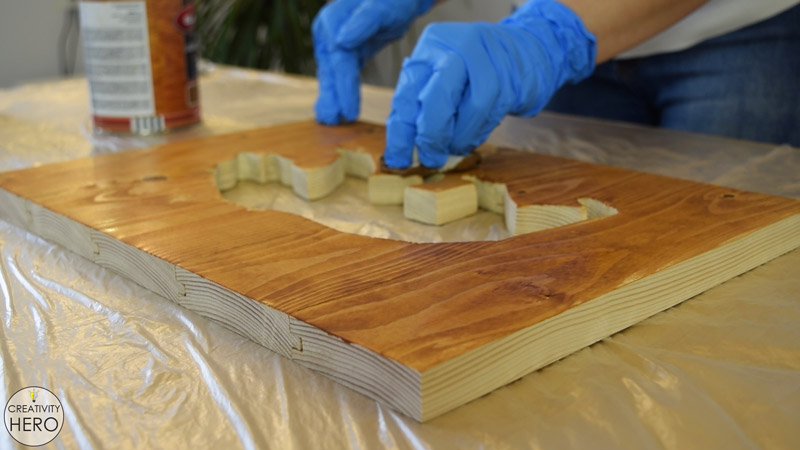
Walnut stain for the cut-out board is exactly what I was looking for. It brings out the natural wood grain creating a beautiful rustic look.
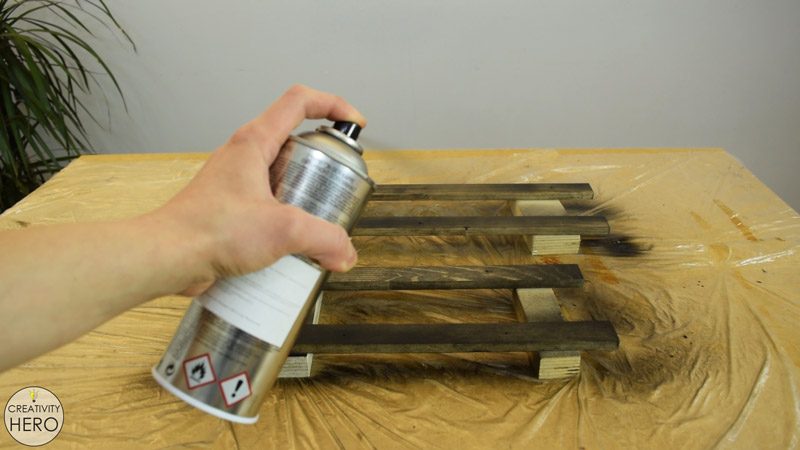
For the frame I chose an ebony stain, which I didn’t like at all. After applying a second coat of the stain it was still too light, so I ended up spray painting it with a black spray paint.
Surprisingly, the black color turned out to be a perfect match for the walnut stain.
Related: DIY Colorful Rectangular Wooden Wall Shelf
Step 7: Attaching Everything Together.
Next, I can attach everything together.
I placed the cut-out board onto 2 layers of fiberboard, because I need to leave enough space for the backing board and for the hanger.
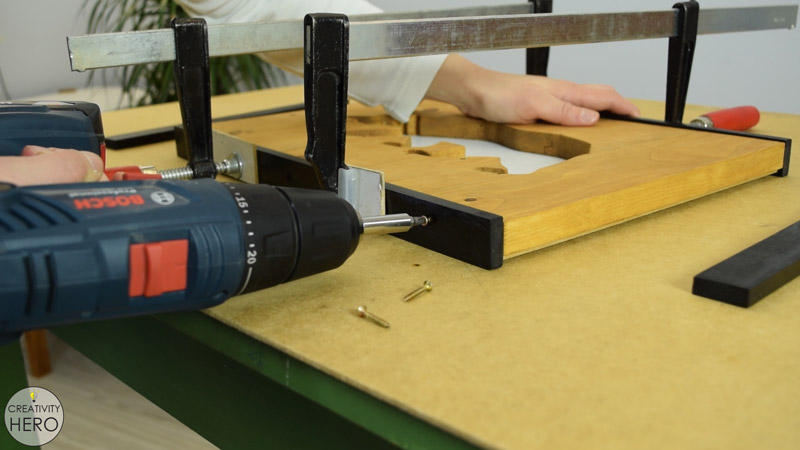
Then I clamped down the black pieces creating a frame and inserted some screws to secure them well. I really like the exposed screws, I think they’re a nice addition to the frame.
Onto the fiberboard I’m going to attach a landscape illustration which I also downloaded from Pixabay.
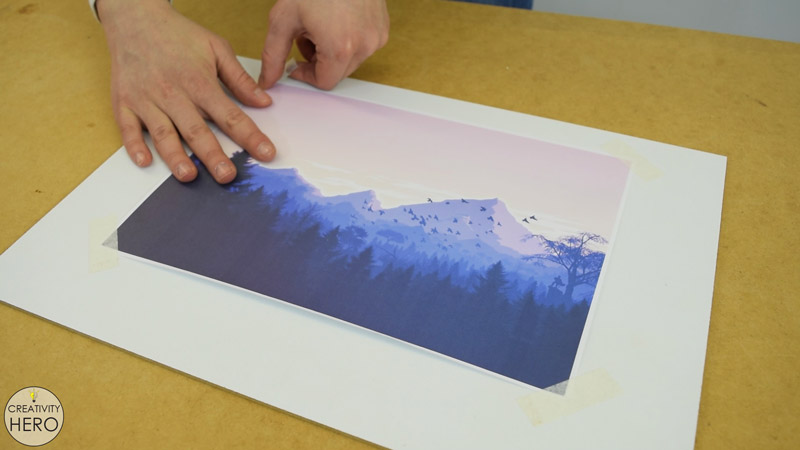
I positioned the picture in the right place, and to make it easily replaceable I attached it with a tape. It won’t be visible anyway.
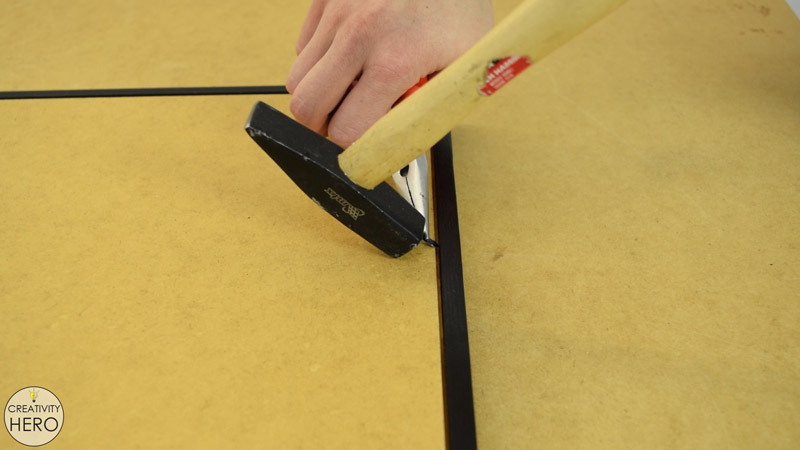
Finally, I can put the backing board and secure it in place with glazier points, which can be bent easily in case you need to switch out the artwork.
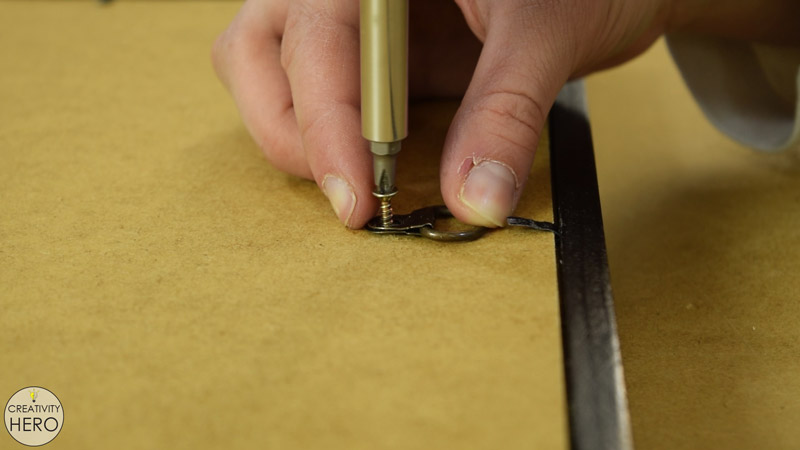
Lastly, I marked the point where I’ll place a D-ring picture frame hanger, and attached it with a screw.
Step 8: Hanging the Wall Art.
What’s left to do is to hang this piece of art onto the wall.

I think this wall art turned out amazing. Starting from the bear cut-out, the picture within, to the color combination, I like every part of it.
If you like this wall art please like, share and subscribe to my YouTube channel.
