


 Featured")
After I built my table saw fence I realized that the next thing I need to do for my workbench is a crosscut sled.
A crosscut sled is an essential part of any table saw. It makes cross cutting operations a lot more accurate, cleaner and safer. This accessory is fairly simple to build. You can find the link to the plan below in this article.
If you want to build it yourself I recommend watching the full video.
Recommended: How to Make a Table Saw Fence and Router Table Fence for Homemade Workbench (Free Plan)
Here are the materials I used:
- Plywood board, 21 mm thick (your local hardware store)
- MDF sheet, 8 mm thick (your local hardware store)
- U-shape aluminum profile
- Wood glue
- CA glue
- T-track kit
- Nuts and washers
- Butterfly bolt
Types of tools I used:
- Circular saw
- Router
- Cordless drill
- Hacksaw
- Caliper
- Clamps
- Countersink drill bit
- Router bits
- Square ruler
- Self-adhesive measuring tape
Disclosure: As an Amazon Associate I earn from qualifying purchases.
Here you can download the FREE PLAN:
Step 1: Creating Miter Slots on the Table Saw Top.
I started this project with creating miter slots on the table saw top. The best tool for cutting miter slots is a router.
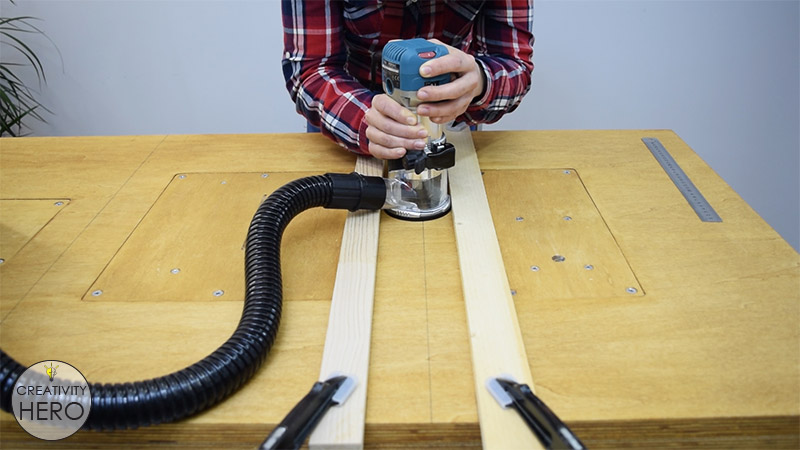
First, I traced some parallel lines that I need to follow with the router and made sure they’re square with the front of the table. Then, I clamped down two guides that will help me make accurate cuts.
So, I carefully started routing the sections out. The depth of the slots is 10 mm, and their width is 15 mm. I have a bit with 12 mm diameter, so I need to make 2 passes to get the proper width.
Once I’m done with the router I need to attach the U-shape aluminum profile into the slots. They’re a perfect fit, so I can cut the aluminum to size with a hacksaw.
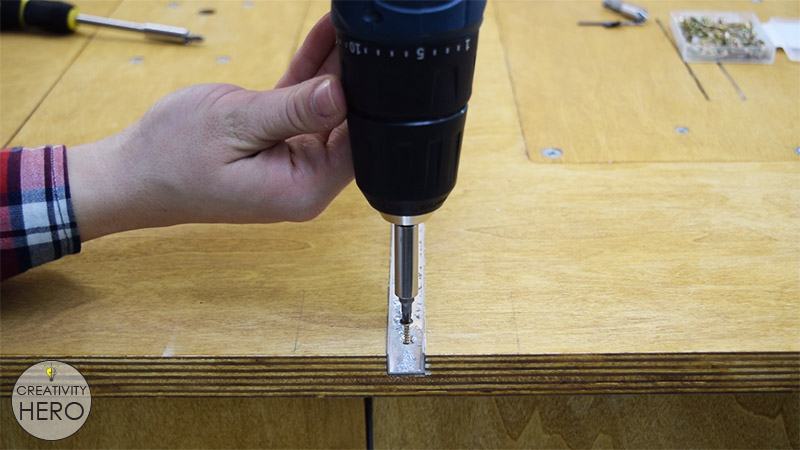
Further, to attach the aluminum into the slots I used some countersunk screws because they need to sit flush with the surface.
Step 2: Making the Runners and the Base of the Crosscut Sled.
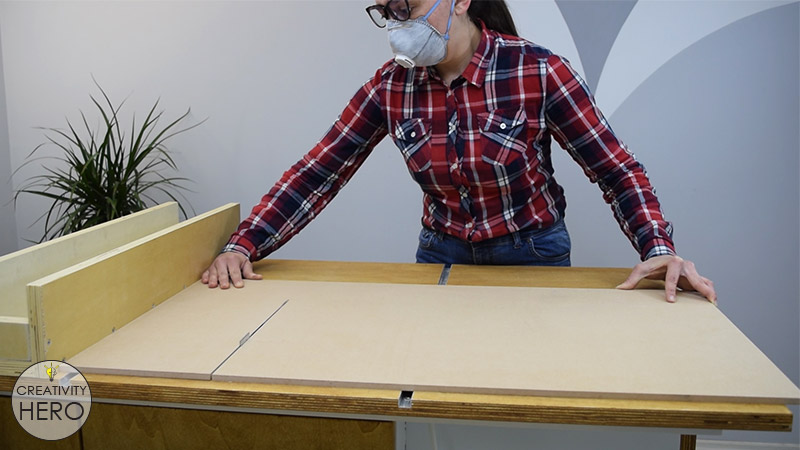
For the base I’m using 8 mm thick MDF, and cut it to size on my table saw. Its dimensions are 70 by 50 cm, which is the right size for me.
Now let’s move on to the runners.
You can use metal, plastic or hard wood runners. I’m using beech for the runners, so I’m cutting 2 identical strips, 13 mm wide and 8 mm thick. Here I need to be careful because these runners should fit in the miter slots without causing any movement.

They’re cut to size and fit into the slots with no side-to-side movement, and also they slide nice and easy. The runners need to be flush with or just a little bit under the surface of the table saw top.
To attach the runners to the bottom of the base I need to raise them up using some spacers, in my case washers. They need to be a bit higher than the table top and when I apply some glue they will have a good contact.
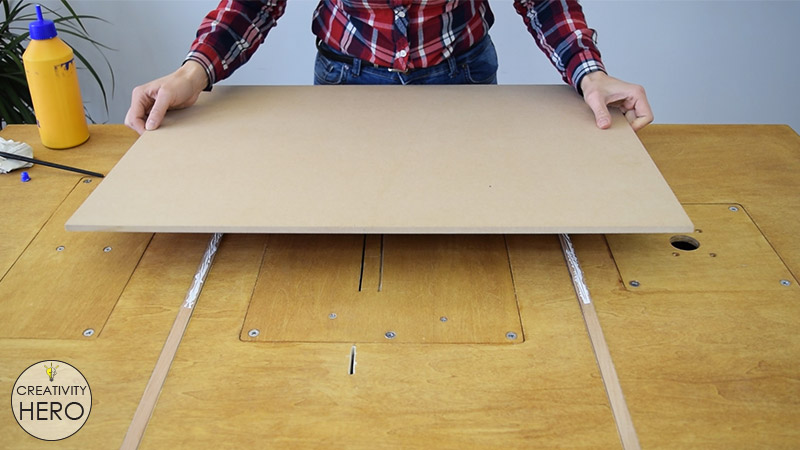
I’ll drop these runners on top of the washers, apply a wood glue on them and place the MDF right on top.
Once the glue has dried, I flip it over and drive at least 5 countersunk screws in each runner to secure them permanently.
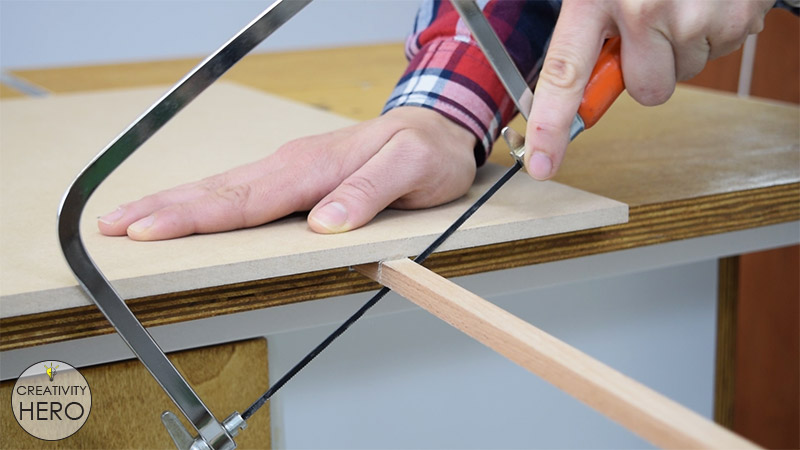
One more thing I need to do with the runners is to cut off the excess length with a handsaw. With that done, I can now move on to the fences.
Step 3: Working on the Fences.
Attaching the back fence.
For the front fence I used two plywood strips, and for the back fence I used one plywood strip. I cut them to size and attached the back fence.
First, I applied a wood glue to secure it well. Then I placed the back fence on the sled and clamped it down. I want the fence to be flush with the edge of the sled, but it doesn’t need to be perfectly square, it’s here just to support the sled. This fence doesn’t need adjustment, so I’ll drive some screws in.
With the back fence in place then I just raised my blade as high as it could go, pushed the sled forward and made about 80% of the kerf cut throughout the sled.
Attaching the front fence.
Now let’s pay attention to the front fence. It consists of two plywood stripes which I glued together with a wood glue, one 8 cm wide and other 6.6 cm wide, because the fence needs a 21 by 14 mm rabbet along one of its edges.
Using a chamfer bit I put a small chamfer on the bottom inside edge of the front fence where it will actually touch the work pieces. With this chamfer I created a dust channel because I wanted to allow the sawdust to have a place to go when I’m using the sled itself, and also I wanted to avoid any inaccuracies.
Both fences should be taller than highest you’ll raise the blade, but not too tall, because it can be difficult to put pressure on the work pieces with your hands.
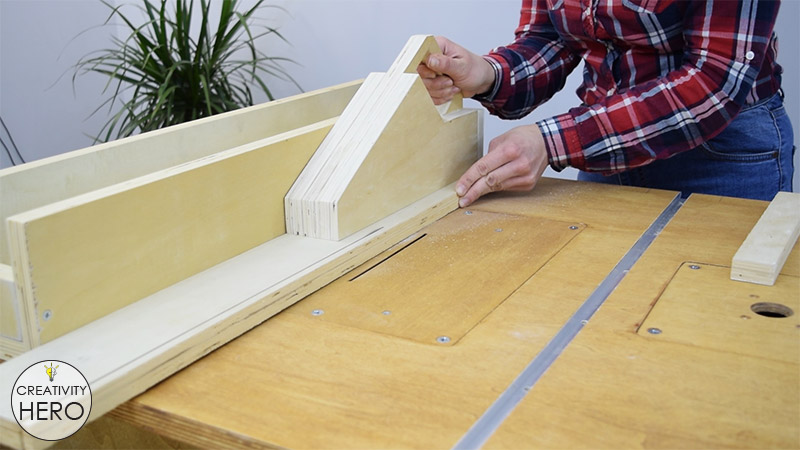
In contrast to the back fence, for the front fence it is crucial to be square to the blade. So, first I’ll use a square ruler and try to get the fence as 90 degrees to the blade as possible. Then, I’ll clamp it in place, pre-drill and countersink a hole and drive two screws in to secure the fence in place.
Here I’m not using wood glue, because I might need to make some adjustments. Then I can continue the saw kerf completely throughout the whole sled.
Recommended: Homemade 3 in 1 Multipurpose Workbench: Table Saw, Router Table and Inverted Jigsaw (Free Plans)
Step 4: Adjusting the Crosscut Sled with the 5 Cut Method.
To fully adjust the sled I’m going to use the 5 cut method.
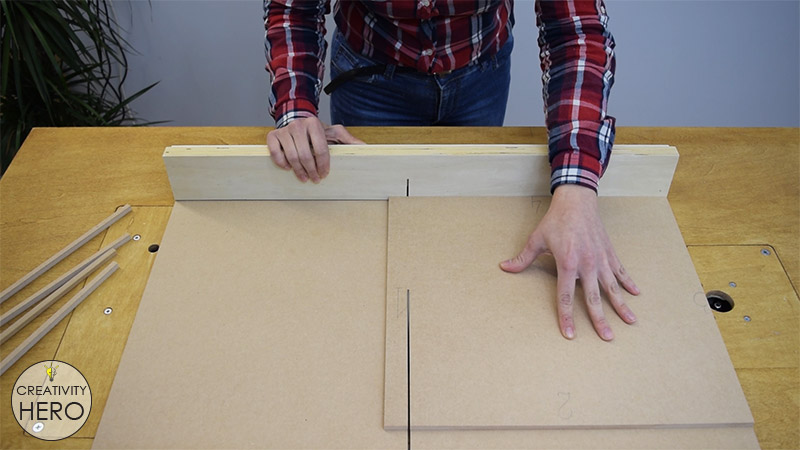
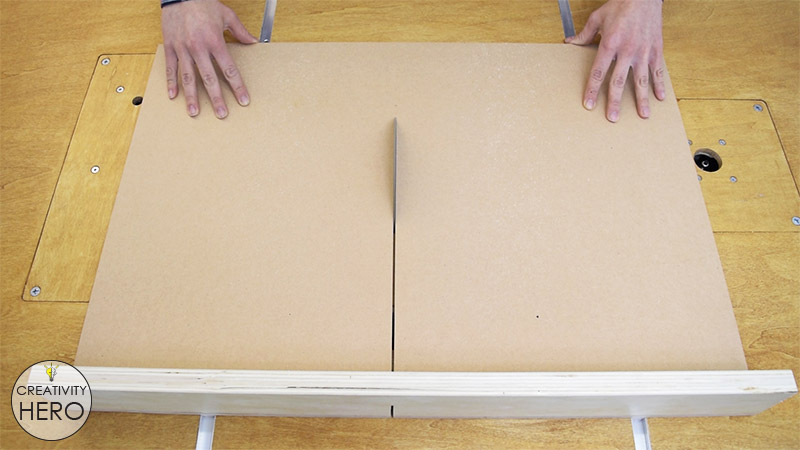
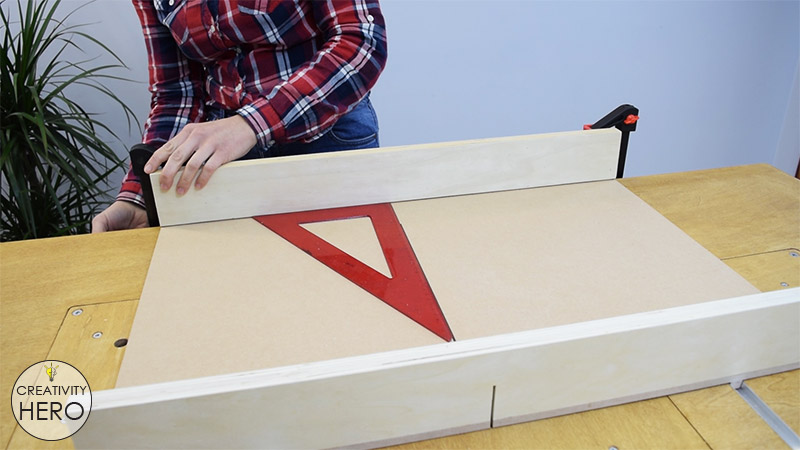
I took a larger piece of MDF scrap, it doesn’t matter what size it is. However, the larger the piece of wood, the more accurate the adjustment will be. All 4 edges I marked with numbers from 1 to 4, and started cutting.
I made a small cut on the edge 1, then rotated the MDF piece clockwise and made another cut on edge 2. I repeated this step with edge 3 and 4, and arrived back at my first original cut that I marked as number 1. Here I’m going to slide my piece more than 2 cm to the right and make the fifth cut. I’m going to take this off cut and measure it’s width with a caliper. It will show me the exact error in the squareness.
How to calculate the error?
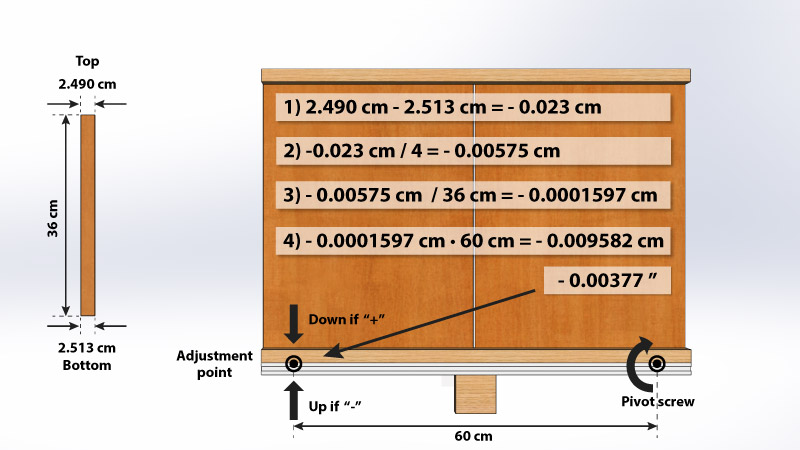
The width of the top is 2.490 cm. The width of the bottom is 2.513 cm. I subtracted the bottom portion from the top and the result is negative 0.023. Then, I divided that by the four angles that are in this rectangle, and I came out with negative 0.00575. I took this number and divided that by the length of my fifth cut which is 36 cm, and got 0.0001597. Then I multiplied that with the distance between my pivot screw and where I’m going to make an adjustment (which is 60 cm).
In my case I had a negative 0.009582. In inches this is a negative 0.00377, which is great. I’m happy with the result and I don’t need to make any adjustment here.
But, if you want to make an adjustment, I’ll explain how to do it. If it’s a negative number, you need to move your fence up on the adjustment side, and if it’s a positive number you need to move it down. The best way to adjust it is with a feeler gauge and a scrap of wood.
If you need to make an adjustment you need to drive a new countersunk screw to secure the fence. Don’t reuse the old screw hole.
To completely secure the fence to the base I’ll drive some more screws on the bottom.
Step 5: Installing a T-Track on the Front Fence.
Now it is time to install a T-track for the stop block. I have a white aluminum curtain track and I cut it to size. Its length needs to match the length of the front fence.
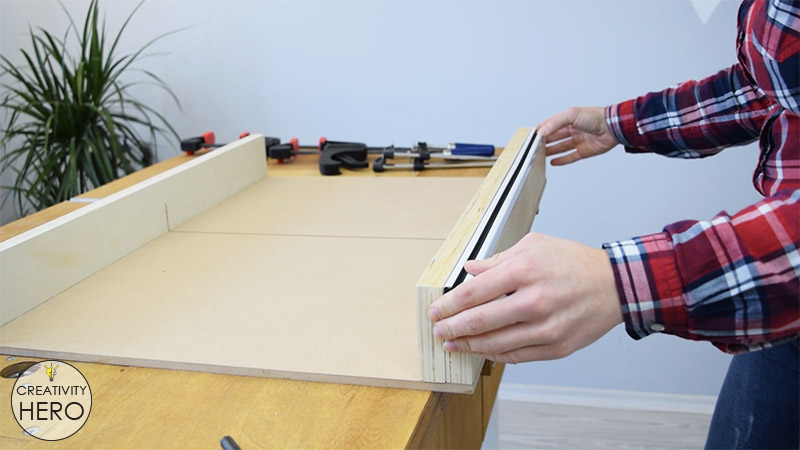
I used a CA glue to make a better contact between the track and the fence. After that I secured the track additionally with some screws.
Step 6: Adding a Blade Guard.
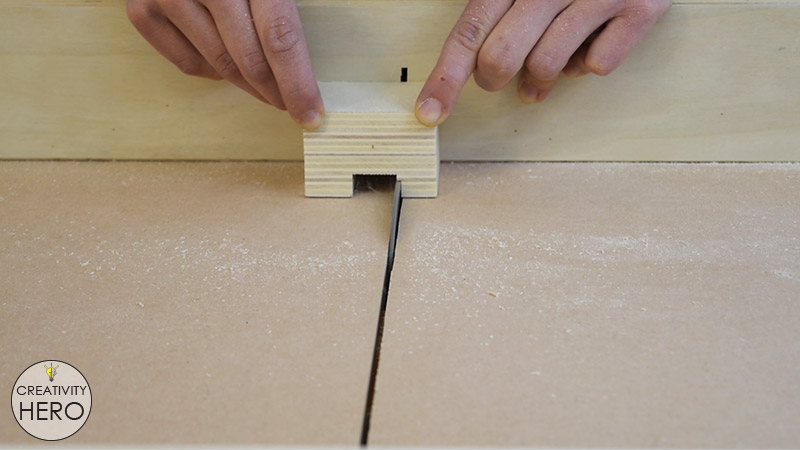
When making cross cuts the blade is protruding out of the back, which means that I need to make a blade guard. I’m going to make the cuts on my new crosscut sled. So, I’m cutting 3 squares out of plywood using a temporary stop block. Then, I’m joining them together with a wood glue, and then, I’m attaching this guard on the front fence.

This block will act as a reminder for me to push the crosscut sled from the sides of the block and not the middle when making cross cuts.
Step 7: Making a Flip Stop Block.
I decided to make a flip stop block out of plywood. This stop block will make repeated cuts possible. It consists of two parts and it’s very easy to make.
I made all the cuts on my table saw with the crosscut sled.
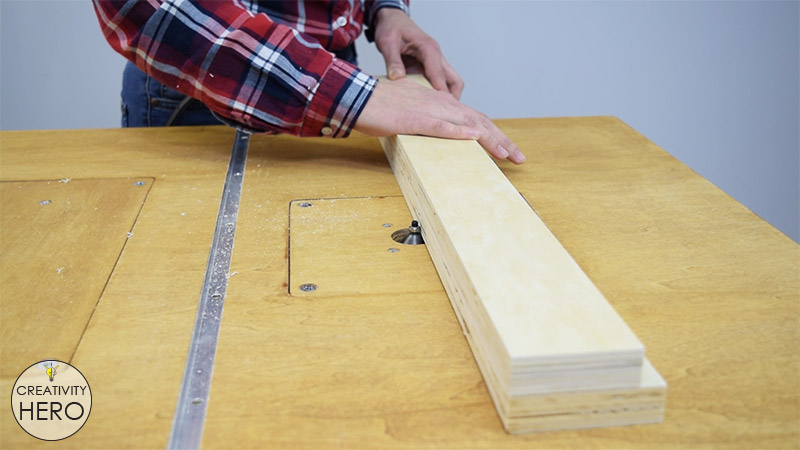
To make the first part of the stop block I’m gluing these pieces together, and then I’m removing 12 x 41 mm of it on the table saw. It was extremely easy to remove that area now that I have the crosscut sled. On this piece I made 2 holes because I need to insert 2 bolts in it.
When it comes to the other part, it consists of 3 small pieces of plywood. I drilled a hole in the smallest one, and then I joined all the pieces together.
To join them, I’m using a wood glue and some screws, because I’m going to move it on the T-track all the time and flip it when making cuts, so it needs to be strong.
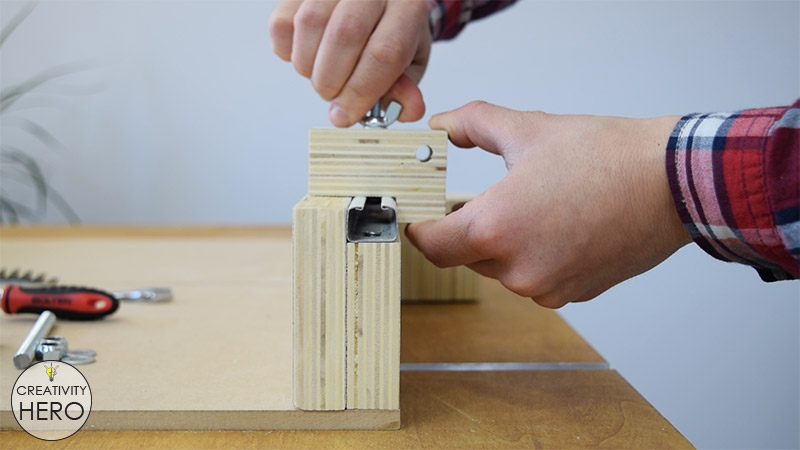
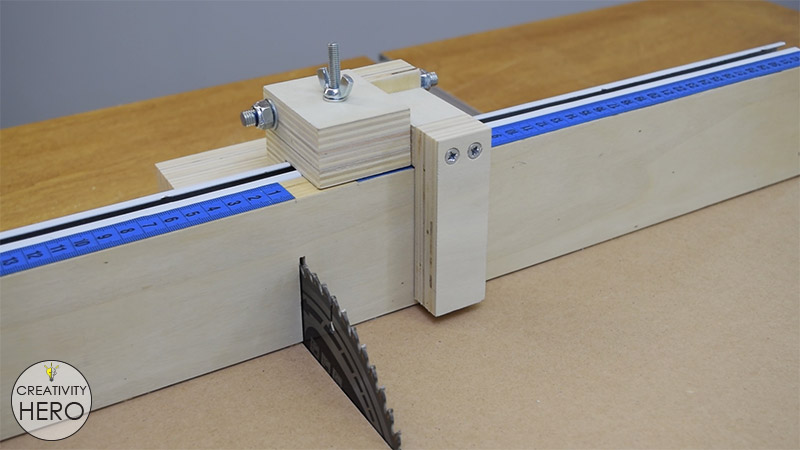
I’m attaching the stop block onto the T-track and tighten it with a bolt and a butterfly. Then, I’m using a longer bolt to connect the two parts of the stop block together and tighten them with washers and nuts with rubber seal.
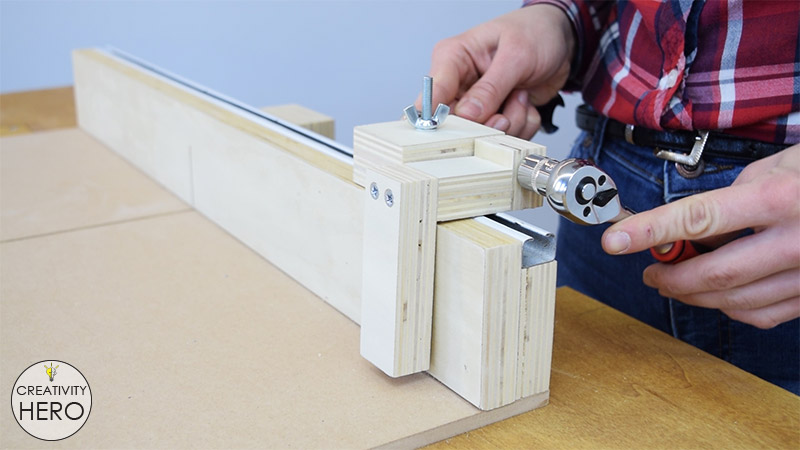
It works pretty well, it’s strong enough and there’s no side-to-side movement.
Step 8: Applying a Tape Measure on the Top of the Front Fence.
What’s left to do is to apply a tape measure on the top of the front fence. I used a sewing tape, set my stop block properly and carefully attached it onto the fence with CA glue.
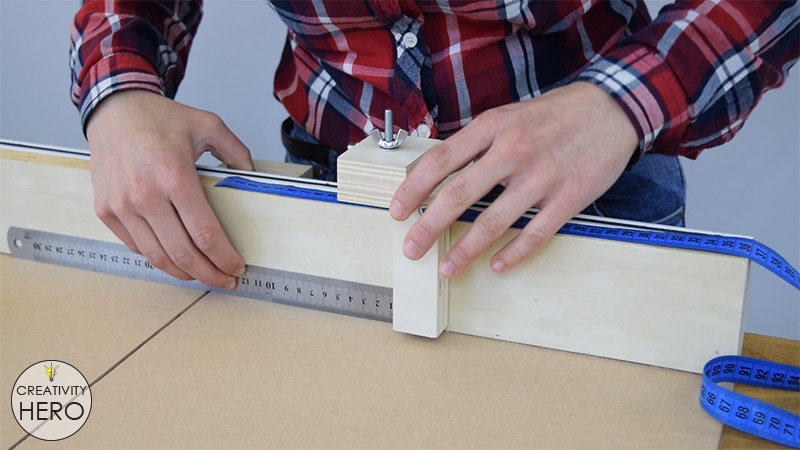
Here you need to take the thickness of the stop block into consideration to determine the starting point of the tape.
Step 9: Making some test cuts on the crosscut sled.
This means that I’m done with the crosscut sled. An the end, I’m going to make some test cuts and see how everything works.
Now I can use it to make little cuts and I can cut larger pieces. Also, I can also use the stop block to make repeated cuts at a perfect 90 degree angle. Most important, I’m protected from kickbacks because it’s pretty safe to use. I really like how this crosscut sled came out.

You May Like: DIY Rustic Hemp Rope Chandelier for 35$
I hope you find this video useful. If you have any questions and thoughts on this crosscut sled leave them in the comments section below. Also if you like this video share it with your friends and subscribe to my YouTube channel.

Could not find the location to get the free plans for the Cross Cut Sled with Stop Block. Would like to build one which would be much easier with plans. Do not have a TV in my workshop. Thank you.
Hey Marija
Great video. You made steps easy to follow. Nice to see other women in woodworking : )
Thank you very much! I really appreciate it! 🙂
desde Colombia, te doy las gracias por tus excelentes aportes.
Thanks Julian! 🙂
Beautiful work. I already built the table and the fence. Working on this next week.
Wow, I’m so glad that you’ve built the table and the fence. I’d be happy to see them. You can e-mail me some photos of them. 😀
I made the bench fence and cross cut sled. I posted Photos on instructables. Thanks for sharing They are great designs but I must admit was not easy. You make it look easy but for a first serious project it was quite difficult. Mainly to cut the wood precisely! I saw in the video, showing the 3D drawing, you had plans o make other accessories. Did you make them? Next project is your clock with different layers!
thanks for sharing Marija!
regards
Martin
Hallo Marija,
habe schon viele DIY-Videos gesehen. Deine sind klasse. Ich habe so einige Anregungen und freue mich wieder in die Werkstatt zu gehen. Die Anleitungen ist aber der Hammer. Da kann sich manch anderer Handwerker hinter verstecken. Ist toll, dass Du uns durch die genauen Angaben direkt etwas an die Hand gibst, dass man umsetzen kann, wenn man kann.
Freue mich diesen Kanal gefunden zu haben.
Gruß aus Aachen – Germany
Rudi
Thank you Rudi! I really appreciate that!
Do you have the plans for your push block?
Hi Tommy. You can find more details in Step 7 in this article. I hope this will help.