


Today I’m going to make a table saw fence and a router table fence for my multipurpose workbench. If you’re new to my website be sure to check out my article on how I built the workbench.
Also if you want to build this fence yourself I’m giving you a free plan. You can find the free plan in the text below.
This is very simple design and the most important thing is that it is strong, functional and provides perfect cuts. I like how it came out and now I can make different cuts on my table saw and router table faster, easier and safer.
Here are the materials I used:
- Plywood 122 x 244 cm, 21 mm thick (your local hardware store)
- Wood glue
- T-nuts
- 5 minute epoxy
- Water-based Polyurethane
- Walnut wood stain
- Nuts and washers
Types of tools I used:
- Circular saw
- Jigsaw
- Router
- Cordless drill
- Forstner bit
- Random orbit sander
- Sanding block
- U-shape saw
- Clamps
- Countersink drill bit
Disclosure: As an Amazon Associate I earn from qualifying purchases.
Here you can download the FREE PLAN:
You may like: DIY Rustic Hemp Rope Chandelier for 35$
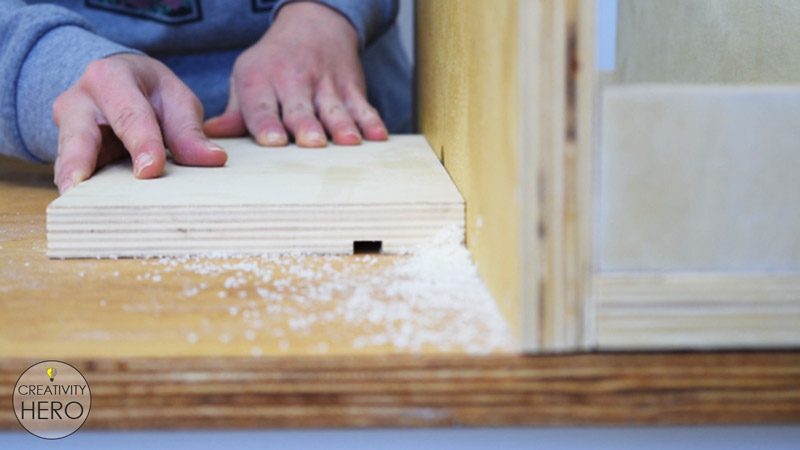
Step 1: Cutting all the plywood pieces to size and sanding them down.
This table saw fence (and router table fence) is made out of plywood board with 21 mm thickness. So, I cut the pieces on my table saw. I clamped down a scrap of plywood and used it as a guide for more accurate cuts. I used a jigsaw to cut the smaller parts of the fence.
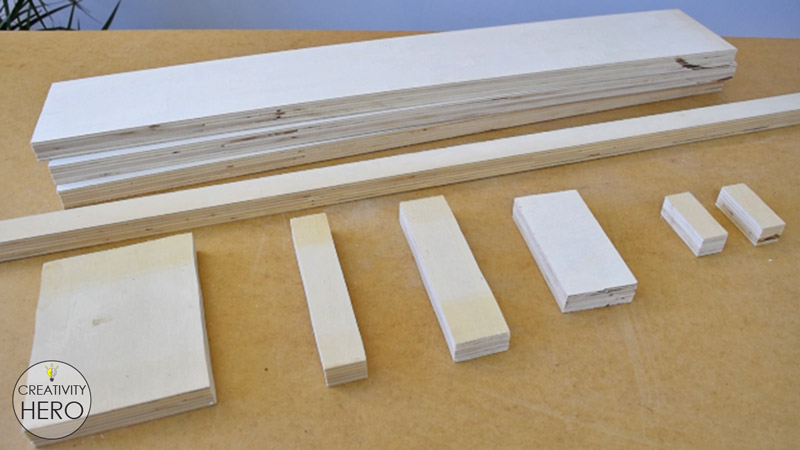
Before putting all the parts together I’m going to do a quick sand with a 180 grit sandpaper. For the larger pieces I used a random orbit sander, but for the smaller ones I used a sanding block. I’m going to make knobs out of the smallest pieces, and I’m going to round their corners a little which will make them more handy and easy to turn.
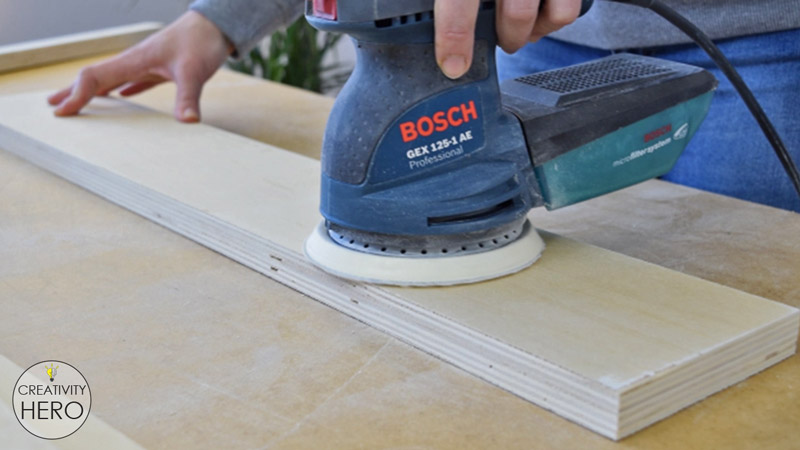
I decided to do the sanding in the beginning, because it would be harder to reach all the corners of the fence after attaching everything together.
Step 2: Assembling the fence.
Now I can move on to assembling the fence.
First I’m going to glue these three boards together with a wood glue and clamp them down.

The most important thing here is squaring. Every piece needs to be square with the workbench, so work on a flat surface and measure twice before driving the screws in.
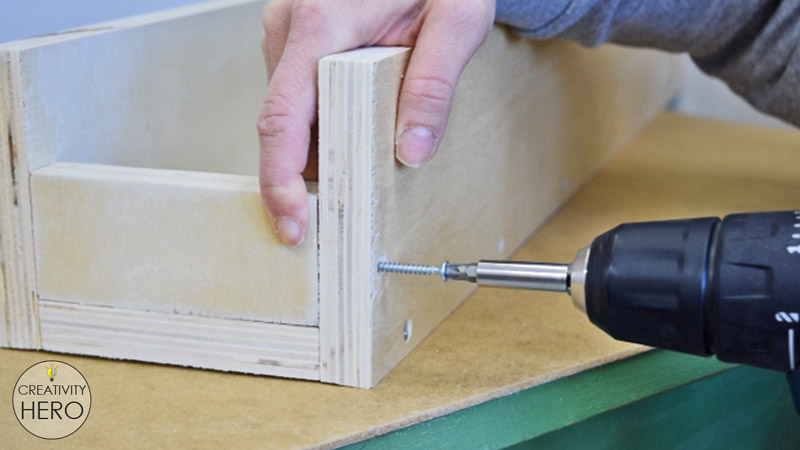
Then, I pre drill holes on each side with a countersink drill bit, making the holes deep enough for the screws to be flush with the surface. This is also a thing you need to pay special attention to, because if the screws aren’t flush, you won’t be able to make accurate cuts with the table saw.
After that I’m driving 5 cm long screws on each side. The screws will hold these three pieces tight in place.
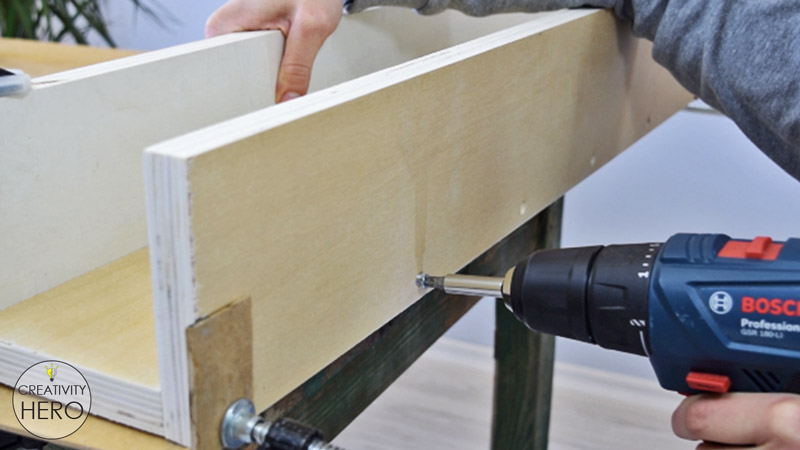
Step 3: Working on the front and the back of the fence.
Now that I’m done with the main part of the fence, I can move on to the front and the back of the fence.
The front piece needs to be perpendicular with the main body of the fence and 65 mm of it need to go below the fence. I drew a line that will help me achieve that. Also I marked the places where I need to attach the screws. Then I pre-drilled the holes with a countersink drill bit, and then I attached it on the fence.
It was a little bit hard to do it, because I don’t have clamps with appropriate length. I decided to apply a wood glue, add some weight and wait for it do dry a bit so I can drive the screws in.
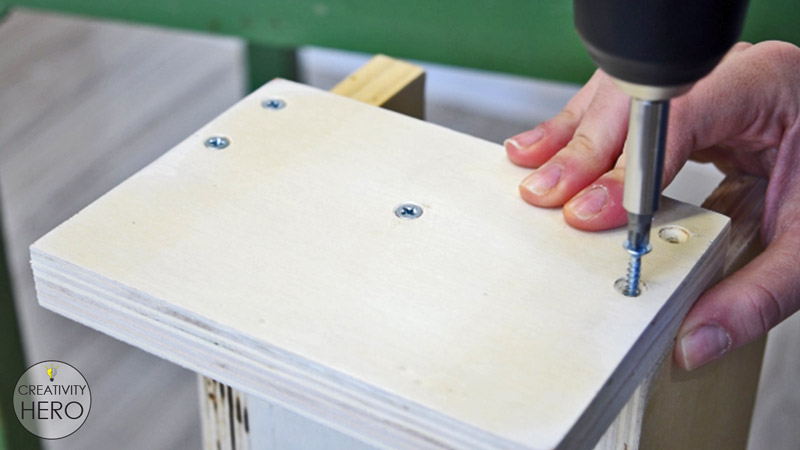
After that I turned the fence upside down and drilled 2 holes on the bottom of the piece that I previously attached. Here I’ll create the lock mechanism of the fence.
I need some extra support on the back of the fence to prevent any flexing, and this small piece will provide that support. I’m going to use 3 screws to hold it in place.
Step 4: Creating the lock mechanism.
These two pieces of plywood I’ll secure together. I marked two points where I’m going to insert T-nuts, because they need to be adjustable for the sliding part of the fence.
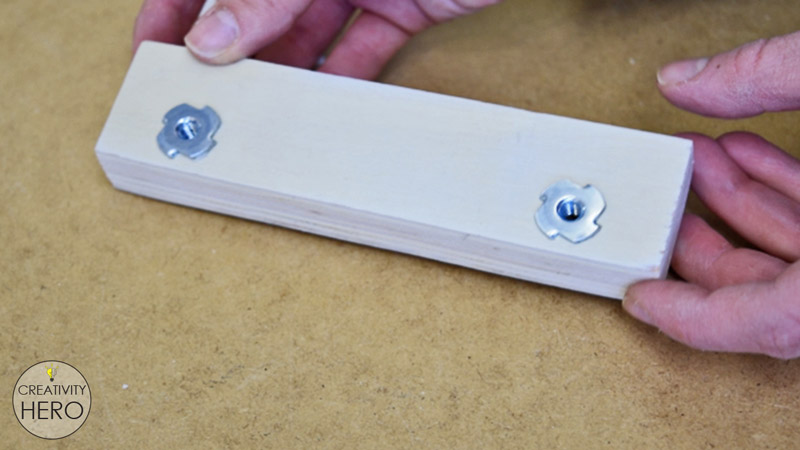
These two holes need to go all the way through both pieces. This means that I need to drill the holes carefully to make them straight and perfectly match both pieces.
First I installed the T-nuts. I applied a small amount of 5-minute epoxy so they can stick well to the wood. Then I pulled the T-nuts into the wood with a clamp.
In order to make knobs I drilled holes in the middle of these 2 small pieces of plywood where the bolts will be inserted.
Step 5: Turning the table saw fence into a router table fence.
As I said in the beginning this fence can be used as a table saw fence, as well as a router table fence. Although I needed to make a hole on one side of the fence before assembling it, I’m doing it later with a 35 mm Forstner bit.
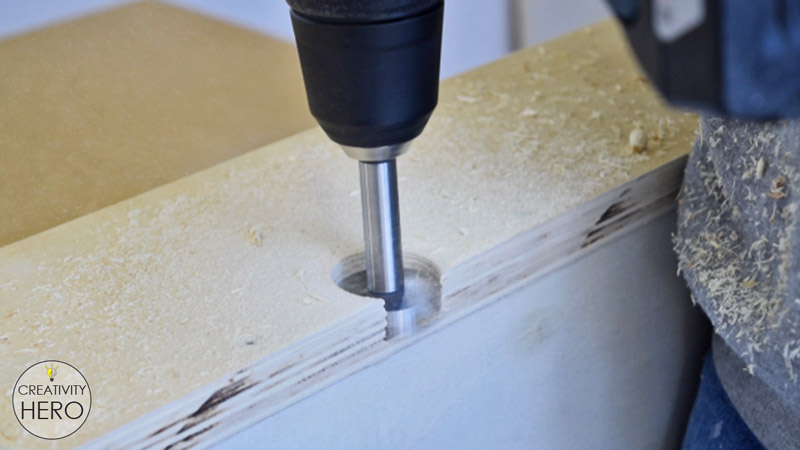
I removed the extra plywood with a U-shape saw which is awesome for this kind of work.
With this done I actually turned this table saw fence into a router table fence as well.
Step 6: Applying a wood finish.
The next thing I need to do is to protect the wood with a finish so that all the pieces that I’m going to cut can slide smoothly on the fence.
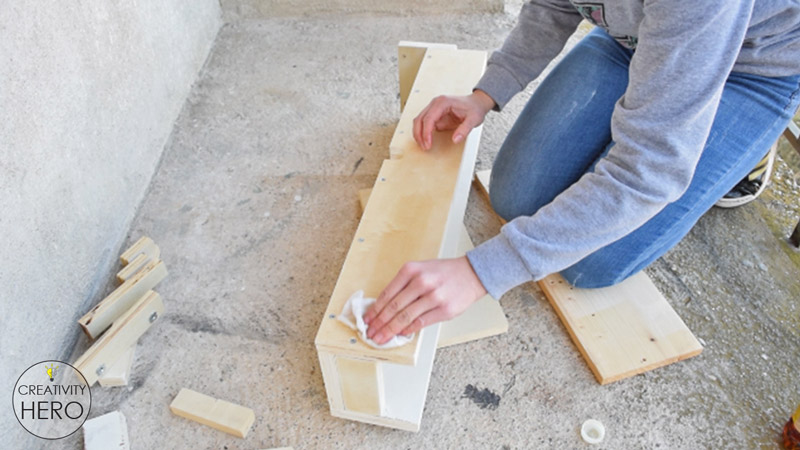
I applied one coat of water-based polyurethane on all parts of the fence with a rag. It is transparent finish which I like because I wanted to achieve a contrast between the workbench and the accessories.

The longest piece of plywood is actually a guide rail of the fence and it needs to be placed under the top of the workbench. Before that I’ll protect it with walnut stain, the same that I used for the workbench. The guide rail will become a part of the workbench and I want its color to match the color of the top.
Step 7: Putting everything together.
Once everything is dry I can move on to putting everything together.
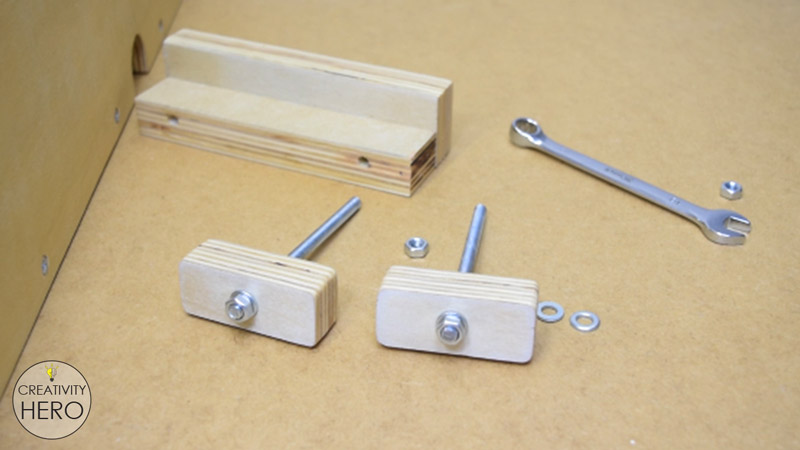
I didn’t have 10 cm long bolts, but I made two bolts out of threaded rod. Then I insert those DIY bolts into the knobs and use nuts and washers on both sides to tighten them well.
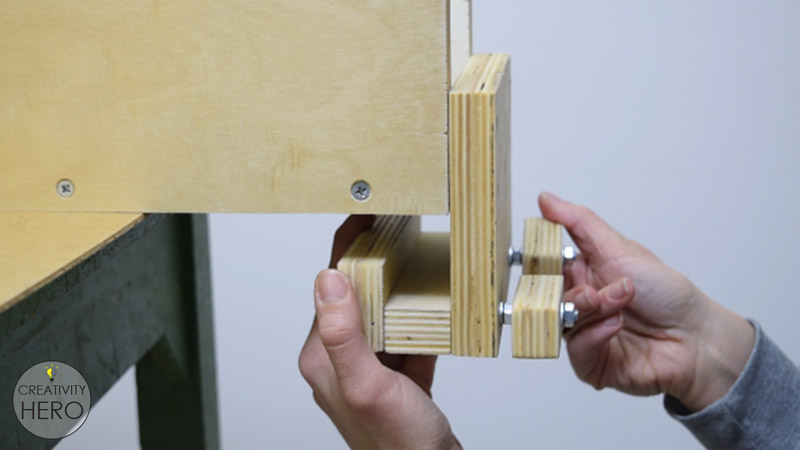
Then I insert the knobs into the holes that I previously made, and finally I insert the last piece on the other side. This means that the lock mechanism is done.
Step 8: Attaching the guide rail of the fence.
One more thing I need to do is to attach the guide rail of the fence. I carefully applied just enough wood glue without making a mess and clamped it below the top with a bunch of clamps making sure that it is flush with the front of the table.
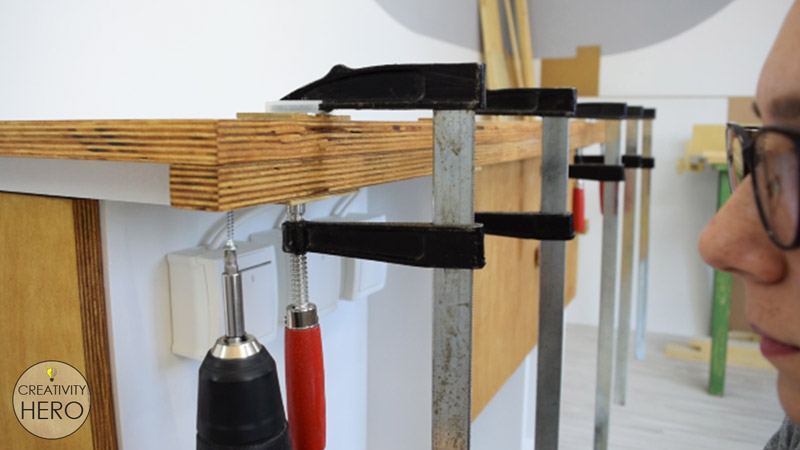
After that I predrilled holes with a countersink bit, and at the end I attached 35 mm screws. I attached a lot of screws on a shorter distance because this rail needs to be firm and flush with the front.
You may like: 5 Types of Wood Glue: How to Use Them and How to Choose the Right One
The fence is done at this point.

To add the fence I have to slide it in and lock it with the knobs. Once I lock it in place it’s not moving which will provide accurate cuts.
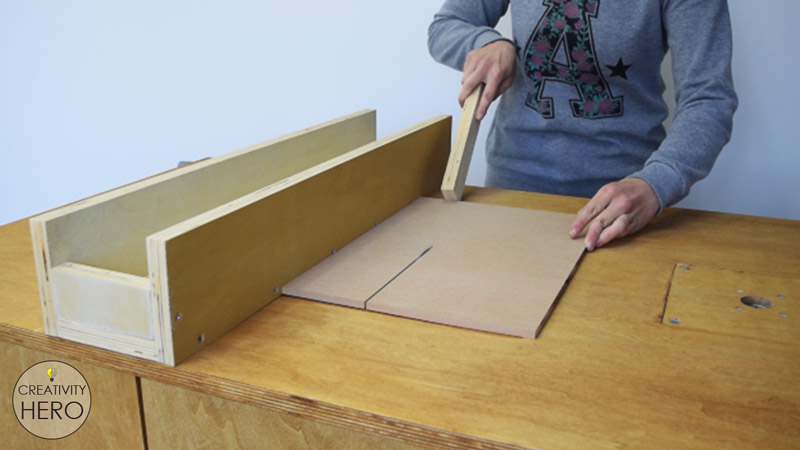
What’s left to do is to check the squaring and run some test cuts.
Now I have a guide that will help me cut wood evenly, precisely and safely.
In the next videos I’ll build some other accessories which are a must have for a workbench like this and I’ll provide free plans for them as well.
I hope this article was helpful. Let me know what you think down in the comments section. Also don’t forget to like, share and subscribe to my YouTube channel.

Hi.Me again I meant to ask you what is the measurement of box I mean the fram
You can find all the measurements in the free plan. If you need any help let me know.
Hi
I tried to download ur plans but was unable to.
I was wondering if u can email them to me.
Keep the good work up.
Thank you so much! Sure, I’ll email you the plans.
Hi, How can I view de 3d models?
Hi. Marija
I was really impressed by your diy projects.keep it up.please can forward the plans of the table saw projects to me,i would really,really that.thanks
Thank you so much! I’m glad you like my project. Sure, I’ll e-mail you the plans. 😀