


In this video I’m going to show you how to make a really cute hanging clothespin photo frame. You can create a perfect addition to your home with this amazing DIY frame.
It’s simple, easy and fun to make and my favorite part of this project is hanging the photos that remind me of my childhood.
Here are the materials I used:
- Wood strip 3 cm wide, 2 cm thick (your local hardware store)
- Nails 12 mm long
- Screws 10 mm long
- Wood stain
- Hemp twine
- Mini clothespins
- Wood glue
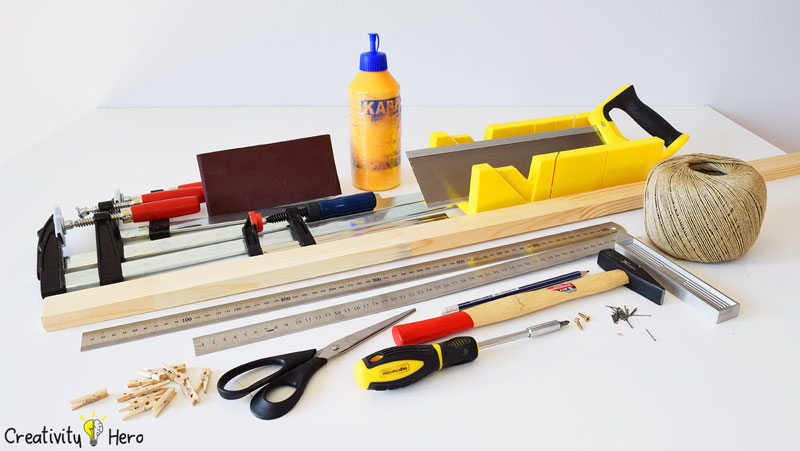
Types of tools I used:
Disclosure: As an Amazon Associate I earn from qualifying purchases.
Related: DIY Colorful Rectangular Wooden Wall Shelf
Dimensions:
– Frame dimensions: 60 x 40 cm
– Inner space: 54 x 34 cm
Twine strips distance (position of the nails from top to bottom):
– 2 cm
– 12.5 cm
– 23 cm
Frame hanger (position of the screws):
– 12 cm on both ends
Step 1: Measuring and cutting the wood strip using a hand saw and a miter box.

This wood strip is 3 cm wide and 2 cm thick. The dimensions of the frame are 60 x 40 centimeters, so I measured two 60s and two 40s with a ruler.
Then I cut those pieces at a 45 degree angle using a handsaw and a miter box. The miter box helped me a lot because it has precut slits, which guide the saw in the correct angle.
Once I’m done cutting I’m going to sand down the miters lightly with 120 grit sandpaper to make sure they’re smooth and line up well. So, I have 4 perfectly aligned pieces and I just have to glue them together.
Step 2: Gluing the joints.

I glued all the joints at the same time, using a wood glue and 2 clamps. I wasn’t sure about clamping all the joints with f-clamps, but it actually turned out pretty well.
It needed several hours to completely dry.
Step 3: Sanding the frame.
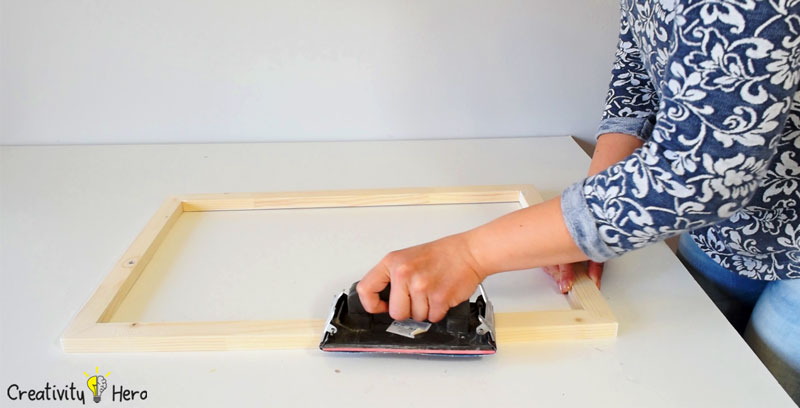
To get rid of wood splinters and grains I am going to sand the frame first with a 120 grit sandpaper, and then with 220 to smooth the surface before applying stain.
Step 4: Staining the frame with wood stain.
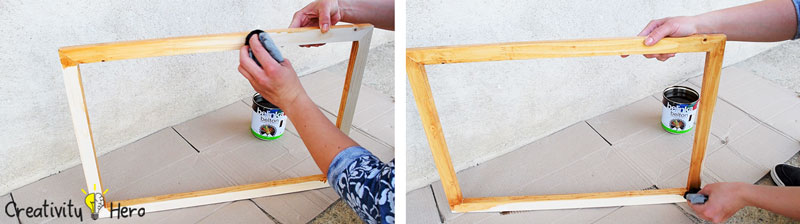
I can now move on to staining it with wood stain.
I just carefully applied a nice coat of stain with a rack making sure to cover the entire frame. I gave the stain the entire day to dry.
Step 5: Marking all the points where the nails and the screws will be driven into.
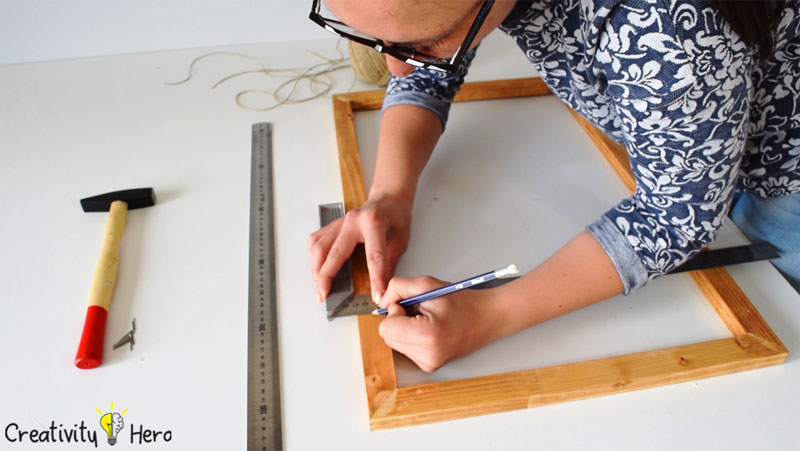
Once the frame has the opportunity to dry, it is time to mark all the points where the nails and the screws will be driven into.
This frame has a 54 x 34 cm inner space, so I have to remember that and divide it properly, making 3 rows for the photos.
Be sure to measure and mark with a precision on both sides of the frame to keep your rows of twine straight.
I wanted at least half centimeter space between each row of photos, which will give a nice and even look of the frame.
Step 6: Driving the nails and the screws into the frame.
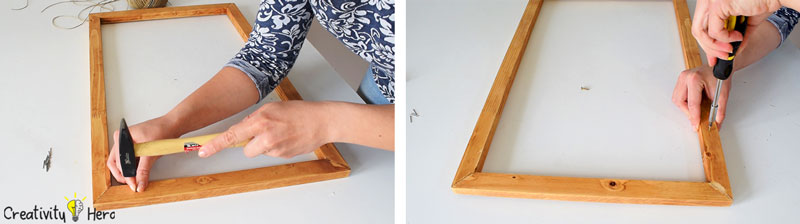
I’m driving the nails into the wood with a mallet, leaving enough space so that the twine could be easily wrapped and knotted around them.
Also, I’m driving two screws on the back side of the frame with a screwdriver. I’ll use them to hang the frame on the wall.
Step 7: Wrapping and knotting the twine.
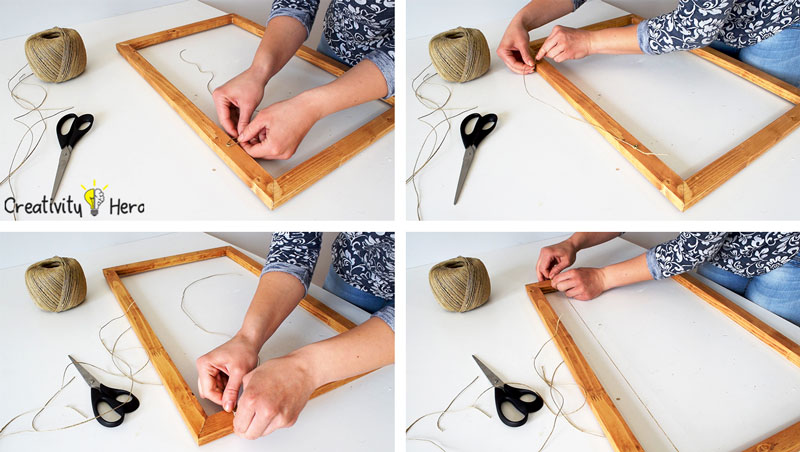
The next step is wrapping and knotting the hemp twine around the nails and the screws. I needed to use thin twine because these clothespins are so tiny.
Make sure to cut the strings a little longer, so it would be easier to make tight knots without using any glue or stapler.
First, I made the frame hanger by fastening one string around the screws.
Then, I fastened the other strings to the nails.
You can make the twine straight or you can leave it a bit loose, it’s all up to you.
Step 8: Hanging the photos with mini clothespins.

Now I’ll hang the photos with these mini clothespins that I got online.
I have total of 12 photos, 3 rows with 4 photos in a row. I’ve used some old photos, a memories from my childhood. The size of the photos is 8.9 by 12.7 cm.
And that’s it.
Now I have my own DIY clothespin photo frame that fits my room perfectly. I’m happy with how it turned out.
I hope you enjoyed this simple DIY project. If you liked this video give me a thumbs up and subscribe to my YouTube channel.
