


Exactly one year ago, in my first video, I made a simple wall clock, and this year I decided to make another, more complex wall clock to celebrate my first anniversary!
In fact, I’m going to make a layered plywood wall clock with a tree ring shape.
Be sure to check the video below for more details!
Materials:
- Plywood – 21 mm thick (your local hardware store)
- Clock mechanism
- Colored pencils
- Clear fast-drying polyurethane
- D-ring hanger
Tools:
- Jigsaw
- Router
- Cordless drill
- Dremel high performance rotary tool kit
- Forstner drill bits
- Router bits
- Sanding block
Disclosure: As an Amazon Associate I earn from qualifying purchases.
Related: How To Make A Modern Wooden Clock | DIY Project
Now let’s get started!
Creating the Shape of the Wall Clock.
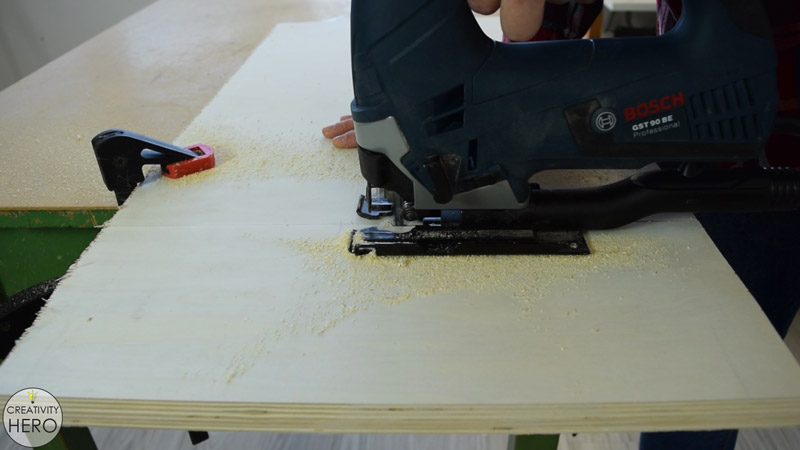
To make this wall clock I’m using 21 mm thick plywood. It is a pretty large and heavy sheet of plywood, so I measured and cut one piece 60 by 40 cm to make the drawing of the clock much easier.
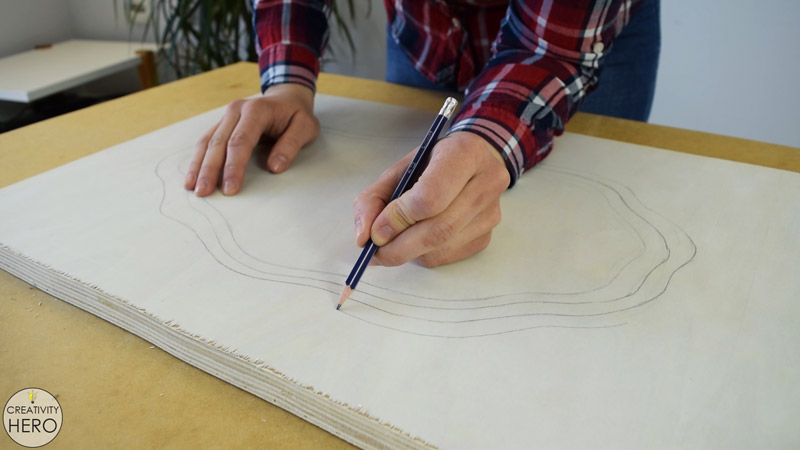
Then, I started drawing the tree ring shape. Initially, I drew 6 rings in total, all with different size, with a nice transition between them. Later you’ll notice that while cutting, I made another, seventh layer, which will improve the complete look of the clock.
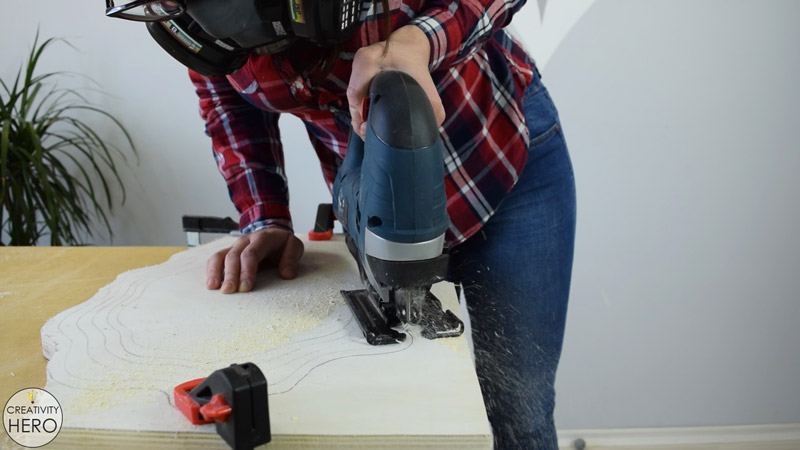
Once I was satisfied with the shape, I took the jigsaw and cut, following the outline of the last, largest layer. This way I got the final size of the clock, which is 55 by 35 cm.

There are some tear outs on the top of the plywood face, but it doesn’t matter because the router will clean everything.
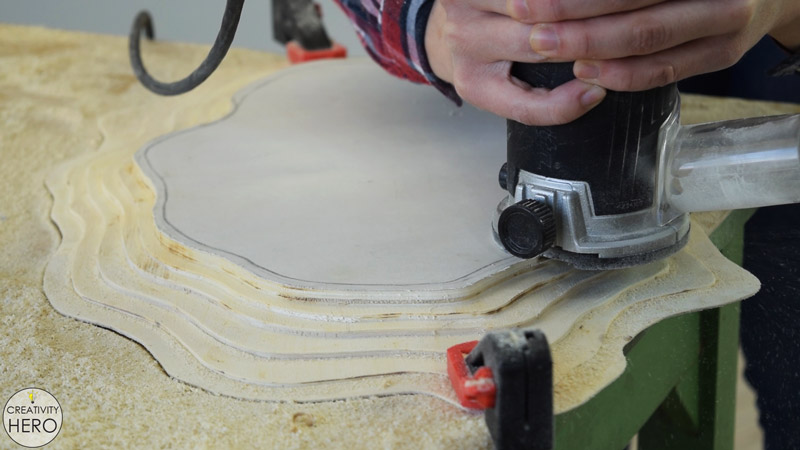
Routing out all the Layers of the Clock.
Now, I can move on to revealing all the layers of the plywood with a router. Each layer will be 3 mm high.

The first layer is already shaped with the jigsaw, which means that I’ll start routing out the second one. The total thickness of the plywood is 21 mm, so in order to get 3 mm high layer, I need to set the cutting depth of the router bit to 18 mm.
This layer was the slowest and the hardest to rout out, due to the fact that it is larger and also I needed to remove 18 mm off the plywood with one pass.
For the third one, I set the router bit to 15 mm cutting depth.
As I mentioned earlier, when I thought I almost finished, I realized I needed to create one more layer, in order to make all the layers 3 mm high. In the beginning I thought that it would be more compelling to make the last, smallest layer 6 mm high, instead of 3, but I was wrong.
Now I have 7 layers with 3 mm height. There are some imperfections, and knots here and there, but I think they actually give a character to the clock.
Related: DIY Colorful Rectangular Wooden Wall Shelf
Making Space for the Clock Mechanism.
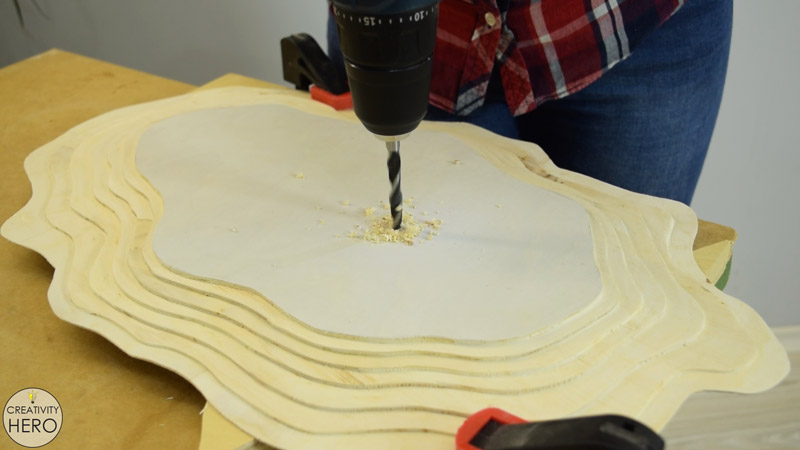
Next, I determined the center of the clock mechanism, and drilled a hole for the threaded shaft to pass through.
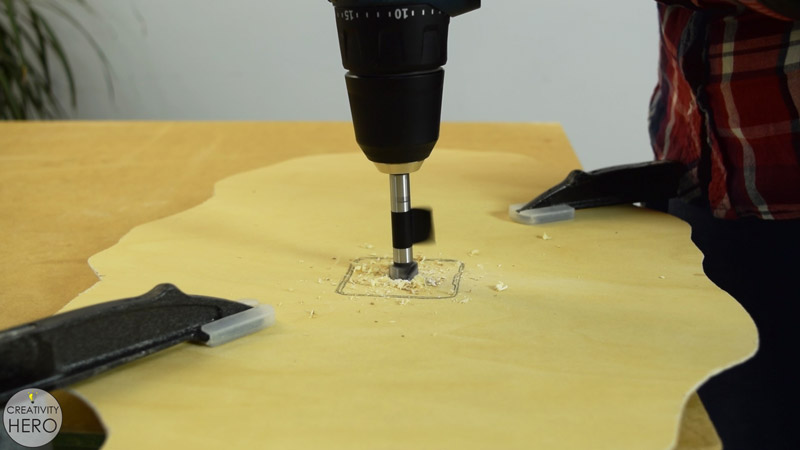
Then, I positioned the clock mechanism on the back side of the clock, and traced the outline. 18 mm of the thickness of this opening need to be removed, so that when the clock mechanism is installed it will stay flush with the surface.
In order to be able to insert the router, I enlarged the hole with a Forstner bit. With this hole done, now I can rout out the opening with the router.
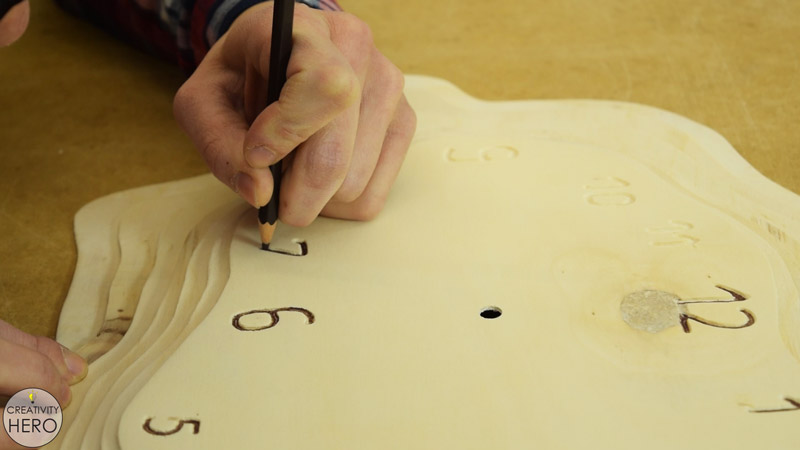
Drawing and Engraving the Numbers.
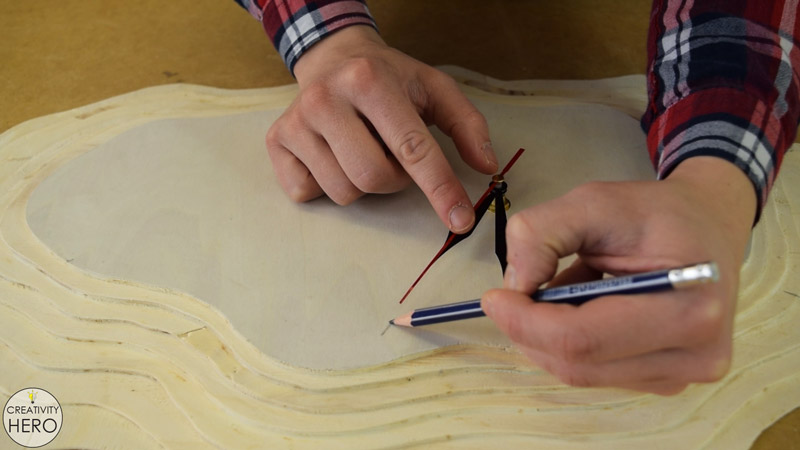
Next, I placed the clock mechanism, and installed the hands. The goal here is to use the hands to mark the exact points for the clock numbers.
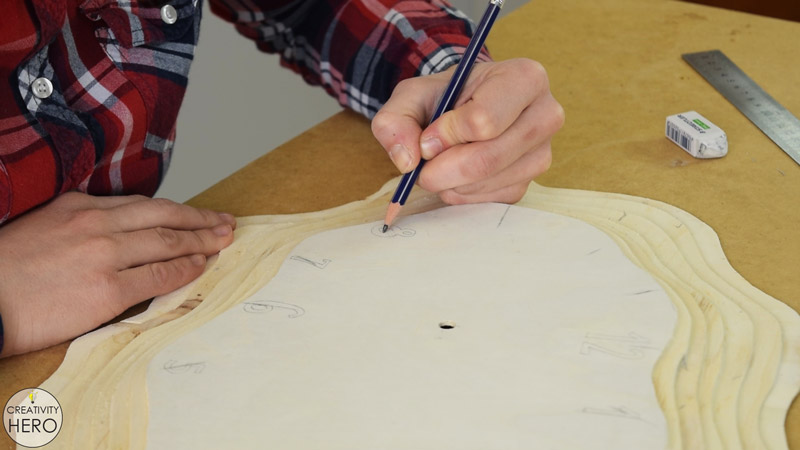
When it comes to the numbers, I wanted to draw them close to the edge of the layer in an interesting order and with different size.
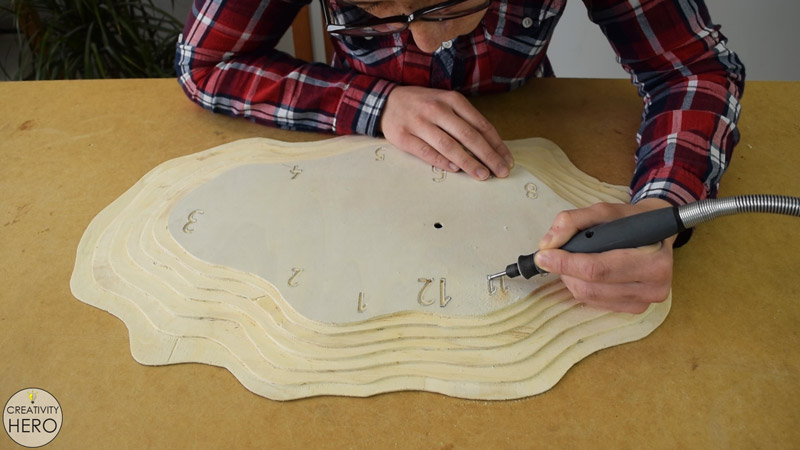
To engrave the numbers I chose a Dremel rotary tool, and inserted the flex shaft with the appropriate engraving bit. I made sure I go deep enough, so that when I sand the surface, the numbers will be still visible enough.
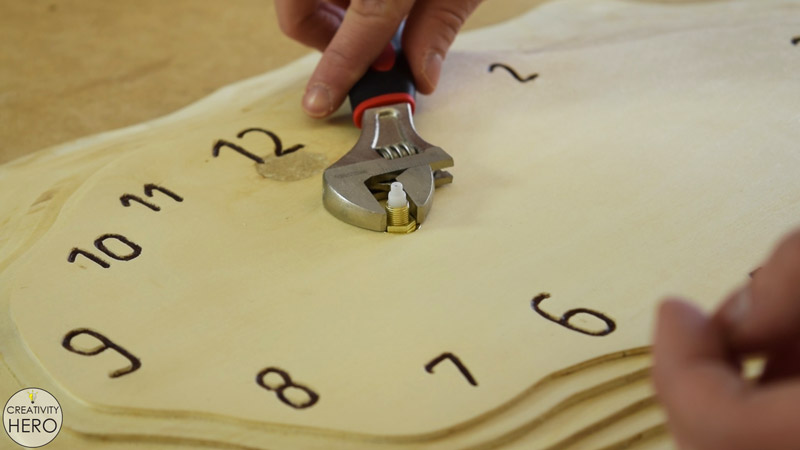
Sanding the Surface.
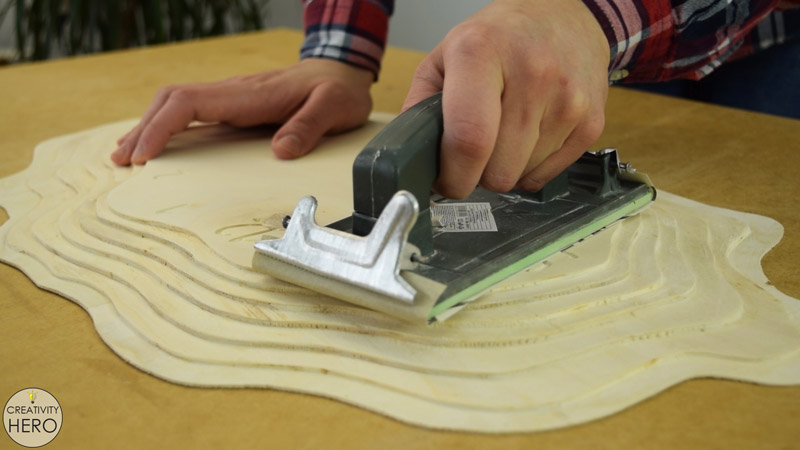
Once I’m done engraving the numbers, I can hand sand the surface, first with 80 grit sandpaper and then with 180. I want to remove the top layer of the plywood face because it is much brighter than the other layers, and I wanted the clock to have a uniform color.
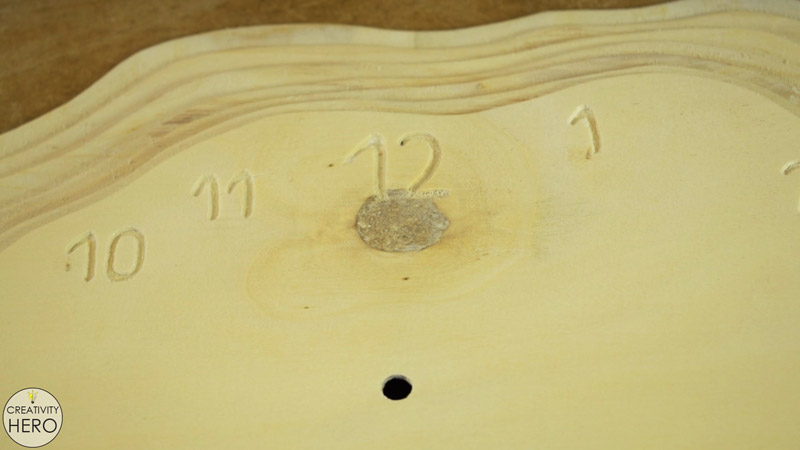
But, when I removed that layer, a knot appeared exactly below the number 12. At first I didn’t like it, but later I realized that it actually makes the clock so special and unique.
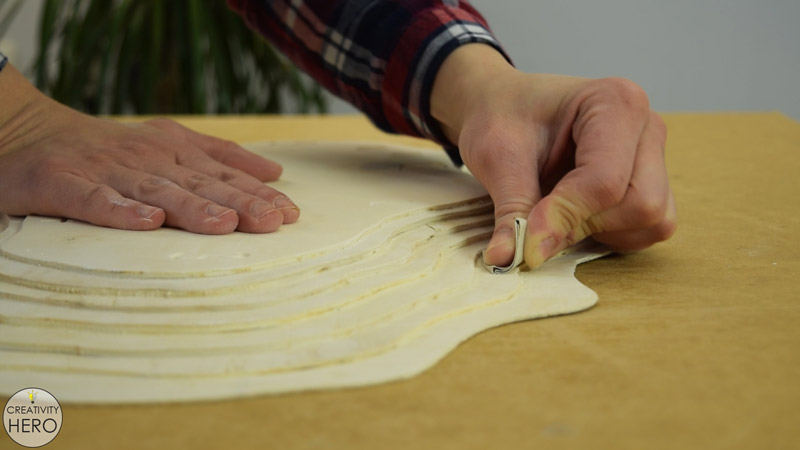
I sanded all the layers as well, to remove any burnt areas caused from the old router bit.
Coloring the Numbers with a Colored Pencil.
To highlight the numbers I decided to make them darker.
My first thoughts were to burn the wood with a soldering iron. But, after a few tests, I realized that my iron is not appropriate for that purpose, since the tip doesn’t reach high temperature, which is essential for wood burning.
After spending a lot of time thinking, I came up with the idea to use color pencil.
Fortunately, I still had some color pencils that I used in my school days, and picked the most suitable brown color.
I just needed to repeat a few times, until I got uniform color of the numbers. Actually, I was pleasantly surprised when I saw how good this came out.
Using color pencil was much easier and faster than wood burning, and I think I achieved the goal. The numbers are visible, and have a really nice color.
Related: DIY Wall Art: Reclaimed Wood Cut-Out with a Picture within
Applying Finish.
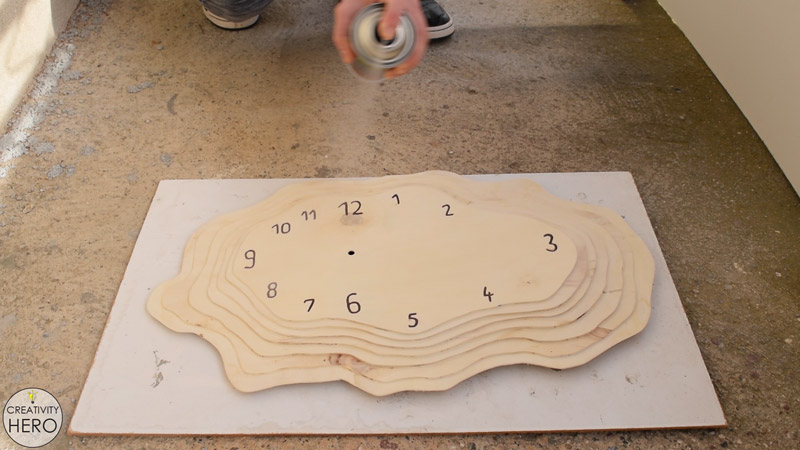
To protect the wood I sprayed one coat of clear fast-drying polyurethane. I wanted to keep the natural color of the plywood with all the imperfections on it.
Inserting a D-Ring Hanger.
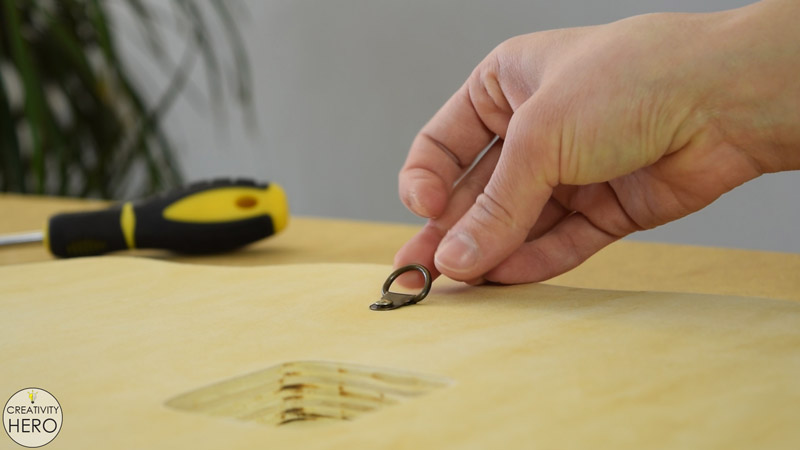
Once the spray has dried I secured a D-ring hanger on the back side.
Installing the Clock Mechanism.
Then, I installed the clock mechanism, and placed the hour, the minute and the second hand in order.
Mounting the Wall Clock.

Finally, I mounted the clock on the wall, and I’m done with this project! I think it turned out pretty cool!

If you like this wall clock be sure to like, share, comment down below and subscribe to my YouTube channel.
