


Today I’m going to make a wine rack. This wine rack is designed to hold 1 bottle and 3 wine glasses.
It is made out of pine wood and a copper pipe. The design is actually quite simple, and consists of 4 copper pipe pieces with different length and 3 wooden pieces with different shape, joined together.
Make sure to watch the video for more details:
Materials:
- Pine wood (your local hardware store)
- Copper pipe
- White spray paint
- Epoxy
- Glue stick
Tools:
Disclosure: As an Amazon Associate I earn from qualifying purchases.
Related: How to Make a Concrete Candle Holder with a Simple Molding Technique
Drawing and Cutting the Shapes.
In the first place, I drew the design onto 3 separate pieces of paper, including all the holes and cuts that need to be done onto each part.
Here’s the template:

A pine was my choice for this project because it is very easy to work with, and I don’t mind covering it with paint since it is cheap and soft wood.
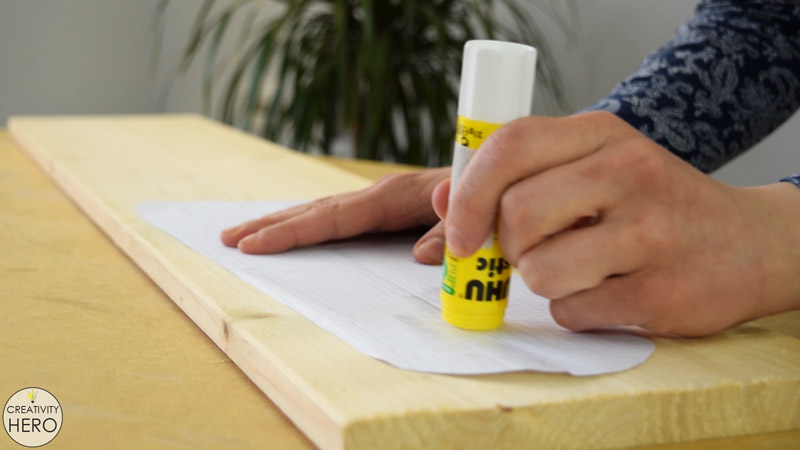
I applied all-purpose glue stick onto the paper and glued it onto the wood. Therefore, I can easily cut the desired shape.

Then, I clamped the board onto the table, and started cutting with a jigsaw, making sure to cut outside the line. Later, I’ll make some adjustments with a rasp. Onto the jigsaw I installed clean cut blade, which helped me avoid tear outs and get clean cuts.
Once I was done with the first piece, I moved on to the second one, and repeated the same process.
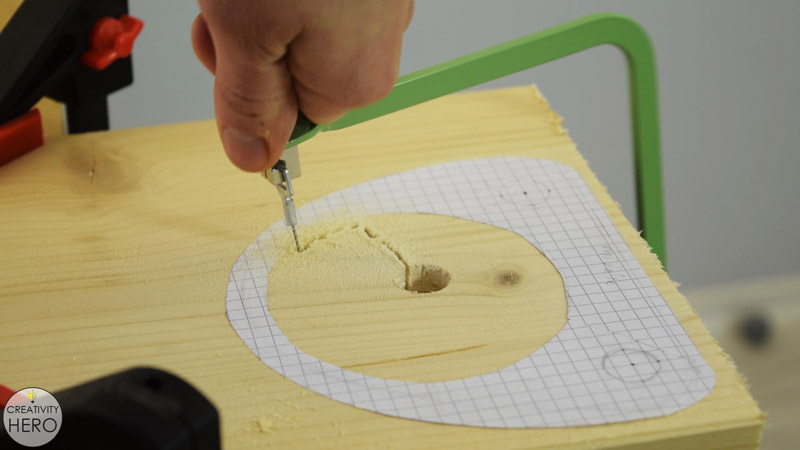
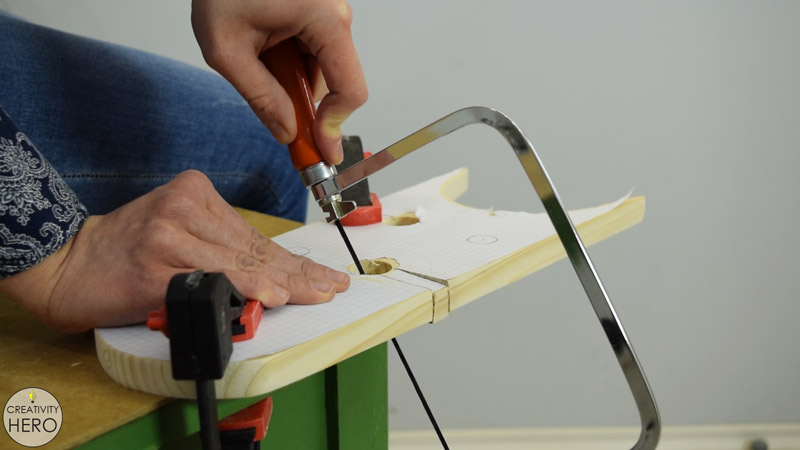
When I got to the smallest piece, I needed to make large opening in the middle, and here’s how I did it:
First, I made a 15 mm hole in the middle with a Forstner bit, which is enough space to fit the coping saw blade. Then, I installed the coping saw there, and made the opening.
There was too much extra wood that I needed to remove in order to get a perfectly round opening. Hence, I took a rasp and spent some time until I finished.
The opening is done, so I can make the final cut with a jigsaw.
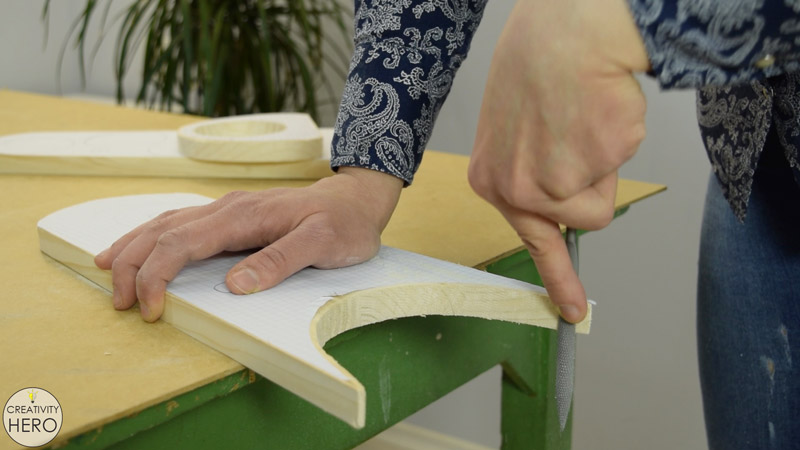
Now I have all three wooden pieces cut to size. Additionally, I need to make some more adjustments with a rasp until I’m happy with the final shapes.
Related: DIY Glass Bottle Home Decor – 3 Simple Ideas
Making Space for the Wine Glasses.
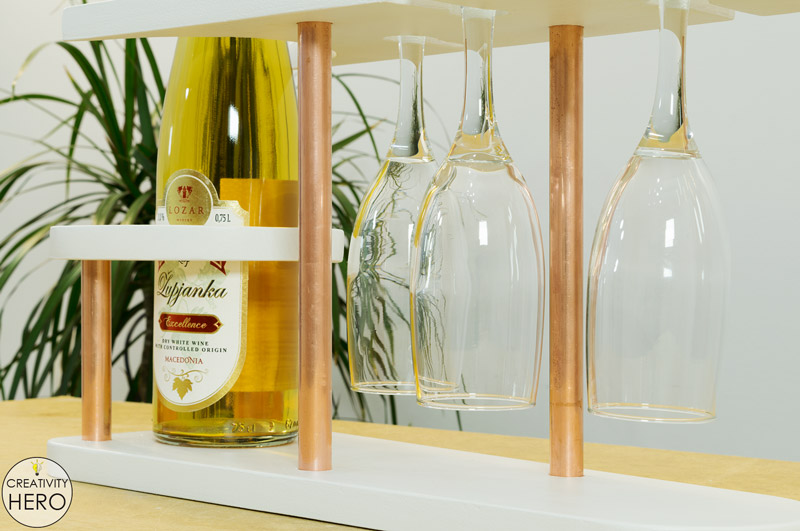
On the piece that will go on the top of the wine rack I need to make 3 holes for wine glasses. Also, I need to make 3 channels that will lead the glasses into the holes.
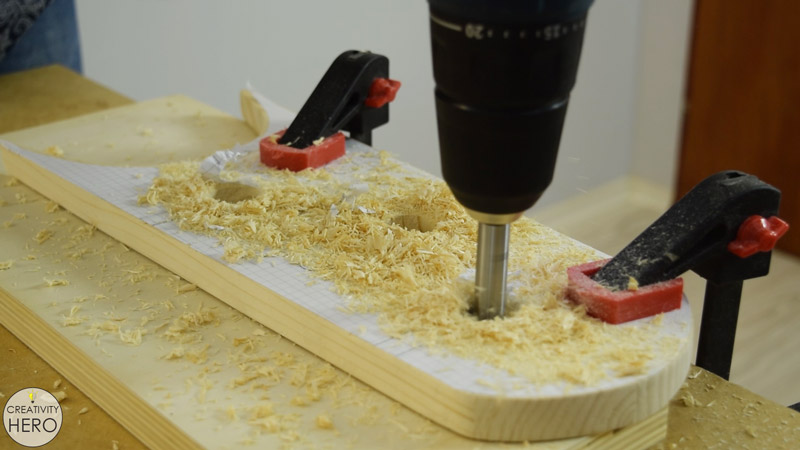
The holes I made with a 25 mm Forstner bit, which is enough space for the wider glass bottom. For the channels I used a coping saw. The width of the channels is around 13 mm, and it is enough to fit the glass stem.
In fact, having thinner channels and wider holes will keep the glasses in place once I hung them onto the rack.
Cutting the Copper Pipes to Size and Drilling Holes for Them into the Wood.
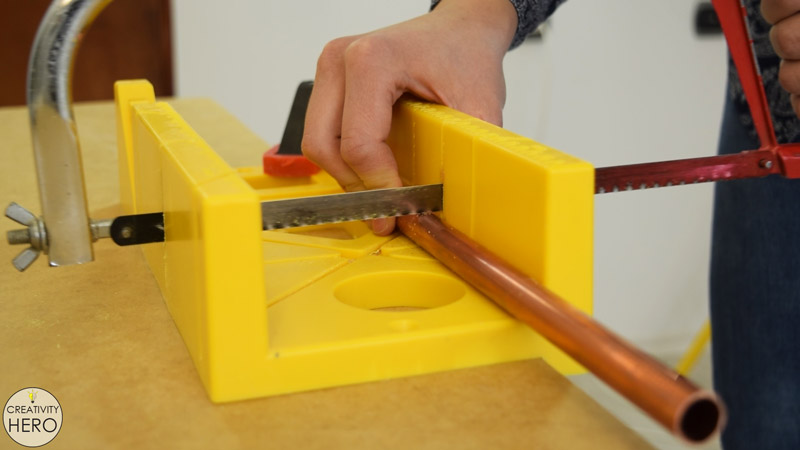
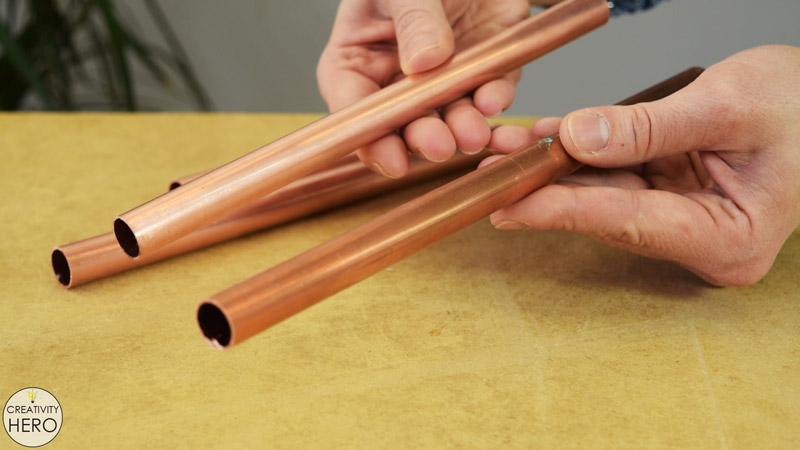
Out of 2 scrap pieces of copper pipes I’ll cut 2 pieces 21 cm long, and 2 pieces 11 cm long. For this purpose I used a hacksaw, but you can use a pipe cutter if you have one.
The shorter copper pipes will support the smaller wooden piece in the middle, and the longer copper pipes will support the larger wooden piece on the top.
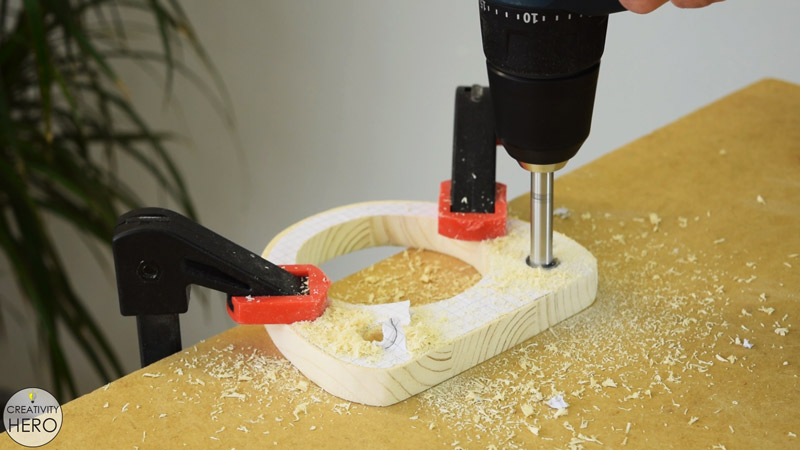
Next, I’m drilling holes on the pre-determined points, where I’ll insert the copper pipes. I’m using 15 mm Forstner bit, and drilling halfway through the wood.
Before drilling these holes double check their position, and make sure the holes on the bottom are parallel with the holes above them, because the copper pipes need to be perpendicular to the wooden pieces.
Sanding All the Parts.
Now that I’m done with all the cuts and holes, I can peel of the paper. Actually, it came off very easy.
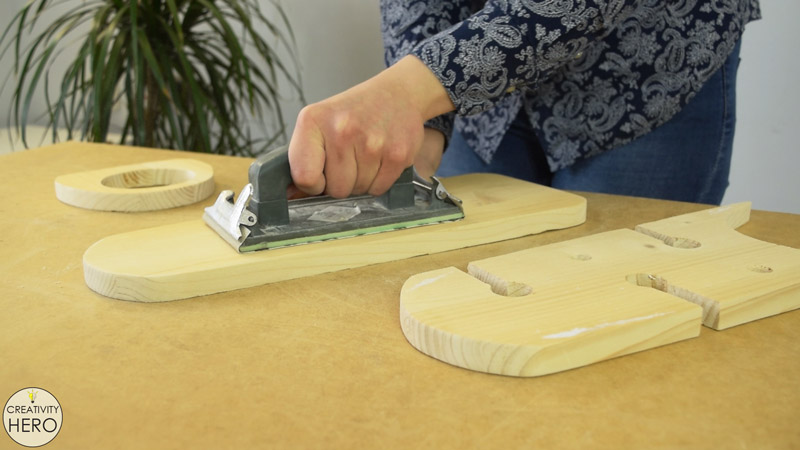
The next step is sanding. I used 120, then 220 grit sandpaper, to make the wood as smooth as possible.
Spray Painting the Wooden Pieces.
Once I finished sanding, I can paint the wooden pieces with white spray paint. I chose white because it matches copper really well.
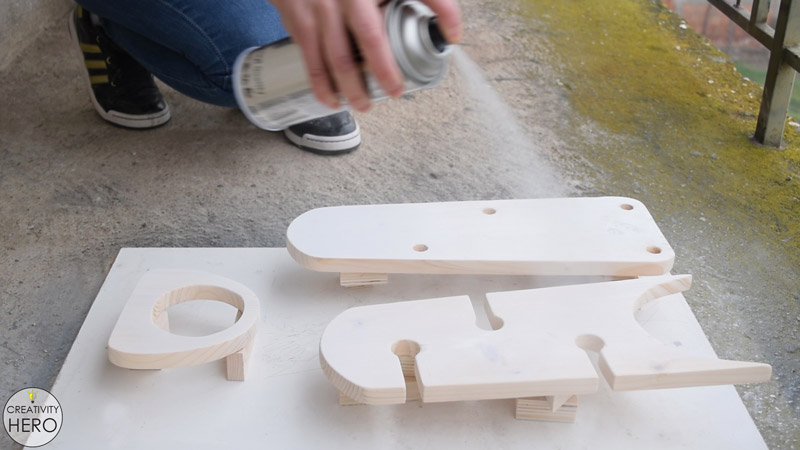
I applied 3 coats of paint, which was enough to get a nice white color. Then waited at least one hour between each coat.
Cleaning the Copper Pipes.
While the paint is drying I can prepare the copper pipes that I previously cut.
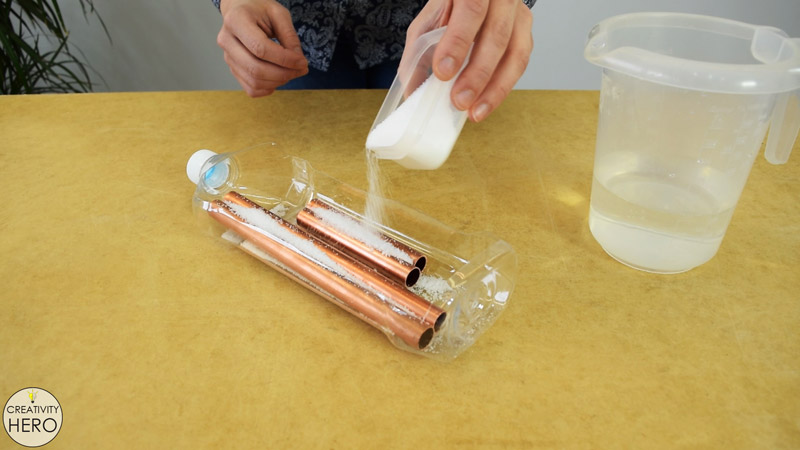
To clean them I used salt and vinegar. I placed the pipes into a plastic container and added a little salt and more vinegar until I completely covered the pipes. After a few minutes, I removed the pipes and wiped them off using a clean cotton cloth.
Here you can see the huge difference between tarnished and clean copper. The result is amazing.
Related: DIY Mid-Century Modern Side Table / End Table
Assembling the Wine Rack.
Now all the parts are ready for assembling.
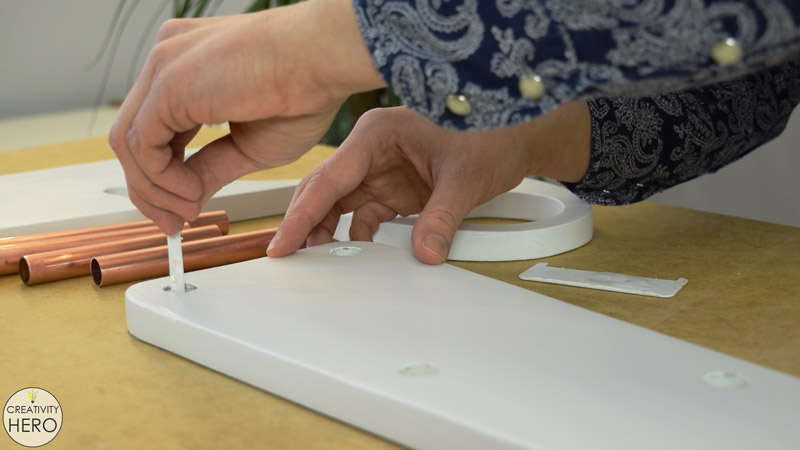
I’m using epoxy to secure the copper pipes into the holes. To keep everything clean, I applied epoxy into the holes, and then inserted the pipes. The epoxy will make a strong connection between the copper and the wood.
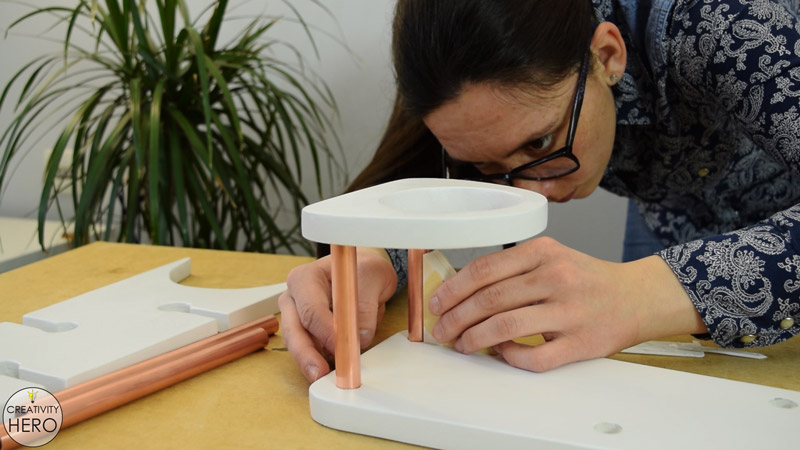
Additionally, I made sure the pipes are perpendicular to the wood, and left them to dry out.
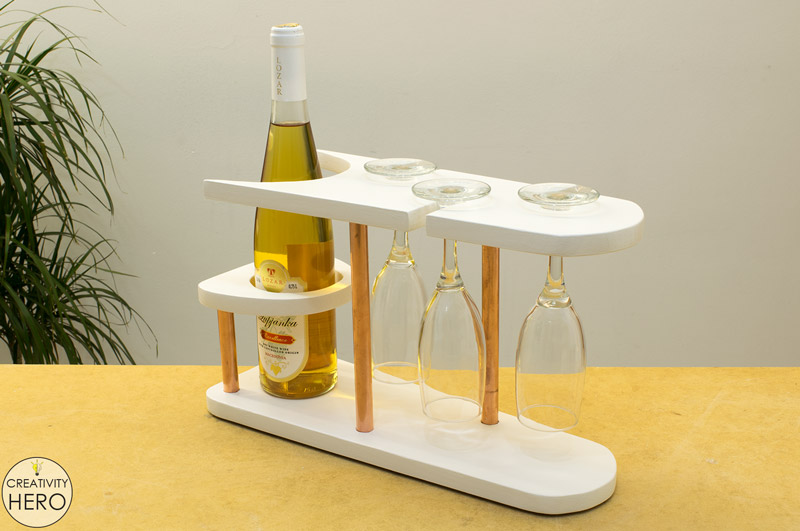
Finally, I can place a bottle of wine and hang wine glasses onto this wine rack. And that’s pretty much everything about this project.
If you enjoyed this project make sure to hit the like button, share, comment down below and subscribe to my YouTube channel.
